springboot加速你的web开发
Spring Boot是由Pivotal团队提供的全新框架,其设计目的是用来简化新Spring应用的初始搭建以及开发过程。该框架使用了特定的方式来进行配置,从而使开发人员不再需要定义样板化的配置。
为了有一个直观的感受,我们来搭建基于springboot的resful风格的web项目,页面使用freemarker模板
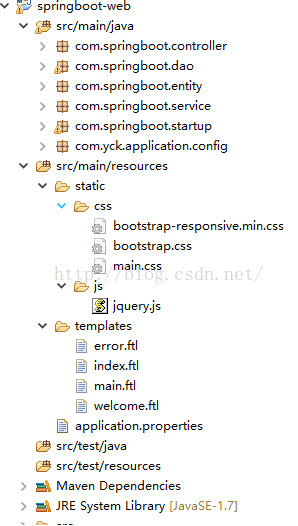
工程结构:可以war包启动,也可以使用jar启动
pom文件的依赖:
配置文件只有一个application.properties:
#freemarker
spring.freemarker.allow-request-override=false
spring.freemarker.cache=true
spring.freemarker.check-template-location=true
spring.freemarker.charset=UTF-8
spring.freemarker.content-type=text/html
spring.freemarker.expose-request-attributes=false
spring.freemarker.expose-session-attributes=false
spring.freemarker.expose-spring-macro-helpers=false
spring.freemarker.prefix=
spring.freemarker.suffix=.ftl
spring.freemarker.template-loader-path=classpath:/templates
#DataSource
spring.datasource.url=jdbc:mysql://localhost:3306/test?useUnicode=true&characterEncoding=UTF-8&zeroDateTimeBehavior=convertToNull
spring.datasource.username=root
spring.datasource.password=root
spring.datasource.driverClassName=com.mysql.jdbc.Driver
#DataSource
datasource.pool.initialSize=10
datasource.pool.minIdle=5
datasource.pool.maxActive=1000
datasource.pool.maxWait=60000
datasource.pool.validationQuery=SELECT 'x'
datasource.pool.testWhileIdle=true
datasource.pool.testOnBorrow=false
datasource.pool.testOnReturn=false
datasource.pool.timeBetweenEvictionRunsMillis=50000
datasource.pool.minEvictableIdleTimeMillis=50000
datasource.pool.numTestsPerEvictionRun=10
datasource.pool.poolPreparedStatements=true
#JPA
spring.jpa.hibernate.ddl-auto=none
spring.jpa.show-sql=true
spring.jpa.open-in-view=true
spring.jpa.database=mysql
spring.jpa.properties.hibernate.format_sql=true
spring.jpa.properties.hibernate.jdbc.fetch_size=50
spring.jpa.properties.hibernate.jdbc.batch_size=20
spring.jpa.properties.javax.persistence.validation.mode=none
spring.jpa.properties.hibernate.connection.isolation=2
项目用main方法启动:使用war必须继承SpringBootServletInitializer
@Configuration
@ComponentScan("com.springboot")
@EnableAutoConfiguration
public class StartUp extends SpringBootServletInitializer{
public static void main(String[] args) {
SpringApplication app = new SpringApplication(StartUp.class);
app.setWebEnvironment(true);
app.setShowBanner(true);
Set
springmvc的controller:
import org.springframework.stereotype.Controller;
import org.springframework.web.bind.annotation.RequestMapping;
@Controller
public class IndexController {
@RequestMapping(value="/login")
@ResponseBody
public String login(String userName, String passWord){
User u = userService.selectUser(userName,passWord);
if(null==u){
return "error";
}else{
return "welcome";
}
}
}
spring-data-jpa的实体类:
import javax.persistence.Column;
import javax.persistence.Entity;
import javax.persistence.GeneratedValue;
import javax.persistence.GenerationType;
import javax.persistence.Id;
import javax.persistence.Table;
@Entity
@Table(name="da_user")
public class User {
@Column(name="user_name")
private String userName;
@Id
@GeneratedValue(strategy=GenerationType.AUTO)
private Long id;
@Column(name="pass_word")
private String passWord;
public String getUserName() {
return userName;
}
public void setUserName(String userName) {
this.userName = userName;
}
public Long getId() {
return id;
}
public void setId(Long id) {
this.id = id;
}
public String getPassWord() {
return passWord;
}
public void setPassWord(String passWord) {
this.passWord = passWord;
}
dao层:
import java.util.List;
import org.springframework.data.jpa.repository.Query;
import org.springframework.data.repository.Repository;
import com.springboot.entity.User;
public interface UserRepository extends Repository
User findByUserNameAndPassWord(String userName, String passWord);
@Query("from User")
List
}
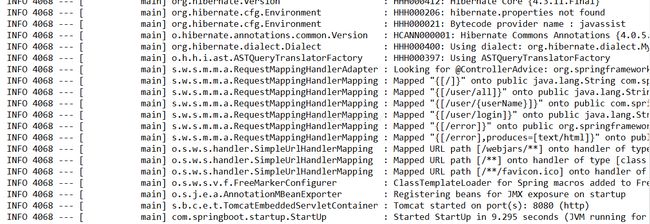
项目启动:
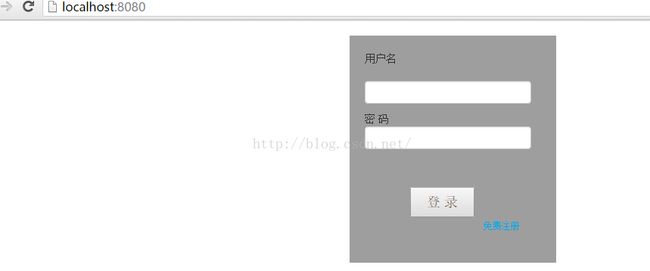
springboot内置tomcat,main方法启动后就可以直接访问了:


