Eclipse、IDEA配置Mybatis--超详细
概述:本文主要介绍如何在Eclipse、IDEA上配置Mybatis,不涉及配置文件的讲解。
一、Eclipse配置Mybatis
包结构:
1、导入jar包
所需jar包:
链接:https://pan.baidu.com/s/1UX35jVu-EOv02qLhEbb83w&shfl=sharepset
提取码:cfct
复制这段内容后打开百度网盘手机App,操作更方便哦
················································································································
将需要的jar包拖拽至WEB-INF中lib目录下(在Eclipse中,把需要的jar包拖拽到WEB-INF下的lib包中,会自动将jar包添加在Libraries中)
2、添加配置文件
以下是配置文件的模板,比较简单。比较复杂的模板需要自己配置,这里不过多解释。
(1) Mybatis-config.xml
<?xml version="1.0" encoding="UTF-8" ?>
<!DOCTYPE configuration
PUBLIC "-//mybatis.org//DTD Config 3.0//EN"
"http://mybatis.org/dtd/mybatis-3-config.dtd">
<configuration>
	<environments default="MySQL">
		<environment id="MySQL">
			<!-- 使用jdbc的事务,mybatis进行管理 -->
			<transactionManager type="JDBC" />
			<!-- 使用jdbc的连接池连接数据库 -->
			<dataSource type="POOLED">
				<property name="driver" value="com.mysql.jdbc.Driver" />
				<property name="url" value="jdbc:mysql://localhost:3306/sms" />
				<property name="username" value="root" />
				<property name="password" value="123123" />
			</dataSource>
		</environment>
	</environments>
	<mappers>
	<!-- Mapper配置文件位置-->
		<mapper resource="UserMapper.xml" />
	</mappers>
</configuration>
(2) Mapper.xml
<?xml version="1.0" encoding="UTF-8" ?>
<!DOCTYPE mapper
PUBLIC "-//mybatis.org//DTD Mapper 3.0//EN"
"http://mybatis.org/dtd/mybatis-3-mapper.dtd">
<!--
	namespace唯一表示此名字下的crud语句
 -->
<mapper namespace="student">
	<!--
		id:唯一标识
		resultType:查询结果的返回类型或者集合的泛型
	 -->
	<select id="selectAllUser" resultType="com.yunhe.javabean.student">
		select * from student
	</select>
	<!--
	<insert id=""></insert>
	<delete id=""></delete>
	<update id=""></update>
	-->
</mapper>
(3) log4j.properties
# Global logging configuration
log4j.rootLogger=DEBUG, stdout
# MyBatis logging configuration...
log4j.logger.org.mybatis.example.BlogMapper=TRACE
# Console output...
log4j.appender.stdout=org.apache.log4j.ConsoleAppender
log4j.appender.stdout.layout=org.apache.log4j.PatternLayout
log4j.appender.stdout.layout.ConversionPattern=%5p [%t] - %m%n
3、单例模式创建MybatisUtil类
package com.yunhe.util;

import java.io.IOException;

import org.apache.ibatis.io.Resources;
import org.apache.ibatis.session.SqlSessionFactory;
import org.apache.ibatis.session.SqlSessionFactoryBuilder;

public class MybatisUtil {
	private MybatisUtil() {
	}

	private static SqlSessionFactory sqlSessionFactory;

	static {
		try {
			sqlSessionFactory = new SqlSessionFactoryBuilder()
					.build(Resources.getResourceAsStream("mybatis-config.xml"));
		} catch (IOException e) {
			e.printStackTrace();
		}
	}

	public static SqlSessionFactory getSqlSessionFactory() {
		return sqlSessionFactory;
	}
}
4、JUit单元测试
(1) 创建Student类
package com.yunhe.javabean;

import java.io.Serializable;

public class Student implements Serializable {

	private static final long serialVersionUID = 5220619131646162976L;
	private String sword;
	private int isTrue;
	private String sname;
	private String sid;

	public String getSword() {
		return this.sword;
	}

	public void setSword(String sword) {
		this.sword = sword;
	}

	public int getIsTrue() {
		return this.isTrue;
	}

	public void setIsTrue(int isTrue) {
		this.isTrue = isTrue;
	}

	public String getSname() {
		return this.sname;
	}

	public void setSname(String sname) {
		this.sname = sname;
	}

	public String getSid() {
		return this.sid;
	}

	public void setSid(String sid) {
		this.sid = sid;
	}

	public Student(String sid, String sname, String sword, int isTrue) {
		super();
		this.sword = sword;
		this.isTrue = isTrue;
		this.sname = sname;
		this.sid = sid;
	}

	public Student() {
		super();
	}

	@Override
	public String toString() {
		return "Student [sword=" + this.sword + ",isTrue=" + this.isTrue + ",sname=" + this.sname + ",sid=" + this.sid
				+ "]";
	}
}
(2) 创建JUnit测试类
选中测试方法,右键点击run as JUnit运行
package com.yunhe.test;

import java.util.List;

import org.apache.ibatis.session.SqlSession;
import org.apache.ibatis.session.SqlSessionFactory;
import org.junit.Test;

import com.yunhe.javabean.Student;
import com.yunhe.util.MybatisUtil;

public class TestOne {

	@Test
	public void TestUtil() {
		SqlSessionFactory factory = MybatisUtil.getSqlSessionFactory();
		SqlSession session = factory.openSession();
		List<Student> students = session.selectList("student.selectAllStudent", Student.class);
		for (Student student : students) {
			System.out.println(student);
		}
	}
}
二、IDEA配置Mybatis
包结构:

1、导入jar包
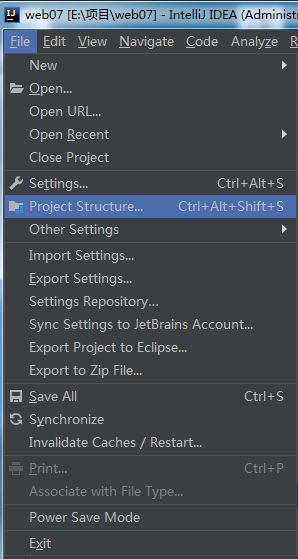
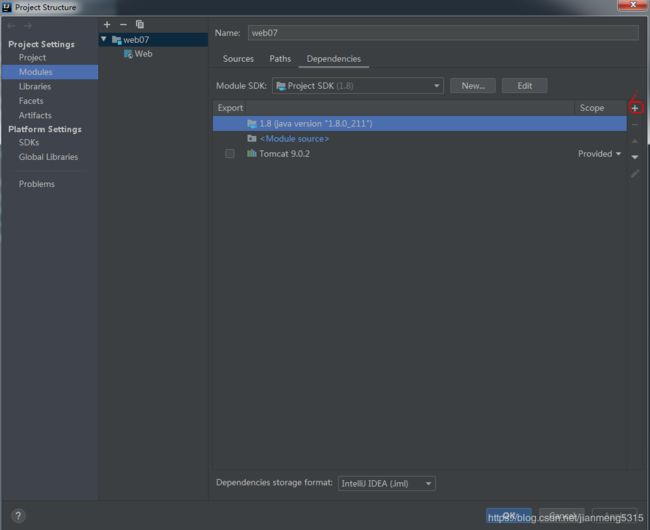
(1) 在External Libraries中导入jar包


点击+号,选中jar包所在目录,添加完之后,点击Apply->OK
效果如下:

(2) 在WEB-INF下新建lib包,将所需jar包拖拽至lib目录
效果如下:

2、添加配置文件
内容同上面Eclipse中的配置文件内容相同;将配置文件放置在src目录下
3、单例模式创建MybatisUtil类,放置在com.yunhe.util包下
内容与上面Eclipse中相同
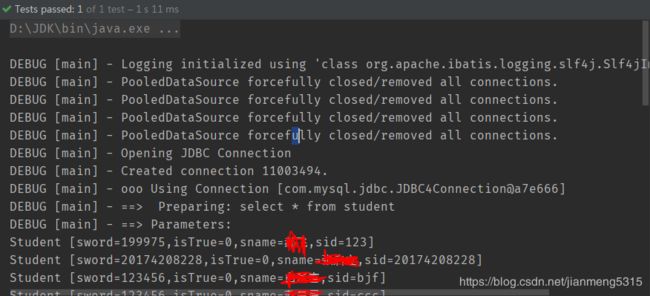
4、单元测试
结果如下:

以上便是Eclipse、IDEA配置Mybatis的全过程。


