虚拟环境下Openfiler存储部署
虚拟环境下Openfiler存储部署
- 一、openfiler安装
- 二、存储划分
- 2.1 非RAID划分方式
- 2.2 RAID划分方式
- 三、创建TARGET
- 四、lun 映射
- 五、创建网络访问
- 六、客户端映射连接
- 七、维护
使用Openfiler可以实现Oracle的共享存储搭建、模拟多路径以及LUN划分,可在物理机以及虚拟机上实现,本次环境使用VMware实现。
附下载地址
http://www.openfiler.com/community/download
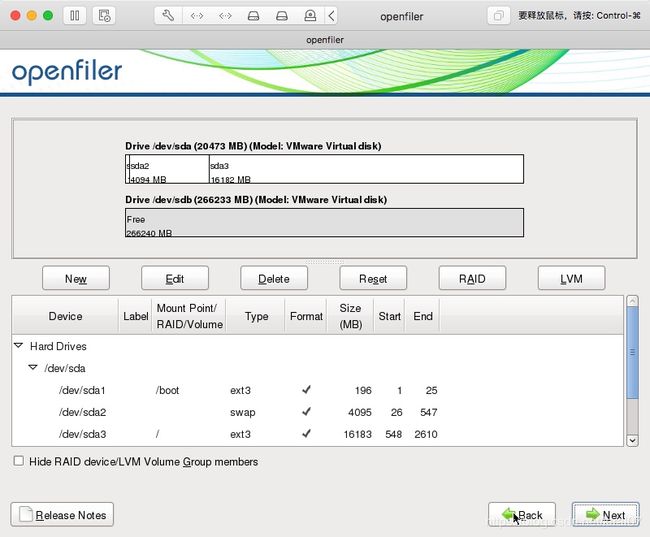
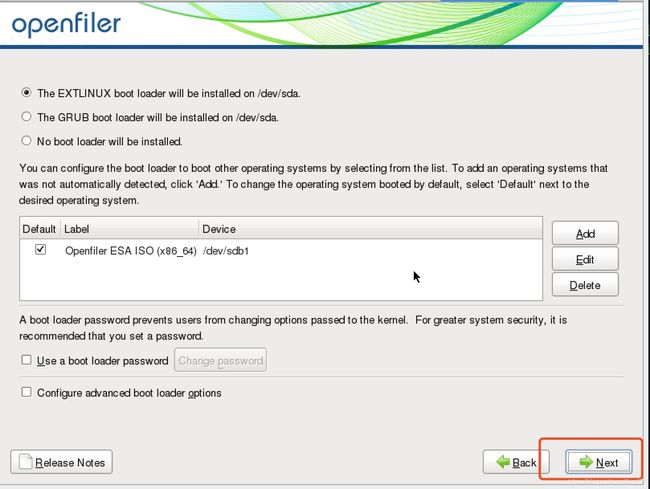
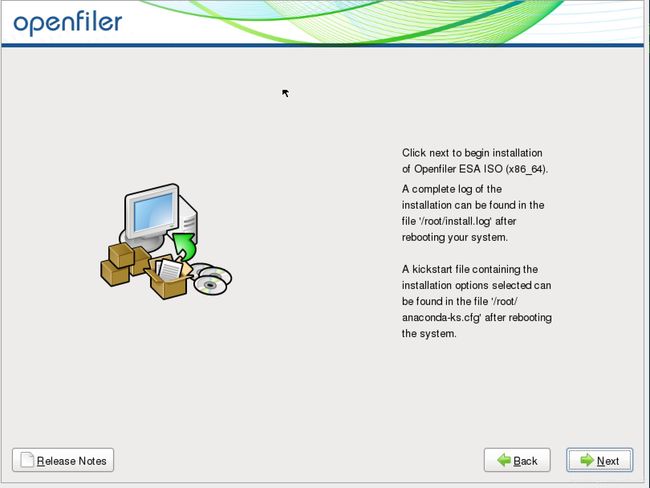
一、openfiler安装


https://192.168.149.129:446
openfiler
password

二、存储划分
2.1 非RAID划分方式
划分步骤:PV->VG-LV
1 选择块设备,如有多个块设备可分别操作

2 在其中一个块设备中创建PV

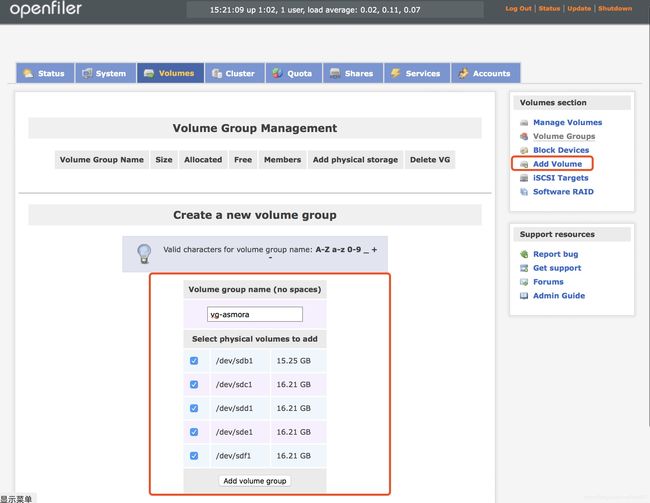
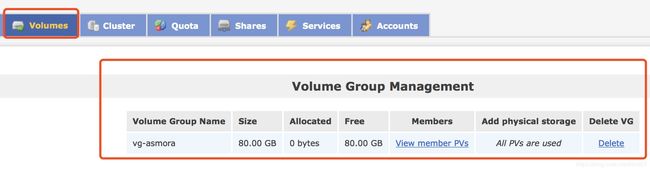
3 创建vg
输入一个名称用于创建vg,可选择多个pv创建vg
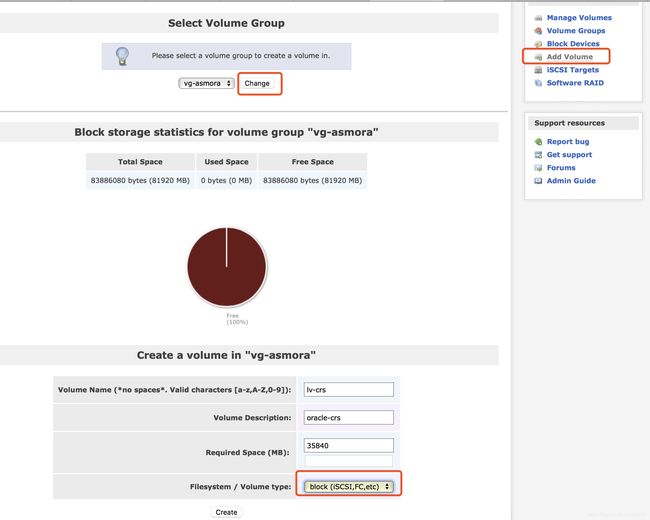
4 创建lv
选择vg名称,点击change,开始创建lv
如下创建两个lv,分别指定大小,类型选择“block”,用于Oracle共享磁盘


2.2 RAID划分方式
1、创建pv
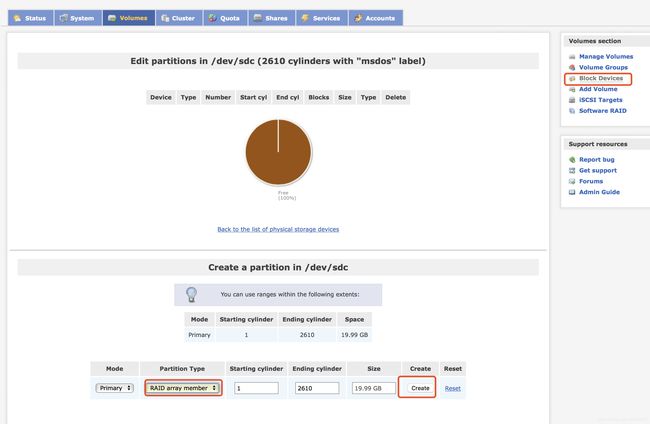
2、创建raid


3、创建vg

4、创建lv


三、创建TARGET
1、点击“ADD"创建存储的target,用于客户端发现存储

2、点击update更新target信息


四、lun 映射
1、在LUN Mapping中点击map,将lun映射到iscsi target中
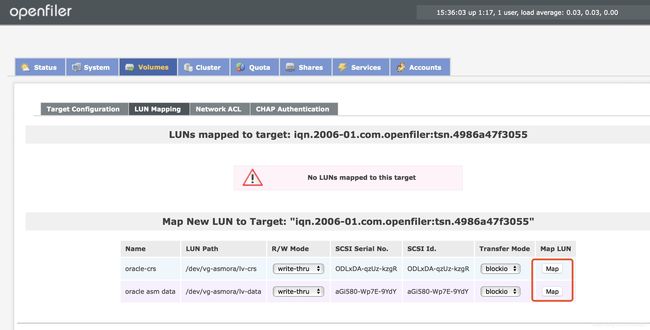
lun已映射完毕

五、创建网络访问
1、要使客户端可以连接iscsi存储,需要在网络访问配置,添加客户端ip地址
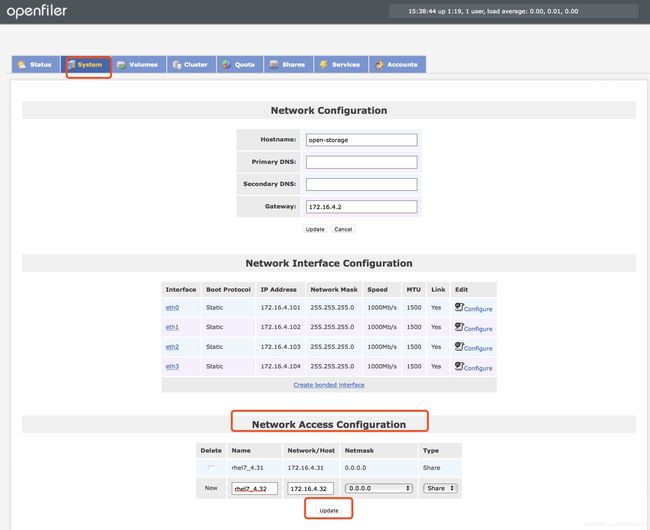
2、设置网段限制客户端访问lun
将客户端的access设置为allow,不然客户端无法发现存储

六、客户端映射连接
在客户端服务器需要安装iscsi initiator用于发现以及登录iscsi存储
1、检查是否有iscsi initiator
[root@rac1 tmp]# rpm -qa|grep iscsi
iscsi-initiator-utils-6.2.0.874-4.el7.x86_64
libvirt-daemon-driver-storage-iscsi-3.2.0-14.el7.x86_64
iscsi-initiator-utils-iscsiuio-6.2.0.874-4.el7.x86_64
libiscsi-1.9.0-7.el7.x86_64
2、启动iscsi并添加到系统服务
systemctl start iscsi
systemctl start iscsid
systemctl enable iscsid
systemctl enable iscsi
3、识别存储
[root@rhel6 iscsi]# iscsiadm -m discovery -t sendtargets -p 172.16.4.101:3260
4、一次性登录所有路径存储
[root@rac1 tmp]# iscsiadm -m node --loginall=all
Logging in to [iface: default, target: iqn.2006-01.com.openfiler:tsn.4986a47f3055, portal: 172.16.4.104,3260] (multiple)
Logging in to [iface: default, target: iqn.2006-01.com.openfiler:tsn.4986a47f3055, portal: 172.16.4.101,3260] (multiple)
Logging in to [iface: default, target: iqn.2006-01.com.openfiler:tsn.4986a47f3055, portal: 172.16.4.102,3260] (multiple)
Logging in to [iface: default, target: iqn.2006-01.com.openfiler:tsn.4986a47f3055, portal: 172.16.4.103,3260] (multiple)
Login to [iface: default, target: iqn.2006-01.com.openfiler:tsn.4986a47f3055, portal: 172.16.4.104,3260] successful.
Login to [iface: default, target: iqn.2006-01.com.openfiler:tsn.4986a47f3055, portal: 172.16.4.101,3260] successful.
Login to [iface: default, target: iqn.2006-01.com.openfiler:tsn.4986a47f3055, portal: 172.16.4.102,3260] successful.
Login to [iface: default, target: iqn.2006-01.com.openfiler:tsn.4986a47f3055, portal: 172.16.4.103,3260] successful.
逐个登录各个路径方式,根据openfiler 4个网卡ip地址登录:
iscsiadm -m node -T iqn.2006-01.com.openfiler:tsn.d61a1fa41fa2 -p 172.16.4.101:3260 -l
iscsiadm -m node -T iqn.2006-01.com.openfiler:tsn.d61a1fa41fa2 -p 172.16.4.102:3260 -l
iscsiadm -m node -T iqn.2006-01.com.openfiler:tsn.d61a1fa41fa2 -p 172.16.4.103:3260 -l
iscsiadm -m node -T iqn.2006-01.com.openfiler:tsn.d61a1fa41fa2 -p 172.16.4.104:3260 -l
5、检查客户端iscsi连接相关信息
[root@rac1 tmp]# iscsiadm -m session
tcp: [1] 172.16.4.101:3260,1 iqn.2006-01.com.openfiler:tsn.4986a47f3055 (non-flash)
tcp: [2] 172.16.4.104:3260,1 iqn.2006-01.com.openfiler:tsn.4986a47f3055 (non-flash)
tcp: [3] 172.16.4.102:3260,1 iqn.2006-01.com.openfiler:tsn.4986a47f3055 (non-flash)
tcp: [4] 172.16.4.103:3260,1 iqn.2006-01.com.openfiler:tsn.4986a47f3055 (non-flash)
6、设置开机自动扫链路
添加存储的target name,便于客户端开机自动扫描存储
vi /etc/iscsi/initiatorname.iscsi
InitiatorName=iqn.2006-01.com.openfiler:tsn.4986a47f3055
7、检查多路径软件是否安装
客户端需要使用多路径软件将各个磁盘路径聚合,检查如下两个软件包是否安装
(1)device-mapper
(2)device-mapper-multipath
[root@rac2 ~]# rpm -qa |grep device-mapper

device-mapper-event-libs-1.02.140-8.el7.x86_64
device-mapper-persistent-data-0.7.0-0.1.rc6.el7.x86_64
device-mapper-1.02.140-8.el7.x86_64
device-mapper-multipath-libs-0.4.9-111.el7.x86_64
device-mapper-multipath-0.4.9-111.el7.x86_64
device-mapper-libs-1.02.140-8.el7.x86_64
device-mapper-event-1.02.140-8.el7.x86_64
如未安装multipath,使用yum安装
yum install device-mapper-multipath

启动多路径服务
systemctl start multipathd
8、开启multipath开机自启
systemctl enable multipathd
9、将多路径加载到系统内核
modprobe dm-multipath
modprobe dm-round-robin
10、生成multipath多路径配置文件
/sbin/mpathconf --enable
生成的文件在/etc/multipath.conf
11、重新加载multipath路径
[root@rac1 tmp]# multipath -F    --------->删除路径
[root@rac1 tmp]# multipath -v2   --------->格式化
create: mpathc (14f504e46494c45524f444c7844412d717a557a2d6b7a6752) undef OPNFILER,VIRTUAL-DISK
size=35G features=‘0’ hwhandler=‘0’ wp=undef
|-± policy=‘service-time 0’ prio=1 status=undef
| - 34:0:0:0 sdb 8:16 undef ready running |-+- policy='service-time 0' prio=1 status=undef |- 35:0:0:0 sdg 8:96 undef ready running
|-± policy=‘service-time 0’ prio=1 status=undef
| - 36:0:0:0 sde 8:64 undef ready running-± policy=‘service-time 0’ prio=1 status=undef
- 37:0:0:0 sdd 8:48 undef ready running create: mpathd (14f504e46494c45526147693538302d577037452d39596459) undef OPNFILER,VIRTUAL-DISK size=30G features='0' hwhandler='0' wp=undef |-+- policy='service-time 0' prio=1 status=undef |- 34:0:0:1 sdc 8:32 undef ready running
|-± policy=‘service-time 0’ prio=1 status=undef
| - 35:0:0:1 sdi 8:128 undef ready running |-+- policy='service-time 0' prio=1 status=undef |- 36:0:0:1 sdh 8:112 undef ready running
-+- policy='service-time 0' prio=1 status=undef- 37:0:0:1 sdf 8:80 undef ready running
12、再次查看多路径状态
  [root@rac1 ~]# service multipathd start
  [root@rac1 tmp]# multipath -ll
4路径存储识别成功

13、查看系统设备
[root@rac1 tmp]# ll /dev/mapper/

多路径软件设置完成后,会在如上路径创建对应设备名称
七、维护
扩容
(a)如果存储空间不够了,要新增加存储 可执行iscsiadm -m session -R去发现
然后multipath -F以及multipath -v2
(b)刷过之后,看看有没有新增的卷
两种方式fdisk -l 或者cat /proc/scsi/scsi
©删除/注销 target连接
iscsiadm -m node -T iqn.2006-01.com.openfiler:tsn.5293d7449ee6 -p 172.16.4.101:3260 -u
iscsiadm -m node --logout
如果直接在vg上扩展容量,可尝试在openfiler web界面中iSCSI Targets Target Configuration重新update LUN Mapping重新map
客户端上注销iscsi,重新登录iscsi解决,再multipath -ll