springsecurity04-springsecurity oauth2实现单点登录之-github客户端模拟
文章目录
- 申请github oauth应用
- 测试github路径
- 获取授权码
- 获取token
- 读取github资源
- springboot单点登录github
- thymeleaf-extras-springsecurity4
- 客户端具体配置
申请github oauth应用
地址:springsecurity04-springsecurity oauth2实现单点登录之-github客户端模拟
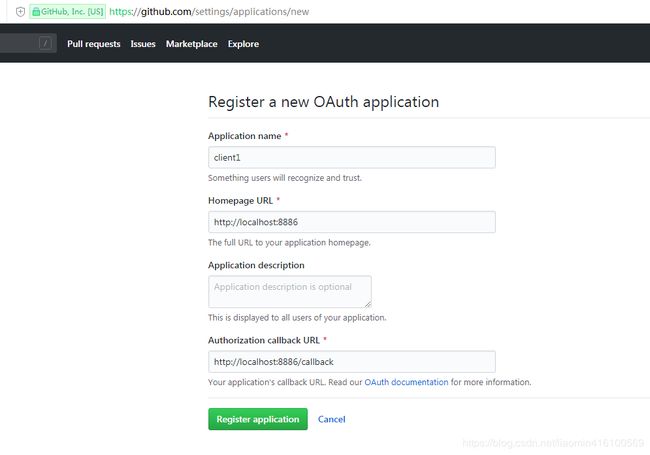
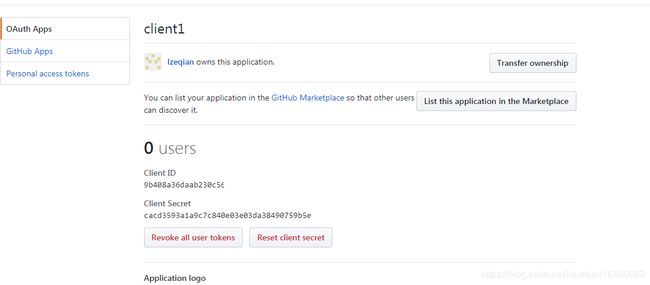
点击注册成功后,可以获取到对应客户端id和客户端密钥
测试github路径
获取授权码
使用之前获取授权码的路径测试
https://github.com/login/oauth/authorize?client_id=你的客户端id&response_type=code&redirect_uri=http://localhost:8886/callback 弹出授权页即正常
如果你的redirect_uri和注册的不一致,会抛出
http://localhost:8886/callback?error=redirect_uri_mismatch&error_description=The+redirect_uri+MUST+match+the+registered+callback+URL+for+this+application.&error_uri=https%3A%2F%2Fdeveloper.github.com%2Fapps%2Fmanaging-oauth-apps%2Ftroubleshooting-authorization-request-errors%2F%23redirect-uri-mismatch
获取token
使用client_id、client_secret和code这三个参数获取用户的access_token,即用户身份标识
https://github.com/login/oauth/access_token?client_id=xxxxxxxxxxxxxxxxxxx&client_secret=xxxxxxxxxxxxxxxxx&code=xxxxxxxxxxxxxxxxxxx
或
https://github.com/login/oauth/access_token?client_id=xxxxxxxxxxxxxxxxxxx&client_secret=xxxxxxxxxxxxxxxxx&code=xxxxxxxxxxxxxxxxxxx&redirect_uri=http://localhost:8080/login
读取github资源
使用access_token获取用户信息
https://api.github.com/user?access_token=xxxxxxxxxxxxxxxxx
springboot单点登录github
登录github操作参考官方文档 https://docs.spring.io/spring-boot/docs/2.0.8.RELEASE/reference/htmlsingle/#boot-features-security-oauth2-client
添加客户端依赖
            org.springframework.boot
            spring-boot-starter-web


            org.springframework.security
            spring-security-oauth2-client
            5.0.11.RELEASE


            org.springframework.boot
            spring-boot-starter-security


            org.springframework.boot
            spring-boot-starter-thymeleaf


            org.thymeleaf.extras
            thymeleaf-extras-springsecurity4


            nekohtml
            nekohtml
            1.9.6.2


            javax.servlet
            javax.servlet-api
            3.0.1
            provided
thymeleaf-extras-springsecurity4
其中 thymeleaf-extras-springsecurity4 用于在模板中判断是否授权或者获取资源信息
具体关于thymeleaf和springsecurity参考官网https://www.thymeleaf.org/doc/articles/springsecurity.html
简单介绍一下:
- sec:authorize用户判断用户授权信息
- sec:authentication 用于打印用户授权信息
打印信息
内置对象principal表示OAuth2Authentication对象(表示oauth认证过的用户信息【包含用户名,用户detail详细信息,图片啊等】)
principal中还有一个 principal 是OAuth2User其中的getAttributes存放着github上所有的个人信息
  This content is only shown to authenticated users.


  This content is only shown to administrators.


  This content is only shown to users.

The sec:authentication attribute is used to print logged user name and roles:

Logged user: Bob
Roles: [ROLE_USER, ROLE_ADMIN]
客户端具体配置
application.properties配置
spring.security.oauth2.client.registration是自定义客户端的前缀
my-client-1名字可以随意
1. client-id:表示客户端编号,github上申请了就可以看到
2. client-secret:客户端密钥,github上申请了就拷贝过来
3. client-name:一般设置是登陆页显示的名字,可以随便取,是个客户端的标识label
4. provider:表示下面定义的provider相关的认证服务器,资源服务器的路径
5. scope:表示服务器运行你访问的范围
6. redirect-uri-template:你定义在github服务器上的Authorization callback URL,必须一致否则报错
7. client-authentication-method:客户端认证方式
8. authorization-grant-type:授权方式,一般就使用授权码模式
spring.security.oauth2.client.provider表示授权服务器和资源服务器提供商
my-oauth-provider就是上面指定提供商的名字
- authorization-uri表示授权登录的url,自动跳转到回调地址参数返回code=授权码
- token-uri 表示通过授权码token
- user-info-uri 表示获取用户信息的地址
- user-name-attribute表示通过user-info-uri获取键值对map中用户名对应属性
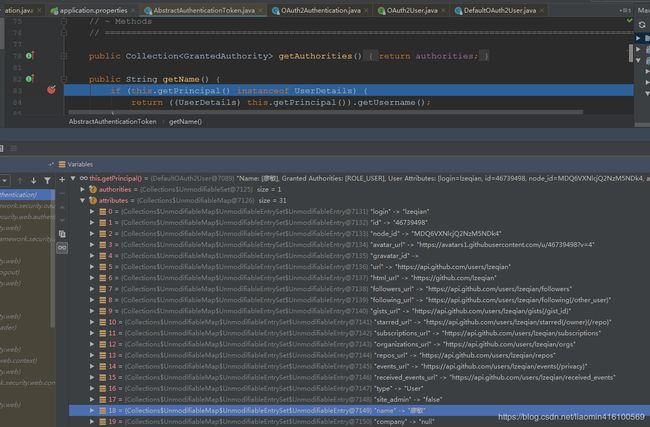
这些属性中 id表示你在github上的id,avatar_url表示你上传到github上的图像,具体参考github官网
spring.security.oauth2.client.registration.my-client-1.client-id=9b408a36daab230c563e
spring.security.oauth2.client.registration.my-client-1.client-secret=cacd3593a1a9c7c840e03e03da38490759b5e960
spring.security.oauth2.client.registration.my-client-1.client-name=my-client-1
spring.security.oauth2.client.registration.my-client-1.provider=my-oauth-provider
spring.security.oauth2.client.registration.my-client-1.scope=all
spring.security.oauth2.client.registration.my-client-1.redirect-uri-template=http://localhost:8886/callback
spring.security.oauth2.client.registration.my-client-1.client-authentication-method=basic
spring.security.oauth2.client.registration.my-client-1.authorization-grant-type=authorization_code

spring.security.oauth2.client.provider.my-oauth-provider.authorization-uri=https://github.com/login/oauth/authorize
spring.security.oauth2.client.provider.my-oauth-provider.token-uri=https://github.com/login/oauth/access_token
spring.security.oauth2.client.provider.my-oauth-provider.user-info-uri=https://api.github.com/user
spring.security.oauth2.client.provider.my-oauth-provider.user-name-attribute=name
server.port=8886
spring.thymeleaf.cache=false
spring.thymeleaf.mode=LEGACYHTML5
debug=false
添加控制层index跳转到index模板
/**
 * @author 廖敏
 * 创建日期 2019-03-12 16:03
 **/
@Controller
public class TestController {
    @GetMapping("/index")
    public String index(Principal principal, Model model) {
        if(principal == null ){
            return "index";
        }
        System.out.println(principal.toString());
        model.addAttribute("principal", principal);
        return "index";
    }
}
添加index.html模板
Hello Spring Security
已有用户登录
登录的用户为:
用户权限为:
用户头像为: ![]()
未有用户登录
添加权限配置类
/*
  任何注解都不需要只需要权限的注解EnableWebSecurity
*/
@EnableWebSecurity
@Configuration
public class UiSecurityConfig extends WebSecurityConfigurerAdapter {

    @Override
    protected void configure(HttpSecurity http) throws Exception {
        http
                .authorizeRequests()
                .anyRequest().authenticated()
                .and()
                .oauth2Login()
                .redirectionEndpoint()
                .baseUri("/callback");//注意一定要是回调地址,不加模板只拦截/login/oauth2/code/*
    }

}
添加启动main
@SpringBootApplication
public class Client1Main {
    public static void main(String[] args) {
        SpringApplication.run(Client1Main.class);
    }
}
启动 访问 http://localhost:8886/index,返现跳转到一个页面,上面有个链接显示配置客户端名称
spring.security.oauth2.client.registration.my-client-1.client-name=my-client-1
cookie是一般的session
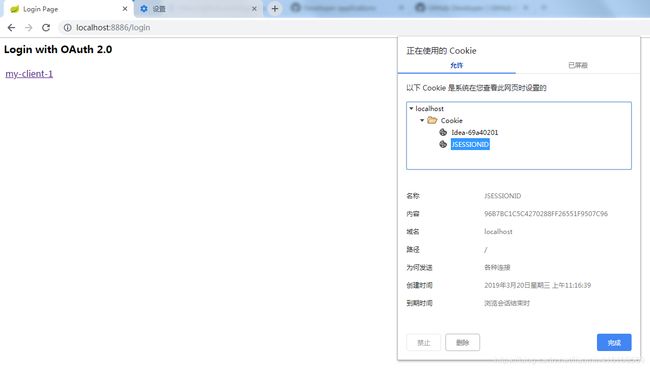
查看源代码
my-client-1
说明/oauth2/authorization/你的名称 会自动过滤去判断是否github授权
点击 my-client-1链接(目前未登录github),自动跳转到github上
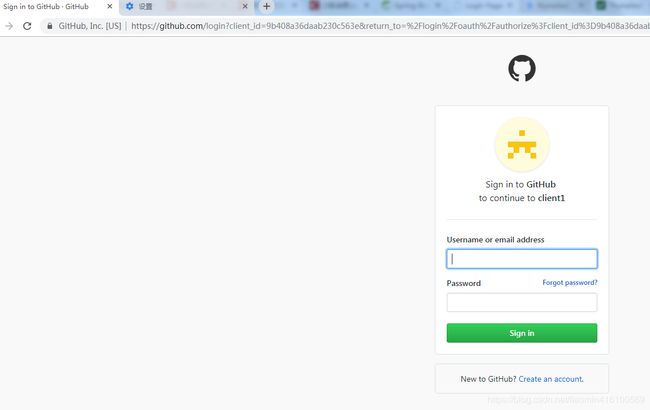
输入用户名和密码,此时自动跳转回 index页面 此时就可以显示用户名等信息(图片偶尔显示不出来【墙】)
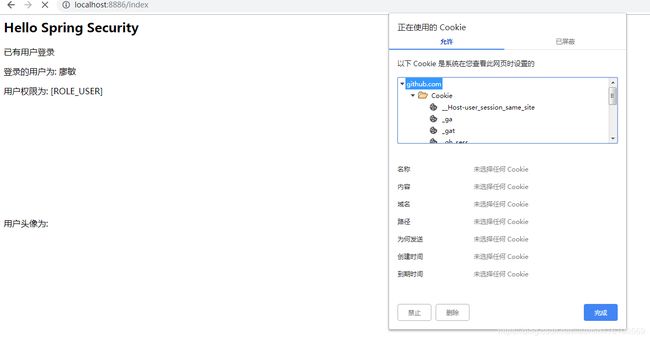
此时多了github的cookie信息
github登录的信息和当前session绑定一起,,之后在访问index或者其他页面,就无需登录了【除非清空缓存】
补一张正确显示图片的效果(我没有修改github上图片)
