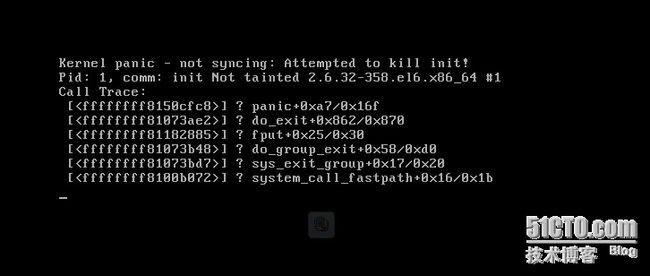
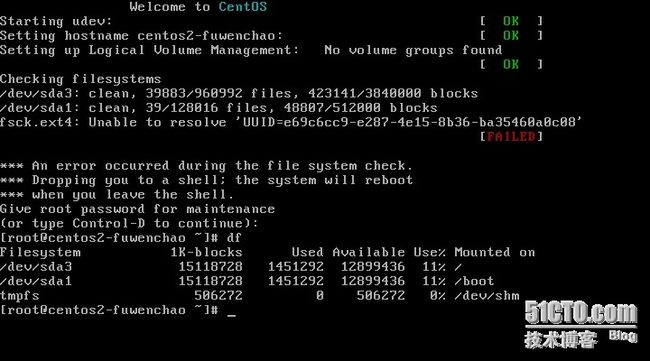
某年的某日,俺重启虚拟机上的系统,啪啪,报错。系统启动不起来:
重装系统,不甘心,正好趁这个机会,深入了解一下Linux系统,Google咯
看到有如下几种解决:
方案一:
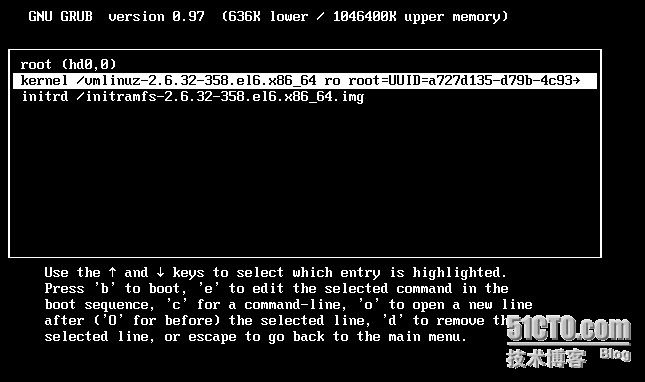
系统启动的时候,按下‘e’键进入grub编辑界面,编辑grub菜单,选择“kernel /vmlinuz-2.6.23.1-42.fc8 ro root=/dev/vogroup00/logvol00 rhgb quiet” 一栏,按‘e’键进入编辑,在末尾增加enforcing=0,即:
kernel /vmlinuz-2.6.23.1-42.fc8 ro root=/dev/vogroup00/logvol00 rhgb quiet enforcing=0
按‘b’键继续引导,OK顺利前进。
不用我,我试过,对我来说不行
方案二:
将方案一中的enforcing=0换成selinux=0
当然要是这么简单我就不写博文了
方案三
出现:Kernel Panic -- not syncing: attempted to kill init 然后就停那里不走了。在网上查了好多资料都不可以。从昨天到今天整了近20个小时,本来想还不如重做个系统得了,但是没有得到客户授权,还是不能乱搞滴~有一些方案是编辑grub,不过试了N种都不行。就决定放弃了。后来在csdn 还是51cto上看到一个方法最终可以了。其间的过程还真是一波三折..
首先要进入系统,然后才能编辑/etc/sysctl.conf.那就找系统盘引导吧。不巧的是,这个品牌机的光驱是cd的,又没有多余的sata口,而机房只有centos 5.3 5.4 dvd 盘,根本没法驱动,汗~。后来意外发现debian 5.0的cd盘。反正都是同样的内核,死马当活马医吧。出现安装界面时,选择rescue mode ,然后一大堆的下一步之后终于看到命令行界面了嘿嘿 !
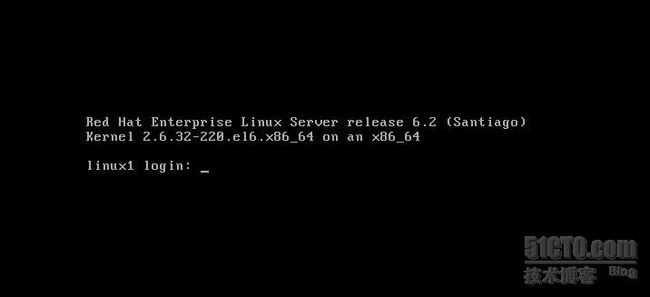
不过令我纳闷的是vi命令不能用。。按理说debian应该是支持vi编辑命令的(主要我还是菜鸟)。后来只好用nano命令了。cd 到etc目录发现下边没有sysctl.conf这个文件。抱着试试的态度,nano sysctl.conf 新建一个吧,在里边输入 kelnel panic=30 kernel sysrq=1 保存退出。重启,终于跳出那个报错,看到了 久违的login界面啦,哈哈...这其中还有很多原理,我不懂,我知道自己还是菜鸟级别,想学好linux也不是一朝一夕的事。不过还要给自己庆祝下,终于把这个问题解决了。
暂时没试,先放一下
方案四:
http://askubuntu.com/questions/92946/cannot-boot-because-kernel-panic-not-syncing-attempted-to-kill-init
At the GRUB screen select the entry you wish to boot in to (most likely the one that's selected as default), press e and then remove 'quiet' and 'splash' from the kernel line if present. You can then press Ctrl-X to boot. This might display a little more information that could be useful. Edit: tumbleweed's suggestion is better, try rescue mode
按照这种操作,看到详细报错如下:
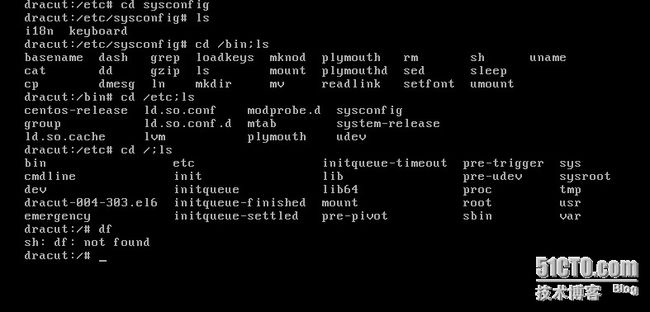
按照如上提示启动系统,进入了如下界面:
再该shell中,发现几乎所有的数据都没了,/etc目录下没剩几个文件了。几乎所有的命令也没了
难道是在该界面所有的数据都被屏蔽掉了,还是所有的数据不明原因的本来就消失了,同样的方法(即删除quiet)在另外的虚拟系统中操作下,是正常启动的!!!
难道果然是磁盘数据都丢失了
方案五:
虽然和我的报错有点不一样,但还是把这种解决问题的方法写下来吧
http://loofeer.blog.51cto.com/707932/996789
昨天修改了SELinux设置,结果导致系统重新启动无法启动,提示kernel panic - not syncing:Attempted to kill init。类似window的蓝屏。如下图:
幸好手里有一张redhat的系统安装盘,果断使用rescue模式解救。大致过程为加载redhat安装盘,进入rescue模式,按照提示用安装盘启动系统,挂载硬盘,然后进入shell模式修改配置文件。
接下来就进入shell了,可以修改配置文件了,然后重新启动系统就可以正常启动了。
方案六:
我之前的猜想是fstab文件根分区挂载出错,导致系统无法启动!一般出现Kernel panic,是内核没有硬盘的驱动造成的,还有一个可能,就是grub的配置里面,root指向有问题!
好吧!rescure mode看看
进入后,虚惊一场!系统文件都还在,应该不是上面说的所有的文件丢失造成的,现在应该确定是/挂在出错或者是grub配置问题,好吧,先分析 / 挂载问题
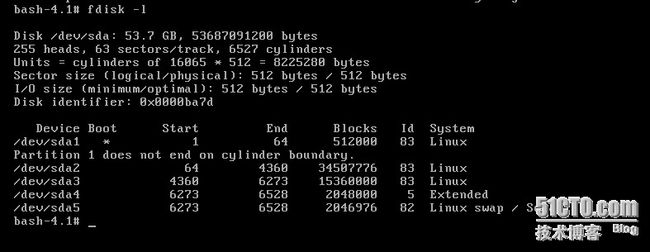
磁盘信息
挂载信息
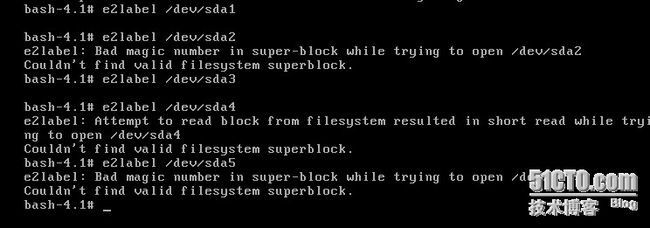
查看每个分区对应的label name
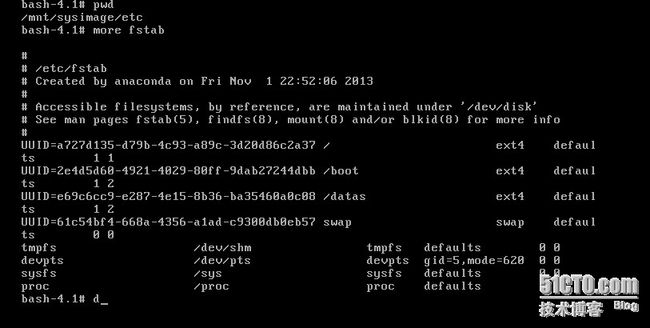
查看/etc/fstab文件
通过上面几个命令的分析,sda3应该为根分区 / ;我们看下sda3的UUID
可以看到根分区的UUID同fstab的UUID不一致
列出磁盘与UUID的关系
我做了如下两种修改
1:vi fstab
直接修改a727d......... 挂在 / 的 sda3的uuid改为4b82e312.............................
reboot重启,不行,还是以前的错误界面
2:重新生成uuid
可以看到sda3重新生成的UUID为ae325b33..............
vi fstab修改/ 的 uuid为ae325b33...........
reboot重启,哦哦,还是失败,返回以前报错界面
看来启动参数那里也错了
重启后任意键到达内核配置,修改root=uuid=xxxxxxxxxxxxxxxxxxxxxxxxxx(上面生成的uuid),启动,哈哈,总算看到点不一样的东西了
看到出现kernel panic报错之前报的就是这个错!hehe
这个unable to reslove 'uuid=XXXXXXXXXX'是什么东东呀!!!!
想也不用想,肯定是除根分区以外其他分区uuid错误!!!按照之前方法修改试试!!先确定分区是哪个!
根据fstab可以看到是挂在到/datas目录上的分区出现问题!根据fdisk -l可以到时sda2挂在到datas目录下的!
首先思路是看能不能先卸载这个分区,发现卸载不了,那就重新生成uuid试下,也不行,看图
咋办呀这!在fstab中删除该行???先不急,Google看下该分区出现了啥问题!
嘿嘿,有点眉目了,看如下解释
is a swap partition, which therefore doesn't have a file system (it's formatted as swap), so it, too, cannot be read by e2label.
虽然我的不是swap,但是联想到之前我做过一次DRBD,将该分区格式化了,呵呵,没办法,fstab删除掉报uuid错的那一行试下
vi fstab准备删除哪一行的时候,却报错该分区为只读,好吧,先重新挂组mount / -o remount,rw后vi fstab dd删除后
mount / -o remount,ro!!!!!!!!!修改完成,准备重新启动,但这个时候又想到一个问题,就是重启后之前在修改启动参数是root的uuid还是否已改变,我是否要找到启动参数的文件/etc/grub.conf永久修改呢!
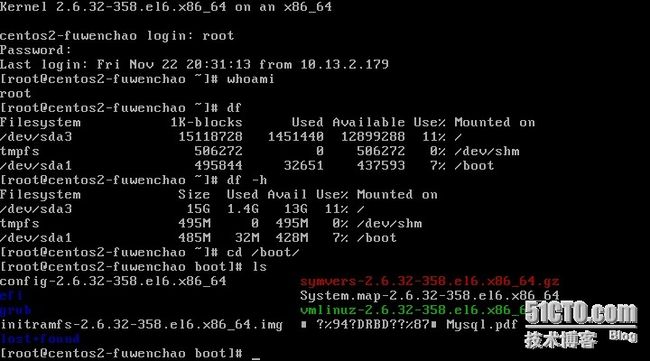
不看不知道,一看吓一跳/boot分区下的文件全都没了!!!
这个,咋办,这个分区是sda1!!!!
恢复/boot还是先启动看看!
1,启动看下;shutdown -r now ,果然不出所料,报最初的错!修改root UUID
本以为修改之后可以的,为什么又报初始错!!
靠,救援模式走起
fuc k,rescure mode 下竟然/boot分区东西都在,这是啥子情况!!!不懂,仔细检查看下
原来是uuid写错了,填写正确的uuid,修改为硬盘启动,OK!!完美启动
下次启动应该还会报错,修改/etc/boot/grub/grub.conf文件即可!!!!!!!!!!!!!
试验成功!!!
克隆后:
主机名修改
网络IP地址
MAC修改
修改网卡地址vi /etc/udev/rules.d/70-persistent-net.rules
该文件记录当前机器上的所有网卡信息
根据刚才新生成的mac地址,找到对应的行,把网卡名称改成 eth0,其它网卡都删除。
# PCI device 0x8086:0x100f (e1000)
#SUBSYSTEM=="net", ACTION=="add", DRIVERS=="?*", ATTR{address}=="00:0c:29:b9:30:#59", ATTR{type}=="1", KERNEL=="eth*", NAME="eth0"
# PCI device 0x8086:0x100f (e1000)
SUBSYSTEM=="net", ACTION=="add", DRIVERS=="?*", ATTR{address}=="00:50:56:25:d4:58", ATTR{type}=="1", KERNEL=="eth*", NAME="eth0"
保存退出,之后vi /etc/sysconfig/network-scripts/ifcfg-eth0,该文件记录第一块网卡eth0的详细信息
把uuid随便改一个数字,保证它跟原来的系统不同即可,然后把HWADDR改成新生成的mac地址,保存退出。
重启系统 shutdown -r now;进入系统,一切OK。
