Spring boot学习之spring-data-jpa的使用(一)
Spring boot学习之jpa的使用
之前我们是简单的入了门,创建一个helloword,而在实际的开发中仅仅入门是不够的,比如就少不了数据库的操作,本章将简单介绍一下基于hibernate的spring boot中jpa的使用。
1.JPA简介
要使用JPA首先得了解什么是JPA,其实本人在此之前对此也是有一些接触的,但是其究竟是个什么东东,也是不了解的,这次也是在网上各种度娘之后对其有了一个比较明确的理解。
其实JPA本身并不是一种框架,是一种规范,其全称是Java Persistence API,是是Sun官方提出的Java持久化规范,而他的出现主要是为了简化现有的持久化开发工作和整合ORM技术,并且其是在充分吸收了现有Hibernate,TopLink,JDO等ORM框架的基础上发展而来的,具有易于使用,伸缩性强等优点。
而官网对spring data jpa是这么介绍的:Spring Data JPA是Spring Data系列的一部分,可以轻松实现基于JPA的存储库。该模块处理对基于JPA的数据访问层的增强的支持。这使得使用数据访问技术构建Spring供电的应用程序变得更加容易。
Spring Data JPA旨在通过减少实际需要的数量来显着提高数据访问层的实现。作为开发人员,您编写存储库接口(包括自定义查找器方法),Spring将自动提供实现。
特征
基于Spring和JPA构建存储库的复杂支持
支持Querydsl谓词,从而支持类型安全的JPA查询
域类的透明审计
分页支持,动态查询执行,整合自定义数据访问代码的能力
@Query引导时间验证注释查询
支持基于XML的实体映射
package com.zxl.examples.controller;

import com.zxl.examples.controller.common.ResultBean;
import com.zxl.examples.controller.common.SuccessBean;
import com.zxl.examples.entity.User;
import com.zxl.examples.service.UserRepository;
import com.zxl.examples.service.UserSerivceImpl;
import org.springframework.beans.factory.annotation.Autowired;
import org.springframework.data.domain.Page;
import org.springframework.data.domain.PageRequest;
import org.springframework.data.domain.Slice;
import org.springframework.data.domain.Sort;
import org.springframework.web.bind.annotation.*;

import java.util.ArrayList;
import java.util.List;

/**
 * Created by Administrator on 2017/7/24.
 */
@RestController
public class UserController {

    @Autowired
    UserRepository userRepository;

    @Autowired
    UserSerivceImpl userSerivce;

    @GetMapping("/users")
    public List findUserList(){
        return userRepository.findAll();
    }

    @PostMapping("/users/add")
    public User addUser(@RequestParam("username") String username,
                              @RequestParam("name") String name,
                              @RequestParam("password") String password){
        User user = new User();
        user.setUsername(username);
        user.setName(name);
        user.setPassword(password);
        return userRepository.save(user);

    }

    @GetMapping("/users/{id}")
    public User getUserById(@PathVariable Long id){
        return userRepository.findOne(id);
    }

    @PutMapping("/users/{id}")
    public User updUserById(@PathVariable Long id,@RequestParam("name") String name){
        User user = userRepository.findOne(id);//先查出来,否则修改的时候会将其他request中没有的参数也给覆盖掉
        user.setName(name);
        return userRepository.save(user);//与保存是同一个方法
    }

    @DeleteMapping("/users/{id}")
    public ResultBean delUserById(@PathVariable Long id){
        userRepository.delete(id);
        return new SuccessBean();
    }

    @GetMapping("/users/username/{username}")
    public List findByUsername(@PathVariable ("username") String username){
        return userRepository.findByUsername(username);
    }

    @PostMapping("/users/addMore")
    public void addMore(){
        userSerivce.addMoreUsers();
    }

    @PostMapping("/users/addList")
    public void addMoreList(){
        userSerivce.addMoreList();
    }


}
通过介绍基于JavaConfig的存储库配置@EnableJpaRepositories
2.1 准备工作
了解了JPA以及Spring data JPA之后那么就可以开始进行实战了,而再此之前需要引入相关的依赖,详见pom文件如下
4.0.0com.zxlsprintboot-examples1.0-SNAPSHOT
     org.springframework.bootspring-boot-starter-parent1.5.4.RELEASE
     org.springframework.bootspring-boot-starter-data-jpaorg.springframework.bootspring-boot-starter-web


     org.hibernatehibernate-coreorg.hsqldbhsqldb
     org.springframework.bootspring-boot-starter-testtestmysqlmysql-connector-java
     org.springframework.bootspring-boot-maven-plugin
# HTTP Server

server:
  port: 8089   # HTTP (Tomcat) port

spring:
  profiles:
    active: local


#日志采用debug模式
debug: true

---
#本地环境
spring:
  profiles: local

  datasource:
    driver-class-name: com.mysql.jdbc.Driver
    url: jdbc:mysql://localhost:3306/bootdb?useUnicode=true&characterEncoding=utf-8&allowMultiQueries=true
    username: root
    password: root

  jpa:
    hibernate:
      ddl-auto: update
    show-sql: true

# REDIS (RedisProperties)
# Redis数据库索引(默认为0)
  redis:
    database: 0
    host: localhost
    port: 6379
    password: xue$Xin+2@!3
    pool:
      # 连接池最大连接数(使用负值表示没有限制)
      max-active: 8
      # 连接池最大阻塞等待时间(使用负值表示没有限制)
      max-wait: -1
      # 连接池中的最大空闲连接
      max-idle: 8
    # 连接超时时间(毫秒)
    timeout: 0


logging:
  level:
    org:
      hibernate:
        SQL: DEBUG
        type:
          descriptor:
            sql: TRACE

---
#开发环境
spring:
  profiles: dev

jdbc:
  driver: com.mysql.jdbc.Driver
  url: jdbc:mysql://localhost:3306/bootdb?useUnicode=true&characterEncoding=utf-8&allowMultiQueries=true
  username: root
  password: root1
其实hibernate有几年没有用过了,大部分年都忘记了,这次也算是温习了一把吧,hql的语法大可以自己简单的去度娘一下,说白了就是把pojo当成table来操作就行了,还有一些参数代入的细节注意下即可,这里简单说下hibernate auto-ddl的配置吧(也是粘贴过来的,懒得自己写了,很有可能自己也没法写的比粘贴的易懂准确):其实这个hibernate.hbm2ddl.auto参数的作用主要用于:自动创建|更新|验证数据库表结构。如果不是此方面的需求建议set value="none"。
create:
每次加载hibernate时都会删除上一次的生成的表,然后根据你的model类再重新来生成新表,哪怕两次没有任何改变也要这样执行,这就是导致数据库表数据丢失的一个重要原因。
create-drop :
每次加载hibernate时根据model类生成表,但是sessionFactory一关闭,表就自动删除。
update:
最常用的属性,第一次加载hibernate时根据model类会自动建立起表的结构(前提是先建立好数据库),以后加载hibernate时根据 model类自动更新表结构,即使表结构改变了但表中的行仍然存在不会删除以前的行。要注意的是当部署到服务器后,表结构是不会被马上建立起来的,是要等 应用第一次运行起来后才会。
validate :
每次加载hibernate时,验证创建数据库表结构,只会和数据库中的表进行比较,不会创建新表,但是会插入新值。
创建一个简单的entity,代码如下,值得注意的地方是这里必须要有一个无参构造方法,否则JPA启动会报错,另外可以看到其实现了Serializable,这部分主要是为了后续要讲到的spring boot data redis使用时用到的,当然了也可以不实现,只不过使用redis的方式会不一样而已,这个看个人喜好了
package com.zxl.examples.entity;

import javax.persistence.Column;
import javax.persistence.Entity;
import javax.persistence.GeneratedValue;
import javax.persistence.Id;
import java.io.Serializable;

/**
 * Created by Administrator on 2017/7/21.
 */
@Entity
public class User implements Serializable {
    private static final long serialVersionUID = 1L;

    @Id
    @Column(name="id",nullable = false)
    @GeneratedValue
    private Long id;

    @Column
    private String username;

    @Column
    private String name;

    @Column
    private String password;

    public Long getId() {
        return id;
    }

    public void setId(Long id) {
        this.id = id;
    }

    public String getUsername() {
        return username;
    }

    public void setUsername(String username) {
        this.username = username;
    }

    public String getName() {
        return name;
    }

    public void setName(String name) {
        this.name = name;
    }

    public String getPassword() {
        return password;
    }

    public void setPassword(String password) {
        this.password = password;
    }

    public User(String username,String name,String password){
        super();
        this.username=username;
        this.name=name;
        this.password=password;
    }

    //必须有一个无参构造方法,否则会报错
    public User(){

    }

    @Override
    public String toString() {
        return getId()+","+getUsername()+","+getName();
    }
}
2.2 创建简单的查询
创建一个自己的Repository,官网上介绍的是其需要集成Repository或者CurdRepository,而此处采用的是继承JpaRepository,至于为什么是JpaRepository,说实话我也不知道,我也是通过看了好多大牛的博客后发现大家都是继承的JpaRepository,所以干脆我也来继承JpaRepository得了,有兴趣的话可以自己去研究研究。
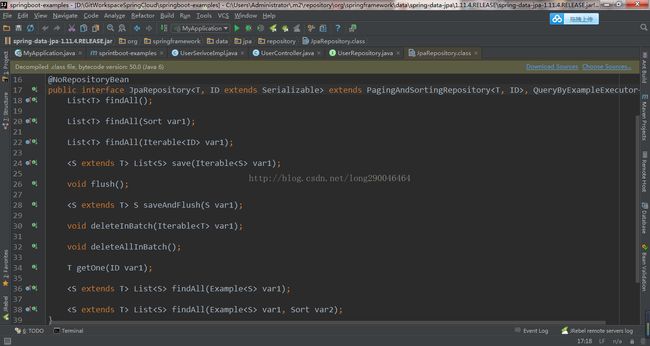
spring data jpa 默认预先生成了一些基本的CURD的方法,直接拿来用就可以,不需要自己来写,可以简单的看一下JpaRepository的源码,一看名称就知道是啥意思了,如下图
创建一个UserController类,代码如下:
package com.zxl.examples.controller;

import com.zxl.examples.controller.common.ResultBean;
import com.zxl.examples.controller.common.SuccessBean;
import com.zxl.examples.entity.User;
import com.zxl.examples.service.UserRepository;
import com.zxl.examples.service.UserSerivceImpl;
import org.springframework.beans.factory.annotation.Autowired;
import org.springframework.data.domain.Page;
import org.springframework.data.domain.PageRequest;
import org.springframework.data.domain.Slice;
import org.springframework.data.domain.Sort;
import org.springframework.web.bind.annotation.*;

import java.util.ArrayList;
import java.util.List;

/**
 * Created by Administrator on 2017/7/24.
 */
@RestController
public class UserController {

    @Autowired
    UserRepository userRepository;

    @Autowired
    UserSerivceImpl userSerivce;

    @GetMapping("/users")
    public List findUserList(){
        return userRepository.findAll();
    }

    @PostMapping("/users/add")
    public User addUser(@RequestParam("username") String username,
                              @RequestParam("name") String name,
                              @RequestParam("password") String password){
        User user = new User();
        user.setUsername(username);
        user.setName(name);
        user.setPassword(password);
        return userRepository.save(user);

    }

    @GetMapping("/users/{id}")
    public User getUserById(@PathVariable Long id){
        return userRepository.findOne(id);
    }

    @PutMapping("/users/{id}")
    public User updUserById(@PathVariable Long id,@RequestParam("name") String name){
        User user = userRepository.findOne(id);//先查出来,否则修改的时候会将其他request中没有的参数也给覆盖掉
        user.setName(name);
        return userRepository.save(user);//与保存是同一个方法
    }

    @DeleteMapping("/users/{id}")
    public ResultBean delUserById(@PathVariable Long id){
        userRepository.delete(id);
        return new SuccessBean();
    }

    @GetMapping("/users/username/{username}")
    public List findByUsername(@PathVariable ("username") String username){
        return userRepository.findByUsername(username);
    }

    @PostMapping("/users/addMore")
    public void addMore(){
        userSerivce.addMoreUsers();
    }

    @PostMapping("/users/addList")
    public void addMoreList(){
        userSerivce.addMoreList();
    }


}
package com.zxl.examples.service;

import com.zxl.examples.entity.User;
import org.springframework.beans.factory.annotation.Autowired;
import org.springframework.cache.annotation.CacheEvict;
import org.springframework.cache.annotation.CachePut;
import org.springframework.cache.annotation.Cacheable;
import org.springframework.data.redis.core.RedisTemplate;
import org.springframework.data.redis.core.StringRedisTemplate;
import org.springframework.stereotype.Service;
import org.springframework.transaction.annotation.Transactional;

import java.util.ArrayList;
import java.util.List;
import java.util.concurrent.TimeUnit;

/**
 * Created by Administrator on 2017/7/24.
 */
@Service("userSerivce")
public class UserSerivceImpl {
    @Autowired
    UserRepository userRepository;

    @Transactional
    public void addMoreUsers(){
        User user1 = new User();
        user1.setUsername("123");
        user1.setName("123");
        user1.setPassword("123");
        userRepository.save(user1);
        User user2 = new User();
        user2.setUsername("234");
        user2.setName("123");
        user2.setPassword("123");
        userRepository.save(user2);
    }

    public void addMoreList(){
        List userList = new ArrayList();
        User user1 = new User();
        user1.setUsername("345");
        user1.setName("123");
        user1.setPassword("123");
        userList.add(user1);

        User user2 = new User();
        user2.setUsername("456");
        user2.setName("123");
        user2.setPassword("123");
        userList.add(user2);
        userRepository.save(userList);
    }


}
package com.zxl.examples.service;

import com.zxl.examples.entity.User;
import org.springframework.data.domain.Page;
import org.springframework.data.domain.Pageable;
import org.springframework.data.domain.Slice;
import org.springframework.data.domain.Sort;
import org.springframework.data.jpa.repository.JpaRepository;
import org.springframework.data.jpa.repository.Query;
import org.springframework.data.repository.query.Param;

import java.util.List;

/**
 * Created by Administrator on 2017/7/21.
 */
public interface UserRepository extends JpaRepository {


}
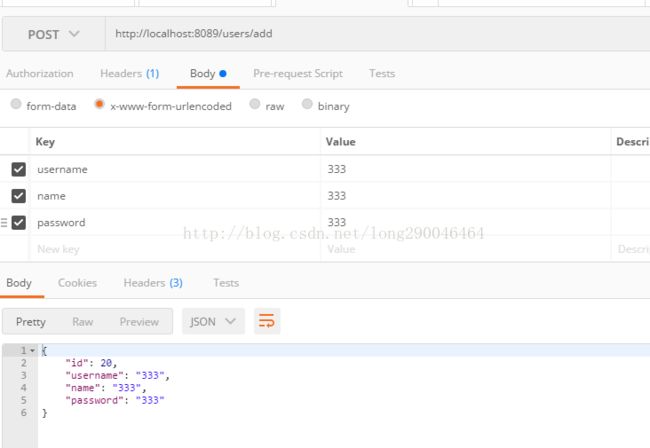
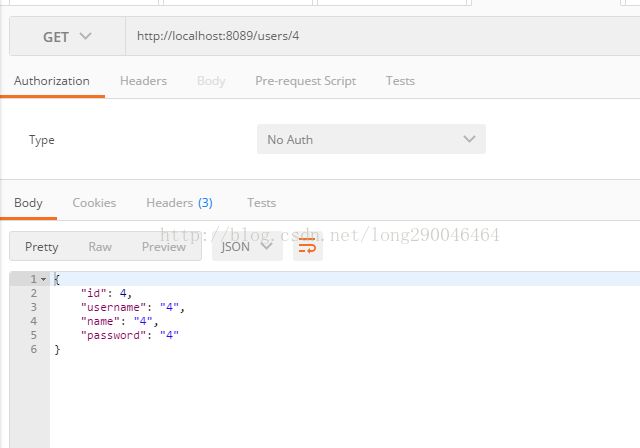
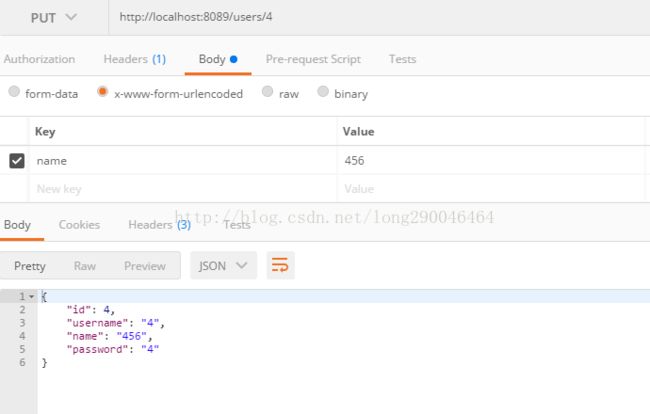
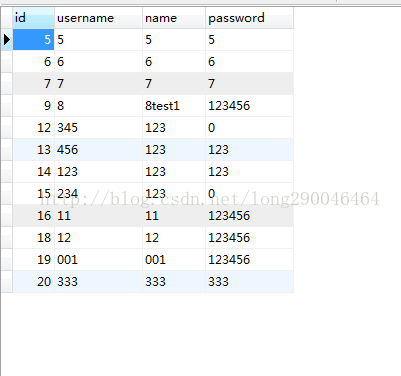
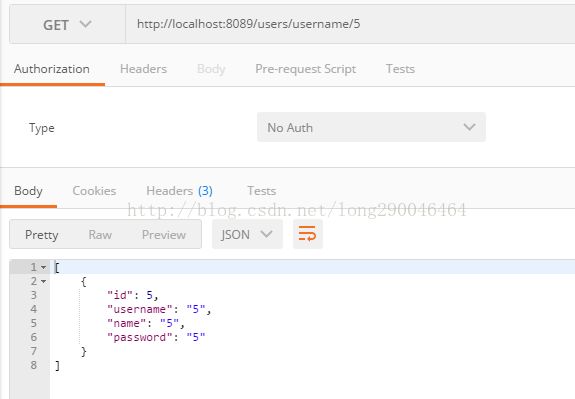
下面使用postman来进行测试,结果如下:
简单查询到此结束了,下篇再继续介绍一些复杂的查询
