二、OpenCV3.4.2 实现图像拼接与融合
参考大神的帖子:
使用OpenCV3进行SURF特征提取和暴力匹配代码详解:https://blog.csdn.net/zilanpotou182/article/details/68061929
OpenCV探索之路(二十四)图像拼接与图像融合技术:http://www.cnblogs.com/skyfsm/p/7411961.html
最终完整代码如下:
#include
#include
#include "opencv2/core.hpp"
#include "opencv2/core/utility.hpp"
#include "opencv2/core/ocl.hpp"
#include "opencv2/imgcodecs.hpp"
#include "opencv2/highgui.hpp"
#include "opencv2/features2d.hpp"
#include "opencv2/calib3d.hpp"
#include "opencv2/imgproc.hpp"
#include"opencv2/flann.hpp"
#include"opencv2/xfeatures2d.hpp"
#include"opencv2/ml.hpp"

using namespace cv;
using namespace std;
using namespace cv::xfeatures2d;
using namespace cv::ml;

void OptimizeSeam(Mat& img1, Mat& trans, Mat& dst);

typedef struct
{
	Point2f left_top;
	Point2f left_bottom;
	Point2f right_top;
	Point2f right_bottom;
}four_corners_t;

four_corners_t corners;

void CalcCorners(const Mat& H, const Mat& src)
{
	double v2[] = { 0, 0, 1 };//左上角
	double v1[3];//变换后的坐标值
	Mat V2 = Mat(3, 1, CV_64FC1, v2);  //列向量
	Mat V1 = Mat(3, 1, CV_64FC1, v1);  //列向量

	V1 = H * V2;
	//左上角(0,0,1)
	cout << "V2: " << V2 << endl;
	cout << "V1: " << V1 << endl;
	corners.left_top.x = v1[0] / v1[2];
	corners.left_top.y = v1[1] / v1[2];

	//左下角(0,src.rows,1)
	v2[0] = 0;
	v2[1] = src.rows;
	v2[2] = 1;
	V2 = Mat(3, 1, CV_64FC1, v2);  //列向量
	V1 = Mat(3, 1, CV_64FC1, v1);  //列向量
	V1 = H * V2;
	corners.left_bottom.x = v1[0] / v1[2];
	corners.left_bottom.y = v1[1] / v1[2];

	//右上角(src.cols,0,1)
	v2[0] = src.cols;
	v2[1] = 0;
	v2[2] = 1;
	V2 = Mat(3, 1, CV_64FC1, v2);  //列向量
	V1 = Mat(3, 1, CV_64FC1, v1);  //列向量
	V1 = H * V2;
	corners.right_top.x = v1[0] / v1[2];
	corners.right_top.y = v1[1] / v1[2];

	//右下角(src.cols,src.rows,1)
	v2[0] = src.cols;
	v2[1] = src.rows;
	v2[2] = 1;
	V2 = Mat(3, 1, CV_64FC1, v2);  //列向量
	V1 = Mat(3, 1, CV_64FC1, v1);  //列向量
	V1 = H * V2;
	corners.right_bottom.x = v1[0] / v1[2];
	corners.right_bottom.y = v1[1] / v1[2];

}


int main()
{
	Mat a = imread("2.jpg", 1);//右图
	Mat b = imread("1.jpg", 1);//左图

	Ptr surf;            //创建方式和OpenCV2中的不一样,并且要加上命名空间xfreatures2d
							   //否则即使配置好了还是显示SURF为未声明的标识符
	surf = SURF::create(800);

	BFMatcher matcher;         //实例化一个暴力匹配器
	Mat c, d;
	vectorkey1, key2;
	vector matches;    //DMatch是用来描述匹配好的一对特征点的类,包含这两个点之间的相关信息
							   //比如左图有个特征m,它和右图的特征点n最匹配,这个DMatch就记录它俩最匹配,并且还记录m和n的
							   //特征向量的距离和其他信息,这个距离在后面用来做筛选

	surf->detectAndCompute(a, Mat(), key1, c);//输入图像,输入掩码,输入特征点,输出Mat,存放所有特征点的描述向量
	surf->detectAndCompute(b, Mat(), key2, d);//这个Mat行数为特征点的个数,列数为每个特征向量的尺寸,SURF是64(维)

	matcher.match(d, c, matches);             //匹配,数据来源是特征向量,结果存放在DMatch类型里面

											  //sort函数对数据进行升序排列
	sort(matches.begin(), matches.end());     //筛选匹配点,根据match里面特征对的距离从小到大排序
	vector< DMatch > good_matches;
	int ptsPairs = std::min(50, (int)(matches.size() * 0.15));
	cout << ptsPairs << endl;
	for (int i = 0; i < ptsPairs; i++)
	{
		good_matches.push_back(matches[i]);//距离最小的50个压入新的DMatch
	}
	Mat outimg;                                //drawMatches这个函数直接画出摆在一起的图
	drawMatches(b, key2, a, key1, good_matches, outimg, Scalar::all(-1), Scalar::all(-1), vector(), DrawMatchesFlags::NOT_DRAW_SINGLE_POINTS);  //绘制匹配点


	imshow("桌面", outimg);

	///////////////////////图像配准及融合////////////////////////

	vector imagePoints1, imagePoints2;

	for (int i = 0; i(i);  //获取第i行的首地址
		uchar* t = trans.ptr(i);
		uchar* d = dst.ptr(i);
		for (int j = start; j < cols; j++)
		{
			//如果遇到图像trans中无像素的黑点,则完全拷贝img1中的数据
			if (t[j * 3] == 0 && t[j * 3 + 1] == 0 && t[j * 3 + 2] == 0)
			{
				alpha = 1;
			}
			else
			{
				//img1中像素的权重,与当前处理点距重叠区域左边界的距离成正比,实验证明,这种方法确实好
				alpha = (processWidth - (j - start)) / processWidth;
			}

			d[j * 3] = p[j * 3] * alpha + t[j * 3] * (1 - alpha);
			d[j * 3 + 1] = p[j * 3 + 1] * alpha + t[j * 3 + 1] * (1 - alpha);
			d[j * 3 + 2] = p[j * 3 + 2] * alpha + t[j * 3 + 2] * (1 - alpha);

		}
	}

}
匹配结果:

右图经过透射投影变换结果:

优化后的拼接融合效果:
备注:此拼接效果是相对于左图做的变换,应将两个图均相对于中心坐标做变换可得到更友好舒服的拼接效果,未完待续。
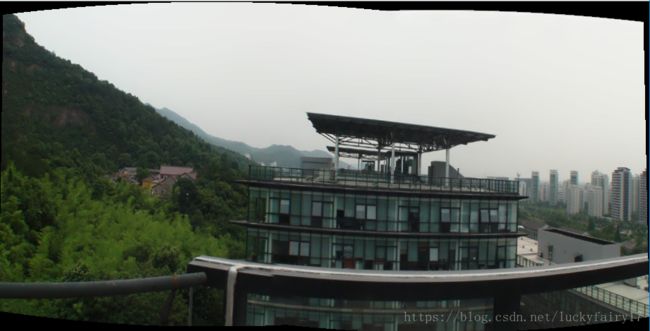
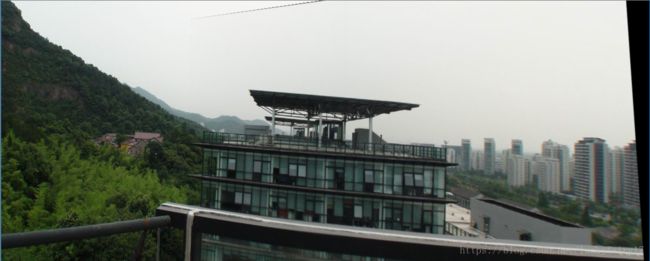
下面给出opencv2/stitching图像拼接函数的运行效果(具体原理还在研究):
#include
#include
#include "opencv2/core.hpp"
#include "opencv2/core/utility.hpp"
#include "opencv2/core/ocl.hpp"
#include "opencv2/imgcodecs.hpp"
#include "opencv2/highgui.hpp"
#include "opencv2/features2d.hpp"
#include "opencv2/calib3d.hpp"
#include "opencv2/imgproc.hpp"
#include"opencv2/flann.hpp"
#include"opencv2/xfeatures2d.hpp"
#include"opencv2/ml.hpp"
#include

using namespace cv;
using namespace std;
using namespace cv::xfeatures2d;
using namespace cv::ml;

bool try_use_gpu = false;
vector imgs;
string result_name = "dst1.jpg";
int main(int argc, char * argv[])
{
	Mat img1 = imread("2.jpg");
	Mat img2 = imread("1.jpg");

	imshow("p1", img1);
	imshow("p2", img2);

	if (img1.empty() || img2.empty())
	{
		cout << "Can't read image" << endl;
		return -1;
	}
	imgs.push_back(img1);
	imgs.push_back(img2);


	Stitcher stitcher = Stitcher::createDefault(try_use_gpu);
	// 使用stitch函数进行拼接
	Mat pano;
	Stitcher::Status status = stitcher.stitch(imgs, pano);
	if (status != Stitcher::OK)
	{
		cout << "Can't stitch images, error code = " << int(status) << endl;
		return -1;
	}
	imwrite(result_name, pano);
	Mat pano2 = pano.clone();
	// 显示源图像,和结果图像
	imshow("全景图像", pano);
	if (waitKey() == 27)
		return 0;
}
原始图像如下:

拼接后效果(符合正常的视觉效果,中心对称):
猜测:分别相对于中心坐标做变换,或者相对于左图变换后做了个旋转