SpringBoot系统学习 - Web篇
一、前言
Spring Boot 是由 Pivotal 团队提供的全新框架,其设计目的是用来简化新 Spring 应用的初始搭建以及开发过程。该框架使用了特定的方式来进行配置,从而使开发人员不再需要定义样板化的配置。
你将要学习的内容:
整合Freemarker
整合 Thymeleaf
整合fastJson和自定义servlet
整合自定义过滤器,监听器,拦截器
配置Aop切面
错误处理
文件上传和下载
cors支持
整合WebSocket
整合Swagger2
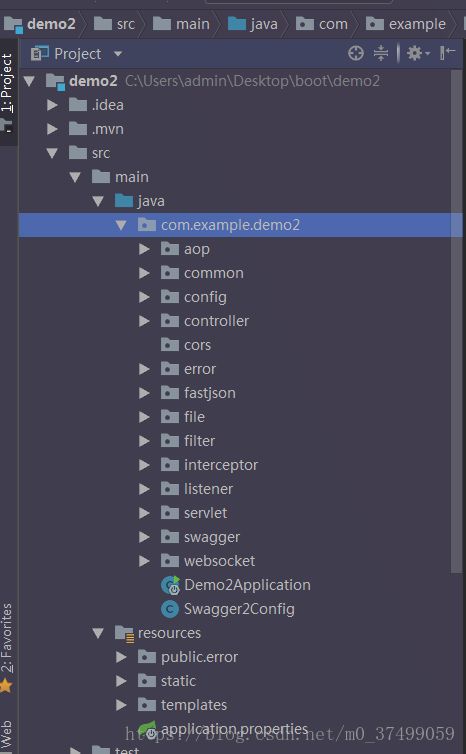
项目源码:https://github.com/chenxingxing6/springboot-study/tree/master/demo2
二、整合Freemarker
由于 jsp 不被 SpringBoot 推荐使用,所以模板引擎主要介绍 Freemarker 和 Thymeleaf。
2.1.1 添加 Freemarker 依赖

2.1.2 添加 Freemarker 模板配置
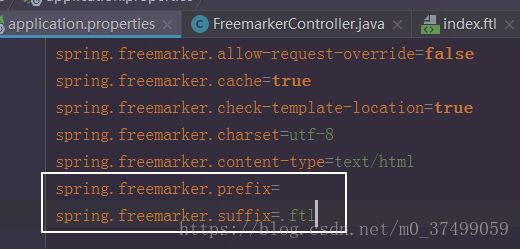
上述配置都是默认值。
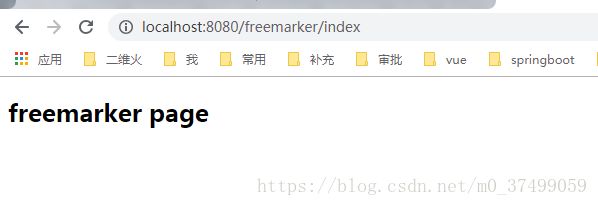
2.1.3 Freemarker 案例演示
创建FreemarkerController.java
package com.example.demo2.controller;

import org.springframework.stereotype.Controller;
import org.springframework.web.bind.annotation.RequestMapping;

import java.util.Map;

/**
 * @author lanxinghua
 * @date 2018/08/29 19:30
 * @description
 */
@Controller
@RequestMapping("/freemarker")
public class FreemarkerController {

    @RequestMapping("/index")
    public String index(Map map){
        map.put("msg", "freemarker page");
        return "index";
    }
}
在 templates 目录中创建名为 index.ftl 文件,内容如下:
<html lang="zh">
<head>
    <meta charset="UTF-8">
    <meta name="viewport"
          content="width=device-width, user-scalable=no, initial-scale=1.0, maximum-scale=1.0, minimum-scale=1.0">
    <meta http-equiv="X-UA-Compatible" content="ie=edge">
    <title>Documenttitle>
head>
<body>
<div class="container">
    <h2>${msg}h2>
div>
body>
html>
三、整合 Thymeleaf
3.1.2添加 Thymeleaf 模板配置

上述配置都是默认值。
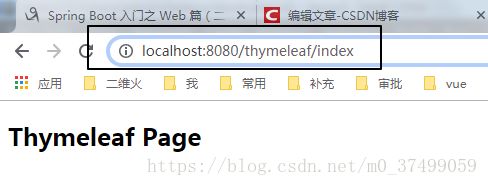
3.1.3Thymeleaf 案例演示
创建ThymeleafController.java
package com.example.demo2.controller;

import org.springframework.stereotype.Controller;
import org.springframework.web.bind.annotation.RequestMapping;

import java.util.Map;

/**
 * @author lanxinghua
 * @date 2018/08/29 19:49
 * @description
 */
@Controller
@RequestMapping("/thymeleaf")
public class ThymeleafController {

    @RequestMapping("/index")
    public String index(Map map){
        map.put("msg", "Thymeleaf Page");
        return "index";
    }
}
四、 整合fastJson和自定义servlet
4.2 整合 Fastjson
创建一个配置管理类 WebConfig ,如下:
package com.example.demo2.fastjson;

import com.alibaba.fastjson.serializer.SerializerFeature;
import com.alibaba.fastjson.support.config.FastJsonConfig;
import com.alibaba.fastjson.support.spring.FastJsonHttpMessageConverter;
import org.springframework.boot.autoconfigure.http.HttpMessageConverters;
import org.springframework.context.annotation.Bean;
import org.springframework.context.annotation.Configuration;
import org.springframework.http.converter.HttpMessageConverter;

/**
 * @author lanxinghua
 * @date 2018/08/29 20:02
 * @description
 */
@Configuration
public class WebConfig {

    @Bean
    public HttpMessageConverters fastJsoncvt(){
        FastJsonHttpMessageConverter cvt = new FastJsonHttpMessageConverter();
        FastJsonConfig jsonConfig = new FastJsonConfig();
        jsonConfig.setSerializerFeatures(SerializerFeature.PrettyFormat);
        cvt.setFastJsonConfig(jsonConfig);
        HttpMessageConverter converter = cvt;
        return new HttpMessageConverters(converter);
    }
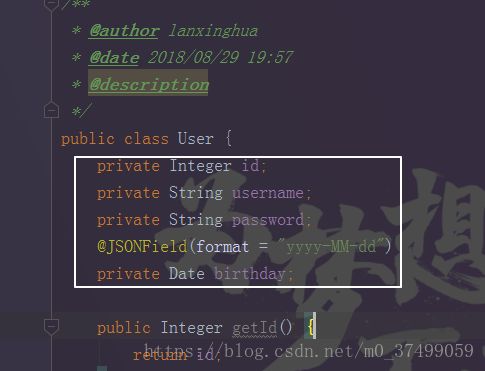
}编写FastjsonController
package com.example.demo2.fastjson;

import org.springframework.web.bind.annotation.RequestMapping;
import org.springframework.web.bind.annotation.RestController;

import java.util.Date;

/**
 * @author lanxinghua
 * @date 2018/08/29 19:57
 * @description
 */
@RestController
@RequestMapping("/fast_json")
public class FastJsonController {
    @RequestMapping("/test")
    public User test() {
        User user = new User();
        user.setId(1);
        user.setUsername("jack");
        user.setPassword("jack123");
        user.setBirthday(new Date());
        return user;
    }
}
4.4编写 Servlet
package com.example.demo2.servlet;


import javax.servlet.ServletException;
import javax.servlet.http.HttpServlet;
import javax.servlet.http.HttpServletRequest;
import javax.servlet.http.HttpServletResponse;
import java.io.IOException;

/**
 * @author lanxinghua
 * @date 2018/08/29 20:14
 * @description
 */
public class ServletDemo extends HttpServlet {
    @Override
    protected void doGet(HttpServletRequest req, HttpServletResponse resp) throws ServletException, IOException {
        resp.setCharacterEncoding("UTF-8");
        resp.setContentType("text/html");
        resp.getWriter().write("自定义servlet");
    }

    @Override
    protected void doPost(HttpServletRequest req, HttpServletResponse resp) throws ServletException, IOException {
        doGet(req, resp);
    }
}
4.5注册 Servlet
package com.example.demo2.servlet;

import org.springframework.boot.web.servlet.ServletRegistrationBean;
import org.springframework.context.annotation.Bean;
import org.springframework.context.annotation.Configuration;

/**
 * @author lanxinghua
 * @date 2018/08/29 20:16
 * @description
 */
@Configuration
public class ServletConfig {
    @Bean
    public ServletRegistrationBean regis(){
        return new ServletRegistrationBean(new ServletDemo(),"/servlet_test");
    }
}
五、整合自定义过滤器,监听器,拦截器
其实这几个都挺简单的,编写相应类,然后WebConfig配置Bean就好了。
public class FilterDemo implements Filter
public class ListenerDemo implements ServletContextListener
public class InterceptorDemo implements HandlerInterceptor
webConfig
package com.example.demo2;

import com.alibaba.fastjson.serializer.SerializerFeature;
import com.alibaba.fastjson.support.config.FastJsonConfig;
import com.alibaba.fastjson.support.spring.FastJsonHttpMessageConverter;
import com.example.demo2.filter.FilterDemo;
import com.example.demo2.interceptor.InterceptorDemo;
import com.example.demo2.listener.ListenerDemo;
import com.example.demo2.servlet.ServletDemo;
import org.springframework.beans.factory.annotation.Autowired;
import org.springframework.boot.autoconfigure.http.HttpMessageConverters;
import org.springframework.boot.autoconfigure.web.servlet.WebMvcAutoConfiguration;
import org.springframework.boot.web.servlet.FilterRegistrationBean;
import org.springframework.boot.web.servlet.ServletListenerRegistrationBean;
import org.springframework.boot.web.servlet.ServletRegistrationBean;
import org.springframework.context.annotation.Bean;
import org.springframework.context.annotation.Configuration;
import org.springframework.http.converter.HttpMessageConverter;
import org.springframework.web.servlet.config.annotation.InterceptorRegistry;
import org.springframework.web.servlet.config.annotation.WebMvcConfigurerAdapter;

import javax.servlet.ServletContextListener;
import java.util.ArrayList;
import java.util.List;

/**
 * @author lanxinghua
 * @date 2018/08/29 20:02
 * @description
 */
@Configuration
public class WebConfig extends WebMvcConfigurerAdapter {

    @Autowired
    private InterceptorDemo interceptorDemo;

    //fastJson
    @Bean
    public HttpMessageConverters fastJsoncvt(){
        FastJsonHttpMessageConverter cvt = new FastJsonHttpMessageConverter();
        FastJsonConfig jsonConfig = new FastJsonConfig();
        jsonConfig.setSerializerFeatures(SerializerFeature.PrettyFormat);
        cvt.setFastJsonConfig(jsonConfig);
        HttpMessageConverter converter = cvt;
        return new HttpMessageConverters(converter);
    }

    //servlet
    @Bean
    public ServletRegistrationBean regis(){
        return new ServletRegistrationBean(new ServletDemo(),"/servlet_test");
    }

    //Filter
    @Bean
    public FilterRegistrationBean timeFilter(){
        FilterRegistrationBean registrationBean = new FilterRegistrationBean();
        registrationBean.setFilter(new FilterDemo());
        List<String> urls = new ArrayList<>();
        urls.add("/*");
        registrationBean.setUrlPatterns(urls);
        return registrationBean;
    }

    //Listener
    @Bean
    public ServletListenerRegistrationBean<ListenerDemo> registrationBean(){
        return new ServletListenerRegistrationBean<>(new ListenerDemo());
    }

    //interceptor
    @Override
    public void addInterceptors(InterceptorRegistry registry) {
        registry.addInterceptor(interceptorDemo);
    }
}
过滤器
package com.example.demo2.filter;

import javax.servlet.*;
import java.io.IOException;

/**
 * @author lanxinghua
 * @date 2018/08/29 21:40
 * @description
 */
public class FilterDemo implements Filter {
    @Override
    public void init(FilterConfig filterConfig) throws ServletException {
        System.out.println("初始化过滤器");
    }

    @Override
    public void doFilter(ServletRequest servletRequest, ServletResponse servletResponse, FilterChain filterChain) throws IOException, ServletException {
        long start = System.currentTimeMillis();
        filterChain.doFilter(servletRequest, servletResponse);
        System.out.println("filter耗时:"+(System.currentTimeMillis()-start));
    }

    @Override
    public void destroy() {
        System.out.println("销毁过滤器");
    }
}
监听器
package com.example.demo2.listener;

import javax.servlet.ServletContextEvent;
import javax.servlet.ServletContextListener;

/**
 * @author lanxinghua
 * @date 2018/08/29 21:34
 * @description
 */
public class ListenerDemo implements ServletContextListener {
    @Override
    public void contextInitialized(ServletContextEvent servletContextEvent) {
        System.out.println("监听器初始化");
    }

    @Override
    public void contextDestroyed(ServletContextEvent servletContextEvent) {
        System.out.println("监听器销毁");
    }
}
拦截器
package com.example.demo2.interceptor;

import org.springframework.stereotype.Component;
import org.springframework.web.servlet.HandlerInterceptor;
import org.springframework.web.servlet.ModelAndView;

import javax.servlet.http.HttpServletRequest;
import javax.servlet.http.HttpServletResponse;

/**
 * @author lanxinghua
 * @date 2018/08/29 21:47
 * @description
 */
@Component
public class InterceptorDemo implements HandlerInterceptor {

    @Override
    public boolean preHandle(HttpServletRequest request, HttpServletResponse response, Object handler) {
        System.out.println("===========preHandle===========");
        return true;
    }

    @Override
    public void postHandle(HttpServletRequest request, HttpServletResponse response, Object handler, ModelAndView modelAndView) {
        System.out.println("========postHandle=========");
    }

    @Override
    public void afterCompletion(HttpServletRequest request, HttpServletResponse response, Object handler, Exception ex) {
        System.out.println("========afterCompletion=========");
    }
}
六、配置Aop切面
6.2 编写切面类
package com.example.demo2.aop;

import org.aspectj.lang.ProceedingJoinPoint;
import org.aspectj.lang.annotation.Around;
import org.aspectj.lang.annotation.Aspect;
import org.springframework.stereotype.Component;

/**
 * @author lanxinghua
 * @date 2018/08/29 21:59
 * @description
 */
@Aspect
@Component
public class AspectDemo {
    @Around("execution(* com.example.demo2.fastjson..*(..))")
    public Object method(ProceedingJoinPoint pjp) throws Throwable {
        Object[] args = pjp.getArgs();
        for (Object arg : args) {
            System.out.println("参数分别为:"+arg);
        }
        long start = System.currentTimeMillis();
        Object proceed = pjp.proceed();
        System.out.println("切面耗时:"+(System.currentTimeMillis()-start));
        return proceed;
    }
}
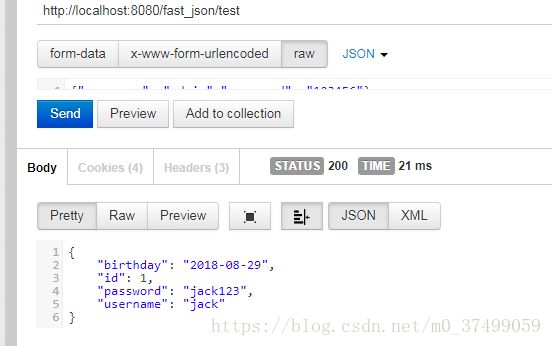
访问:http://localhost:8080/fast_json/test

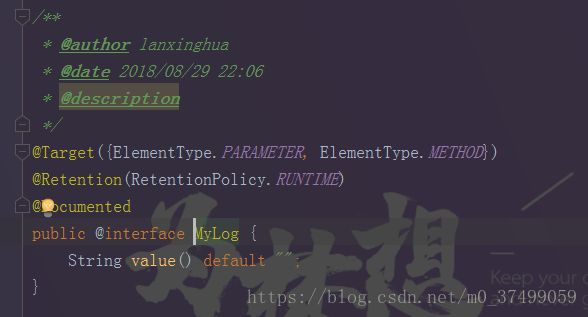
我们玩高级一点,通过注解来切日志。
首先创建注解的注解:MyLog
然后编写Aspect
package com.example.demo2.aop;

import org.aspectj.lang.JoinPoint;
import org.aspectj.lang.Signature;
import org.aspectj.lang.annotation.After;
import org.aspectj.lang.annotation.Aspect;
import org.aspectj.lang.reflect.MethodSignature;
import org.springframework.stereotype.Component;

import java.lang.reflect.Method;

/**
 * @author lanxinghua
 * @date 2018/08/29 22:18
 * @description
 */
@Aspect
@Component
public class AnnotationAspectDemo {
    @After("@annotation(com.example.demo2.aop.MyLog)")
    public void after(JoinPoint joinPoint) {
        this.printLog(joinPoint);
    }

    private void printLog(JoinPoint joinPoint) {
        try {
            MyLog myLog = getAnnotationLog(joinPoint);
            if (myLog == null){
                return;
            }
            String className = joinPoint.getTarget().getClass().getName();
            String methodName = joinPoint.getSignature().getName();
            String msg = myLog.value();
            System.out.println(">>>>>>>>>>>>>类名:"+className);
            System.out.println(">>>>>>>>>>>>>方法名:"+methodName);
            System.out.println(">>>>>>>>>>>>>日志消息:"+msg);
        } catch (Exception e) {
            e.printStackTrace();
        }
    }

    //如果注解存在,就获取
    private static MyLog getAnnotationLog(JoinPoint joinPoint) {
        Signature signature = joinPoint.getSignature();
        MethodSignature methodSignature = (MethodSignature) signature;
        Method method = methodSignature.getMethod();
        if (method != null) {
            return method.getAnnotation(MyLog.class);
        }
        return null;
    }
}
访问:http://localhost:8080/fast_json/test

这也是企业里面处理日志的方法。
七、错误处理
7.1 友好页面
在 src/main/resources 下创建 /public/error,在该目录下再创建一个名为 xxx.html 文件,该页面的内容就是当系统报错时返回给用户浏览的内容:

我们访问一个不存在的url

这样提示就能比较友好,这个404页面可以做的漂亮一些。
全局异常捕获
当前台请求后台发生异常,怎么样返回一个好的json呢,那json里面最好能有后台错误信息返回。
编写一个类充当全局异常的处理类,需要使用 @ControllerAdvice 和 @ExceptionHandler 注解:
package com.example.demo2.common;

import org.springframework.web.bind.annotation.ControllerAdvice;
import org.springframework.web.bind.annotation.ExceptionHandler;
import org.springframework.web.bind.annotation.ResponseBody;

import java.util.HashMap;
import java.util.Map;

/**
 * @author lanxinghua
 * @date 2018/08/29 22:40
 * @description 全局异常捕获器
 */
@ControllerAdvice
public class GlobalException {
    /**
     * Exception 异常
     */
    @ExceptionHandler(Exception.class)
    @ResponseBody
    public Map defaultExceptionHandler(Exception e){
        Map map = new HashMap<>();
        map.put("code", 500);
        map.put("msg", e.getMessage());
        return map;
    }
}
编写一个产生异常的Controller
package com.example.demo2.error;

import org.springframework.web.bind.annotation.RequestMapping;
import org.springframework.web.bind.annotation.RestController;

/**
 * @author lanxinghua
 * @date 2018/08/29 22:43
 * @description 参数全局异常捕获
 */
@RestController
@RequestMapping("/error")
public class ErrorController {

    @RequestMapping("/test")
    public void error(){
        int i = 1/0;
    }
}
访问:http://localhost:8080/error/test
测试结果:

八、 文件上传和下载
8.2 实现文件上传
编写一个实体类,用于封装返回信息:
package com.example.demo2.file;

/**
 * @author lanxinghua
 * @date 2018/08/29 23:11
 * @description
 */
public class FileInfo {
    private String path;

    public FileInfo(String path) {
        this.path = path;
    }

    public String getPath() {
        return path;
    }

    public void setPath(String path) {
        this.path = path;
    }
}
编写 Controller,用于处理文件上传
package com.example.demo2.file;

import com.alibaba.fastjson.JSON;
import org.springframework.web.bind.annotation.*;
import org.springframework.web.multipart.MultipartFile;

import javax.servlet.http.HttpServletRequest;
import javax.servlet.http.HttpServletResponse;
import java.io.File;

/**
 * @author lanxinghua
 * @date 2018/08/29 23:12
 * @description
 */
@RestController
@RequestMapping("/file")
public class FileController {
    private String path = "d:\\";
    @PostMapping
    public FileInfo upload(MultipartFile file) throws Exception{
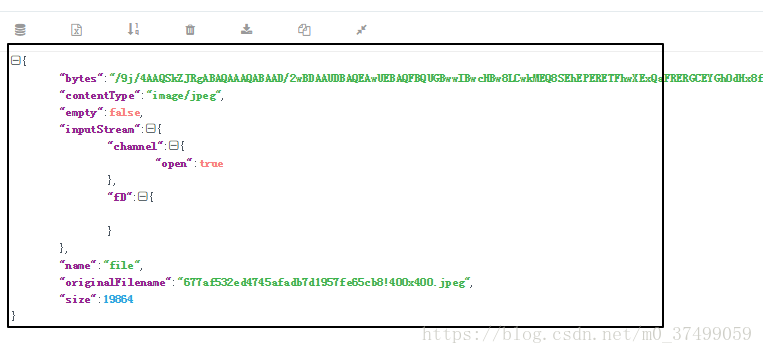
        System.out.println(JSON.toJSONString(file));
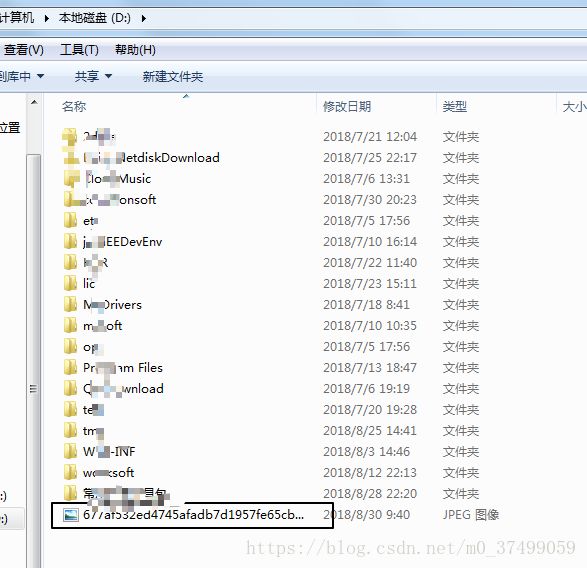
        File localFile = new File(path, file.getOriginalFilename());
        file.transferTo(localFile);
        return new FileInfo(localFile.getAbsolutePath());
    }
}
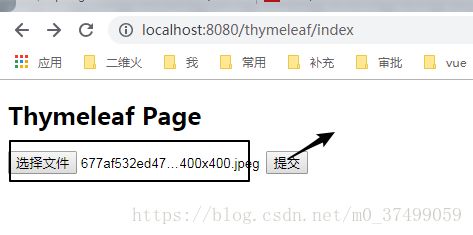
编写前端页面:
 <form action="/file" method="post" enctype="multipart/form-data">
      <input type="file" value="上传文件" name="file">
      <input type="submit">
form>8.3 实现文件下载
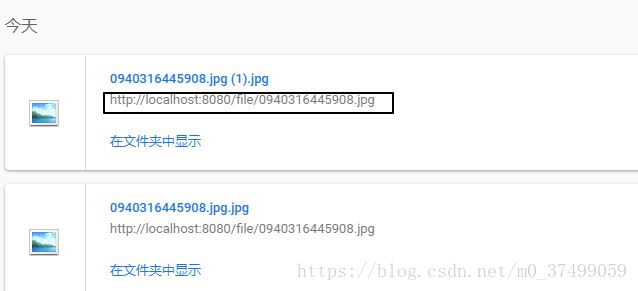
编写 Controller,用于处理文件下载
package com.example.demo2.file;

import com.alibaba.fastjson.JSON;
import org.apache.commons.io.IOUtils;
import org.springframework.web.bind.annotation.*;
import org.springframework.web.multipart.MultipartFile;

import javax.servlet.ServletOutputStream;
import javax.servlet.http.HttpServletRequest;
import javax.servlet.http.HttpServletResponse;
import java.io.File;
import java.io.FileInputStream;
import java.io.FileNotFoundException;

/**
 * @author lanxinghua
 * @date 2018/08/29 23:12
 * @description
 */
@RestController
@RequestMapping("/file")
public class FileController {
    private String path = "d:\\";

    @PostMapping
    public FileInfo upload(MultipartFile file) throws Exception{
        System.out.println(JSON.toJSONString(file));
        File localFile = new File(path, file.getOriginalFilename());
        file.transferTo(localFile);
        return new FileInfo("http://localhost:8080/file/"+file.getOriginalFilename());
    }

    @GetMapping("/{id}")
    public void downLoad(@PathVariable String id, HttpServletRequest request, HttpServletResponse response){
        try {
            File file = new File(path, id );
            FileInputStream inputStream = new FileInputStream(file);
            ServletOutputStream outputStream = response.getOutputStream();
            response.setContentType("application/x-download");
            response.addHeader("Content-Disposition", "attachement;filename="+id+".jpg");
            IOUtils.copy(inputStream, outputStream);
        } catch (Exception e) {
            e.printStackTrace();
        }
    }
}
九、 cors支持(跨域)
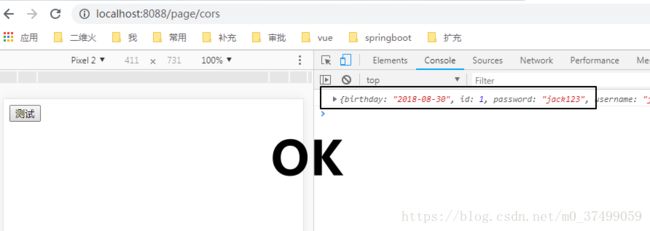
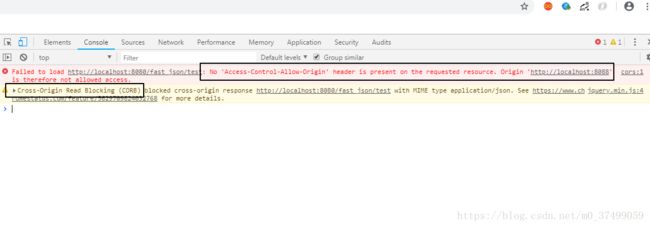
测试:前端服务器启动端口为 8088 与后端服务器 8080 不同源,因此出现跨域的问题
编写pageController
package com.example.demo2.controller;

import org.springframework.stereotype.Controller;
import org.springframework.web.bind.annotation.RequestMapping;

/**
 * @author lanxinghua
 * @date 2018/08/30 10:09
 * @description
 */
@Controller
@RequestMapping("/page")
public class PageController {
    @RequestMapping("/cors")
    public String corsPage(){
        return "cors";
    }
}
编写页面ajax请求:
<html lang="zh">
<head>
    <meta charset="UTF-8">
    <meta name="viewport"
          content="width=device-width, user-scalable=no, initial-scale=1.0, maximum-scale=1.0, minimum-scale=1.0">
    <meta http-equiv="X-UA-Compatible" content="ie=edge">
    <title>跨域测试title>
head>
<body>
<div class="container">
    <button id="test">测试button>
div>
body>
<script type="text/javascript" src="/js/jquery.min.js">script>
<script type="text/javascript">
    $(function () {
        $("#test").on("click", function () {
            $.ajax({
                "url":"http://localhost:8080/fast_json/test",
                "type":"get",
                "dataType":"json",
                "success":function (data) {
                    console.log(data);
                }
            })
        });
    });
script>
html>怎么解决该问题呢?可以两种维度控制客户端请求。(粗|细)
1) 粗粒度:
在webConfig添加Bean
 //cors
    @Bean
    public WebMvcConfigurer corsConfigurer(){
        return new WebMvcConfigurer() {
            @Override
            public void addCorsMappings(CorsRegistry registry) {
                registry.addMapping("/fast_json/**")
                        .allowedOrigins("http://localhost:8088");
            }
        };
    }
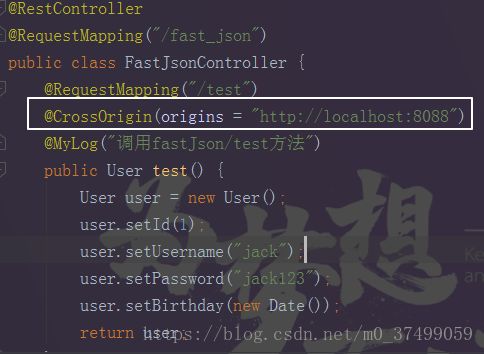
2) 细粒度:
在 FastJsonController 类中的方法上添加 @CrossOrigin(origins=”xx”) 注解:
十、 整合WebSocket
WebSocket是HTML5出的东西(协议),也就是说HTTP协议没有变化,或者说没关系,但HTTP是不支持持久连接的(长连接,循环连接的不算)。
HTTP的生命周期通过 Request 来界定,也就是一个 Request 一个 Response ,那么在 HTTP1.0 中,这次HTTP请求就结束了。
在HTTP1.1中进行了改进,使得有一个keep-alive,也就是说,在一个HTTP连接中,可以发送多个Request,接收多个Response。但是请记住 Request = Response, 在HTTP中永远是这样,也就是说一个request只能有一个response。而且这个response也是被动的,不能主动发起。
首先Websocket是基于HTTP协议的,或者说借用了HTTP的协议来完成一部分握手。
首先我们来看个典型的 Websocket 握手
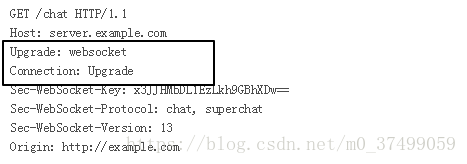
这段类似HTTP协议的握手请求中,多了几个东西
Upgrade: websocket
Connection: Upgrade
这个就是Websocket的核心了,告诉 Apache 、 Nginx 等服务器:注意啦,我发起的是Websocket协议,快点帮我找到对应的助理处理~不是那个老土的HTTP。
Sec-WebSocket-Key: x3JJHMbDL1EzLkh9GBhXDw==
Sec-WebSocket-Protocol: chat, superchat
Sec-WebSocket-Version: 13
首先, Sec-WebSocket-Key 是一个 Base64 encode 的值,这个是浏览器随机生成的,告诉服务器:泥煤,不要忽悠窝,我要验证尼是不是真的是Websocket助理。
然后, Sec_WebSocket-Protocol 是一个用户定义的字符串,用来区分同URL下,不同的服务所需要的协议。简单理解:今晚我要服务A,别搞错啦~
最后, Sec-WebSocket-Version 是告诉服务器所使用的 Websocket Draft (协议版本)
long poll 和 ajax轮询
ajax轮询的原理非常简单,让浏览器隔个几秒就发送一次请求,询问服务器是否有新信息
long poll 其实原理跟 ajax轮询 差不多,都是采用轮询的方式,不过采取的是阻塞模型(一直打电话,没收到就不挂电话),也就是说,客户端发起连接后,如果没消息,就一直不返回Response给客户端。直到有消息才返回,返回完之后,客户端再次建立连接,周而复始。
通过上面这个例子,我们可以看出,这两种方式都不是最好的方式,需要很多资源。
一种需要更快的速度,一种需要更多的’电话’。这两种都会导致’电话’的需求越来越高。
Websocket:服务端就可以主动推送信息给客户端啦。
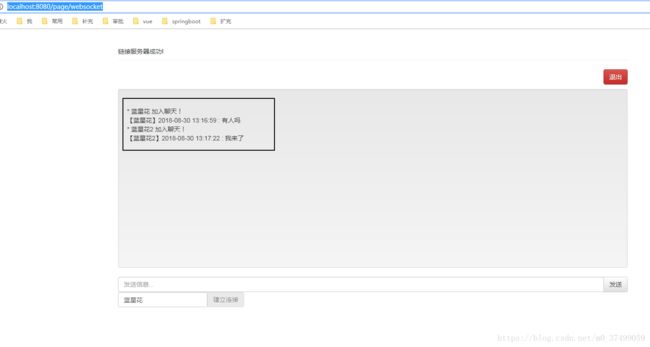
10.2实现
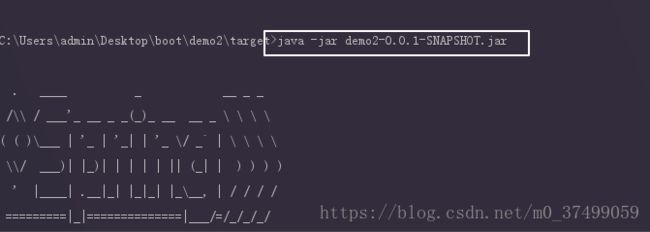
该方式只适用于通过 jar 包直接运行项目的情况。
package com.example.demo2.websocket;

import org.springframework.stereotype.Component;

import javax.websocket.*;
import javax.websocket.server.PathParam;
import javax.websocket.server.ServerEndpoint;
import java.io.IOException;
import java.text.SimpleDateFormat;
import java.util.Date;
import java.util.Set;
import java.util.concurrent.CopyOnWriteArraySet;

/**
 * @author lanxinghua
 * @date 2018/08/30 11:10
 * @description websocket 测试
 */
@ServerEndpoint(value = "/webSocketServer/{userName}")
@Component
public class WebsocketServer {

    private static final Set connections = new CopyOnWriteArraySet<>();
    private String nickName;
    private Session session;

    private static String getDateTime(Date date) {
        SimpleDateFormat format = new SimpleDateFormat("yyyy-MM-dd HH:mm:ss");
        return format.format(date);
    }

    @OnOpen
    public void start(@PathParam("userName") String userName, Session session) {
        this.nickName = userName;
        this.session = session;
        connections.add(this);
        String msg = String.format("* %s %s", nickName, "加入聊天!");
        broadcast(msg);
    }

    @OnClose
    public void end() {
        connections.remove(this);
        String msg = String.format("* %s %s", nickName, "退出聊天!");
        broadcast(msg);
    }

    @OnMessage
    public void pushMsg(String msg) {
        broadcast("【" + this.nickName + "】" + getDateTime(new Date()) + " : " + msg);
    }

    @OnError
    public void onError(Throwable t) throws Throwable{
        System.out.println("发送错误:"+t.getMessage());
    }

    //广播形式发送消息
    private void broadcast(String msg) {
        for (WebsocketServer client : connections) {
            try {
                synchronized (client) {
                    client.session.getBasicRemote().sendText(msg);
                }
            } catch (IOException e) {
                connections.remove(client);
                try {
                    client.session.close();
                } catch (Exception e1) {
                    e1.printStackTrace();
                }
                String errMsg = String.format("* %s %s", client.nickName, "断开连接!");
                broadcast(errMsg);
            }
        }

    }
}
编写页面:
<html>

<head lang="zh">
    <meta charset="UTF-8">
    <link rel="stylesheet" href="/css/bootstrap.min.css">
    <link rel="stylesheet" href="/css/bootstrap-theme.min.css">
    <script src="/js/jquery.min.js">script>
    <script src="/js/bootstrap.min.js">script>
    <style type="text/css">
        #msg {
            height: 400px;
            overflow-y: auto;
        }

        #userName {
            width: 200px;
        }

        #logout {
            display: none;
        }
    style>
    <title>webSocket测试title>
head>

<body>
<div class="container">
    <div class="page-header" id="tou">webSocket及时聊天Demo程序div>
    <p class="text-right" id="logout">
        <button class="btn btn-danger" id="logout-btn">退出button>
    p>
    <div class="well" id="msg">div>
    <div class="col-lg">
        <div class="input-group">
            <input type="text" class="form-control" placeholder="发送信息..." id="message"> <span class="input-group-btn">
                    <button class="btn btn-default" type="button" id="send"
                            disabled="disabled">发送button>
                span>
        div>
        <div class="input-group">
            <input id="userName" type="text" class="form-control" name="userName" placeholder="输入您的用户名" />
            <button class="btn btn-default" type="button" id="connection-btn">建立连接button>
        div>

    div>

div>

div>
<script type="text/javascript">
    $(function() {
        var websocket;
        $("#connection-btn").bind("click", function() {
            var userName = $("#userName").val();
            if (userName == null || userName == "") {
                alert("请输入您的用户名");
                return;
            }
            connection(userName);
        });

        function connection(userName) {
            var host = window.location.host;
            if ('WebSocket' in window) {
                websocket = new WebSocket("ws://" + host +
                        "/webSocketServer/" + userName);
            } else if ('MozWebSocket' in window) {
                websocket = new MozWebSocket("ws://" + host +
                        "/webSocketServer/" + userName);
            }
            websocket.onopen = function(evnt) {
                $("#tou").html("链接服务器成功!")
                $("#send").prop("disabled", "");
                $("#connection-btn").prop("disabled", "disabled");
                $("#logout").show();
            };
            websocket.onmessage = function(evnt) {
                $("#msg").html($("#msg").html() + "
" + evnt.data);
            };
            websocket.onerror = function(evnt) {
                $("#tou").html("报错!")
            };
            websocket.onclose = function(evnt) {
                $("#tou").html("与服务器断开了链接!");
                $("#send").prop("disabled", "disabled");
                $("#connection-btn").prop("disabled", "");
                $("#logout").hide();
            }
        }

        function send() {
            if (websocket != null) {
                var $message = $("#message");
                var data = $message.val();
                if (data == null || data == "") {
                    return;
                }
                websocket.send(data);
                $message.val("");
            } else {
                alert('未与服务器链接.');
            }
        }

        $('#send').bind('click', function() {
            send();
        });

        $(document).on("keypress", function(event) {
            if (event.keyCode == "13") {
                send();
            }
        });

        $("#logout-btn").on("click", function() {
            websocket.close(); //关闭TCP连接
        });
    });
script>
body>
html>
到这里就搞定了。
十一、整合Swagger2
11.1添加依赖
<dependency>
    <groupId>io.springfoxgroupId>
    <artifactId>springfox-swagger2artifactId>
    <version>2.7.0version>
dependency>
<dependency>
    <groupId>io.springfoxgroupId>
    <artifactId>springfox-swagger-uiartifactId>
    <version>2.7.0version>
dependency>
11.2 配置
重新创建一个配置类,如下
@Configuration
@EnableSwagger2
public class Swagger2Configuration {

    @Bean
    public Docket accessToken() {
        return new Docket(DocumentationType.SWAGGER_2)
                .groupName("api")// 定义组
                .select() // 选择那些路径和 api 会生成 document
                .apis(RequestHandlerSelectors.basePackage("com.light.springboot.controller")) // 拦截的包路径
                .paths(PathSelectors.regex("/*/.*"))// 拦截的接口路径
                .build() // 创建
                .apiInfo(apiInfo()); // 配置说明
    }

    private ApiInfo apiInfo() {
        return new ApiInfoBuilder()//
                .title("Spring Boot 之 Web 篇")// 标题
                .description("spring boot Web 相关内容")// 描述
                .termsOfServiceUrl("http://www.extlight.com")//
                .contact(new Contact("moonlightL", "http://www.extlight.com", "[email protected]"))// 联系
                .version("1.0")// 版本
                .build();
    }
}
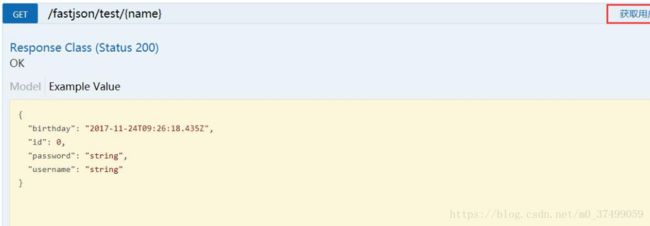
测试:
@Api(value = "FastJson测试", tags = { "测试接口" })
@RestController
@RequestMapping("fastjson")
public class FastJsonController {

    @ApiOperation("获取用户信息")
    @ApiImplicitParam(name = "name", value = "用户名", dataType = "string", paramType = "query")
    @GetMapping("/test/{name}")
    public User test(@PathVariable("name") String name) {
        User user = new User();

        user.setId(1);
        user.setUsername(name);
        user.setPassword("jack123");
        user.setBirthday(new Date());

        return user;
    }
}