【实战】Spring+SpringMVC+Mybatis实现增删改查--(一)SSM环境的搭建及整合
Spring+SpringMVC+Mybatis实现增删改查--(一)SSM环境的搭建及整合
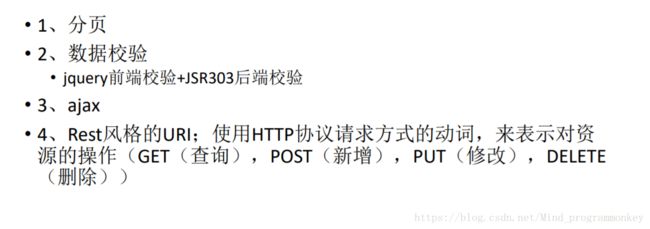
整个项目的功能点:
整个项目的技术点
一、Spring+Spring MVC+Mybatis项目基础环境搭建
1、创建一个maven project工程
2.在pom.xml中引入项目所依赖的包
spring、springmvc、mybatis、数据库连接池、驱动包以及其他包
具体的包:spring-webmvc spring-jdbc spring-aspects
mybatis mybatis-spring c3p0 mysql-connector
jstl javax.servlet-api junit mybatis-generator-core spring-test
pom.xml文件
  4.0.0
  com.lcz
  ssm_crud
  0.0.1-SNAPSHOT
  war


	    org.springframework
	    spring-webmvc
	    4.3.7.RELEASE


	    org.springframework
	    spring-jdbc
	    4.3.7.RELEASE


	    org.springframework
	    spring-aspects
	    4.3.7.RELEASE


	    org.mybatis
	    mybatis
	    3.4.2


	    org.mybatis
	    mybatis-spring
	    1.3.1


	    c3p0
	    c3p0
	    0.9.1


	    mysql
	    mysql-connector-java
	    5.1.41


	    javax.servlet
	    jstl
	    1.2


	    javax.servlet
	    javax.servlet-api
	    3.1.0
	    provided


	    junit
	    junit
	    4.12
	    test


		org.mybatis.generator
		mybatis-generator-core
 		1.3.5


	    org.springframework
	    spring-test
	    4.3.7.RELEASE
	    test
3.引入bootstrap框架
(1)下载bootstrap框架
https://v3.bootcss.com/getting-started/#download下载用于生产环境的BootStrap的。
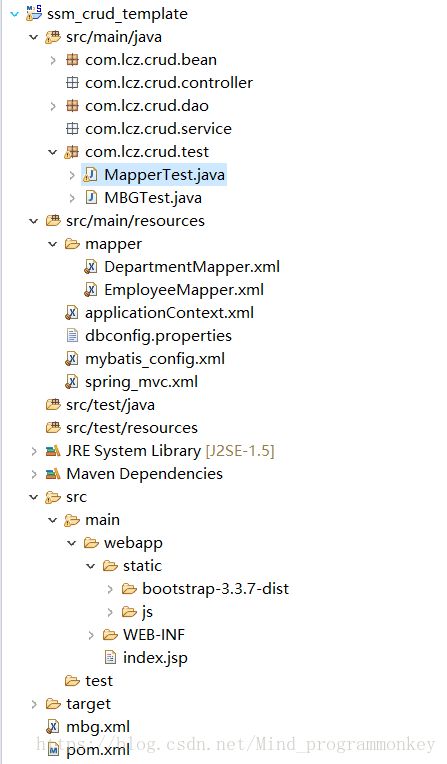
(2)在项目的webapp下新建一个static文件夹里,在里面新建一个js文件夹用来存放从网上下载的jquery.js,同时在static文件夹里粘贴下载好的bootstrap文件夹。
(3)如何界面中引入bootstrap框架
4.编写ssm整合的关键配置文件
web.xml application.xml springmvc.xml mybatis_config.xml
(1).webapp/WEB-INF/web.xml
可以通过快捷键alt+/,选择contextloadlistener,修改
可以通过快捷键alt+/,选择dispatcherServlet,然后修改
CharacterEncodingFilter 通过ctrl+shift+t快捷键搜索前面的包,打开,并进行配置
HiddenHttpMethodFilter通过ctrl+shift+t快捷键搜索前面的包,打开,并进行配置
具体的配置如下:
		contextConfigLocation
		classpath:applicationContext.xml


		org.springframework.web.context.ContextLoaderListener


		springDispatcherServlet
		org.springframework.web.servlet.DispatcherServlet

			contextConfigLocation
			classpath:spring_mvc.xml

		1


		springDispatcherServlet
		/


		CharacterEncodingFilter
		org.springframework.web.filter.CharacterEncodingFilter

			encoding
			utf-8


			forceRequestEncoding
			true


			forceResponseEncoding
			true


		CharacterEncodingFilter
		/*


		HiddenHttpMethodFilter
		org.springframework.web.filter.HiddenHttpMethodFilter


		HiddenHttpMethodFilter
		/*
(2).spring_mvc.xml
a.src/main/resources新建一个spring bean configuration file。
这里要注意要想出现上述配置文件,需要在Help->Eclipse Marketplace中安装好STS(Spring Tool Suit),然后在eclipse中preferences中general->editors->file associations进行配置
将spring config editor设置为default,为第一个显示,即设置完毕。
b.设置spring_mvc.xml
添加链接时,可以快速的在视图中通过namespaces来添加如下图
具体的配置如下:
(3)applicationContext.xml(同上一步建立步骤)
具体的配置如下:
(4)mybatis_config.xml
新建一个.xml文件,在其中设置好全局配置
4.数据库的编写
在数据库中建立一个ssm_crud数据库并建立两个表tbl_dept及tbl_emp
(1).tbl_dept表的设计规则
(2).tbl_empt表的设计规则
(3).tbl_empt表的关联规则
设置外键
(4)下面给出建表语句
tbl_dept表的建表语句
/*
Navicat MySQL Data Transfer

Source Server         : mysql
Source Server Version : 50721
Source Host           : localhost:3306
Source Database       : ssm_crud

Target Server Type    : MYSQL
Target Server Version : 50721
File Encoding         : 65001

Date: 2018-06-08 07:19:49
*/

SET FOREIGN_KEY_CHECKS=0;

-- ----------------------------
-- Table structure for `tbl_dept`
-- ----------------------------
DROP TABLE IF EXISTS `tbl_dept`;
CREATE TABLE `tbl_dept` (
  `dept_id` int(11) NOT NULL AUTO_INCREMENT,
  `dept_name` varchar(255) NOT NULL,
  PRIMARY KEY (`dept_id`)
) ENGINE=InnoDB AUTO_INCREMENT=23 DEFAULT CHARSET=utf8;

-- ----------------------------
-- Records of tbl_dept
-- ----------------------------
INSERT INTO `tbl_dept` VALUES ('1', '开发部');
INSERT INTO `tbl_dept` VALUES ('2', '测试部');/*
Navicat MySQL Data Transfer
Source Server : mysql
Source Server Version : 50721
Source Host : localhost:3306
Source Database : ssm_crud
Target Server Type : MYSQL
Target Server Version : 50721
File Encoding : 65001
Date: 2018-06-08 07:19:57
*/
SET FOREIGN_KEY_CHECKS=0;
-- ----------------------------
-- Table structure for `tbl_emp`
-- ----------------------------
DROP TABLE IF EXISTS `tbl_emp`;
CREATE TABLE `tbl_emp` (
`emp_id` int(11) NOT NULL AUTO_INCREMENT,
`emp_name` varchar(255) NOT NULL,
`gender` char(1) NOT NULL,
`email` varchar(255) NOT NULL,
`d_id` int(11) NOT NULL,
PRIMARY KEY (`emp_id`),
KEY `fk_emp_dept` (`d_id`),
CONSTRAINT `fk_emp_dept` FOREIGN KEY (`d_id`) REFERENCES `tbl_dept` (`dept_id`)
) ENGINE=InnoDB AUTO_INCREMENT=1004 DEFAULT CHARSET=utf8;
-- ----------------------------
-- Records of tbl_emp
-- ----------------------------
INSERT INTO `tbl_emp` VALUES ('1', 'Mali', 'F', '[email protected]', '1');
INSERT INTO `tbl_emp` VALUES ('2', 'Mark', 'M', '[email protected]', '1');5.mybatis generator逆向工程的编写
使用mybatis逆向工程可以直接根据数据库中数据表生成bean以及mapper
mybatis generator
(1)在pom.xml中导包
mybatis-generator-core
(2)在项目下新建mbg.xml
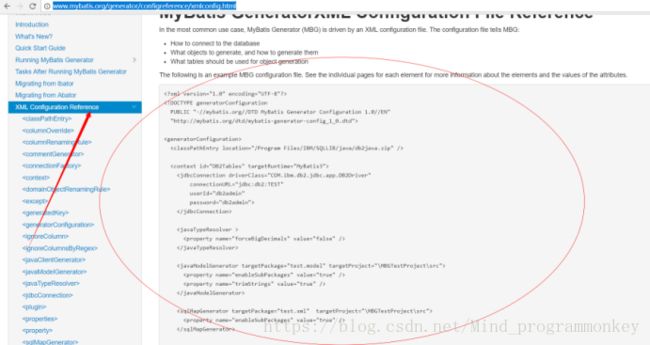
打开网址http://www.mybatis.org/generator/configreference/xmlconfig.html
找到XML Configuration Reference然后复制粘贴到我们新建的mbg.xml中
然后修改配置信息,配置好数据库连接信息,指定javabean的生成位置、指定sql映射文件生成的位置、指定dao接口生成的位置,table指定每个表的生成策略。
源码如下:
(3)逆向工程的运行
运行之前先建立好各个包
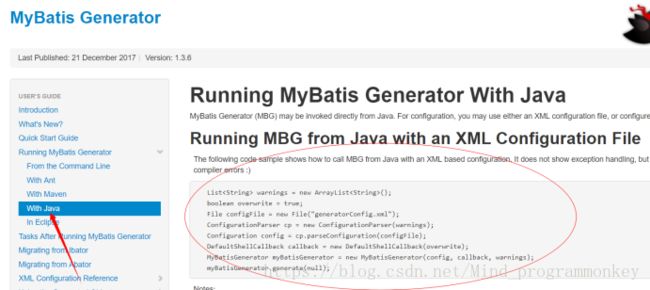
然后在com.lcz.crud.test这个包中新建一个MBGTest的类用来运行。
运行代码可见刚才的Mybatis generator的官网的连接中
修改好文件位置,运行即可。
源码如下:
package com.lcz.crud.test;

import java.io.File;
import java.util.ArrayList;
import java.util.List;

import org.mybatis.generator.api.MyBatisGenerator;
import org.mybatis.generator.config.Configuration;
import org.mybatis.generator.config.xml.ConfigurationParser;
import org.mybatis.generator.internal.DefaultShellCallback;

public class MBGTest {

	public static void main(String[] args) throws Exception {
		List warnings = new ArrayList();
		boolean overwrite = true;
		File configFile = new File("mbg.xml");
		ConfigurationParser cp = new ConfigurationParser(warnings);
		Configuration config = cp.parseConfiguration(configFile);
		DefaultShellCallback callback = new DefaultShellCallback(overwrite);
		MyBatisGenerator myBatisGenerator = new MyBatisGenerator(config,
				callback, warnings);
		myBatisGenerator.generate(null);
	}
} (4)运行结果
运行之后可见bean包及dao包以及resource下的mapper文件自动生成了。这里由于项目关系,所以对mapper文件下的EmployeeMapper.xml文件进行了修改,新增了一个关联查询,可以查询employee的时候同时查询出department。
6.导入spring test
通过spring test来测试上述的CRUD是否能够运行
(1)导入springtest包
(2)@ContextConfiguration指定spring配置文件的位置
(3)直接autowired的组件
package com.lcz.crud.test;

import java.util.UUID;

import org.apache.ibatis.session.SqlSession;
import org.junit.Test;
import org.junit.runner.RunWith;
import org.springframework.beans.factory.annotation.Autowired;
import org.springframework.context.ApplicationContext;
import org.springframework.context.support.ClassPathXmlApplicationContext;
import org.springframework.test.context.ContextConfiguration;
import org.springframework.test.context.junit4.SpringJUnit4ClassRunner;

import com.lcz.crud.bean.Department;
import com.lcz.crud.bean.Employee;
import com.lcz.crud.dao.DepartmentMapper;
import com.lcz.crud.dao.EmployeeMapper;

/**
 * 测试dao层的工作
 * @author LvChaoZhang
 * 推荐spring的项目就可以使用spring的单元测试,可以自动注入我们需要的空间
 * 1.导入springtest包
 * 2.@ContextConfiguration指定spring配置文件的位置
 * 3.直接autowired的组件
 */
@RunWith(SpringJUnit4ClassRunner.class)
@ContextConfiguration(locations={"classpath:applicationContext.xml"})
public class MapperTest {
	@Autowired
	DepartmentMapper departmentmapper;
	@Autowired
	EmployeeMapper employmapper;

	@Autowired
	SqlSession sqlsession;
	/**
	 * 测试DepartmentMapper
	 */
	@SuppressWarnings("resource")
	@Test
	public void testCRUD() {
//		//1.创建spring ioc容器
//		ApplicationContext ioc = new ClassPathXmlApplicationContext("spring.xml");
//		//2.从容器中获取mapper
//		Department bean = ioc.getBean(Department.class);
		System.out.println(departmentmapper);

		//1.插入几个部门

//		departmentmapper.insertSelective(new Department(null,"开发部"));
//		departmentmapper.insertSelective(new Department(null,"测试部"));

		//2.插入员工
		//employmapper.insertSelective(new Employee(null,"jack","M","[email protected]",1));
		//3.批量插入多个员工,批量,使用可以执行批量操作的sqlsession
		/*for()
		employmapper.insertSelective(new Employee(null,"jack","M","[email protected]",1));
		*/
		EmployeeMapper mapper = sqlsession.getMapper(EmployeeMapper.class);
		for(int i=0;i<1000;i++) {
			String uid=UUID.randomUUID().toString().substring(0, 5)+""+i;
			mapper.insertSelective(new Employee(null,uid,"M",uid+"@lcz.com",1));
		}
		System.out.println("批量执行完毕!");
	}
}
7.项目链接
github地址:点击打开链接
csdn地址:点击打开链接


