Apache – 配置https:证书
个人博客地址,文章也全:点击打开链接
第一步:创建文件夹
cd /private/etc/apache2
sudo mkdir ca
sudo chmod 777 ca //修改文件夹权限,在里面操作不用sudo
在ca文件夹下创建些内容,暂没用到
cd ca
mkdir demoCA
mkdir demoCA/newcerts
mkdir demoCA/private
touch demoCA/index.txt
echo “01” >> demoCA/serial
第二步:生成证书
openssl genrsa -out server.key 2048 //生成网站服务器公钥,用rsa算法
openssl req -new -out server.csr -key server.key
需补充以下信息:
Country Name (2 letter code) [AU]:CN[这里是国家,CN中国]
State or Province Name (full name) [Some-State]:shanghai
Locality Name (eg, city) []:shanghai
Organization Name (eg, company) [Internet Widgits Pty Ltd]:sj
Organizational Unit Name (eg, section) []:sj
Common Name (e.g. server FQDN or YOUR name) []:www.jobyme88.com[这个必须填正确,是你的服务器的域名,或者ip]
Email Address []:
openssl genrsa -out ca.key 2048 //生成ca密钥
openssl req -new -out -x509 -days 365 -key ca.key -out ca.crt //生成ca证书,365天有效,x509常用算法
openssl ca -in server.csr -out server.crt -cert ca.crt -keyfile ca.key //会生成server.crt,即签名后的服务器证书
第三步:生成client.key
openssl genrsa – out client.key 2048
openssl req -new -key client.key -out client.csr
openssl x509 -req -days 365 -ca ca.crt -cakey ca.key -cacreateserial -in client.csr -out client.crt
openssl pkcs12 -export -clcerts -in client.crt -inkey client.key -out client.p12 //将client.crt转换为 .pfx 格式的证书
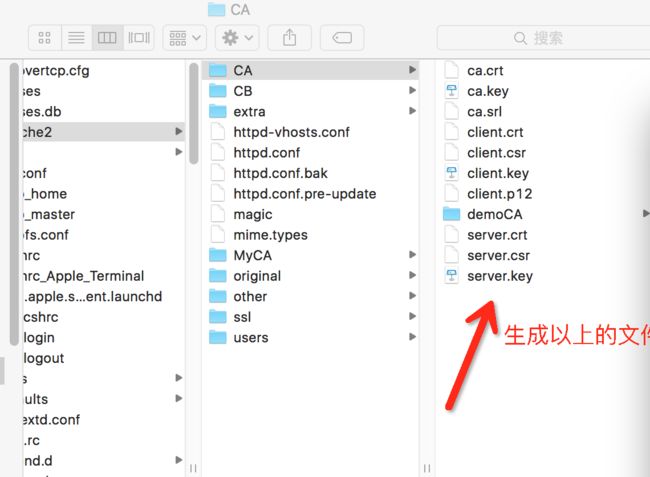
生成以下文件:
ca.crt
ca.key
ca.srl
client.crt
client.csr
client.key
client.p12
SSLSessionCache: ‘shmcb’ session cache not supported (known names: ). Maybe
第几步:httpd.conf配置
先备份下
sudo cp httpd.conf httpd.conf.bak
cd extra
sudo cp httpd-ssl.conf httpd-ssl.conf.bak
sudo cp httpd-vhosts.conf httpd-vhosts.conf.bak
打开ssl模块,去掉前面#
LoadModule ssl_module libexec/apache2/mod_ssl.so
报socache错误,再打开对应的socache模块即可
LoadModule socache_shmcb_module libexec/apache2/mod_socache_shmcb.so
引入httpd-ssl.conf, httpd-vhosts.conf文件,去掉前面#
Include /private/etc/apache2/extra/httpd-ssl.conf
Include/private/etc/apache2/extra/httpd-vhosts.conf
修改Options FollowSymLinks Multiviews为:
Options Indexes FollowSymLinks Multiviews (添加Indexes
第几步:httpd-ssl.conf配置
SSLCertificateFile “private/etc/apache2/ca/server.crt”
SSLCertificateKeyFile “/private/etc/apache2/ca/server.key”
SSLCACertificateFile “/private/etc/apache2/ca/ca.crt”
第几步:httpd-vhosts.conf配置
这里注意几点:
1)先不要配置ssl,确认虚拟主机的配置正确,http能正常访问。
发现VirtualHost块格式都要对齐,先前我都用tab,但不能,后来Directory外用4个空格,Directory里用tab就可以访问了。
2) 端口改为443(原来80),不然会报Forbidden错误
3)出现Safair cannot establish secure connection错误,把SSLVerifyClient require改为optionsl就可以了。
最后
sudo apachectl configtest //检查配置文件
sudo apachectl -k restart //强制重启
双击server.crt
在浏览器输入https://www.sj.com应该能正常访问,其它没有ssl证书的虚拟主机还是可以http访问,不影响。
最后,感谢这位朋友,https://blog.csdn.net/mn704058053/article/details/51879159
