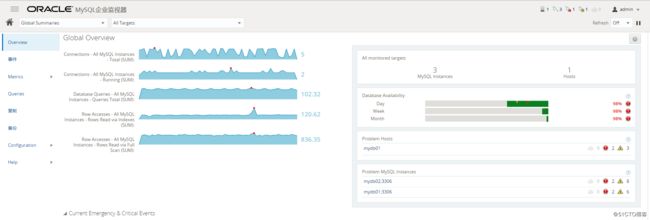
本文介绍如何安装使用MySQL Enterprise Monitor工具。分两部分介绍:服务端安装和agent安装
1、下载安装
1.1 服务端安装
在服务端安装MySQL Enterprise Monitor Service Manager 8,如下:
[root@hdp02 ~]# unzip MEM_8.0_For_Linux_x86_64.zip
Archive:  MEM_8.0_For_Linux_x86_64.zip
  inflating: mysqlmonitor-8.0.0.8131-linux-x86_64-update-installer.bin
  inflating: mysqlmonitor-8.0.0.8131-linux-x86_64-installer.bin
  inflating: README_en.txt
  inflating: monitor.a4.pdf
  inflating: monitor.pdf
 extracting: mysql-monitor-html.zip
  inflating: mysql-monitor-html.tar.gz
  inflating: READ_ME_ja.txt
[root@hdp02 ~]# ./mysqlmonitor-8.0.0.8131-linux-x86_64-installer.bin
Language Selection

Please select the installation language
[1] English - English
[2] Japanese - 日本語
Please choose an option [1] :
Info: During the installation process you will be asked to enter usernames and
passwords for various pieces of the Enterprise Monitor. Please be sure to make
note of these in a secure location so you can recover them in case they are
forgotten.
Press [Enter] to continue:
----------------------------------------------------------------------------
Welcome to the setup wizard for the MySQL Enterprise Monitor

----------------------------------------------------------------------------
Please specify the directory where the MySQL Enterprise Monitor will be
installed

Installation directory [/opt/mysql/enterprise/monitor]:

----------------------------------------------------------------------------
Select Requirements

Select Requirements

Please indicate the scope of monitoring this installation will initially encompass so we can configure memory usage accordingly. NOTE: This setting may have a big impact on overall performance. The manual contains instructions for updating the configuration later, if needed. This installation will monitor a:

System Size

[1] Small system: 1 to 5 MySQL Servers monitored from a laptop computer or low-end server with no more than 4 GB of RAM
[2] Medium system: Up to 100 MySQL Servers monitored from a medium-size but shared server with 4 GB to 8 GB of RAM
[3] Large system: More than 100 MySQL Servers monitored from a high-end server dedicated to MEM with more than 8 GB RAM
Please choose an option [2] :

----------------------------------------------------------------------------
Tomcat Server Options

Please specify the following parameters for the bundled Tomcat Server

Tomcat Server Port [18080]:

Tomcat SSL Port [18443]:

----------------------------------------------------------------------------
Service Manager User Account

You are installing as root, but it's not good practice for the Service Manager
to run under the root user account.  Please specify the name of a user account
to use for the Service Manager below.  Note that this user account will be
created for you if it doesn't already exist.

User Account [mysqlmem]:

----------------------------------------------------------------------------
Database Installation

Please select which database configuration you wish to use

[1] I wish to use the bundled MySQL database
[2] I wish to use an existing MySQL database *
Please choose an option [1] :

* We will validate the version of your existing MySQL database server during the
installation. See documentation for minimum version requirements.

* Important: If your existing MySQL database server already has another MySQL
Enterprise Monitor repository in it that you want to keep active, be sure to
specify a unique name in the "MySQL Database Name" field on the next screen.

Visit the following URL for more information:

http://dev.mysql.com/doc/mysql-monitor/8.0/en/mem-install-server.html

----------------------------------------------------------------------------
Repository Configuration

Please specify the following parameters for the bundled MySQL server

Repository Username [service_manager]:

Password :
Re-enter :
MySQL Database Port [13306]:

MySQL Database Name [mem]:

----------------------------------------------------------------------------
Setup is now ready to install MySQL Enterprise Monitor on your computer.

Do you want to continue? [Y/n]: y

----------------------------------------------------------------------------
Please wait while Setup installs MySQL Enterprise Monitor on your computer.

 Installing
 0% ______________ 50% ______________ 100%
 #########################################

----------------------------------------------------------------------------
Completed installing files

Setup has completed installing the MySQL Enterprise Monitor files on your
computer

Uninstalling the MySQL Enterprise Monitor files can be done by invoking:
/opt/mysql/enterprise/monitor/uninstall

To complete the installation, launch the MySQL Enterprise Monitor UI and
complete the initial setup. Refer to the readme file for additional information
and a list of known issues.

Press [Enter] to continue:

----------------------------------------------------------------------------
Completed installing files

WARNING: To improve security, all communication with the Service Manager uses
SSL. Because only a basic self-signed security certificate is included when the
Service Manager is installed, it is likely that your browser will display a
warning about an untrusted connection. Please either install your own
certificate or add a security exception for the Service Manager URL to your
browser. See the documentation for more information.

http://dev.mysql.com/doc/mysql-monitor/8.0/en/mem-ssl-installation.html
Press [Enter] to continue:

----------------------------------------------------------------------------
Setup has finished installing MySQL Enterprise Monitor on your computer.

View Readme File [Y/n]: Y

README
Copyright (c) 2005, 2018, Oracle and/or its affiliates. All rights reserved.

This is a release of the MySQL Enterprise Monitor, version 8.0.0.8131.

License information can be found in the LICENSES.pdf file in the
licenses folder of the installation. This distribution may include
materials developed by third parties. For license  and attribution
notices for these materials, please refer to the LICENSES.pdf file.

For more information on the MySQL Enterprise Monitor, visit
https://docs.oracle.com/cd/E17952_01/mysql-monitor-8.0-en/index.html
or https://dev.mysql.com/doc/mysql-monitor/8.0/en/.
For additional downloads of MySQL Enterprise Monitor, visit
https://support.oracle.com/.

For further information about MySQL Enterprise Monitor or additional
documentation, see:

  http://www.mysql.com
  http://www.mysql.com/products/enterprise
  http://www.mysql.com/products/enterprise/monitor.html

MySQL Enterprise Monitor is brought to you by the MySQL team at Oracle.
Press [Enter] to continue:
Info: To configure the MySQL Enterprise Monitor please visit the following page:
https://localhost:18443
Press [Enter] to continue:
1.2 服务管理
[root@hdp02 ~]# /etc/init.d/mysql-monitor-server start
[root@hdp02 ~]# /etc/init.d/mysql-monitor-server status
MySQL Enterprise MySQL is running
MySQL Enterprise Tomcat is running
[root@hdp02 ~]# /etc/init.d/mysql-monitor-server stop
1.3 创建用户
安装完成后,必须创建管理员用户以及agent注册用户。登录web界面,如下: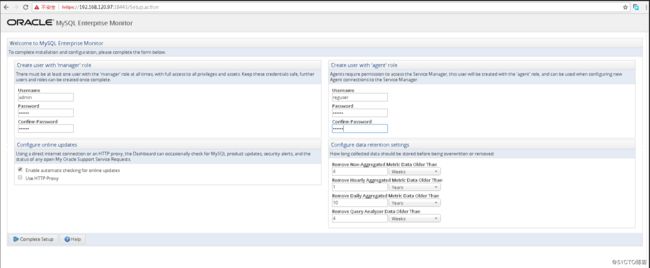
点击complete setup,进入欢迎界面: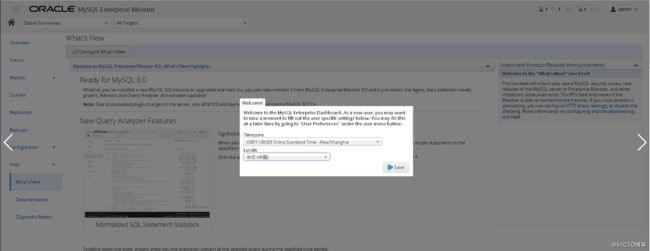
选择时间以及locale,点击保存即可。
2、Agent安装
[root@mydb01 ~]# ./mysqlmonitoragent-8.0.0.8131-linux-x86-64bit-installer.bin
Language Selection

Please select the installation language
[1] English - English
[2] Japanese - 日本語
Please choose an option [1] :
----------------------------------------------------------------------------
Welcome to the MySQL Enterprise Monitor Agent Setup Wizard.

----------------------------------------------------------------------------
Installation directory

Please specify the directory where MySQL Enterprise Monitor Agent will be
installed

Installation directory [/opt/mysql/enterprise/agent]:

How will the agent connect to the database it is monitoring?

[1] TCP/IP
[2] Socket
Please choose an option [1] :

----------------------------------------------------------------------------
Monitoring Options

You can configure the Agent to monitor this host (file systems, CPU, RAM, etc.)
and then use the Monitor UI to furnish connection parameters for all current and
future running MySQL Instances. This can be automated or done manually for each
MySQL Instance discovered by the Agent. (Note: scanning for running MySQL
processes is not available on Windows, but you can manually add new connections
and parameters from the Monitor UI as well.)

Visit the following URL for more information:
http://dev.mysql.com/doc/mysql-monitor/8.0/en/mem-qanal-using-feeding.html

Monitoring options:

[1] Host only: Configure the Agent to monitor this host and then use the Monitor UI to furnish connection parameters for current and future running MySQL Instances.
[2] Host and database: Configure the Agent to monitor this host and furnish connection parameters for a specific MySQL Instance now. This process may be scripted. Once installed, this Agent will also continuously look for new MySQL Instances to monitor as described above.
Please choose an option [2] :

----------------------------------------------------------------------------
Setup is now ready to begin installing MySQL Enterprise Monitor Agent on your
computer.

Do you want to continue? [Y/n]: Y

----------------------------------------------------------------------------
Please wait while Setup installs MySQL Enterprise Monitor Agent on your
computer.

 Installing
 0% ______________ 50% ______________ 100%
 #########################################

----------------------------------------------------------------------------
MySQL Enterprise Monitor Options

Hostname or IP address []: 192.168.120.97

Tomcat SSL Port [18443]:

The following are the username and password that the Agent will use to connect
to the Monitor.  They were defined when you installed the Monitor.  They can be
modified under Settings, Manage Users.  Their role is defined as "agent".

Agent Username [agent]: reguser

Agent Password :
Re-enter :
----------------------------------------------------------------------------
Monitored Database Configuration Options

Validate hostname, port, and Admin account privileges [Y/n]: Y

Configure encryption settings for user accounts [y/N]: y

Configure less privileged user accounts [y/N]: y

----------------------------------------------------------------------------
Monitored Database Information

IMPORTANT: The Admin user account specified below requires special MySQL
privileges.

Visit the following URL for more information:
http://dev.mysql.com/doc/mysql-monitor/8.0/en/mem-agent-rights.html

MySQL hostname or IP address [localhost]: 192.168.120.92

MySQL Port [3306]:

Admin User []: root

Admin Password :
Re-enter Password :
Monitor Group []:
----------------------------------------------------------------------------
Encryption Settings

Require Encryption [y/N]: y

Allow Self-Signed Certificates [y/N]: y

CA Certificate []:

----------------------------------------------------------------------------
Less Privileged User Account Creation

IMPORTANT: Less privileged accounts can be used to enhance monitoring security,
and can even be created for you if the Admin account has GRANT privileges.

Visit the following URL for more information:
http://dev.mysql.com/doc/mysql-monitor/8.0/en/mem-agent-rights.html

Auto-Create Less Privileged Users [Y/n]: Y

General Username []:

General Password :
Re-enter Password :
Limited Username []:

Limited Password :
Re-enter Password :
Warning: You need to provide a non-empty General Username
Press [Enter] to continue:
----------------------------------------------------------------------------
Less Privileged User Account Creation

IMPORTANT: Less privileged accounts can be used to enhance monitoring security,
and can even be created for you if the Admin account has GRANT privileges.

Visit the following URL for more information:
http://dev.mysql.com/doc/mysql-monitor/8.0/en/mem-agent-rights.html

Auto-Create Less Privileged Users [Y/n]: Y

General Username []: general

General Password :
Re-enter Password :
Limited Username []: limited

Limited Password :
Re-enter Password :
----------------------------------------------------------------------------
Configuration Report

MySQL Enterprise Monitor Agent (Version 8.0.0.8131)

The settings you specified are listed below.

Note that if you are using a Connector to collect Query Analyzer data,
you will need some of these settings to configure the Connector. See
the following for more information:
http://dev.mysql.com/doc/mysql-monitor/8.0/en/mem-qanal-using-feeding.html

Installation directory: /opt/mysql/enterprise/agent

MySQL Enterprise Monitor UI:
-------------------------
Hostname or IP address: 192.168.120.97
Tomcat Server Port: 18443
Use SSL: yes

Monitored MySQL Database:
-------------------------
Hostname or IP address: localhost
Port: 3306
Press [Enter] to continue:

Press [Enter] to continue:

----------------------------------------------------------------------------
Start MySQL Enterprise Monitor Agent

Info to start the MySQL Enterprise Monitor Agent

The MySQL Enterprise Monitor Agent was successfully installed. To start the
Agent please invoke:
/etc/init.d/mysql-monitor-agent start
Press [Enter] to continue:

----------------------------------------------------------------------------
Setup has finished installing MySQL Enterprise Monitor Agent on your computer.

View Agent Readme File [Y/n]: Y

README
Copyright (c) 2005, 2018, Oracle and/or its affiliates. All rights reserved.

This is a release of the MySQL Enterprise Monitor, version 8.0.0.8131.

License information can be found in the LICENSES.pdf file in the
licenses folder of the installation. This distribution may include
materials developed by third parties. For license  and attribution
notices for these materials, please refer to the LICENSES.pdf file.

For more information on the MySQL Enterprise Monitor, visit
https://docs.oracle.com/cd/E17952_01/mysql-monitor-8.0-en/index.html
or https://dev.mysql.com/doc/mysql-monitor/8.0/en/.
For additional downloads of MySQL Enterprise Monitor, visit
https://support.oracle.com/.

For further information about MySQL Enterprise Monitor or additional
documentation, see:

  http://www.mysql.com
  http://www.mysql.com/products/enterprise
  http://www.mysql.com/products/enterprise/monitor.html

MySQL Enterprise Monitor is brought to you by the MySQL team at Oracle.
Press [Enter] to continue:
[root@mydb01 ~]# /etc/init.d/mysql-monitor-agent status
MySQL Enterprise Agent does not appear to be running
[root@mydb01 ~]# /etc/init.d/mysql-monitor-agent start
Starting MySQL Enterprise Agent service... SUCCESS!
[root@mydb01 ~]# /etc/init.d/mysql-monitor-agent status
MySQL Enterprise Agent is running
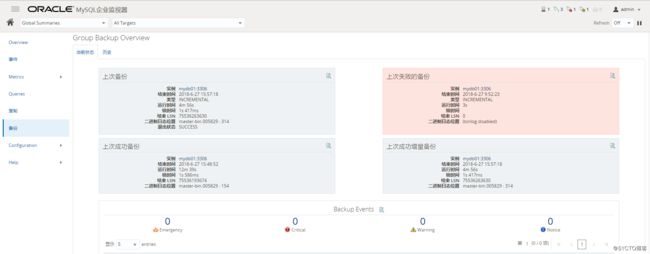
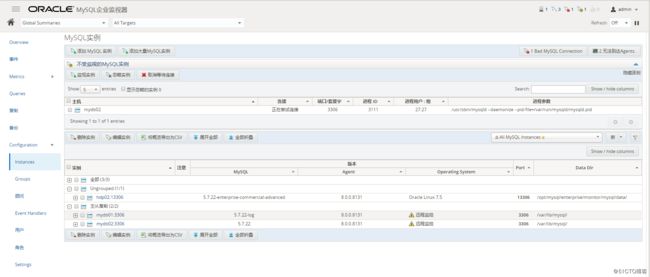
所有agent安装完成后,可以通过web管理界面进行分组,比如:主从复制。如果使用了MySQL Enterprise Backup,也可以查看到备份的相关信息。