Element-ui自定义table表头,修改列标题样式、添加tooltip, :render-header使用简介
关注我的个人博客:pinbolei.cn,获取更多内容
由于Element-ui官方在2.4.11及以后的版本中添加了自定义表头的方法,如果你的Element-ui版本是在2.4.11以上,建议参考我的另一篇博客element-ui table列表自定义表头,修改列标题样式、添加tooltip
render-header
render-header在官方文档中的介绍是这样的:
| 参数 | 说明 | 类型 | 可选值 | 默认值 |
|---|---|---|---|---|
| render-header | 列标题 Label 区域渲染使用的 Function | Function(h, { column, $index }) | — | — |
修改列标题样式
1.在列标题后面加一个图标。
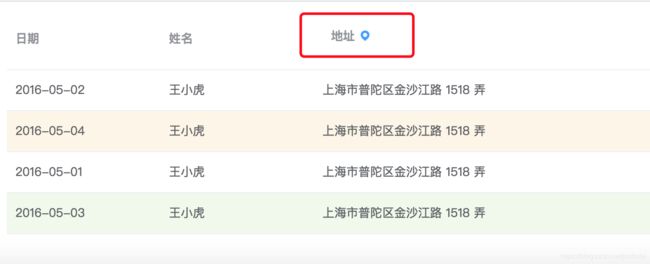
以element-ui官方文档一个table表格为例,我们在地址的后面加一个定位标志的图标,代码如下:
<template>
  <el-table
    :data="tableData2"
    style="width: 100%"
    :row-class-name="tableRowClassName">
    <el-table-column
      prop="date"
      label="日期"
      width="180">
    </el-table-column>
    <el-table-column
      prop="name"
      label="姓名"
      width="180">
    </el-table-column>
    <el-table-column
      prop="address"
      label="地址" :render-header="renderHeader"> // 加入render事件
    </el-table-column>
  </el-table>
</template>

<style>
  .el-table .warning-row {
    background: oldlace;
  }

  .el-table .success-row {
    background: #f0f9eb;
  }
</style>

<script>
  export default {
    methods: {
      tableRowClassName({row, rowIndex}) {
        if (rowIndex === 1) {
          return 'warning-row';
        } else if (rowIndex === 3) {
          return 'success-row';
        }
        return '';
      },
      // render 事件
      renderHeader (h,{column}) { // h即为cerateElement的简写,具体可看vue官方文档
        return h(
          'div',
          [
            h('span', column.label),
            h('i', {
              class:'el-icon-location',
              style:'color:#409eff;margin-left:5px;'
            })
          ],
        );
       }
    },
    data() {
      return {
        tableData2: [{
          date: '2016-05-02',
          name: '王小虎',
          address: '上海市普陀区金沙江路 1518 弄',
        }, {
          date: '2016-05-04',
          name: '王小虎',
          address: '上海市普陀区金沙江路 1518 弄'
        }, {
          date: '2016-05-01',
          name: '王小虎',
          address: '上海市普陀区金沙江路 1518 弄',
        }, {
          date: '2016-05-03',
          name: '王小虎',
          address: '上海市普陀区金沙江路 1518 弄'
        }]
      }
    }
  }
</script>
2.在列标题后面添加一个单选框
还是以上面的代码为例,只写关键代码:
...
// render 事件
renderHeader (h,{column}) { // h即为cerateElement的简写,具体可看vue官方文档
  return h(
   'div',
   [
     h('span', column.label),
     h('el-checkbox',{
       style:'margin-left:5px',
       on:{
         change:this.select // 选中事件
       }
     })
   ],
 );
},
// 添加选中事件
select (data) {
  console.log(data);
}
...
3.在表头添加一个Tooltip
我们经常会遇到一些奇怪的需求,但是即使再奇怪我们也不能认输,现在有一个需求,要在列表表题后面添加一个提示,我们开始尝试着做:
还是以上面的代码为例,刚开始我想直接用‘el-tooltip’,应该不是很难,然后就是这样:
...
renderHeader (h,{column}) {
  return h(
    'div',
    [
      h('span', column.label),
      h('el-tooltip',[
        h('i', {
          class:'el-icon-question',
          style:'color:#409eff;margin-left:5px;'
        })
      ],{
        content: '这是一个提示'
      })
    ]
  );
}
...
运行后发现,基本样式出来了,但是提示没有
根据element-ui 关于tooltip的文档,我发现不管是effect, content还是placement 对tooltip都不管用,既然硬上不管用,就曲线救国,通过组件的方法,先造个轮子再走路
// 写一个PromptMessage的组件,并全局注册
<template>
  <div class="tooltip">
    <el-tooltip effect="dark" placement="right">
      <div slot="content"> // 插槽,可提供多行的提示信息
        <p v-for="item in messages" :key="item">
          {{item}}
        </p>
      </div>
      <i class="el-icon-question" style="color:#409eff;margin-left:5px;font-size:15px;"></i>
    </el-tooltip>
  </div>
</template>

<script>
  export default {
    props:['messages']
  };
</script>
然后在render-header事件中使用组件
...
renderTip (h,{column}) {
  return h(
    'div',{
      style:'display:flex;margin:auto;'
    },
    [
      h('span', column.label),
      h('prompt-message', {
        props: {messages: ["这是住址信息"]}
      })
    ]
  );
}
...
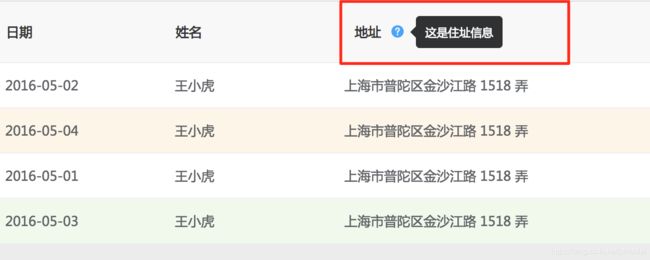
这次我们发现,果然造的轮子还是挺不错的
JSX语法
或许你会发现,这个原生的createElement 写起来并不简单,而且很费事,我们也可以采用JSX的方式,这个在Vue官方文档中有提到

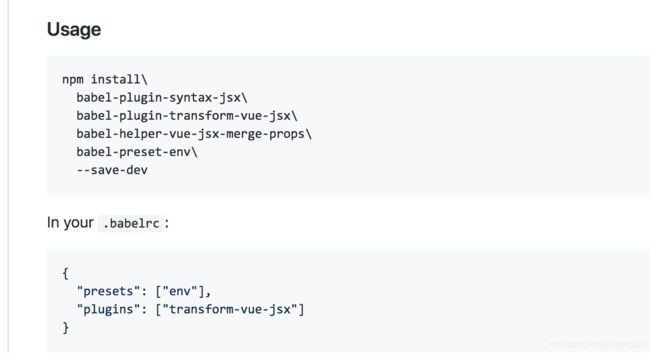
查看文档,可以找到安装使用的方法
安装完成后想要再实现tooltip就简单了
...
renderTip (h,{column}) {
  return (
    <el-tooltip class="tooltip" effect="dark" placement="right">
      <ul slot="content">
        <li>这是第一个提示</li>
        <li>这是第二个提示<li>
      </ul>
      <i class="el-icon-question"></i>
    </el-tooltip>
  );
}
...
这样看着很好理解,写起来也很方便


