Spring Cloud入门(七)Spring Cloud Bus
前言
本章讲解Spring Cloud组件中的Spring Cloud Bus的相关知识
方法
1.概念
ConfigClient(微服务)从ConfigServer端获取自己对应的配置文件,但是目前的问题是:当远程git仓库配置文件发生改变时,每次都是需要重启ConfigCient(微服务),如果有上百上千个微服务呢?我想我们不会一个个去重启每个微服务,也就是说如何让ConfigServer端通知到ConfigClient端?即ConfigClient端如何感知到配置发生更新?
如果想要解决这个问题,就需要用到我们的Spring Cloud Bus,即消息总线!
通过学习他人的博客,我已经完全蒙圈了,这里来聊下我的总结!
2.环境搭建
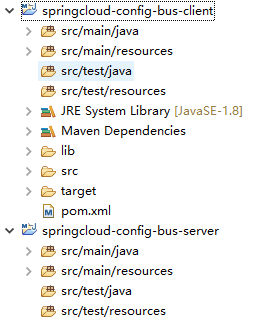
为了更好的演示我们这次的程序,我们将重新编写ConfigClient和ConfigServer两个工程!
1)创建ConfigClient和ConfigServer两个工程
2)修改pom文件
ConfigServer:主要配置config-server、bus、actuator
		org.springframework.boot
		spring-boot-starter


	    org.springframework.cloud
	    spring-cloud-config-server


           org.springframework.cloud
           spring-cloud-starter-bus-amqp


	    org.springframework.boot
	    spring-boot-starter-actuator
ConfigClient:主要配置config-client、bus、actuator
		org.springframework.boot
		spring-boot-starter-web


	    org.springframework.cloud
	    spring-cloud-config-client


	    org.springframework.cloud
	    spring-cloud-starter-bus-amqp


	    org.springframework.boot
	    spring-boot-starter-actuator
那么,这里的pom文件就算配置完毕了。
3.config-server搭建
1)直接上干货,配置application.yml
注意:本次的项目git上的配置文件为:application-hello.yml
内容如下:
spring:
    profiles:
        active: dev
---
server:
    port: 8080
spring:
    application:
        name: application-6
    profiles: dev

---
server:
    port: 9090
spring:
    application:
        name: application-10
    profiles: test
这是最基本的配置。。。如果不明白的话自行百度,至于为什么用yml,是上个博客的经验。。。
application.yml:
server:
  port: 8688
# spring cloud config server
spring:
  application:
    name: config-bus-server
  cloud:
    config:
      server:
        git:
          uri: https://github.com/wangjian136/spring-cloud-config.git
# rabbitmq config
  rabbitmq:
    host: 192.168.1.108
    port: 5672
    username: jwang
    password: 123456
# bus-refresh config
management:
  endpoints:
    web:
      exposure:
include: bus-refreshConfigServerApp加入@EnableConfigServer注解,我相信大家都知道:
package cn.edu.ccut;

import org.springframework.boot.SpringApplication;
import org.springframework.boot.autoconfigure.SpringBootApplication;
import org.springframework.cloud.config.server.EnableConfigServer;


@EnableConfigServer
@SpringBootApplication
public class ConfigServerApp {

	public static void main(String[] args) {
		SpringApplication.run(ConfigServerApp.class, args);
	}

}
到这里,我们的config-server就算配置完毕了!
4.config-client搭建
本次的客户端不搞那么多花头,直接上最简单的springboot工程,这样大家可能好理解些。
1)配置bootstrap.yml
#spring cloud config client
spring:
  cloud:
    config:
      name: application-hello
      profile: dev
      label: master
      uri: http://192.168.1.103:8688
#rabbitmq config
  rabbitmq:
    host: 192.168.1.108
    port: 5672
    username: jwang
    password: 123456
#bus-refresh config
management:
  endpoints:
    web:
      exposure:
        include: bus-refresh
2)编写一个controller用来做测试
package cn.edu.ccut.controller;

import org.springframework.beans.factory.annotation.Value;
import org.springframework.cloud.context.config.annotation.RefreshScope;
import org.springframework.web.bind.annotation.RequestMapping;
import org.springframework.web.bind.annotation.RestController;

@RestController
@RefreshScope
public class TestController {

	@Value("${spring.application.name}")
	private String applicationName;

	@Value("${server.port}")
	private String port;

	@RequestMapping("/config")
	public String getMsg(){
		System.out.println("--port--:"+port);
		System.out.println("--name--:"+applicationName);
		return "port:"+port+",name:"+applicationName;
	}
}
该controller将输出应用名称和端口号,等下我们在git文件中把应用名称改了,然后在不重启的状态下试试。
3)启动类的编写
启动类没什么改变,就是普通的springboot启动类就哦了
5.测试运行
1)首先将我们的rabbitmq启动完毕,这里不再赘述
2)启动config-server

我们可以看到,服务端启动成功了!在rabbitmq中我们将发现一个队列生成!
![]()
输入以下地址http://localhost:8688/application-hello-dev.yml验证是否可以读取配置文件:

该输出代表成功!
3)启动config-client

我们发现,它从config-server端成功的读取了配置,且端口号为8080!
接下来我们访问http://localhost:8080/config观察效果:

这显然是正确的!
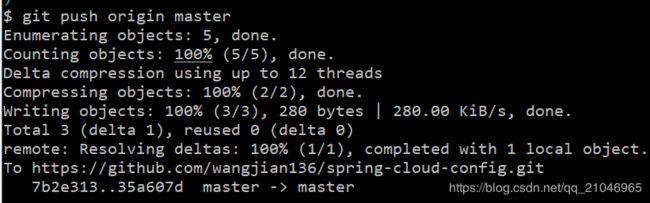
4)改动git相关配置文件并上传
我们将application-6改成了application-7

这里我使用命令将其上传:
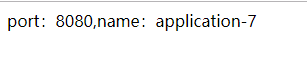
5)访问http://localhost:8080/config观察效果
还是他娘的没变!
6)在postman中输入命令
http://localhost:8688/actuator/bus-refresh

观察rabbitmq队列状态:

很显然,已经发生了改变!
7)访问http://localhost:8080/config观察效果