springboot2 springboot-admin - 服务管理与监控
前言
最近公司的Springboot2.x项目中需要做一个服务监控工具,网上找到了springboot-admin。通过根据对 官方文档 和各位大佬的文章学习和分析,最终得以完成任务。
鉴于差点被网上各种文章绕晕,特此开篇写一个自认为靠谱的文章来介绍下springboot-admin的使用。
1、springboot-admin说来其实也简单(因为我是“刚需”来着)
总共分两步:
第一步:新建一个springboot的项目作为springboot-admin监控服务器(然后一堆配置等会儿唠);
第二步:在你需要被监控的服务中一顿配置(你的服务作为springboot-admin的被监控客户端服务);
2、springboot-admin服务器端
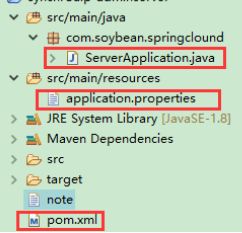
项目结构如下:
主要文件pom.xml、application.properties、ServerApplication.java
2.1、pom.xml文件
	4.0.0

	SpringBoot2.x admin-server
	服务监控
	com.soybean.springboot
	admin-server
	0.0.1-SNAPSHOT
	jar


		org.springframework.boot
		spring-boot-starter-parent
		2.1.7.RELEASE


			org.springframework.boot
			spring-boot-starter-web


			de.codecentric
			spring-boot-admin-starter-server
			2.1.6


			org.springframework.boot
			spring-boot-starter-security


			aliyun
			aliyun
			http://maven.aliyun.com/nexus/content/groups/public/
			default

				true
				never


				true
				never


			aliyun
			aliyun
			http://maven.aliyun.com/nexus/content/groups/public/

				true


				false
2.2、application.properties文件
# springboot-admin 服务器端口
server.port=8000

## 安全 - admin服务端登录的账号/密码(在被监控服务中也需要相应配置admin服务端的账号/密码才可以被监控到
spring.security.user.name=admin
spring.security.user.password=123456
2.3、ServerApplication.java
package com.soybean.springclound;

import org.springframework.boot.SpringApplication;
import org.springframework.boot.autoconfigure.EnableAutoConfiguration;
import org.springframework.context.annotation.Configuration;
import org.springframework.security.config.annotation.web.builders.HttpSecurity;
import org.springframework.security.config.annotation.web.configuration.WebSecurityConfigurerAdapter;
import org.springframework.security.web.authentication.SavedRequestAwareAuthenticationSuccessHandler;
import org.springframework.security.web.csrf.CookieCsrfTokenRepository;

import de.codecentric.boot.admin.server.config.AdminServerProperties;
import de.codecentric.boot.admin.server.config.EnableAdminServer;

/**
 * SpringBoot Admin的服务端启动程序
 *
 * zkh
 * 2019年9月24日 上午9:57:35
 */
@Configuration
@EnableAutoConfiguration
@EnableAdminServer // 开启Admin
public class ServerApplication {

	public static void main(String[] args) {
		SpringApplication.run(ServerApplication.class, args);
	}

	/**
	 * 开启服务端登录认证
	 * 描述:展示登陆页面,需要登录才能访问
	 *
	 * zkh
	 * 2019年9月24日 上午8:12:26
	 */
	@Configuration
	public static class SecuritySecureConfig extends WebSecurityConfigurerAdapter {
	    private final String adminContextPath;

	    public SecuritySecureConfig(AdminServerProperties adminServerProperties) {
	        this.adminContextPath = adminServerProperties.getContextPath();
	    }

	    /**
	     * Admin服务端访问权限控制
	     * 描述:跟被监控的客户端服务关系不大,我刚开始以为是给客户端配置的。。。
	     */
	    @Override
	    protected void configure(HttpSecurity http) throws Exception {
	        // @formatter:off
	        SavedRequestAwareAuthenticationSuccessHandler successHandler = new SavedRequestAwareAuthenticationSuccessHandler();
	        successHandler.setTargetUrlParameter("redirectTo");
	        successHandler.setDefaultTargetUrl(adminContextPath + "/");

	        http.authorizeRequests()
	        		// 授予对所有静态资产和登录页的公共访问权限
	                .antMatchers(adminContextPath + "/assets/**").permitAll()
	                .antMatchers(adminContextPath + "/login").permitAll()
	                // 所有其他请求都必须经过身份验证
	                .anyRequest().authenticated().and()
	                // 配置登录和注销
	                .formLogin().loginPage(adminContextPath + "/login").successHandler(successHandler).and()
	                .logout().logoutUrl(adminContextPath + "/logout").and()
	                // 启用HTTP基本支持。这是spring boot管理客户端注册所必需的
	                .httpBasic().and()
	                // 使用cookies启用csrf保护
	                .csrf().csrfTokenRepository(CookieCsrfTokenRepository.withHttpOnlyFalse())
	                .ignoringAntMatchers(
	                		// 禁用crsf保护spring boot管理客户端用来注册的端点
	                        adminContextPath + "/instances",
	                        // 禁用执行器端点的CRSF保护
	                        adminContextPath + "/actuator/**"
	                );
	    }
	}

}
有了这3文件服务器端就算建好了,测试一下
运行ServerApplication
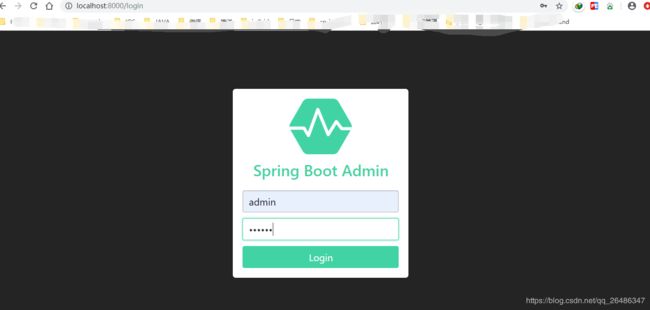
打开浏览器,输入http://localhost:8000/login,页面如下:
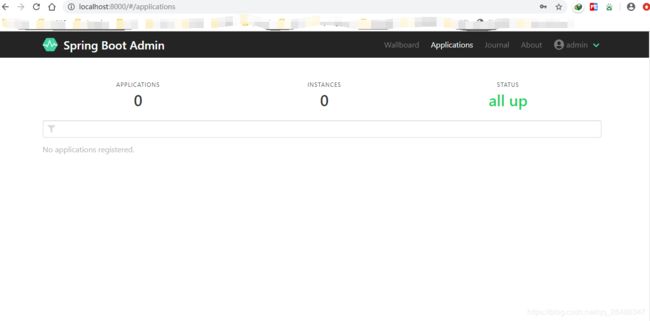
输入我们在application.properties文件中配置的springboot-admin服务器端登录账号和密码登录后,如下:
到此springboot-admin服务器端创建成功。
3、springboot-admin被监控服务(或者admin客户端)
就是你想要被监控的springboot项目
这个就简单了,只需要在原有项目基础上改动两个文件:pom.xml、application.properties
3.1、pom.xml文件
pom.xml:只需向这个文件中添加springboot-admin的客户端jar:spring-boot-admin-starter-client,无需其他操作
        ...此处是你的其他引用jar包


		    de.codecentric
		    spring-boot-admin-starter-client
		    2.1.6
3.2、application.properties文件
对这个文件的操作可能有两步
第一步:添加springboot-admin的客户端配置(必须的)
第二步:如果你的项目有权限控制,至少需要放行springboot-admin的监控信息展示页面(actuator及actuator/health) http://你的服务ip:端口/项目名/actuator、http://你的服务ip:端口/项目名/actuator/health,不然监控了半天看不到监控信息就尴尬了
必要的配置信息
## 监控工具 springboot Admin(注意:需要在访问权限过滤中放行admin的几个页面,不然在admin服务端查看监控信息时(比如:你的服务地址/项目名/actuator)会被你的服务给重定向到登录页,这个需要留意了!!!)
#监控服务端地址
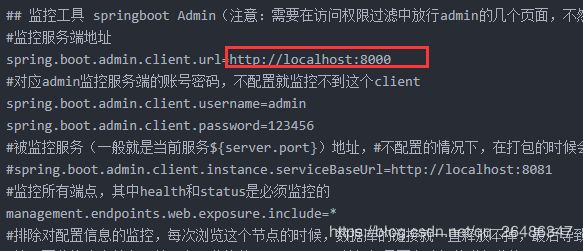
spring.boot.admin.client.url=http://localhost:8000
#对应admin监控服务端的账号密码,不配置就监控不到这个client
spring.boot.admin.client.username=admin
spring.boot.admin.client.password=123456
#被监控服务(一般就是当前服务${server.port})地址,#不配置的情况下,在打包的时候会有提示。不影响运行。
#spring.boot.admin.client.instance.serviceBaseUrl=http://localhost:8081
#监控所有端点,其中health和status是必须监控的
management.endpoints.web.exposure.include=*
#排除对配置信息的监控,每次浏览这个节点的时候,数据库的链接就一直释放不掉,最后导致超时,因为配置信息的监控也不重要,
#就不再监控这个节点,以下为可监控的endpoint。可以根据需要有选择的进行监控。
#health,status,env,metrics,dump,jolokia,info,configprops,trace,logfile,refresh,flyway,liquibase,heapdump,loggers,auditevents,hystrix.stream,activiti
management.endpoints.web.exposure.exclude=configprops
#info信息会显示到Springboot Admin的服务端,这里取的是maven中的数据
[email protected]@
[email protected]@
[email protected]@
可能需要的权限放行配置信息
extend.shiro.filter.rules[7]=/actuator-->anon
extend.shiro.filter.rules[8]=/actuator/**-->anon
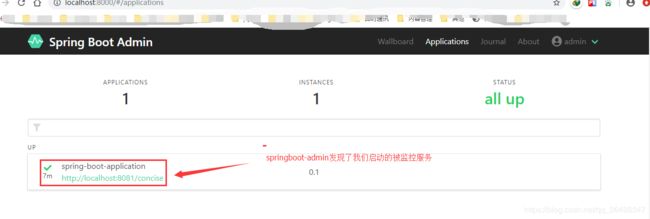
好了,springboot-admin的被监控服务就配置好了,启动被监控服务(之前springboot-admin的服务器服务已启动)测试一下
这时我们点击发现的这个服务时,会跳转到被监控服务的登录页面,是的设置就是这样没错的(你可能以为点开会展示监控信息什么的),那么怎么查看监控信息呢,如下
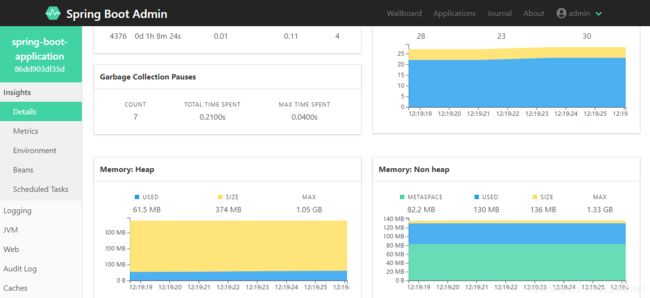
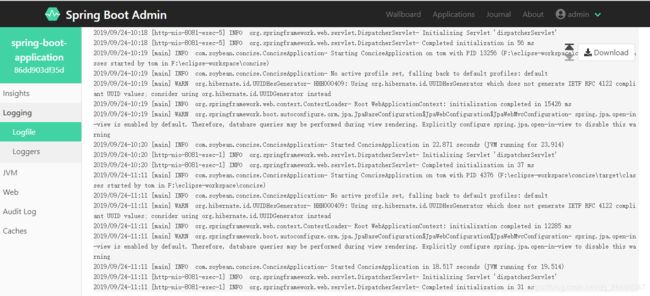
单击这个大大的名字spring-boot-application,展开如下界面:
4、远程监控实现
这里对于新手有个误区,就是老想把SpringbootAdmin集成3到自己的系统中(我刚开始就是这么想的。。。),
但是集成进自己的系统几乎是不现实的,如果你想使用自带的UI界面,那么它的安全验证(或者说是请求权限)会跟你的安全验证冲突。
那么SpringbootAdmin怎么能实现远程监控呢?
中的spring.boot.admin.client.url=http://localhost:8080这句
如果不是localhost,而是一个公网的域名呢,比如spring.boot.admin.client.url=http://www.abc.com
所以你只需让你的监控服务器跟你的被监控系统在同一个网络环境下就可以监控到。
结论:SpringbootAdmin实现远程监控的解决方案并不是将其集成到系统内部,而是让监控服务跟被监控系统在同一个网络下。
代码里的注释很重要,可少踩很多坑点!!!
