springboot整合ssm框架
随着spring4.0的版本发布,springboot一个非常好的框架简化了后端人员的开发布局。那么在此,这里是基于maven与springboot整合的一个ssm框架。springboot-spring-springmvc-mybatis快速框架。
如果觉得文章不错,对你有帮助,请作者喝杯咖啡,谢谢!如果对您有帮助 ,请多多支持.多少都是您的心意与支持,一分也是爱,再次感谢!!!打开支付宝首页搜“556723462”领红包,领到大红包的小伙伴赶紧使用哦!感谢大家的支持!您的支持,我会继续分享更多的文章,欢迎关注!
微信端 |
支付宝端 |
支付宝红包端 |
 |
 |
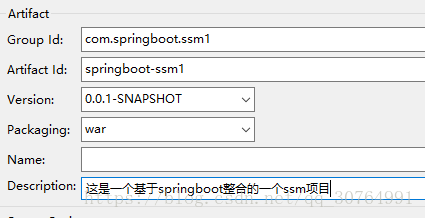
1,创建一个maven项目如下图所示:
2,在pom.xml导入springboot-ssm所需要的jar包版本依赖,具体依赖如下:
3.配置application.properties具体如下:
spring.datasource.driverClassName=com.mysql.jdbc.Driver
spring.datasource.url=jdbc:mysql://127.0.0.1:3306/ssm?useUnicode=true&characterEncoding=utf-8
spring.datasource.username=root
spring.datasource.password=123456
#tomcat端口配置,这里是8080
server.port=8080
那么到此,springboot整合ssm就好了!!!!,是不是很easy,很惊讶!这才是刚开始,路漫漫其修远兮,吾将上下而求索。
4.测试,springboot的一个主入口,具体代码如下:
package com.spring.demo;
import org.springframework.boot.SpringApplication;
import org.springframework.boot.autoconfigure.SpringBootApplication;
import org.springframework.stereotype.Controller;
import org.springframework.web.bind.annotation.RequestMapping;
import org.springframework.web.bind.annotation.ResponseBody;
@Controller//标明这是一个SpringMVC的Controller控制器;
@SpringBootApplication//Spring Boot项目的核心注解,主要目的是开启自动配置。
//SpringBootApplication:包含@Configuration、@EnableAutoConfiguration、@ComponentScan
public class HelloApplication {
@RequestMapping("hello")//请求路径
@ResponseBody//返回json数据
public String hello() {
return "hello world! 你好世界!";
}
//在main方法中启动一个应用,即:这个应用的入口
public static void main(String[] args) {
//springboot的启动入口
SpringApplication.run(HelloApplication.class, args);
}
}
在浏览器中输入请求地址如图所示:

