Linux yum安装MySQL5.7,及远程连接mysql(亲测有效!)
一、安装配置MySQL的yum源
| 1 2 3 4 5 6 7 8 9 10 |
|

检查是否有mysql57-community-dmr这个源,如上图所示。
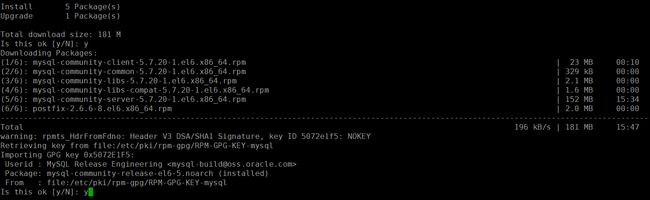
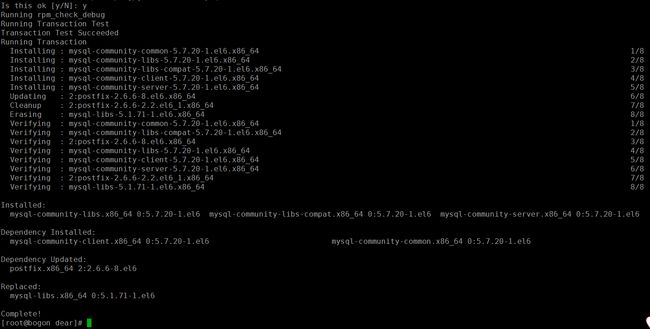
二、yum安装MySQL5.7
# 安装MySQL5.7
yum install mysql-community-server
报错; 您可以尝试添加 --skip-broken 选项来解决该问题 您可以尝试执行:rpm -Va --nofiles --nodigest
修改/etc/yum.repos.d/mysql-community.repo 源文件
vim /etc/yum.repos.d/mysql-community.repo

然后再次执行yum install mysql-community-server

三、启动MySQL
# 禁用selinux
setenforce 0
sed -i '/^SELINUX=/c\SELINUX=disabled' /etc/selinux/config
# 启动mysqld,启动之前先修改/etc/my.cnf配置文件,本文用默认的配置。
service mysqld start


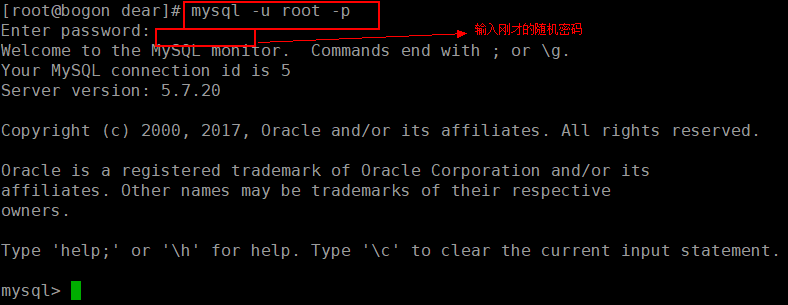
四、连接MySQL并修改密码
[root@iZ2zeintcn2jtegaarzs4yZ ~]# grep "password" /var/log/mysqld.log

[root@iZ2zeintcn2jtegaarzs4yZ ~]# mysql -uroot -p
mysql> set global validate_password_policy=0;
mysql> set global validate_password_length=1;
mysql> set password=password('123456');

五、使用Navicat远程连接MySQL报错1103
| 1 |
|
mysql> grant all privileges on *.* to 'root'@'%' identified by 'Password123@mysql' with grant option;
mysql> flush privileges; 
开放3306端口;
[root@iZrj98hvt5pgeax2pgdjw3Z ~]# vi /etc/sysconfig/iptables
防火墙开放3306端口
1、打开防火墙配置文件
vi /etc/sysconfig/iptables
如果没有这个文件,需要安装iptables
#先检查是否安装了iptables
service iptables status
#安装iptables
yum install -y iptables
#升级iptables
yum update iptables
#安装iptables-services
yum install iptables-services
禁用/停止自带的firewalld服务
#停止firewalld服务
systemctl stop firewalld
#禁用firewalld服务
systemctl mask firewalld
开启iptables服务
![]()
#注册iptables服务
#相当于以前的chkconfig iptables on
systemctl enable iptables.service
#开启服务
systemctl start iptables.service
#查看状态
systemctl status iptables.service
vi /etc/sysconfig/iptables
2、增加下面一行
注意:增加的开放3306端口的语句一定要在icmp-host-prohibited之前
-A INPUT -m state --state NEW -m tcp -p tcp --dport 3306 -j ACCEPT
3、重启防火墙
service iptables restart
附:个人配置
![]()
# Firewall configuration written by system-config-firewall
# Manual customization of this file is not recommended.
*filter
:INPUT ACCEPT [0:0]
:FORWARD ACCEPT [0:0]
:OUTPUT ACCEPT [0:0]
-A INPUT -m state --state ESTABLISHED,RELATED -j ACCEPT
-A INPUT -p icmp -j ACCEPT
-A INPUT -i lo -j ACCEPT
-A INPUT -i eth0 -j ACCEPT
-A INPUT -m state --state NEW -m tcp -p tcp --dport 22 -j ACCEPT
-A INPUT -m state --state NEW -m tcp -p tcp --dport 80 -j ACCEPT
-A INPUT -m state --state NEW -m tcp -p tcp --dport 3306 -j ACCEPT
-A FORWARD -m state --state ESTABLISHED,RELATED -j ACCEPT
-A FORWARD -p icmp -j ACCEPT
-A FORWARD -i lo -j ACCEPT
-A FORWARD -i eth0 -j ACCEPT
-A INPUT -j REJECT --reject-with icmp-host-prohibited
-A FORWARD -j REJECT --reject-with icmp-host-prohibited
COMMIT