CentOS7.4搭建LAMP环境安装WordPress详细图解
实验环境
服务器操作系统:CentOS 7.4(Linux)
博客部署服务器:Apache
后台语言:PHP
数据库:MySql
前端框架:WordPress
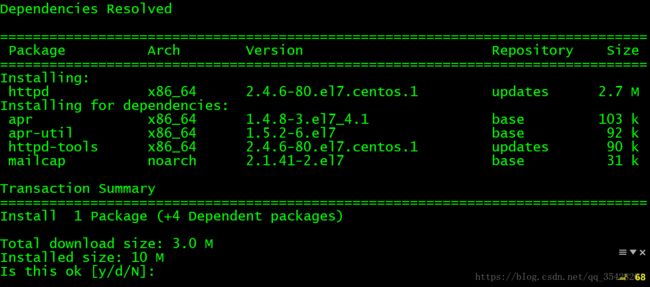
安装Apache(Apache软件安装包叫httpd)
yum install httpd->y
安装完成
开启 Apache服务
systemctl start httpd设置Apache开机启动
systemctl enable httpd接下来就可以验证Apache是否安装成功了
由于CentOS7安全性问题,需要手工关闭一下防火墙
先查看一下防火墙状态
systemctl list-unit-files|grep firewalld.service关闭防火墙
systemctl stop firewalld.service #停止firewall
systemctl disable firewalld.service #禁止firewall开机启动
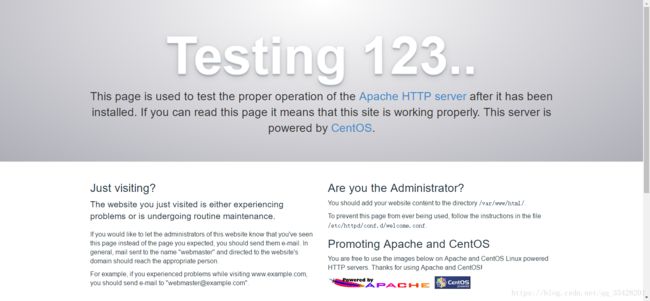
这样就可以验证Apache是否安装成功了。
打开浏览器,输入你虚拟机或者服务器IP(如果IP是私有IP,需要在同一LAN下查看)出现这个界面说明你的Apache安装成功了。
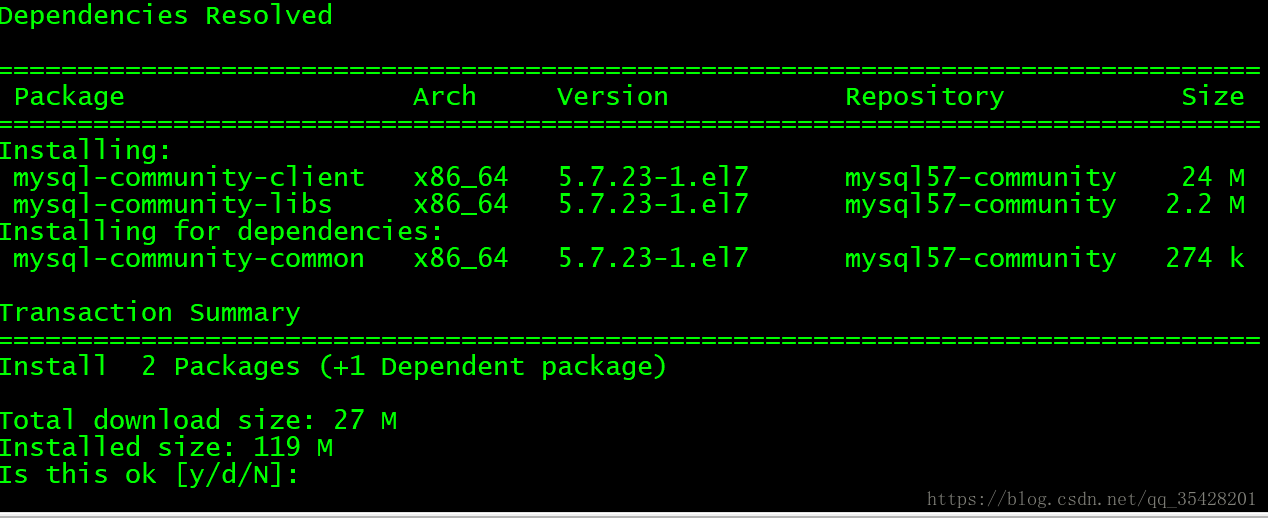
安装数据库Mysql
rpm -Uvh http://dev.mysql.com/get/mysql-community-release-el7-9.noarch.rpm
yum install mysql mysql-server mysql-libs mysql-server
->y
开机默认启动Apache 和Mysql 服务
systemctl enable httpd.service
systemctl enable mysqld.service
建议再重启一下这两个服务
systemctl restart httpd.service
systemctl restart mysqld.service
测试Mysql是否安装成功:
mysql -u root -p尴尬的报了这个错误,当然有解决方法啦
ERROR 1045 (28000): Access denied for user 'root'@'localhost' (using password: NO)解决方法
1.关闭Mysql服务
systemctl stop mysqld.service2.修改配置文件无密码登录
vi /etc/my.cnf最后加上
skip-grant-tables3.启动Mysql
systemctl start mysqld.service4.登陆Mysql
mysql -u root5.修改密码
use mysql;

update mysql.user set authentication_string=password('wordpress2018') where user='root' ;  //我这里设置的密码为wordpress2018,可以更改为你需要的密码,牢记密码
6.再次打开my.cnf 把那最后那句刚添加的skip-grant-tables再删掉
7.重启Mysql
systemctl restart mysqld.service再次验证
mysql -u root -p输入密码 wordpress2018
出现下面这些代码,说明你的Mysql已经安装成功
Welcome to the MySQL monitor.  Commands end with ; or \g.
Your MySQL connection id is 2
Server version: 5.7.23

Copyright (c) 2000, 2018, Oracle and/or its affiliates. All rights reserved.

Oracle is a registered trademark of Oracle Corporation and/or its
affiliates. Other names may be trademarks of their respective
owners.

Type 'help;' or '\h' for help. Type '\c' to clear the current input statement.
在 Mysql 中新建数据库
create database wordpress;


Query OK, 1 row affected (0.00 sec)//出现这句话说明创建成功
安装PHP以及相关组件 ->y
yum install phpyum install php-mysqlyum install php-gd php-imap php-ldap php-odbc php-pear php-xml php-xmlrpc测试PHP是否安装成功
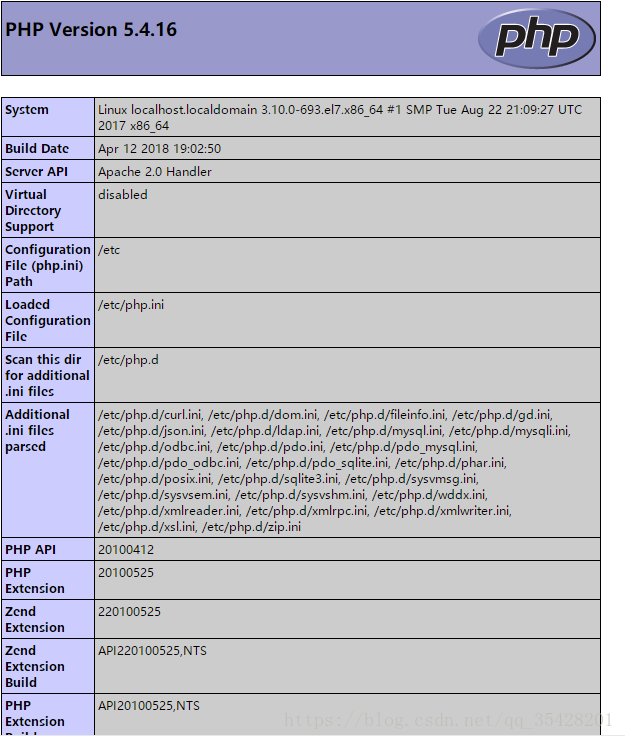
在/var/www/html下建立一个test.php文件:
vi /var/www/html/test.php文件内输入
现在你在浏览器种输入
http://x.x.x.x/test.php 就可以看到 PHP 的信息了
下载安装WordPress
WordPress源有很多,你可以直接选用官网自带的,
wget http://cn.wordpress.org/wordpress-4.9.8-zh_CN.zip //使用wget下载或者自己到适合的wordpress包,然后上传到服务器
解压
unzip wordpress-4.9.4-zh_CN.zip 又出现错误了,因为这是一台新的,好多软件包没有安装,现在还需要再安装一个解压软件
-bash: unzip: command not foundyum install unzip然后再执行解压命令
unzip wordpress-4.9.4-zh_CN.zip 将wordprss下所有的文件复制到apache服务器下的根目录
cp -r wordpress/* /var/www/html/配置wordpress的配置文件
进入html文件夹下,html是apache的根目录
cd /var/www/html/复制配置文件
cp wp-config-sample.php wp-config.php编辑wordpress的配置文件
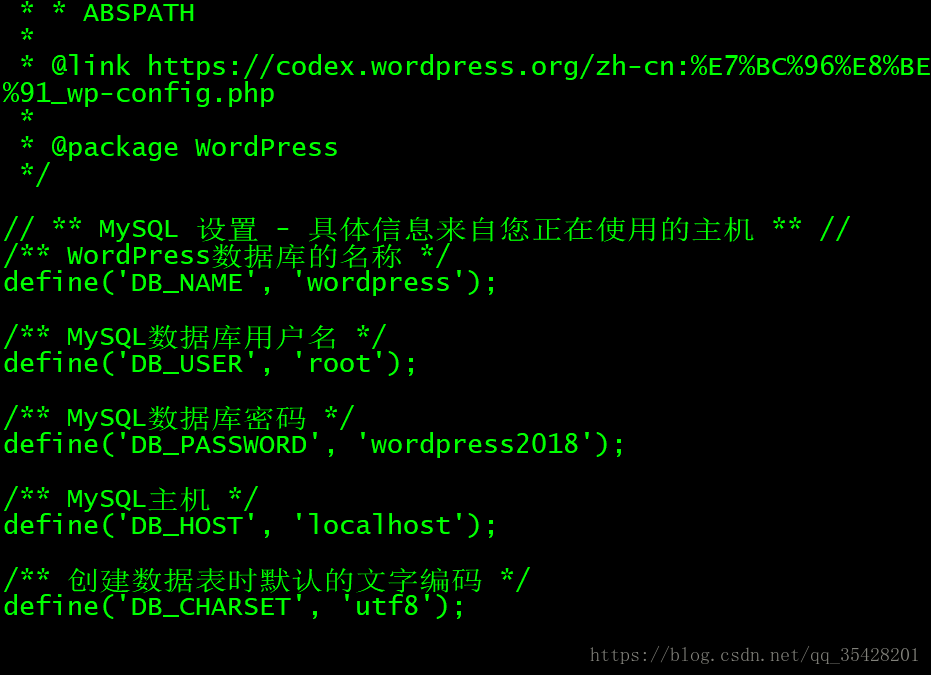
vi wp-config.php然后输入数据库名称,例如我上面创建的数据库wordpress,然后是数据库的用户名和密码,“MySQL主机”一般默认为localhost,不需要修改
把这一段,DB_NAME,DB_USER,DB_PASSWORD更改成之前你配置的就可以了。
// ** MySQL 设置 - 具体信息来自您正在使用的主机 ** //
/** WordPress数据库的名称 */
define('DB_NAME', 'wordpress');

/** MySQL数据库用户名 */
define('DB_USER', 'root');

/** MySQL数据库密码 */
define('DB_PASSWORD', 'wordpress2018');

/** MySQL主机 */
define('DB_HOST', 'localhost');

/** 创建数据表时默认的文字编码 */
define('DB_CHARSET', 'utf8');
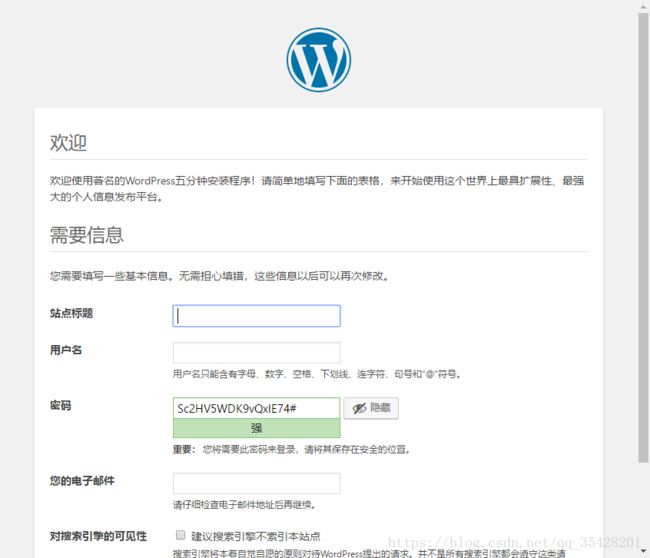
再次打开浏览器,输入IP,即可看到Wordpress配置安装界面,然后安装成功,可以正常使用了。
