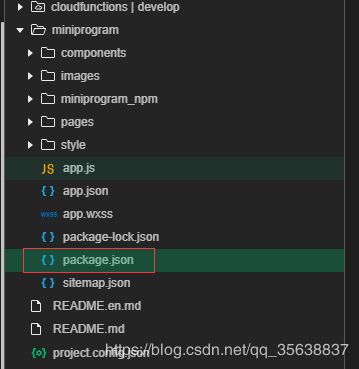
小程序入门
注:本文档是学习慕课网谢成老师的轻松入门微信小程序与云开发的简单总结,有兴趣的朋友可以学习一下。
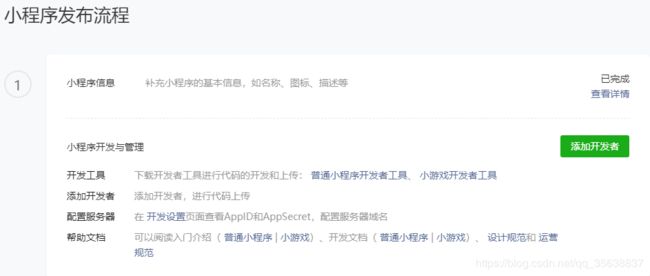
1.注册小程序账号
小程序appid和开发工具
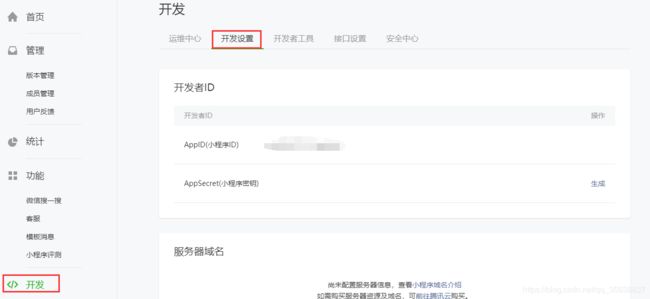
点击左侧开发>开发设置可以找到小程序对应的appid,在创建项目时会用到
2.工具准备
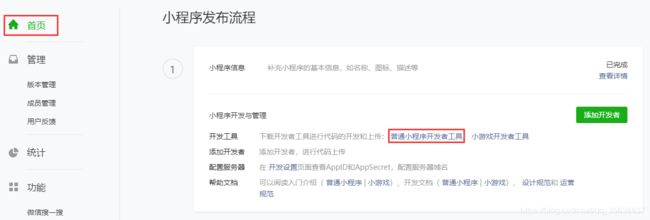
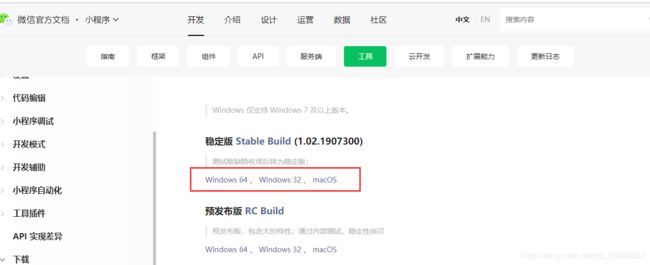
点击首页,点击普通小程序开发者工具跳转到小程序开发文档,在工具栏中点击微信开发者工具跳转到工具页面,根据具体情况选择对应的开发工具进行安装,下载后点击安装即可。

3.开发工具的基本使用
在打开小程序开发工具后,需要通过微信扫描进行登录,登录成功后如下界面:
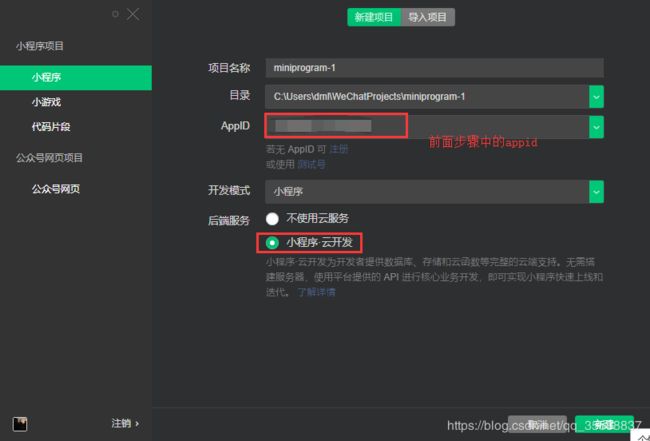
如果没有注册小程序,可以选择测试号进行创建,但是测试号不能进行云开发,不需要可以不选择云开发。
3.1 工具介绍
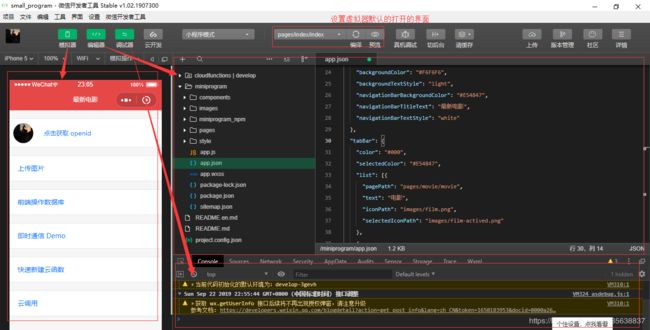
工具主要分为三大块,模拟器、编辑器、调试器,可根据需要选择显示板块。在设置中可以对工具进行外观、字体等设置。
3.2 项目结构
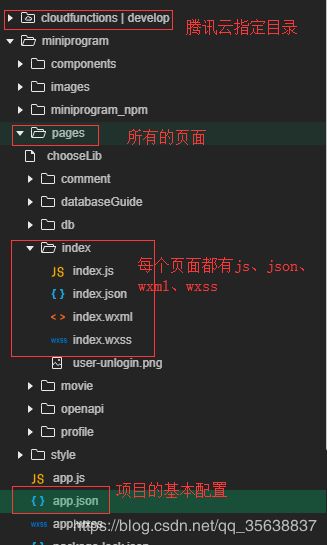
所有的页面在pages目录下,每个页面由js、json、wxml、wxss
js:脚本逻辑文件
json:配置文件,json格式进行配置
wxml:相当于html
wxss:相当于css
3.3 配置文件
项目配置project.config.json
全局配置app.json
4.基础知识
4.1 tabBar
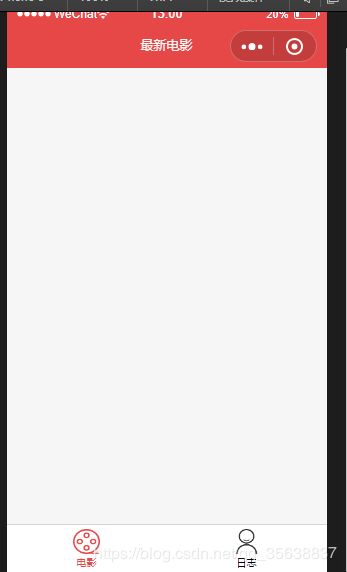
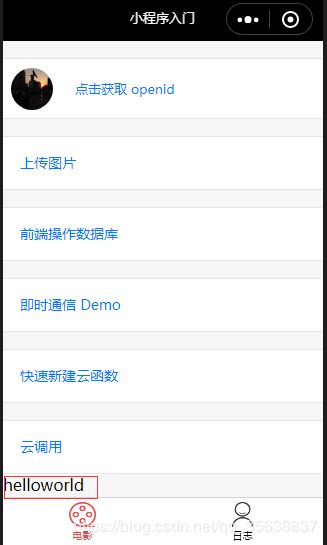
4.1.1 效果
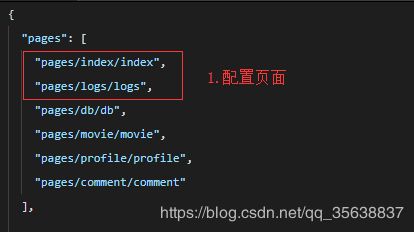
4.1.2 页面配置
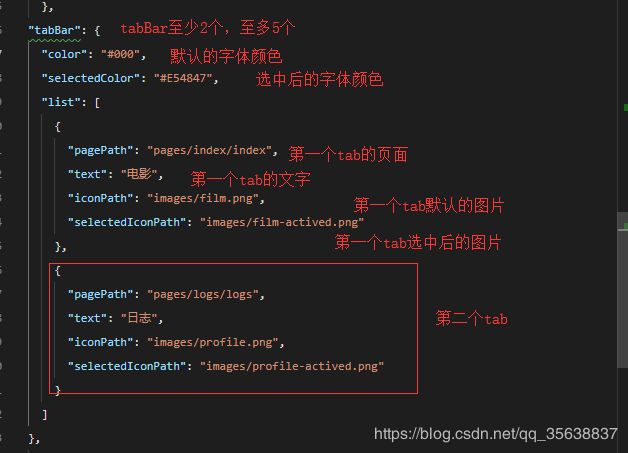
4.1.3 tabBar的配置
4.1.4 代码
  "pages": [
    "pages/index/index",
    "pages/logs/logs",

  ],
"tabBar": {
  "color": "#000",
  "selectedColor": "#E54847",
  "list": [
    {
      "pagePath": "pages/index/index",
      "text": "电影",
      "iconPath": "images/film.png",
      "selectedIconPath": "images/film-actived.png"
    },
    {
      "pagePath": "pages/logs/logs",
      "text": "日志",
      "iconPath": "images/profile.png",
      "selectedIconPath": "images/profile-actived.png"
    }
  ]
},
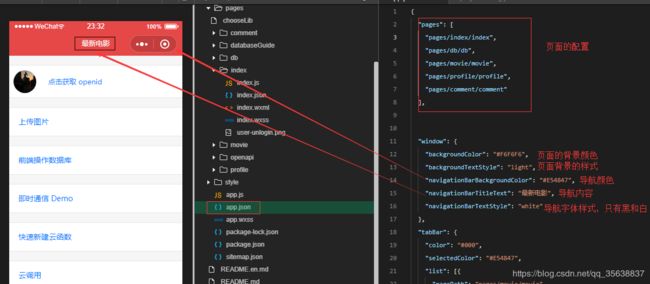
4.2 配置页面头部样式
4.3 数据绑定
4.3.1 简单绑定
在wxml文件中根据{{}}进行取值
在js文件中data中设置对应的值
如:index.wxml文件中
{{msg}}
在index.js文件中:
Page({
  data: {
    msg: 'helloworld'
  },
4.3.2 逻辑判断
不显示
显示
注意与hidden意义不一样,hidden只是不显示,但是存在页面中。在频繁切换场景下使用hidden。
4.3.3 循环
{{item}} --{{index}}
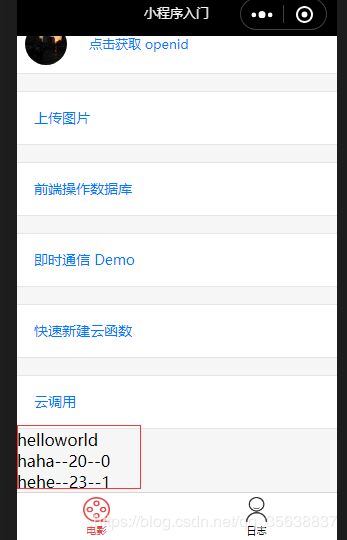
4.3.4 对象 + 循环
index.js
  data: {
    list: [
      {
        name: 'haha',
        age: 20
      }, {
        name: 'hehe',
        age: 23
      }
    ]
  },
index.wxml
{{item.name}}--{{item.age}}--{{index}}
4.4 事件绑定
index.wxml
index.js
click: function(event) {
	//获取data-id的值
    var id = event.target.dataset.id;
    console.log(id)
    console.log("点击啦");
  },
5.云开发
开通云开发,点击开发工具的“云开发”:

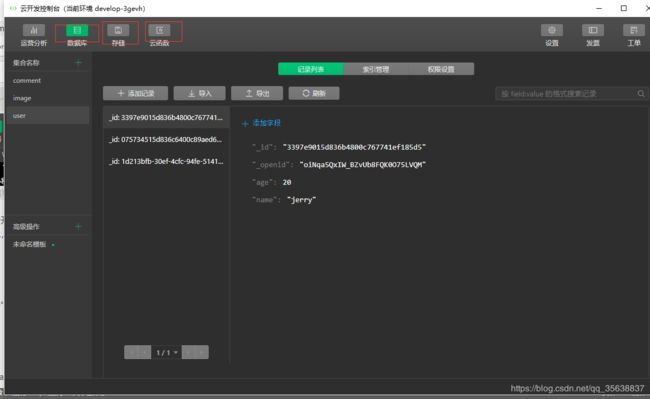
第一次开通是需要进行开通的,点击开通,设置环境名称等即可开通,每个小程序账号可以免费创建两个环境,可以分别作为测试、开发环境。可以通过界面进行管理:
5.1 数据库
选择数据库,创建集合“user”表进行测试。
需要进行初始化:
//初始化数据库
const db = wx.cloud.database();
5.1.1 新增
 //插入
  insert: function(){
    db.collection('user').add({
      data: {
        name: 'jack',
        age: 18
      }
    }).then(res=>{
      console.log(res);
    }).catch(err=>{
      console.log(err);
    })
  },
5.1.2 删除
//删除单条数据
  delete:function() {
    db.collection('user').doc('该条数据的id').remove().then(res =>{
      console.log(res);
    }).catch(err => {
      console.log(err);
    })
  },
5.1.3 修改
//更新
  update:function(){
    db.collection('user').doc('该条数据的id').update({
      data: {
        name: 'Tom'
      }
    }).then(res => {
      console.log(res);
    }).catch(err =>{
      console.log(err);
    })
  },
5.1.4 查询
//查询
  search:function(){
    db.collection('user').where({
      name: 'jerry'
    }).get().then(res => {
      console.log(res);
    }).catch(err =>{
      console.log(err);
    })
  },
5.2 云函数
5.2.1 云函数环境配置
因为云函数运行环境是node.js,所以需要安装node环境,点击node.js官网下载安装即可,安装可参考安装教程。
新建云函数:

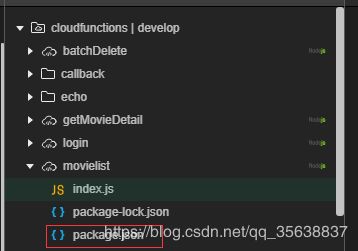
新建成功,会在云开发环境下有对应的函数的文件夹,下面有一个index.js文件和packge.json文件

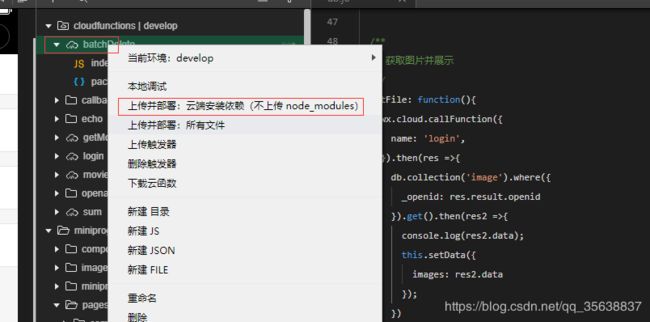
在编写云函数完成后,将云函数进行部署,注意函数改动后都需要进行重新上传。
5.2.1 自定义云函数批量删除
编写云函数代码,云函数对应的index.js文件:
// 云函数入口文件
const cloud = require('wx-server-sdk')
const db = cloud.database();
cloud.init()


// 云函数入口函数
exports.main = async (event, context) => {
  try{
    return await db.collection('user').where({	//表名
      name: 'jerry'	//删除条件
    }).remove();
  } catch(e) {
    console.error(e);
  }
}
调用云函数,调用页面对应js文件:
/**
 * 批量删除
 */
  batchDelete: function(){
    wx.cloud.callFunction({
      name: 'batchDelete'	//函数名
    }).then(res =>{
      console.log(res);
    }).catch(err =>{
      console.error(err);
    })
  },
5.2.2 调用已有云函数
获取用户的openid
//获取用户的openid
  getOpenId: function(){
   wx.cloud.callFunction({
     name: 'login'
   }).then(res => {
     console.log(res);
   }).catch(err => {
     console.log(err);
   })
  },
5.3 云存储
5.3.1 上传图片
//上传图片
  upload: function(){
    //选择图片
    wx.chooseImage({
      count: 1,
      sizeType: ['original', 'compressed'],
      sourceType: ['album', 'camera'],
      success(res) {
        // tempFilePath可以作为img标签的src属性显示图片
        const tempFilePaths = res.tempFilePaths[0];
        console.log(tempFilePaths);
        wx.cloud.uploadFile({
          cloudPath: new Date().getTime() + '.png', //上传后的文件名
          filePath: tempFilePaths,//上传的临时文件路径
          success: res =>{
            console.log(res.fileID);
            db.collection('image').add({
              data: {
                fileId: res.fileID
              }
            }).then(res => {
              console.log(res);
            }).catch(err =>{
              console.log(err);
            })
          },
          fail: console.error
        })
      }
    })
  },
5.3.2 获取图片并展示
 /**
   * 获取图片并展示
   */
  getFile: function(){
    wx.cloud.callFunction({
      name: 'login',
    }).then(res =>{
      db.collection('image').where({
        _openid: res.result.openid
      }).get().then(res2 =>{
        console.log(res2.data);
        this.setData({
          images: res2.data
        });
      })
    })
  },
5.3.3 下载图片
/**
   * 下载图片
   */
  downloadFile: function(event){
    console.log("event.target.dataset.fileid:" + event.target.dataset.fileid);
    console.log(event)
    wx.cloud.downloadFile({
      fileID: event.target.dataset.fileid,
      success: res =>{
        //返回临时文件路径
        console.log("下载文件" + res.tempFilePath);
        //保存图片到
        wx.saveImageToPhotosAlbum({
          filePath: res.tempFilePath,
          success(res) {
            wx.showToast({
              title: '保存成功',
            })
           }
        })
      },
      fail: console.error
    })
  },
6.引入第三方组件库
//初始化文件
npm init
输入后所有设置为默认,回车即可。
npm i vant-weapp -S --production
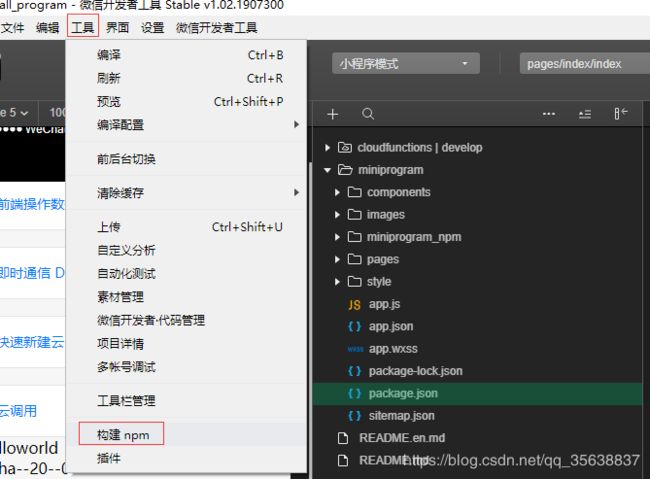
安装完成后,点击工具,选择构建npm:
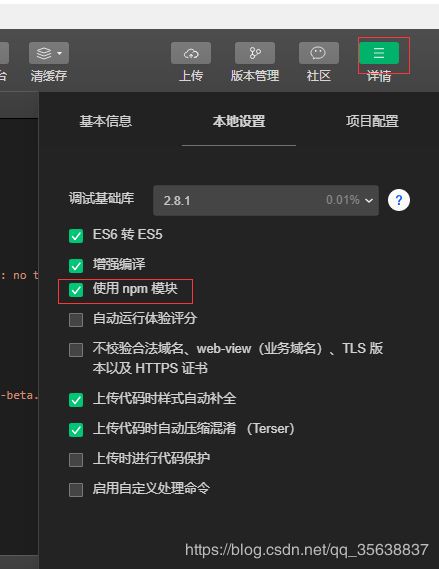
点击详情,选择使用npm模块:
使用
先引入:
在页面的json文件引入对应组件,如按钮:
{
  "usingComponents": {
      "van-button": "vant-weapp/button"
  }
}
wxml文件:
危险按钮
更多使用请查看官网。
7.云函数发送请求
地址:request-promise
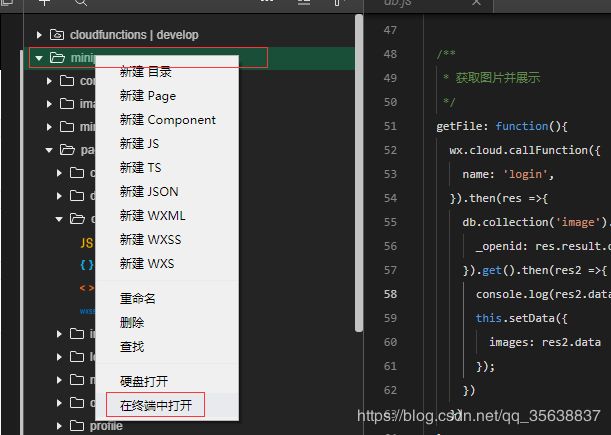
新建云函数,在云函数打开终端进行安装:
npm install --save request
npm install --save request-promise
// 云函数入口文件
const cloud = require('wx-server-sdk')

cloud.init()

var rp = require('request-promise');

// 云函数入口函数
exports.main = async (event, context) => {
  // http://api.douban.com/v2/movie/in_theaters?apikey=0df993c66c0c636e29ecbb5344252a4a&start=0&count=10
  return rp('http://api.douban.com/v2/movie/in_theaters?apikey=0df993c66c0c636e29ecbb5344252a4a&start='+ event.start + '&count=' + event.count)
    .then(function (res) {
      console.log(res);
      return res;
    })
    .catch(function (err) {
      console.log(err);
    });
}
调用:
getMovieList: function(){
  wx.showLoading({
    title: '加载中',
  })
  console.log("this.data.movieList.length:" + this.data.movieList.length)
  wx.cloud.callFunction({
    name: 'movielist',
    data: {
      start: this.data.movieList.length,
      count: 10
    }
  }).then(res => {
    console.log(res);
    this.setData({
      movieList: this.data.movieList.concat(JSON.parse(res.result).subjects),
    });
    wx.hideLoading();
  }).catch(err => {
    console.error(err);
    wx.hideLoading();
  })
},
