SpringBoot2.0.5整合Dubbo及MyBatis实现分布式架构
一.框架的搭建
1.由于Dubbo官方推荐使用Zookeeper作为注册中心,所以我们先搭建Zookeeper
(1)在VMware中安装CentOS操作系统,这里就做介绍了,网上有很多教程。
(2)安装JDK(此步也跳过)
(3)上传zookeeper-3.4.6.tar.gz到linux系统中(下载地址:http://mirrors.hust.edu.cn/apache/zookeeper/)
![]()
(4)解压至/usr/local/路径下
tar -zxvf zookeeper-3.4.6.tar.gz -C /usr/local/(5) 在解压后的zookeeper-3.4.6中创建data目录
mkdir data(6)进入conf目录,将zoo_sample.cfg 改名为 zoo.cfg
cd conf
mv zoo_sample.cfg zoo.cfg
(7)编辑zoo.cfg文件,修改其中的一个配置
vim zoo.cfg修改配置
dataDir=/usr/local/zookeeper-3.4.6/data按Esc 后按 : 后输入wq回车进行保存
(8)启动Zookeeper,进入bin目录,其中start开启服务,stop关闭服务,status查看服务状态
./zKServer.sh start|stop|status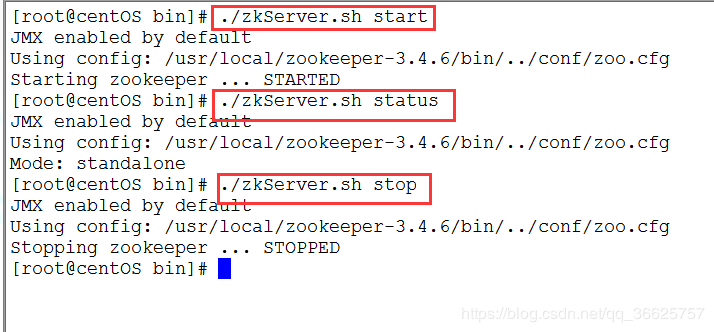
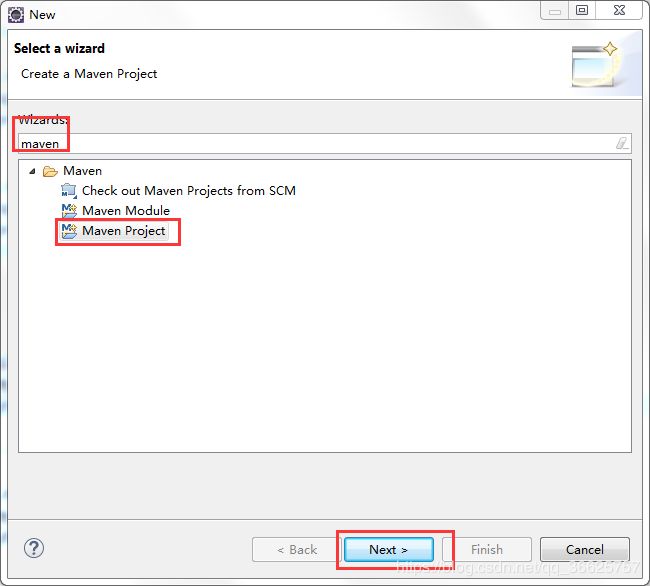
2.创建整个项目的父工程,用于控制版本
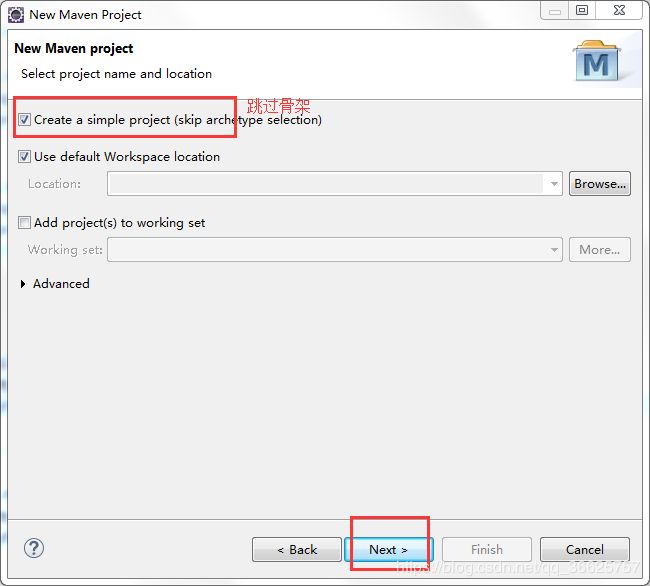
(1)搭建父工程
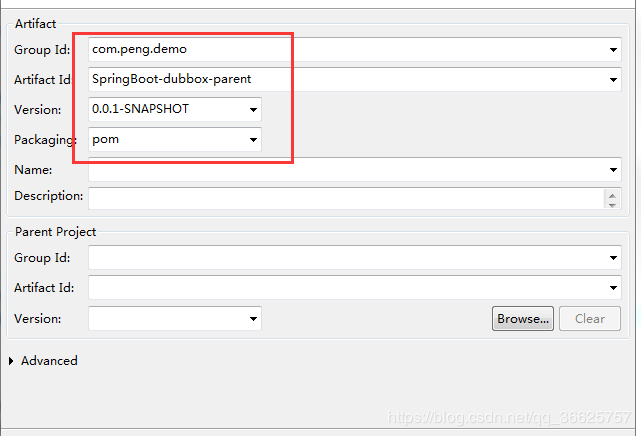
(2)加入pom依赖
  4.0.0
  com.peng.demo
  SpringBoot-dubbox-parent
  0.0.1-SNAPSHOT
  pom


	    UTF-8
		UTF-8
		1.8
	    2.0.5.RELEASE
	    0.2.0
	    1.3.2
	    5.1.42


				org.springframework.boot
				spring-boot-dependencies
				2.0.5.RELEASE
				pom
				import


		        org.springframework.boot
		        spring-boot-starter-web
		        ${springboot.version}


	            org.springframework.boot
	            spring-boot-starter-thymeleaf
	            ${springboot.version}


		        org.springframework.boot
		        spring-boot-starter-test
		        ${springboot.version}
		        test


		        mysql
		        mysql-connector-java
		        ${mysql.version}


				org.mybatis.spring.boot
				mybatis-spring-boot-starter
				${mybatis.version}


			        com.github.pagehelper
			        pagehelper-spring-boot-starter
			        1.2.3


			    com.alibaba.boot
			    dubbo-spring-boot-starter
			    ${dubbo.version}
3.创建实体工程
(1)在父工程上右键->New->Other->搜索Maven->选中Maven Module->Next->选中Craete a simple project.....->输入Module Name为SpringBoot-dubbox-dao->next->next
(2)创建实体类(实体类在分布式之间传输一定要实现序列化接口)
import java.io.Serializable;
public class TbUser implements Serializable {
private Integer id;
private String email;
private String lastName;
public Integer getId() {
return id;
}
public void setId(Integer id) {
this.id = id;
}
public String getEmail() {
return email;
}
public void setEmail(String email) {
this.email = email;
}
public String getLastName() {
return lastName;
}
public void setLastName(String lastName) {
this.lastName = lastName;
}
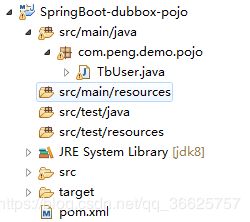
}(3)工程目录
4.创建Dao工程,此框架将操作数据库工程单独抽成一个jar包,其他工程依赖于Dao
(1)在父工程上右键->New->Other->搜索Maven->选中Maven Module->Next->选中Craete a simple project.....->输入Module Name为SpringBoot-dubbox-pojo->next->next
(2)加入pom依赖
  4.0.0

    com.peng.demo
    SpringBoot-dubbox-parent
    0.0.1-SNAPSHOT

  SpringBoot-dubbox-dao


        mysql
        mysql-connector-java


        org.mybatis.spring.boot
        mybatis-spring-boot-starter


	        com.github.pagehelper
	        pagehelper-spring-boot-starter


    	com.peng.demo
    	SpringBoot-dubbox-pojo
    	0.0.1-SNAPSHOT
(3)创建mapper文件
import org.apache.ibatis.annotations.Select;

import com.peng.demo.pojo.TbUser;

public interface TbUserMapper {

	@Select("select * from tb_user where id=#{id}")
	TbUser findById(Integer id);

}
(4)创建MyBatis配置文件
import org.mybatis.spring.annotation.MapperScan;
import org.mybatis.spring.boot.autoconfigure.ConfigurationCustomizer;
import org.springframework.context.annotation.Bean;
import org.springframework.context.annotation.Configuration;

@Configuration
@MapperScan("com.peng.demo.mapper")
public class MyBatisConfig {

	@Bean
	public ConfigurationCustomizer configurationCustomizer(){
		return new ConfigurationCustomizer(){
			public void customize(org.apache.ibatis.session.Configuration configuration) {
				//开启驼峰命名法
				configuration.setMapUnderscoreToCamelCase(true);
			}
		};
	}

}
注:@MapperScan配置扫描基本mapper
(5)在resources下创建application-db.properties文件,并编辑
#配置数据库
spring.datasource.driver-class-name=com.mysql.jdbc.Driver
spring.datasource.url=jdbc:mysql://192.168.25.128:3306/springboot?autoReconnect=true&useUnicode=true&characterEncoding=utf8
spring.datasource.username=root
spring.datasource.password=123456
#配置PageHelper
#配置使用的数据库
pagehelper.helper-dialect=mysql
#pageNum小于1会查询第一页,如果pageNum大于pageSize会查询最后一页
pagehelper.reasonable=true
pagehelper.supportMethodsArguments=true
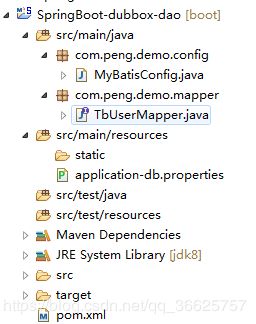
pagehelper.params=count=countSql(6)工程目录
5.创建服务接口工程,由于Dubbo要求,服务的提供者与服务的消费者使用的接口必须在同一个包中,所以将服务接口单独抽成一个jar包,服务的提供者与服务的消费者均需要依赖于这个jar包
(1)在父工程上右键->New->Other->搜索Maven->选中Maven Module->Next->选中Craete a simple project.....->输入Module Name为SpringBoot-dubbox-interface->next->next
(2)加入pom依赖
  4.0.0

    com.peng.demo
    SpringBoot-dubbox-parent
    0.0.1-SNAPSHOT

  SpringBoot-dubbox-interface


  		com.peng.demo
  		SpringBoot-dubbox-pojo
  		0.0.1-SNAPSHOT
(3)创建UserService接口
import com.peng.demo.pojo.TbUser;
public interface UserService {
TbUser findById(Integer id);
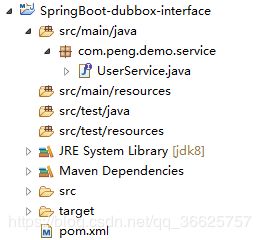
}(4)工程目录
6.创建服务实现工程
(1)在父工程上右键->New->Other->搜索Maven->选中Maven Module->Next->选中Craete a simple project.....->输入Module Name为SpringBoot-dubbox-service->next->next
(2)加入pom依赖
  4.0.0

    com.peng.demo
    SpringBoot-dubbox-parent
    0.0.1-SNAPSHOT

  SpringBoot-dubbox-service


        org.springframework.boot
        spring-boot-starter-web


        org.springframework.boot
        spring-boot-starter-test
        test


	    com.alibaba.boot
	    dubbo-spring-boot-starter


  		com.peng.demo
  		SpringBoot-dubbox-interface
  		0.0.1-SNAPSHOT


  		com.peng.demo
  		SpringBoot-dubbox-dao
  		0.0.1-SNAPSHOT


				org.springframework.boot
				spring-boot-maven-plugin


					com.peng.demo.SpringBootDubboxService


							repackage
(3)创建程序主入口类
import org.springframework.boot.SpringApplication;
import org.springframework.boot.autoconfigure.SpringBootApplication;

@SpringBootApplication
public class SpringBootDubboxService {
	public static void main(String[] args) {
		SpringApplication.run(SpringBootDubboxService.class, args);
	}
}
(4)创建服务实现类
import org.springframework.beans.factory.annotation.Autowired;

import com.alibaba.dubbo.config.annotation.Service;
import com.peng.demo.mapper.TbUserMapper;
import com.peng.demo.pojo.TbUser;
import com.peng.demo.service.UserService;

@Service
public class UserServiceImpl implements UserService {

	@Autowired
	private TbUserMapper tbUserMapper;

	public TbUser findById(Integer id) {
		return tbUserMapper.findById(id);
	}

}
注:这里的@Service为Dubbo中的
(5)配置文件
#配置dubbo
dubbo.protocol.id=dubbo
dubbo.protocol.name=dubbo
dubbo.protocol.port=20881
dubbo.application.name=SpringBoot-dubbox-service
dubbo.registry.address=zookeeper://192.168.25.128:2181
dubbo.scan.basePackages=com.peng.demo.service.impl
#加载Dao中的配置文件
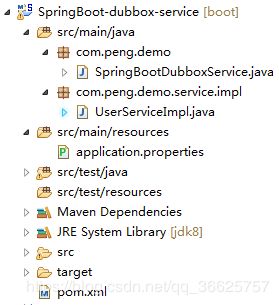
spring.profiles.include=db(6)工程目录
7.创建Web工程
(1)在父工程上右键->New->Other->搜索Maven->选中Maven Module->Next->选中Craete a simple project.....->输入Module Name为SpringBoot-dubbox-web->next->next
(2)加入pom依赖
  4.0.0

    com.peng.demo
    SpringBoot-dubbox-parent
    0.0.1-SNAPSHOT

  SpringBoot-dubbox-web


        org.springframework.boot
        spring-boot-starter-web


        org.springframework.boot
        spring-boot-starter-thymeleaf


	    com.alibaba.boot
	    dubbo-spring-boot-starter


    	com.peng.demo
    	SpringBoot-dubbox-interface
    	0.0.1-SNAPSHOT


				org.springframework.boot
				spring-boot-maven-plugin


					com.peng.demo.SpringBootDubboxWeb


							repackage
(3)创建主程序类
import org.springframework.boot.SpringApplication;
import org.springframework.boot.autoconfigure.SpringBootApplication;

@SpringBootApplication
public class SpringBootDubboxWeb {
	public static void main(String[] args) {
		SpringApplication.run(SpringBootDubboxWeb.class, args);
	}
}
(4)编写Controller
import org.springframework.web.bind.annotation.RequestMapping;
import org.springframework.web.bind.annotation.RestController;

import com.alibaba.dubbo.config.annotation.Reference;
import com.peng.demo.pojo.TbUser;
import com.peng.demo.service.UserService;

@RestController
public class UserController {

	@Reference(timeout=10000)
	private UserService userService;

	@RequestMapping("/findbyId")
	public TbUser findById(Integer id){
		return userService.findById(id);
	}

}
注:其中的@Reference(timeout=10000)为Dubbo中的,10000为调用服务超时时间
(5)配置文件
#配置dubbo
dubbo.application.name=SpringBoot-dubbox-web
dubbo.registry.address=zookeeper://192.168.25.128:2181
dubbo.scan.basePackages=com.peng.demo.controller
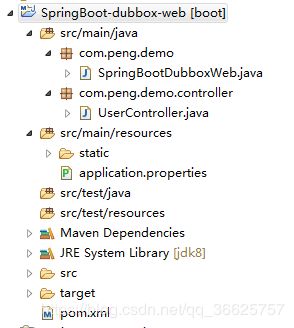
server.port=8081(6)工程目录
8.测试
1.将整体工程先安装到maven仓库,父工程右键->Run as->Maven install
2.先启动SpringBoot-dubbox-service工程,运行SpringBootDubboxService的main方法
3.在启动SpringBoot-dubbox-web工程,运行SpringBootDubboxWeb的main方法
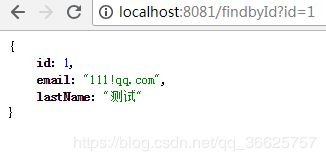
4.在浏览器输入http://localhost:8081/findbyId?id=1即可查看到数据
9.pagehelper的使用
1.依赖引入,工程创建已经引入(跳过)
2.数据库多添加几条数据(跳过)
3.TbUserMapper中加入以下方法
@Select("select * from tb_user")
List findByPage();
4.UserService中加入以下方法
List findByPage(); 5.UserServiceImpl添加方法实现
public List findByPage() {
	//参数一:页码    参数二:每页显示条数
	PageHelper.startPage(1, 3);
	return tbUserMapper.findByPage();
}
6.UserController添加访问接口
@RequestMapping("/findByPage")
public List findByPage(){
return userService.findByPage();
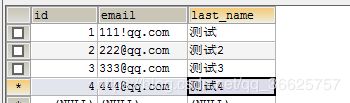
} 7.测试,浏览器输入http://localhost:8081/findByPage即可查到第一页数据

注:我这里数据库中存在四条数据,通过分页查到前三条。
10.结束
至此,SpringBoot整合Dubbo及MyBatis实现分布式已经完成啦,由于技术水平有限,如有错误,请留言更正。