整合SSH注解实现
整合SSH注解实现
- 目录
- 说明
- 项目的结构
- 配置web.xml
- 配置struts.xml
- 配置applicationContext.xml
- 配置User.hbm.xml
- 配置jdbc.properties
- Action层:UserAction.java
- Service层:UserService.java
- DAO层:UserService.java
- Entity层:User.java
- 注册界面:hello.html
- 显示界面:show.jsp
- 总结
目录
说明
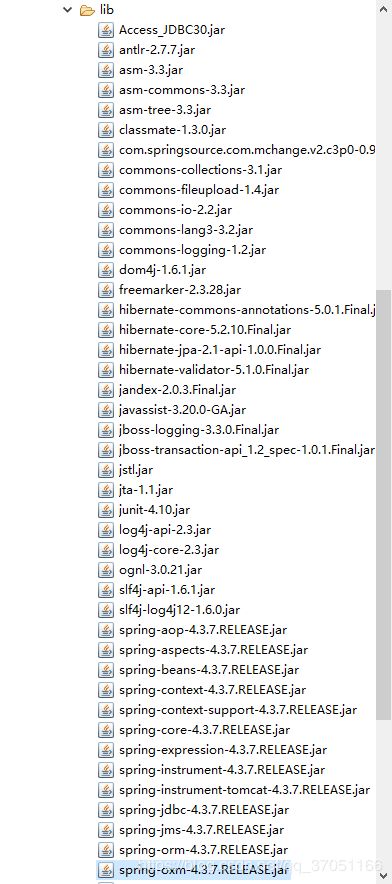
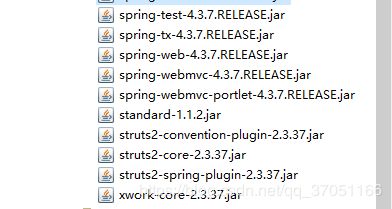
整合SSH的环境是:Eclipse+Tomcat 服务器+Access数据库。
项目的结构
图片:
配置web.xml
在整合ssh框架时需要先在web.xml中分别配置struts和spring,代码片.
<?xml version="1.0" encoding="UTF-8"?>
<web-app xmlns:xsi="http://www.w3.org/2001/XMLSchema-instance"
	xmlns="http://java.sun.com/xml/ns/javaee"
	xsi:schemaLocation="http://java.sun.com/xml/ns/javaee
						http://java.sun.com/xml/ns/javaee/web-app_2_5.xsd"
	id="WebApp_ID" version="2.5">
	<display-name>**项目名称**</display-name>

	<!-- 延迟加载问题 -->
	<filter>
		<filter-name>OpenSessionInViewFilter</filter-name>
		<filter-class>org.springframework.orm.hibernate5.support.OpenSessionInViewFilter</filter-class>
	</filter>
	<filter-mapping>
		<filter-name>OpenSessionInViewFilter</filter-name>
		<!--在csdn编辑器中我不知道如何把**"/和*打在一起"**,在粘贴时请删除两种中的空格 -->
		<url-pattern>/ *</url-pattern>
	</filter-mapping>

	<!-- 配置Struts2的核心过滤器,拦截/ *.action -->
	<filter>
		<filter-name>struts2</filter-name>
		<filter-class>org.apache.struts2.dispatcher.ng.filter.StrutsPrepareAndExecuteFilter</filter-class>
	</filter>
	<filter-mapping>
		<filter-name>struts2</filter-name>
		<!--在csdn编辑器中我不知道如何把**"/和*打在一起"**,在粘贴时请删除两种中的空格 -->
		<url-pattern>/ *</url-pattern>
	</filter-mapping>


	<!-- 配置Spring的监听器 -->
	<listener>
		<listener-class>org.springframework.web.context.ContextLoaderListener</listener-class>
	</listener>
	<!-- 引入spring配置文件applicationContext.xml,路径在classpath -->
	<context-param>
		<param-name>contextConfigLocation</param-name>
		<param-value>classpath:applicationContext.xml</param-value>
	</context-param>

	<!-- 注册页面 -->
	<welcome-file-list>
		<welcome-file>hello.html</welcome-file>
		<welcome-file>index.htm</welcome-file>
		<welcome-file>index.jsp</welcome-file>
		<welcome-file>default.html</welcome-file>
		<welcome-file>default.htm</welcome-file>
		<welcome-file>default.jsp</welcome-file>
	</welcome-file-list>
</web-app>
说明:
struts 2 的拦截器是 StrutsPrepareAndExecuteFilter,不要用错老版本的了。
提醒:
当复制粘贴网络上的配置文件 .xml时,在编辑器中可能会报错,有两个原因:
1. 复制粘贴后,编辑器没有反应过来。解决: 在编辑器中全选已经粘贴的内容,剪切,保存当前文件(空白的),再粘贴,这样就可以了。
2. 网络上复制粘贴的代码中含有不可见的字符,在编辑器中不能识别这样字符,就会报错。解决: 将报错的行的上下空白部分删除,再自行调整格式。
配置struts.xml
配置struts的struts.xml,使用通配符的方式来访问action,代码片.
<?xml version="1.0" encoding="UTF-8"?>
<!DOCTYPE struts PUBLIC "-//Apache Software Foundation//DTD Struts Configuration 2.0//EN" "http://struts.apache.org/dtds/struts-2.0.dtd">
<struts>

	<!-- 开启开发者模式,默认开启,devMode:devlementMode;即,可以随时调整文件,保存后即已默认加载了已变更内容。无需重启server或重新加载项目即可保存且展示变更。 -->
    <constant name="struts.devMode" value="true"/>
    <!-- 设置spring的自动装配方式,只有引入spring插件后才有效。可选值(name, type, auto, constructor,name)(默认name) -->
	<constant name="struts.objectFactory.spring.autoWire.alwaysRespect" value="true"/>
	<!-- 上传文件大小限制设置 -->
	<constant name="struts.multipart.maxSize" value="25242880" />
	<!-- 使用国际化,fileUpload是国际化资源文件 -->
	<constant name="struts.custom.i18n.resources" value="fileUpload"></constant>
	<!-- 编码格式 -->
    <constant name="struts.i18n.encoding" value="UTF-8" />

	<package name="mypackage" extends="struts-default" namespace="/">
		<!-- 定义一个拦截器 -->
        <interceptors>
            <interceptor name="authority" class="struts.myinterceptor"/>
            <!-- 拦截器栈 -->
            <interceptor-stack name="myinterceptor-stack">
            	<interceptor-ref name="authority" />
            	<!-- 默认拦截器栈 -->
                <interceptor-ref name="defaultStack" />
            </interceptor-stack>
        </interceptors>
      </package>
</struts>
说明:
只定义了一些常量,和定义了一个拦截器栈,没有定义action
配置applicationContext.xml
配置spring的applicationContext.xml,代码片.
<?xml version="1.0" encoding="UTF-8"?>
<beans xmlns="http://www.springframework.org/schema/beans"
    xmlns:xsi="http://www.w3.org/2001/XMLSchema-instance"
    xmlns:context="http://www.springframework.org/schema/context"
    xmlns:aop="http://www.springframework.org/schema/aop"
    xmlns:tx="http://www.springframework.org/schema/tx"
    xsi:schemaLocation="http://www.springframework.org/schema/beans
    http://www.springframework.org/schema/beans/spring-beans.xsd
    http://www.springframework.org/schema/context
    http://www.springframework.org/schema/context/spring-context.xsd
    http://www.springframework.org/schema/aop
    http://www.springframework.org/schema/aop/spring-aop.xsd
    http://www.springframework.org/schema/tx
    http://www.springframework.org/schema/tx/spring-tx.xsd">

    <!-- 开启注解扫描 -->
    <context:component-scan base-package="com"/>

	<!-- 配置连接池,引入外部属性文件 -->
	<context:property-placeholder location="classpath:jdbc.properties" />

   <!-- 配置连接池 ,需要引入C3P0的包-->
	<bean id="dataSource" class="com.mchange.v2.c3p0.ComboPooledDataSource">
		<property name="driverClass" value="${jdbc.driverClass}"></property>
		<property name="jdbcUrl" value="${jdbc.url}"></property>
		<property name="user" value="${jdbc.username}"></property>
		<property name="password" value="${jdbc.password}"></property>
	</bean>

	<!-- 配置hibernate Session工厂bean及相关属性 -->
	<bean id="sessionFactory"
		class="org.springframework.orm.hibernate5.LocalSessionFactoryBean">
		<!-- 注入连接池 -->
		<property name="dataSource" ref="dataSource"></property>
		<!-- 设置加载hibernate的属性 -->
		<property name="hibernateProperties">
			<props>
				<prop key="hibernate.dialect">org.hibernate.dialect.SQLServerDialect</prop>
				<prop key="hibernate.show_sql">true</prop>
				<prop key="hibernate.format_sql">true</prop>
				<!-- 更新数据库 -->
				<prop key="hibernate.hbm2ddl.auto">update</prop>
			</props>
		</property>
        <!-- 引入JavaBean映射的配置文件 -->
        <property name="mappingResources">
            <list>
                <value>com/entity/User.hbm.xml</value>
            </list>
        </property>
    </bean>

   <!-- 配置事务管理器 -->
	<bean id="transactionManager"
		class="org.springframework.orm.hibernate5.HibernateTransactionManager">
		<property name="sessionFactory" ref="sessionFactory" />
	</bean>

	<!-- 开启注解事务 -->
	<tx:annotation-driven transaction-manager="transactionManager"/>

</beans>
提醒:
1. 在SSH整合中上述的事务管理是非必须的。
2. 如何使用注解的方式来整合SSH,要使用hibernate5(可能是我的个人问题)。
配置User.hbm.xml
配置hibernate的XXX.hbm.xml,我是在eclipse中使用了hibernate插件来做的,代码片.
<?xml version="1.0" encoding="UTF-8"?>
<!DOCTYPE hibernate-mapping PUBLIC
    "-//Hibernate/Hibernate Mapping DTD 3.0//EN"
    "http://www.hibernate.org/dtd/hibernate-mapping-3.0.dtd">

<hibernate-mapping>
	<class name="com.entity.User" table="user">
		<id name="userid" column="id">
			<generator class="assigned" />
		</id>
		<property name="username" column="name" />
		<property name="password" column="pass" />
	</class>
</hibernate-mapping>
提醒:
1. 要特别注意主键的生成策略。
2. 使用插件时表属性名和实体类属性名可能不一样。
配置jdbc.properties
配置连接数据库的资源文件的jdbc.properties,代码片.
jdbc.driverClass=com.hxtt.sql.access.AccessDriver
jdbc.url=jdbc:Access:///F:HrMS.accdb
jdbc.username=
jdbc.password=
说明:
在配置applicationContext.xml中的连接池时引用key名。
提醒:
1. 在资源文件中key名的命名不能和操作系统的默认名称冲突了,否则访问的是系统的值。
Action层:UserAction.java
Action类,代码片.
package com.action;
import javax.annotation.Resource;
import org.springframework.context.annotation.Scope;
import org.springframework.stereotype.Controller;
import com.entity.User;
import com.service.UserService;
import com.opensymphony.xwork2.ActionContext;
import com.opensymphony.xwork2.ActionSupport;

import org.apache.struts2.convention.annotation.Action;
import org.apache.struts2.convention.annotation.InterceptorRef;
import org.apache.struts2.convention.annotation.ParentPackage;
import org.apache.struts2.convention.annotation.Result;
import com.opensymphony.xwork2.ModelDriven;

// 定义一个userAction-bean,
@Controller(value = "userAction")
// 范围是prototype,多例
@Scope(value = "prototype")
//定义包名
@ParentPackage("mypackage")
public class UserAction extends ActionSupport implements ModelDriven<User> {

	// set方法注入一个service层的userService-bean
	@Resource(name = "userService")
	private UserService userService;

	//使用ModelDriven接口来实例化实体类
	private User user = new User();

	//定义action
	@Action(value="user_save",
			results={
					@Result(name="xxx",location="/WEB-INF/xxx.jsp",type="dispatcher"),
					@Result(name="SUCCESS",location="/show.jsp",type="redirect")
					},
			interceptorRefs={
					@InterceptorRef(value="myinterceptor-stack")
					}
			)
	public String save() {
		System.out.println(user.getPassword() + "-=-" + user.getUsername() + "-=-");
		userService.save(user);
		ActionContext.getContext().put("ulist", user);
		return SUCCESS;
	}

	//定义action
	@Action(value = "user_findAll",
			results = {
					@Result(name = "xxx", location = "/WEB-INF/xxx.jsp", type = "dispatcher"),
					@Result(name = "SUCCESS", location = "/show.jsp", type = "redirect")
					},
			interceptorRefs = {
					@InterceptorRef(value = "myinterceptor-stack")
					}
			)
	public String findAll() {
		// ......
		return SUCCESS;
	}

	@Override
	public User getModel() {
		// TODO Auto-generated method stub
		return user;
	}

}
注意:
1. action类继承 ActionSupport,来定义action类。
2. 实现接口ModelDriven接口来实例化实体类。
3. 注解定义action
Service层:UserService.java
Service类,代码片.
package com.service;
import java.util.List;
import javax.annotation.Resource;
import org.springframework.stereotype.Service;
import org.springframework.transaction.annotation.Transactional;
import com.dao.UserDao;
import com.entity.User;

//事务管理一个类
@Transactional
//定义一个Service-bean
@Service(value="userService")
public class UserService{

    //set方法注入DAO层UserDao-bean
    @Resource(name="UserDao")
    private UserDao userDao;

    //事务管理一个方法
    @Transactional
    public void save(User user) {
    	System.out.println("这是服务层");
        userDao.save(user);
    }

    public List<User> findAll() {
        return userDao.findAll();
    }
}
注意:
在Service层使用-事务管理
DAO层:UserService.java
DAO类,代码片.
package com.dao;
import java.util.List;
import javax.annotation.Resource;
import org.hibernate.Session;
import org.hibernate.SessionFactory;
import org.springframework.stereotype.Repository;
import com.entity.User;

//定义一个DAO-bean
@Repository(value="UserDao")
public class UserDao{

	//set方法注入sessionFactory-bean:hibernate的session 工厂
    @Resource(name="sessionFactory")
    private SessionFactory sessionFactory;

    public void setSessionFactory(SessionFactory sessionFactory) {
		this.sessionFactory = sessionFactory;
	}

	@Override
    public void save(User user) {
    	System.out.println("这是DAO,1");
    	Session session=this.sessionFactory.openSession();
    	System.out.println("这是DAO,2");
        session.save(user);
        session.flush();
        session.close();
    }

	@SuppressWarnings("unchecked")
	@Override
    public List<User> findAll() {
		Session session=this.sessionFactory.openSession();
		//HQL语句,强制转换为list集合了
		List<User> u=(List<User>)session.createQuery("select u from User u where 1 = 1");
		session.flush();
        session.close();
        return u;
    }
}
注意:
1. 使用hibernate的API来操作数据库。
2. 在session.createQuery(“查询语句”)返回的是实体对象的集合。
Entity层:User.java
实体类,代码片.
package com.entity;

public class User {
    private String userid;
    private String username;
    private String password;
    public User() {
    }
    public User(String userid, String username, String password) {
        this.userid = userid;
        this.username = username;
        this.password = password;
    }
    public String getUserid() {
        return userid;
    }
    public void setUserid(String userid) {
        this.userid = userid;
    }
    public String getUsername() {
        return username;
    }
    public void setUsername(String username) {
        this.username = username;
    }
    public String getPassword() {
        return password;
    }
    public void setPassword(String password) {
        this.password = password;
    }
}
注册界面:hello.html
注册界面,代码片.
<!DOCTYPE html PUBLIC "-//W3C//DTD XHTML 1.0 Transitional//EN" "http://www.w3.org/TR/xhtml1/DTD/xhtml1-transitional.dtd">
<html xmlns="http://www.w3.org/1999/xhtml">
<head>
<meta http-equiv="Content-Type" content="text/html; charset=utf-8" />
<title>注册界面</title>
</head>
<body>
	<h1 align="center">请输入用户名和密码</h1>
	<form id="form1" name="form1" method="post" action="user_save">
		<p align="center">
			userid: <input type="text" name="user.userid"  />
		</p>
		<p align="center">
			username: <input type="text" name="user.username"  />
		</p>
		<p align="center">
			password: <input type="text" name="user.password"  />
		</p>
		<p align="center">
			<input type="reset" name="重置" id="重置" value="重置" />
			<input type="submit" name="确定" id="确定" value="提交" />
		</p>
	</form>
</body>
</html>
注意:
属性名要使用对象.属性的方式。
显示界面:show.jsp
注册界面,代码片.
<%@ page language="java" contentType="text/html; charset=UTF-8"
    pageEncoding="UTF-8"%>
<%@ taglib prefix="c" uri="http://java.sun.com/jsp/jstl/core" %>
<!DOCTYPE html PUBLIC "-//W3C//DTD HTML 4.01 Transitional//EN" "http://www.w3.org/TR/html4/loose.dtd">
<html>
<head>
<meta http-equiv="Content-Type" content="text/html; charset=UTF-8">
<title>Insert title here</title>
</head>
<body>
    <c:forEach items="${ulist}" var="user">
        <p>${user.userid} == ${user.username} == ${user.password}</p>
    </c:forEach>
</body>
</html>
总结
	1. 在整合SSH时要注意包的版本问题。
	2. 配置的内容名称不要写错了。
	3. 类不要写错了,检验方式,安Ctrl
	4. 注意空值情况
	5. 多看异常,要有信心
**引用包是最大的困难(一步一步来)**