SpringCloud 之 Config 配置中心与动态刷新
SpringCloud 之 Config 配置中心与动态刷新
- 应用场景
- Spring-Cloud-Config
- Git 上的配置
- Config-Server
- 依赖
- 注解
- 配置
- 路径规则
- Config-Client
- 依赖
- 配置
- 动态刷新配置
- config-client 加依赖
- config-client 加配置
- config-client 加注解
- 动态刷新
- 总结
应用场景
在项目中我们可能会出现某些情况需要对配置文件进行统一管理,比如:配置了一些默认数据在配置文件里,后期由运维进行管理,但是每次修改都要开发进行修改再部署真的太麻烦了,因此有了 config 后,我们可以把配置文件统一到 git 上,由运维人员自己修改
Spring-Cloud-Config
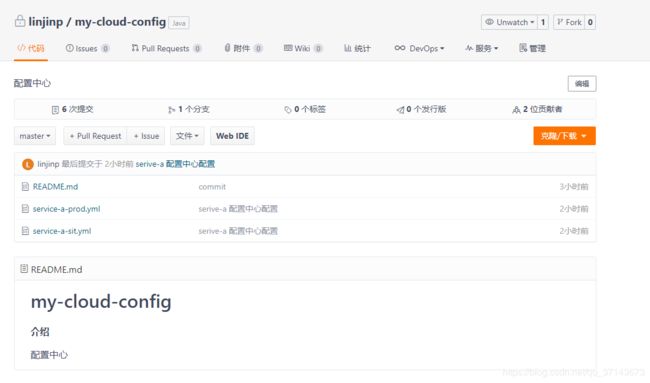
Git 上的配置
Config-Server
基本的 Eureka 就不多赘述了
首先必要的就是配置中心服务端,用于从 git 拉取对应配置
依赖
<!-- config 配置中心服务端 -->
<dependency>
    <groupId>org.springframework.cloud</groupId>
    <artifactId>spring-cloud-config-server</artifactId>
</dependency>
注解
启动器上加 @EnableConfigServer 注解启用配置中心
// 配置中心服务端启用
@EnableConfigServer
// Eureka 客户端
@EnableDiscoveryClient
// 由于没数据库,排除配置
@SpringBootApplication(exclude = DataSourceAutoConfiguration.class)
public class ConfigApplication {
    public static void main(String[] args) {
        SpringApplication.run(ConfigApplication.class, args);
    }
}
配置
#配置端口号
server:
  port: 8085

spring:
  application:
    #配置服务名
    name: config-server
  # 配置中心配置
  cloud:
    config:
      server:
        git:
          # git 仓库路径,这里用的是 gitee
          uri: https://gitee.com/linjinp/my-cloud-config.git
          # Git仓库的账号
          username: xxxx
          # Git仓库的密码
          password: xxxx
服务端的配置很简单,直接启动就行了
路径规则
{application} 对应的服务名
{profile} 对应的环境,比如本地,测试,正式对应的配置
{label} 对应的分支,比如你的配置 git 上是在 dev 分支上,这个就是 dev,默认的都是 master
/{application}/{profile}[/{label}]
/{application}-{profile}.yml
/{label}/{application}-{profile}.yml
/{application}-{profile}.properties
/{label}/{application}-{profile}.properties
Config-Client
服务端建立好后,我们就可以在客户端上使用了
这里我在 service-a 服务上使用
依赖
<!-- config 配置中心客户端 -->
<dependency>
    <groupId>org.springframework.cloud</groupId>
    <artifactId>spring-cloud-starter-config</artifactId>
</dependency>
配置
service-a-sit.yml
服务器上的配置这里就不展示了,主要就是一些 eureka,数据库之类的配置
application.yml 文件
#配置端口号
server:
  port: 8080

spring:
  application:
    #配置服务名
    name: service-a
新建 bootstrap.yml 文件,config 客户端的配置都写在里面
你可能会有疑问,为什么要再建一个 bootstrap.yml 而不直接写在 application.yml 里?
如果你直接写在 application.yml 里然后再启动项目你会发现 spring.cloud.config.uri 输出的都是 http://localhost:8888
SpringBoot为我们提供了服务配置的属性文件application.properties
SpringCloud为我们提供了服务配置的属性文件bootstrap.properties
Spring Cloud应用程序通过创建一个“引导”上下文来进行操作,这个上下文是主应用程序的父上下文。开箱即用,负责从外部源加载配置属性,还解密本地外部配置文件中的属性。这两个上下文共享一个Environment,这是任何Spring应用程序的外部属性的来源。
Bootstrap属性的优先级高,因此默认情况下不能被本地配置覆盖。
说的简单点,如果写在 application.yml 里就会被默认值覆盖。写在 bootstrap.properties 则不会被覆盖,因为优先级更高
# config client 配置
spring:
  cloud:
    config:
      uri: http://127.0.0.1:8085/  # spring-cloud-config 服务地址
      profile: sit #配置项环境
      label: master # 配置在 git 上对应的分支,默认为 master
根据之前路径规则,我们这里读取到的配置文件路径符合 /{application}-{profile}.yml 规则
master 分支的 http://
动态刷新配置
要实现动态刷新我们需要在客户端结合使用 Spring Boot Actuator 开放使用 refresh 端口
config-client 加依赖
<!-- Spring Boot Actuator:健康检查、审计、统计和监控 -->
<dependency>
     <groupId>org.springframework.boot</groupId>
     <artifactId>spring-boot-starter-actuator</artifactId>
 </dependency>
config-client 加配置
management.endpoints.web.exposure.include 值为 * 表示开放所有的端口,如果你只想开放 refresh 就改成 refresh 就可以了
#Actuator配置开放所有端点
management:
  endpoints:
    web:
      exposure:
        include: "*"
  endpoint:
    health:
      show-details: always
config-client 加注解
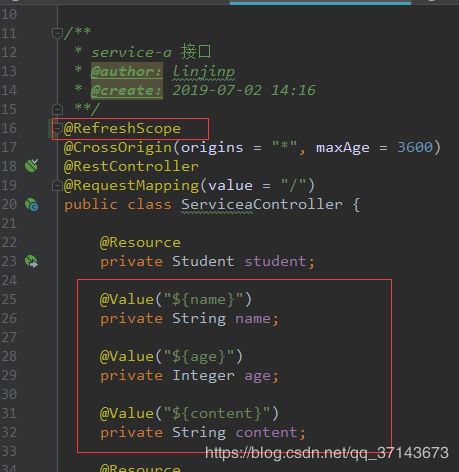
@RefreshScope 这里的注解不是在启动器上加,而是你要对象需要动态刷新属性,就加载那个类上
动态刷新
先来看下启动效果
可以看到端口已经开放了,这里注意下,这个 /actuator/refresh 端口是 POST 请求

现在先直接请求下

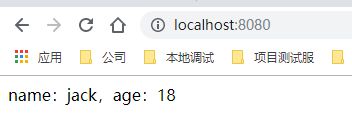
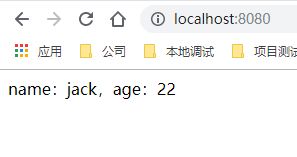
现在我们把年龄改为 22

调用成功,age 属性已经刷新
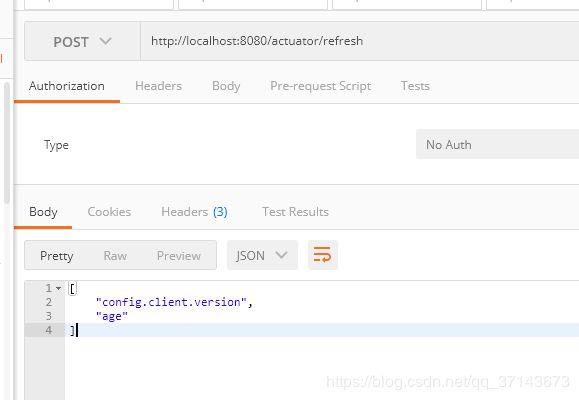
结果
总结
这个动态刷新的原来就是这样,很简单
通过 Spring Boot Actuator 的 refresh 端口实现动态刷新
方法1:改完配置后直接用 Postman 之类的工具调用下端口刷新下
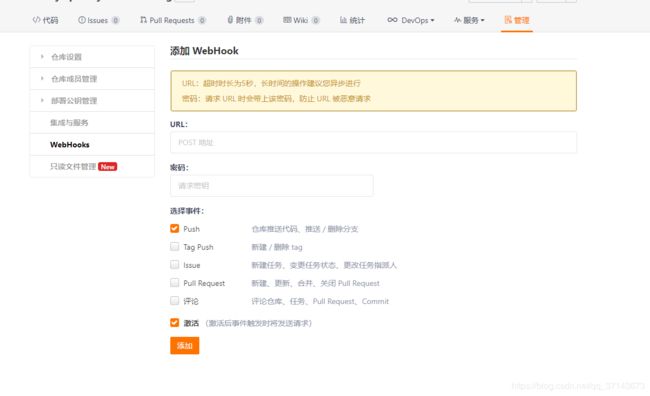
方法2:可以结合 WebHooks 钩子函数,提交时自动去调用端口,由于 gitee 上必须正规的域名,我这就不展示了
