LNMP架构(二)
五 Nginx安装
cd /usr/local/src
下载wget http://nginx.org/download/nginx-1.12.1.tar.gz
解压tar zxf nginx-1.12.1.tar.gz
编译 ./configure --prefix=/usr/local/nginx
安装make && make install
vim /etc/init.d/nginx //复制如下内容
#!/bin/bash
# chkconfig: - 30 21
# description: http service.
# Source Function Library
. /etc/init.d/functions
# Nginx Settings
NGINX_SBIN="/usr/local/nginx/sbin/nginx"
NGINX_CONF="/usr/local/nginx/conf/nginx.conf"
NGINX_PID="/usr/local/nginx/logs/nginx.pid"
RETVAL=0
prog="Nginx"
start()
{
echo -n $"Starting $prog: "
mkdir -p /dev/shm/nginx_temp
daemon $NGINX_SBIN -c $NGINX_CONF
RETVAL=$?
echo
return $RETVAL
}
stop()
{
echo -n $"Stopping $prog: "
killproc -p $NGINX_PID $NGINX_SBIN -TERM
rm -rf /dev/shm/nginx_temp
RETVAL=$?
echo
return $RETVAL
}
reload()
{
echo -n $"Reloading $prog: "
killproc -p $NGINX_PID $NGINX_SBIN -HUP
RETVAL=$?
echo
return $RETVAL
}
restart()
{
stop
start
}
configtest()
{
$NGINX_SBIN -c $NGINX_CONF -t
return 0
}
case "$1" in
start)
start
;;
stop)
stop
;;
reload)
reload
;;
restart)
restart
;;
configtest)
configtest
;;
*)
echo $"Usage: $0 {start|stop|reload|restart|configtest}"
RETVAL=1
esac
exit $RETVAL
chmod 755 /etc/init.d/nginx
chkconfig --add nginx
chkconfig nginx on
cd /usr/local/nginx/conf/;
mv nginx.conf nginx.conf.bak
vim nginx.conf //写入如下内容(参考https://coding.net/u/aminglinux/p/aminglinux-book/git/blob/master/D15Z/nginx.conf)
/usr/local/nginx/sbin/nginx -t
/etc/init.d/nginx start
netstat -lntp |grep 80
测试Nginx:curl 127.0.0.1或者curl localhost访问
测试PHP解析
vi /usr/local/nginx/html/1.php //加入如下内容
echo "test php scripts.";
?>
curl localhost/1.php
六 Nginx默认虚拟主机
第一个被Nginx加载的虚拟主机就是默认主机。和httpd不同的是,它有一个配置用来标记默认虚拟主机,也就是说,如果没有这个标记,第一个虚拟主机为默认虚拟主机。
vim /usr/local/nginx/conf/nginx.conf //增加
include vhost/*.conf
mkdir /usr/local/nginx/conf/vhost
cd !$; vim default.conf //加入如下内容
server
{
listen 80 default_server; // 有这个标记的就是默认虚拟主机
server_name aaa.com;
index index.html index.htm index.php;
root /data/wwwroot/default;
}
mkdir -p /data/wwwroot/default/
echo "This is a default site.">/data/wwwroot/default/index.html
/usr/local/nginx/sbin/nginx -t
/usr/local/nginx/sbin/nginx -s reload
curl localhost
curl -x127.0.0.1:80 aaa.com
七 Nginx用户认证
vim /usr/local/nginx/conf/vhost/test.com.conf//写入如下内容
server
{
listen 80;
server_name test.com;
index index.html index.htm index.php;
root /data/wwwroot/test.com;
location /
{
auth_basic "Auth";
auth_basic_user_file /usr/local/nginx/conf/htpasswd;
}
}
yum install -y httpd
htpasswd -c /usr/local/nginx/conf/htpasswd aming
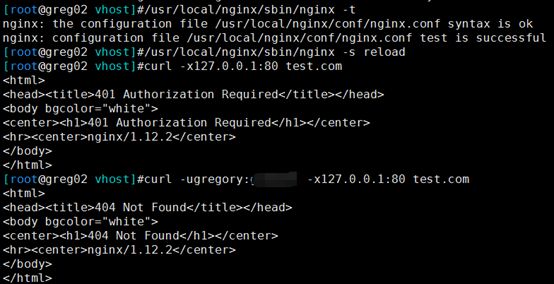
-t && -s reload //测试配置并重新加载
401说明网站需要验证
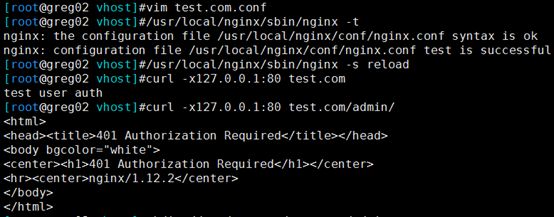
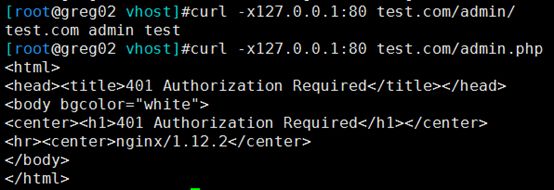
针对某个目录做用户认证,需要修改location后面的路径
server
{
listen 80;
server_name test.com;
index index.html index.htm index.php;
root /data/wwwroot/test.com;
location /admin/
{
auth_basic "Auth";
auth_basic_user_file /usr/local/nginx/conf/htpasswd;
}
}
针对访问的url
server
{
listen 80;
server_name test.com;
index index.html index.htm index.php;
root /data/wwwroot/test.com;
location /admin/
{
auth_basic "Auth";
auth_basic_user_file /usr/local/nginx/conf/htpasswd;
}
}
八 Nginx域名重定向
更改test.com.conf
server
{
listen 80;
server_name test.com test1.com test2.com;
index index.html index.htm index.php;
root /data/wwwroot/test.com;
if ($host != 'test.com' ) {
rewrite ^/(.*)$ http://test.com/$1 permanent;
}
}
server_name后面支持写多个域名,这里要和httpd的做一个对比
permanent为永久重定向,状态码为301,如果写redirect则为302
[root@greg02 vhost]#/usr/local/nginx/sbin/nginx -t
nginx: the configuration file /usr/local/nginx/conf/nginx.conf syntax is ok
nginx: configuration file /usr/local/nginx/conf/nginx.conf test is successful
[root@greg02 vhost]#/usr/local/nginx/sbin/nginx -s reload
[root@greg02 vhost]#curl -x127.0.0.1:80 test2.com/index.html -I
HTTP/1.1 301 Moved Permanently
Server: nginx/1.12.2
Date: Sat, 11 Nov 2017 11:14:43 GMT
Content-Type: text/html
Content-Length: 185
Connection: keep-alive
Location: http://test.com/index.html


