urllib是基于http的高层库,它有以下三个主要功能:
(1)request处理客户端的请求
(2)response处理服务端的响应
(3)parse会解析url
一、爬取网页内容
我们知道,网页上呈现的优美页面,本质都是一段段的HTML代码,加上JS 、CSS等,本人也是刚开始学python,这个文章也比较小白,资深老鸟请忽略~~。
本文所说的代码都是基于python3的,使用phython2的请注意
python 3.x中urllib库和urilib2库合并成了urllib库
其中urllib2.urlopen()变成了urllib.request.urlopen()
urllib2.Request()变成了urllib.request.Request()
那么获取网页有哪一些方法呢?这里列举了三种方法,具体查看代码。
import urllib.request
import http.cookiejar

url = 'http://www.baidu.com'

#直接通过url来获取网页数据
print('第一种 :直接通过url来获取网页数据')
response = urllib.request.urlopen(url)
html = response.read()
mystr = html.decode("utf8")
response.close()
print(mystr)

#构建request对象进行网页数据获取
print('第二种 :构建request对象进行网页数据获取')
request = urllib.request.Request(url)
request.add_header('user-agent', 'Mozilla/5.0')
response2 = urllib.request.urlopen(request)
html2 = response2.read()
mystr2 = html2.decode("utf8")
response2.close()
print(mystr2)


#使用cookies来获取 需要import http.cookiejar
print('第三种:使用cookies来获取')
cj = http.cookiejar.LWPCookieJar()
opener = urllib.request.build_opener(urllib.request.HTTPCookieProcessor(cj))
urllib.request.install_opener(opener)
response3 = urllib.request.urlopen(url)
print(cj)
html3 = response3.read()
mystr3 = html3.decode("utf8")
response3.close()
print(mystr3)
将上面的代码copy之后,在pycharm新建一个python项目,如下图,新建一个python file ,命名为demo.py 黏贴上面的代码

右键运行改文件,我们就可以从控制台获取到整个网页内容了

或者打开pycharm的terminal窗口,输入
python demo.py

copy上面网页内容,然后黏贴到下面的在线HTML 运行工具
http://www.5axxw.com/tools/web/web_run.html

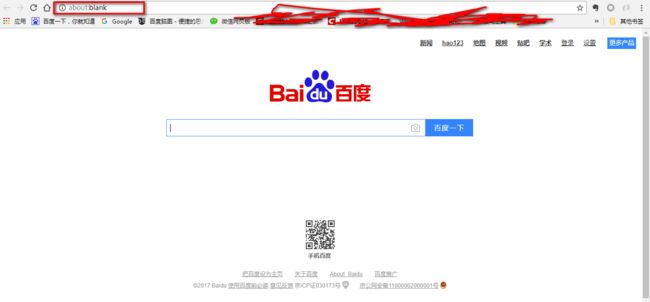
运行之后我们可以看到下图网址部分是本地的,对比网页的百度,发现底部的那些网页新闻不见了,因为我们抓取的是静态网页呀,动态网页需要的一些参数,要如何传递给他,下面有简单的解释。利用这个我们也可以只抓取我们需要的静态网页,相当于做了一些去广告之类的。。。。。
从代码看出,上面使用的urlopen方法,传入一个URL,这个网址是百度首页,协议是HTTP协议,当然你也可以把HTTP换做FTP,FILE,HTTPS 等等,只是代表了一种协议,urlopen一般接受三个参数,它的参数如下:
urlopen(url, data, timeout)
第一个参数url即为URL,第二个参数data是访问URL时要传送的数据,第三个timeout是设置超时时间。
第二三个参数是可以不传送的,data默认为空None,timeout默认为 socket._GLOBAL_DEFAULT_TIMEOUT
第一个参数URL是必须要传送的,在这个例子里面我们传送了百度的URL,执行urlopen方法之后,返回一个response对象,返回信息便保存在这里面。
response.read()
response对象有一个read方法,可以返回获取到的网页内容,我们可以的到一个HTML格式的文档。
二、构造Request
其实上面的urlopen参数也可以传入一个Request类的实例,我们构造request时需要传入Url,Data等等的内容。
import urllib.request
req = urllib.request.Request('http://python.org/')
response = urllib.request.urlopen(req)
the_page = response.read()
三、发送数据
http协议有六种请求方法,get,head,put,delete,post,options,数据传送最基本的就是POST和GET两种方式,其他方式这里也不进行扩展。
这里我们结合CSDN的登录进行介绍
打开以下网页 https://passport.csdn.net/account/login?from=http://my.csdn.net/my/mycsdn 我们可以看到需要我们输入一个是账号,一个是密码。
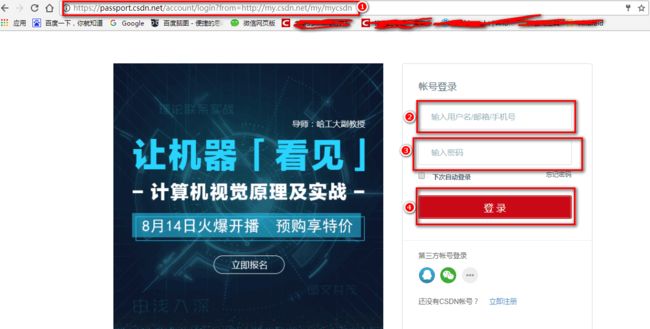
点击登录之后,网页就是利用post的方式,把上面两个输入项作为参数,动态的发送过去了。
import urllib.parse
import urllib.request

values = {}
values['username'] = "[email protected]"
values['password'] = "XXXXXXX"

user_agent = 'Mozilla/4.0 (compatible; MSIE 5.5; Windows NT)'
headers = {'User-Agent': user_agent}

data = urllib.parse.urlencode(values).encode('UTF8')//这里不encode会类型报错
url = "https://passport.csdn.net/account/login?from=http://my.csdn.net/my/mycsdn"
request = urllib.request.Request(url, data, headers)
response = urllib.request.urlopen(request)
the_page = response.read()
print(the_page.decode("utf8"))
运行之后我们发现又跳回了登录界面,里面我们看到返回网页中有这么一段注释:
于是我们需要添加这个参数,然后登录就成功了,请看代码
import urllib.parse, urllib.request, http.cookiejar, re

cookie = http.cookiejar.CookieJar()
cookieProc = urllib.request.HTTPCookieProcessor(cookie)
opener = urllib.request.build_opener(cookieProc)
h = opener.open('https://passport.csdn.net').read().decode("utf8")
patten1 = re.compile(r'name="lt" value="(.*?)"')
patten2 = re.compile(r'name="execution" value="(.*?)"')
b1 = patten1.search(h)
b2 = patten2.search(h)
postData = {
    'username': 'csdn用户名',
    'password': 'csdn密码',
    'lt': b1.group(1),
    'execution': b2.group(1),
    '_eventId': 'submit',
}

postData = urllib.parse.urlencode(postData).encode('UTF8')

opener.addheaders = [('Origin', 'https://passport.csdn.net'),
                     ('User-Agent',
                      'Mozilla/5.0 (Windows NT 6.1; WOW64) AppleWebKit/537.36 (KHTML, like Gecko) Chrome/45.0.2454.101 Safari/537.36'),
                     ('Referer', 'https://passport.csdn.net/account/login?from=http://my.csdn.net/my/mycsdn')
                     ]
response = opener.open('https://passport.csdn.net', postData)
text = response.read().decode('utf-8', 'ignore')
print(text)

response2 = opener.open('http://my.csdn.net/my/mycsdn')
text2 = response2.read().decode('utf-8', 'ignore')
print(text2)

GET方式:
上面我们使用的是post的形式的,至于GET方式区别就是在URL上,我们如果直接把参数写到网址上面,构建一个带参数的URL。
values={}
values['username'] = "[email protected]"
values['password']="XXXX"
data = urllib.parse.urlencode(values)
url = "http://passport.csdn.net/account/login"
geturl = url + "?"+data
使用 HTTP 的 PUT 和 DELETE 方法
有时候需要用到PUT方式或者DELETE方式请求。
PUT:这个方法比较少见。HTML表单也不支持这个。本质上来讲, PUT和POST极为相似,都是向服务器发送数据,但它们之间有一个重要区别,PUT通常指定了资源的存放位置,而POST则没有,POST的数据存放位置由服务器自己决定。
DELETE:删除某一个资源。基本上这个也很少见,不过还是有一些地方比如amazon的S3云服务里面就用的这个方法来删除资源。
如果要使用 HTTP PUT 和 DELETE ,只能使用比较低层的 httplib 库。虽然如此,我们还是能通过下面的方式,使 urllib 能够发出 PUT 或DELETE 的请求,不过用的次数的确是少,在这里提一下。
import urllib.request
request = urllib.request.Request(uri, data=data)
request.get_method = lambda: 'PUT' # or 'DELETE'
response = urllib.request.urlopen(request)
四、添加头部
我们知道,很多网站,如果不设置请求头部属性,根本就不会得到响应,而且有一些还要求匹配头部的某些属性,所以我们需要去模拟正常访问的头部设置。那么我们怎么获取这个headers的属性呢?
这个需要借助我们的Chrome浏览器了。F12打开你需要爬取的网页,打开网络监听

起初右边是没有多少信息的,然后点击登录,我们可以看到捕获到了很多信息,我们选取第一个,点击header,就可以查看到我们需要的一些信息了。具体headers各个属性的作用,请参阅 Http Headers各属性的作用

其中,agent就是请求的身份,如果没有写入请求身份,那么服务器不一定会响应,所以可以在headers中设置agent,当我们设置leheaders,在构建request时传入,到了请求时,就会加入headers传送,服务器若识别了是浏览器发来的请求,就会得到响应。
另外,我们还有对付”反盗链”的方式,对付防盗链,服务器会识别headers中的referer是不是它自己,如果不是,有的服务器不会响应,所以我们还可以在headers中加入referer
cookie = http.cookiejar.CookieJar()
cookieProc = urllib.request.HTTPCookieProcessor(cookie)
opener = urllib.request.build_opener(cookieProc)
opener.addheaders = [('Origin', 'https://passport.csdn.net'),
                     ('User-Agent',
                      'Mozilla/5.0 (Windows NT 6.1; WOW64) AppleWebKit/537.36 (KHTML, like Gecko) Chrome/45.0.2454.101 Safari/537.36'),
                     ('Referer', '需要添加头部的网址')
                     ]
五、http 错误
import urllib.request
req = urllib.request.Request(' ')
try:
urllib.request.urlopen(req)
except urllib.error.HTTPError as e:
print(e.code)
print(e.read().decode("utf8"))
六、异常处理
except HTTPError as e:
except URLError as e:
from urllib.request import Request, urlopen
from urllib.error import URLError, HTTPError
req = Request("http://www..net /")
try:
response = urlopen(req)
except HTTPError as e:
print('The server couldn't fulfill the request.')
print('Error code: ', e.code)
except URLError as e:
print('We failed to reach a server.')
print('Reason: ', e.reason)
else:
print("good!")
print(response.read().decode("utf8"))
except URLError as e:
if hasattr(e, 'reason'):
elif hasattr(e, 'code'):
from urllib.request import Request, urlopen
from urllib.error import  URLError
req = Request("http://www.Python.org/")
try:
response = urlopen(req)
except URLError as e:
if hasattr(e, 'reason'):
print('We failed to reach a server.')
print('Reason: ', e.reason)
elif hasattr(e, 'code'):
print('The server couldn't fulfill the request.')
print('Error code: ', e.code)
else:
print("good!")
print(response.read().decode("utf8"))
七、HTTP 认证
import urllib.request
# create a password manager
password_mgr = urllib.request.HTTPPasswordMgrWithDefaultRealm()
# Add the username and password.
# If we knew the realm, we could use it instead of None.
top_level_url = ""
password_mgr.add_password(None, top_level_url, 'rekfan', 'xxxxxx')
handler = urllib.request.HTTPBasicAuthHandler(password_mgr)
# create "opener" (OpenerDirector instance)
opener = urllib.request.build_opener(handler)
# use the opener to fetch a URL
a_url = ""
x = opener.open(a_url)
print(x.read())
# Install the opener.
# Now all calls to urllib.request.urlopen use our opener.
urllib.request.install_opener(opener)
a = urllib.request.urlopen(a_url).read().decode('utf8')
print(a)
八、使用代理
urllib 默认会使用环境变量 http_proxy 来设置 HTTP Proxy。假如一个网站它会检测某一段时间某个IP 的访问次数,如果访问次数过多,它会禁止你的访问。所以你可以设置一些代理服务器来帮助你做工作,每隔一段时间换一个代理,网站君都不知道是谁在捣鬼了!
下面一段代码说明了代理的设置用法
import urllib.request
enable_proxy = True
proxy_support = urllib.request.ProxyHandler({'sock5': 'localhost:1080'})
null_proxy_handler = urllib.request.ProxyHandler({})
if enable_proxy:
    opener = urllib.request.build_opener(proxy_support)
else:
  opener = urllib.request.build_opener(null_proxy_handler)
urllib.request.install_opener(opener)
a = urllib.request.urlopen("").read().decode("utf8")
print(a)
九、超时
import socket
import urllib.request
# timeout in seconds
timeout = 2
socket.setdefaulttimeout(timeout)
# this call to urllib.request.urlopen now uses the default timeout
# we have set in the socket module
req = urllib.request.Request('')
a = urllib.request.urlopen(req).read()
print(a)
上面已经说过urlopen方法了,第三个参数就是timeout的设置,可以设置等待多久超时,为了解决一些网站实在响应过慢而造成的影响。
例如下面的代码,如果第二个参数data为空那么要特别指定是timeout是多少,写明形参。
import urllib.request
response = urllib.request.urlopen('http://www.baidu.com', timeout=10)
如果data已经传入,则不必声明。
import urllib.request
response = urllib.request.urlopen('http://www.baidu.com',data, 10)