在android开发过程中,我们会用到/res目录下的文件(图片,颜色,布局文件等),通过getResource()方法我们能很方便的使用这个资源。这些资源会被一起打包到apk文件中,如下图:
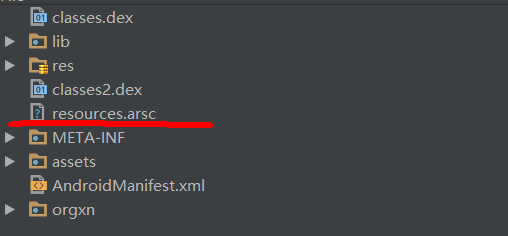
真正的资源放在res目录下,Android应用程序资源的编译和打包之后就生成一个资源索引文件resources.arsc,通过resources.arsc能过准确的找到对应的资源文件,关于resources.arsc的详细解释,可参考这般文章 http://blog.csdn.net/beyond702/article/details/49228115。
那这些资源是怎么加载到,又是何时加载到应用程序中的呢?这篇文章想跟大家分享的就是Android中资源的加载和匹配。
在app启动过程中,在什么时候进行app资源的加载(图片,布局文件,颜色等)? 如何将资源与应用关联在一起?
代码中通过getResources()获得Resoures对象,然后通过Resource的相关方法进行获取相关资源,所以我们看Resoures对象是在什么时候创建的就能推断出app资源加载的节点,看源码:
@Override
public Resources getResources() {
    return mBase.getResources();
}
我看到我们在Activity中调用的getResources()方法其实是mBase.getResources(),也就是说调用的mBase中的getResources()方法,而mBase的数据类型其实是Context,是一个抽象类。代码如下:
public class ContextWrapper extends Context {
Context mBase;

public ContextWrapper(Context base) {
    mBase = base;
}

/**
 * Set the base context for this ContextWrapper.  All calls will then be
 * delegated to the base context.  Throws
 * IllegalStateException if a base context has already been set.
 *
 * @param base The new base context for this wrapper.
 */
protected void attachBaseContext(Context base) {
    if (mBase != null) {
        throw new IllegalStateException("Base context already set");
    }
    mBase = base;
}
什么是Context?
说到Context,作为一个android工程师肯定很熟悉,在开发过程中,Context是一个非常重要的的类型,Context意为上下文,也就是程序的运行环境。它分装了很多重要的操作,如startActiviy()、sendBroadcast()、bindService()等,因此,Context对开发者来说最重要的高层接口。Context只是一个定义了很多接口的抽象类,这些接口的真正实现其实是通过Context的子类ContextImpl类中,这种设计模式叫做外光模式(感兴趣的同学可以去研究一下什么是“外观模式”)。
先看看ContextImpl的构造方法,看源码:
private ContextImpl(ContextImpl container, ActivityThread mainThread,
    LoadedApk packageInfo, IBinder activityToken, UserHandle user, int flags,
    Display display, Configuration overrideConfiguration, int createDisplayWithId) {
mOuterContext = this;
//获取包的信息
mPackageInfo = packageInfo;
mResourcesManager = ResourcesManager.getInstance();
 /代码省略/
if (compatInfo == null) {
    compatInfo = (displayId == Display.DEFAULT_DISPLAY)
            ? packageInfo.getCompatibilityInfo()
            : CompatibilityInfo.DEFAULT_COMPATIBILITY_INFO;
}
//获取对应资源
Resources resources = packageInfo.getResources(mainThread);
if (resources != null) {
    if (displayId != Display.DEFAULT_DISPLAY
            || overrideConfiguration != null
            || (compatInfo != null && compatInfo.applicationScale
                    != resources.getCompatibilityInfo().applicationScale)) {

        if (container != null) {
            // This is a nested Context, so it can't be a base Activity context.
            // Just create a regular Resources object associated with the Activity.
            resources = mResourcesManager.getResources(
                    activityToken,
                    packageInfo.getResDir(),
                    packageInfo.getSplitResDirs(),
                    packageInfo.getOverlayDirs(),
                    packageInfo.getApplicationInfo().sharedLibraryFiles,
                    displayId,
                    overrideConfiguration,
                    compatInfo,
                    packageInfo.getClassLoader());
        } else {
            // This is not a nested Context, so it must be the root Activity context.
            // All other nested Contexts will inherit the configuration set here.
            resources = mResourcesManager.createBaseActivityResources(
                    activityToken,
                    packageInfo.getResDir(),
                    packageInfo.getSplitResDirs(),
                    packageInfo.getOverlayDirs(),
                    packageInfo.getApplicationInfo().sharedLibraryFiles,
                    displayId,
                    overrideConfiguration,
                    compatInfo,
                    packageInfo.getClassLoader());
        }
    }
}
mResources = resources;
}
在ContextImpl的构造方法中会初始化化该进程的各个字段,例如资源、包信息、屏幕配置等。通过packageInfo可以得到Resources。所以我们发现要知道app资源的加载时间节点取决于ContextImpl的创建时间。
我们来看看 ContextImpl是什么时候赋值给Activity的mBase的?
先来讲讲app的启动,app在启动是,首先会fork一个子进程,并且调用ActivityThread.mian方法启动该进程。ActivityThread又会构建Application对象,然后和Activity、ContextImpl关联起来,最后会调用Activity的onCreate()、onStart()、onResume()函数使Activity运行起来 ,此时app的界面就出现在我们面前了。main函数会间接地调用ActivityThread中的handleLaunchActivity函数启动默认的Activity,handleLaunchActivity代码如下:
private void handleLaunchActivity(ActivityClientRecord r, Intent customIntent, String reason) {
//代码省略
 Activity a = performLaunchActivity(r, customIntent);
//代码省略
}

private Activity performLaunchActivity(ActivityClientRecord r, Intent customIntent) {
// 代码省略
Activity activity = null;
try {
    java.lang.ClassLoader cl = r.packageInfo.getClassLoader();
//创建Activity
    activity = mInstrumentation.newActivity(
            cl, component.getClassName(), r.intent);
    StrictMode.incrementExpectedActivityCount(activity.getClass());
    r.intent.setExtrasClassLoader(cl);
    r.intent.prepareToEnterProcess();
    if (r.state != null) {
        r.state.setClassLoader(cl);
    }
} catch (Exception e) {
    if (!mInstrumentation.onException(activity, e)) {
        throw new RuntimeException(
            "Unable to instantiate activity " + component
            + ": " + e.toString(), e);
    }
}
try {
//创建Application
    Application app = r.packageInfo.makeApplication(false, mInstrumentation)

    if (activity != null) {
   //构建ContextImpl   createBaseContextForActivity方法返回的是ContextImpl对象
        Context appContext = createBaseContextForActivity(r, activity);
        CharSequence title = r.activityInfo.loadLabel(appContext.getPackageManager());
        Configuration config = new Configuration(mCompatConfiguration);

 //建立Activity与ContextImpl、Application的关联
        activity.attach(appContext, this, getInstrumentation(), r.token,
                r.ident, app, r.intent, r.activityInfo, title, r.parent,
                r.embeddedID, r.lastNonConfigurationInstances, config,
                r.referrer, r.voiceInteractor, window);
//代码省略

//回调Activity的onCreate方法
        if (r.isPersistable()) {
            mInstrumentation.callActivityOnCreate(activity, r.state, r.persistentState);
        } else {
            mInstrumentation.callActivityOnCreate(activity, r.state);
        }
} catch (SuperNotCalledException e) {
    throw e;
} catch (Exception e) {
    if (!mInstrumentation.onException(activity, e)) {
        throw new RuntimeException(
            "Unable to start activity " + component
            + ": " + e.toString(), e);
    }
}
return activity;
}
从代码中我可以看到,每次创建Activiy都会创建ContextImpl与这个activity关联起来,当然关联起来的还有Application,只是Application只会创建一次。ContextImpl最终会被ContentWrapper类的mBase字段引用。
总结一下,获取资源的操作实际上是由ContextImpl来完成的,Activity、Service等组件的getResource方法最终都会转发给ContextImpl类型的mBase字段。也就是调用了ContextImpl的getResource函数,而这个Resource在ContextImpl关联到 Activity之前就会初始化Resource对象。
Android资源是如何进行匹配的
根据上面的内容我们知道在ContextImpl构造函数中进行Resource的初始化,那我们看看 Resource是如何进行初始化的。
private ContextImpl(ContextImpl container, ActivityThread mainThread,
    LoadedApk packageInfo, IBinder activityToken, UserHandle user, int flags,
    Display display, Configuration overrideConfiguration, int createDisplayWithId) {
mOuterContext = this;
mPackageInfo = packageInfo;
//代码省略
Resources resources = packageInfo.getResources(mainThread);
if (resources != null) {
if (displayId != Display.DEFAULT_DISPLAY
        || overrideConfiguration != null
        || (compatInfo != null && compatInfo.applicationScale
                != resources.getCompatibilityInfo().applicationScale)) {

    if (container != null) {
        // This is a nested Context, so it can't be a base Activity context.
        // Just create a regular Resources object associated with the Activity.
//根据设备配置获取对应的资源
        resources = mResourcesManager.getResources(
                activityToken,
                packageInfo.getResDir(),
                packageInfo.getSplitResDirs(),
                packageInfo.getOverlayDirs(),
                packageInfo.getApplicationInfo().sharedLibraryFiles,
                displayId,
                overrideConfiguration,
                compatInfo,
                packageInfo.getClassLoader());
    } else {
        // This is not a nested Context, so it must be the root Activity context.
        // All other nested Contexts will inherit the configuration set here.
        resources = mResourcesManager.createBaseActivityResources(
                activityToken,
                packageInfo.getResDir(),
                packageInfo.getSplitResDirs(),
                packageInfo.getOverlayDirs(),
                packageInfo.getApplicationInfo().sharedLibraryFiles,
                displayId,
                overrideConfiguration,
                compatInfo,
                packageInfo.getClassLoader());
    }
}
}
mResources = resources;
}
在通过mPackageInfo得到对应的资源之后,最终都会调用ResourceManager的中的方法来根据设备配置等相关信息获取对应的资源,也就是资源的适配。已ResourceManager中的getResources方法为例,代码如下:
public @Nullable Resources getResources(@Nullable IBinder activityToken,
    @Nullable String resDir,
    @Nullable String[] splitResDirs,
    @Nullable String[] overlayDirs,
    @Nullable String[] libDirs,
    int displayId,
    @Nullable Configuration overrideConfig,
    @NonNull CompatibilityInfo compatInfo,
    @Nullable ClassLoader classLoader) {
try {
    Trace.traceBegin(Trace.TRACE_TAG_RESOURCES, "ResourcesManager#getResources");
//已apk路径、屏幕设备id、配置等构建一个资源key
    final ResourcesKey key = new ResourcesKey(
            resDir,
            splitResDirs,
            overlayDirs,
            libDirs,
            displayId,
            overrideConfig != null ? new Configuration(overrideConfig) : null, // Copy
            compatInfo);
    classLoader = classLoader != null ? classLoader : ClassLoader.getSystemClassLoader();
//根据这个key和ativityToke在mActivityResourceReferences中查看是否加载过这个资源,如果
//有直接返回,如果没有加载过生成一个Resource返回并保存到 mActivityResourceReferences
//中。
    return getOrCreateResources(activityToken, key, classLoader);
} finally {
    Trace.traceEnd(Trace.TRACE_TAG_RESOURCES);
}
}
在android23之前版本ResourcesManager通过mActiveResources字段管理Resource,它的数据类型是ArrayMap
private static class ActivityResources {
public final Configuration overrideConfig = new Configuration();
public final ArrayList> activityResources = new ArrayList<>();
}
已android23之前Resources的管理方式为例说明,代码如下:
public Resources getTopLevelResources(String resDir, String[] splitResDirs,
    String[] overlayDirs, String[] libDirs, int displayId,
    Configuration overrideConfiguration, CompatibilityInfo compatInfo, IBinder token) {
final float scale = compatInfo.applicationScale;
ResourcesKey key = new ResourcesKey(resDir, displayId, overrideConfiguration, scale, token);
Resources r;
synchronized (this) {
//判断是否加载过该资源
    WeakReference wr = mActiveResources.get(key);
    r = wr != null ? wr.get() : null;
    if (r != null && r.getAssets().isUpToDate()) {
    //已加载过,直接返回
        return r;
    }
}
//没有加载过,构建AssetManager对象
AssetManager assets = new AssetManager();
   //将APK路径添加到AssetManager的资源路径中
if (resDir != null) {
    if (assets.addAssetPath(resDir) == 0) {
        return null;
    }
}
//屏幕分辨率
DisplayMetrics dm = getDisplayMetricsLocked(displayId);
//设备配置
Configuration config;
//创建Resources
r = new Resources(assets, dm, config, compatInfo, token);
if (false) {
    Slog.i(TAG, "Created app resources " + resDir + " " + r + ": "
            + r.getConfiguration() + " appScale="
            + r.getCompatibilityInfo().applicationScale);
}
synchronized (this) {
    //缓存资源
    mActiveResources.put(key, new WeakReference(r));
    return r;
}
}
首先会以APK路径、屏幕设备id、配置等构建一个资源key,根据这个key到ResourcesManager类的mActiveResources中查询是否 加载已经加载过该Apk资源,如果含有缓存那么直接使用缓存。这个mActiveResources维护了当前应用程序进程中加载的每一个APK文件及其对应的Resources对象的对应关系。如果没有缓存,那么就会创建一个,并且保存在mActiveResources中。
在没有资源缓存的情况下,ActivityThread会创建一个AssetManager对象,并且调用AssetManager对象的addAssetPath函数来将参数resDir作为它的资源目录,这个Dir就是Apk文件的绝对路径。创建了一个新的AssetManager对象之后,会将这个AssetManager对象作为Resource构造的第一个参数来构建一个新的Resources对象。这个新创建的Resources对象会以前面所创建的ResourcesKey对象为键值缓存在mActiveResources所描述的一个HashMap中,以便重复使用该资源时无需重复创建。
总结
以上就是关于android资源加载和匹配的源码分析,通过对资源加载机制的学习,可以帮助我们重更深的角度理解一个app在android系统中的运行原理。据我说知,目前很多android插件技术也是基于android的资源加载机制实现的。最后希望我的文章能对大家有所帮助,文中有任何错误欢迎大家指出。
参考:
1.《Android源码设计模式解析与实战》
2.Android源码