mask rcnn tensorflow
刚开始我还没注意,等到读代码的时候才发现,这个Mask r-cnn是基于FPN和 ResNet101 实现的,说好的Faster rcnn怎么不见了。
贴上md里面的一句话:
It's based on Feature Pyramid Network (FPN) and a ResNet101 backbone.
原理简介:
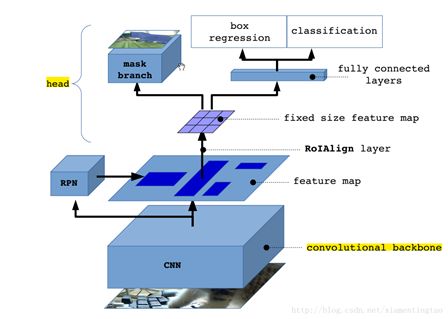
mask rcnn 是在faster rcnn 原理上进行改进,加入mask 层。这里原理不进行细讲,这里只对提到的mask 网络进行讲解。
mask分支采用FCN对每个RoI的分割输出维数为Kmm(其中:m表示RoI Align特征图的大小),即K个类别的mm的二值mask, 这里的通道数就是k,k是物体的类别;这样就保持mm的空间布局,pixel-to-pixel操作需要保证RoI特征 映射到原图的对齐性,这也是使用RoIAlign解决对齐问题原因,减少像素级别对齐的误差。
K x m x m二值mask结构解释:最终的FCN输出一个K层的mask,每一层代表一类,Log输出,用0.5作为阈值进行二值化,产生背景和前景的分割Mask,所以这里的mask就是一个对ROI的掩码,大小和ROI一样大,但是Mask的值却是0和1.
得到Lmask 使得网络能够输出每一类的 mask,且不会有不同类别 mask 间的竞争. 在faster rcnn中每个ROI只会预测一个类别。所以Mask只有一个输出, 就是通过classification 进行类别预测,得到ROI中物体的类别,只把与类别对应的mask 进行输出。进行损失函数计算的时候,其他class不贡献Loss。
代码
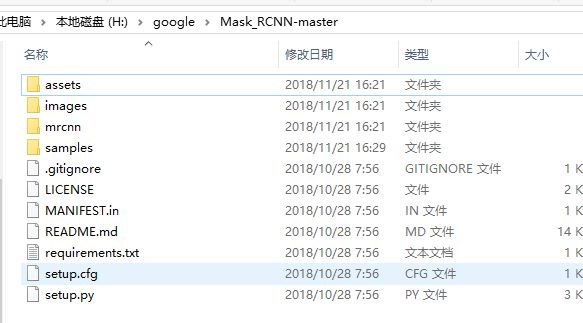
这里就是mask rcnn的目录。
samples中有很多说明教程文档
- demo.ipynb 最简单的开始方式。展示了使用一个在MS COCO上预训练的模型在你的图片上实现图像分割。包括了在任意图片上实现图像检测和实例分割的代码。
- train_shapes.ipynb 展示了怎么训练Mask R-CNN用自己的数据集。这个教程包括了一个玩具数据集来演示训练一个新数据集。
- model.py util.py config.py 这些文件包括主要的Mask RCNN实现。
- inspect_data.ipynb 这个教程展示了不同的预处理步骤来准备训练数据
- inspect_model.ipynb 这个教程深度解析了mask rcnn执行目标检测和语义分割的每一步。
- inspect_weights.ipynb 这个教程考察了训练模型的权重,寻找异常值和反常的模式。
在matterport Mask_RCNN官方教程翻译中有详细的中文说明。
文档说明:
- 训练一个新模型微调自预训练的COCO权重
python3 coco.py train --dataset=/path/to/coco/ --model=coco - 训练一个新模型微调自预训练的ImageNet权重
python3 coco.py train --dataset=/path/to/coco/ --model=imagenet - 继续训练一个模型利用你之前已经训练过的模型
python3 coco.py train --dataset=/path/to/coco/ --model=/path/to/weights.h5 - 继续训练最后的模型,这个模块会找到最后训练出来的模型
python3 coco.py train --dataset=/path/to/coco/ --model=last
可以用以下代码评估COCO模型
python3 coco.py evaluate --dataset=/path/to/coco/ --model=last
训练设置,学习率以及其他参数在config.py里面设置。利用你自己的数据集训练:
为了训练你自己的数据集你需要修改下面两个类:
- Config : 这个类包括了默认的配置,修改你需要改变的属性。
- Dataset: 这个类使得你可以使用新数据集用于训练不需要改变模型的代码。它也支持加载多个数据集同时,如果你想检测的目标不是在同一个数据集里这会非常有用。
- Dataset是一个基类。为了使用它,创建一个继承自它的新类,增加函数指向你的数据集。可以在util.py和train_shapes.ipynb和coco.py里看它的用法。
经过多方的筛选,为了更加深入了解mask rcnn的模型。
这里解读/samples/shapes/train_shapes.ipynb,这是一个详细的训练模型教程。可以运行这个的这个代码进行,对模型流程进行了解。。。。
train_shapes.ipynb
这里文件分为,如下几个部分:
- Configurations
设置训练参数 - Notebook Preferences
设置notebook的参数 - Dataset
构建数据创建模块 - Create Model
创建mask rcnn 模块 - Training
对模型进行训练 - Detection
对测试数据进行检测 - Evaluation
对模型进行评估
ShapesConfig
class ShapesConfig(Config):
    """Configuration for training on the toy shapes dataset.
    Derives from the base Config class and overrides values specific
    to the toy shapes dataset.
    """
    # Give the configuration a recognizable name
    # 为config命名
    NAME = "shapes"

    # Train on 1 GPU and 8 images per GPU. We can put multiple images on each
    # GPU because the images are small. Batch size is 8 (GPUs * images/GPU).
    # 训练在一个GPU上,每个GPU每次训练的bacthsize是8
    GPU_COUNT = 1
    IMAGES_PER_GPU = 8

    # Number of classes (including background)
    # 这里的类别,是3 + 1,三个类别和一个背景
    NUM_CLASSES = 1 + 3  # background + 3 shapes

    # Use small images for faster training. Set the limits of the small side
    # the large side, and that determines the image shape.
    IMAGE_MIN_DIM = 128
    IMAGE_MAX_DIM = 128

    # Use smaller anchors because our image and objects are small
    # 每个anchors的大小是8-128,主要是这里的目标比较小
    RPN_ANCHOR_SCALES = (8, 16, 32, 64, 128)  # anchor side in pixels

    # Reduce training ROIs per image because the images are small and have
    # few objects. Aim to allow ROI sampling to pick 33% positive ROIs.
    TRAIN_ROIS_PER_IMAGE = 32

    # Use a small epoch since the data is simple
    STEPS_PER_EPOCH = 100

    # use small validation steps since the epoch is small
    VALIDATION_STEPS = 5

config = ShapesConfig()
config.display()
上面是一个对模型进行参数设置的类,这里注释写比较详细。设置的了anchors的尺寸, 每张图片会检测32个ROI(感兴趣区域)。一些参数等等。。。。
ShapesDataset
class ShapesDataset(utils.Dataset):
    """Generates the shapes synthetic dataset. The dataset consists of simple
    shapes (triangles, squares, circles) placed randomly on a blank surface.
    The images are generated on the fly. No file access required.
    """

    def load_shapes(self, count, height, width):
        """Generate the requested number of synthetic images.
        count: number of images to generate.
        height, width: the size of the generated images.
        """
        # Add classes
        self.add_class("shapes", 1, "square")
        self.add_class("shapes", 2, "circle")
        self.add_class("shapes", 3, "triangle")

        # Add images
        # Generate random specifications of images (i.e. color and
        # list of shapes sizes and locations). This is more compact than
        # actual images. Images are generated on the fly in load_image().
        for i in range(count):
            bg_color, shapes = self.random_image(height, width)
            self.add_image("shapes", image_id=i, path=None,
                           width=width, height=height,
                           bg_color=bg_color, shapes=shapes)

    def load_image(self, image_id):
        """Generate an image from the specs of the given image ID.
        Typically this function loads the image from a file, but
        in this case it generates the image on the fly from the
        specs in image_info.
        """
        info = self.image_info[image_id]
        bg_color = np.array(info['bg_color']).reshape([1, 1, 3])
        image = np.ones([info['height'], info['width'], 3], dtype=np.uint8)
        image = image * bg_color.astype(np.uint8)
        for shape, color, dims in info['shapes']:
            image = self.draw_shape(image, shape, dims, color)
        return image

    def image_reference(self, image_id):
        """Return the shapes data of the image."""
        info = self.image_info[image_id]
        if info["source"] == "shapes":
            return info["shapes"]
        else:
            super(self.__class__).image_reference(self, image_id)

    def load_mask(self, image_id):
        """Generate instance masks for shapes of the given image ID.
        """
        info = self.image_info[image_id]
        shapes = info['shapes']
        count = len(shapes)
        mask = np.zeros([info['height'], info['width'], count], dtype=np.uint8)
        for i, (shape, _, dims) in enumerate(info['shapes']):
            mask[:, :, i:i+1] = self.draw_shape(mask[:, :, i:i+1].copy(),
                                                shape, dims, 1)
        # Handle occlusions
        occlusion = np.logical_not(mask[:, :, -1]).astype(np.uint8)
        for i in range(count-2, -1, -1):
            mask[:, :, i] = mask[:, :, i] * occlusion
            occlusion = np.logical_and(occlusion, np.logical_not(mask[:, :, i]))
        # Map class names to class IDs.
        class_ids = np.array([self.class_names.index(s[0]) for s in shapes])
        return mask.astype(np.bool), class_ids.astype(np.int32)

    def draw_shape(self, image, shape, dims, color):
        """Draws a shape from the given specs."""
        # Get the center x, y and the size s
        x, y, s = dims
        if shape == 'square':
            cv2.rectangle(image, (x-s, y-s), (x+s, y+s), color, -1)
        elif shape == "circle":
            cv2.circle(image, (x, y), s, color, -1)
        elif shape == "triangle":
            points = np.array([[(x, y-s),
                                (x-s/math.sin(math.radians(60)), y+s),
                                (x+s/math.sin(math.radians(60)), y+s),
                                ]], dtype=np.int32)
            cv2.fillPoly(image, points, color)
        return image

    def random_shape(self, height, width):
        """Generates specifications of a random shape that lies within
        the given height and width boundaries.
        Returns a tuple of three valus:
        * The shape name (square, circle, ...)
        * Shape color: a tuple of 3 values, RGB.
        * Shape dimensions: A tuple of values that define the shape size
                            and location. Differs per shape type.
        """
        # Shape
        shape = random.choice(["square", "circle", "triangle"])
        # Color
        color = tuple([random.randint(0, 255) for _ in range(3)])
        # Center x, y
        # 这里是每个物体的最大的尺寸
        buffer = 20
        # 随机选择一个点为物体在图片的中心
        y = random.randint(buffer, height - buffer - 1)
        x = random.randint(buffer, width - buffer - 1)
        # Size
        # 物体的面积
        s = random.randint(buffer, height//4)
        return shape, color, (x, y, s)

    def random_image(self, height, width):
        """Creates random specifications of an image with multiple shapes.
        Returns the background color of the image and a list of shape
        specifications that can be used to draw the image.
        """
        # Pick random background color
        bg_color = np.array([random.randint(0, 255) for _ in range(3)])
        # Generate a few random shapes and record their
        # bounding boxes
        shapes = []
        boxes = []
        N = random.randint(1, 4)
        for _ in range(N):
            shape, color, dims = self.random_shape(height, width)
            shapes.append((shape, color, dims))
            x, y, s = dims
            boxes.append([y-s, x-s, y+s, x+s])
        # Apply non-max suppression wit 0.3 threshold to avoid
        # shapes covering each other
        keep_ixs = utils.non_max_suppression(np.array(boxes), np.arange(N), 0.3)
        shapes = [s for i, s in enumerate(shapes) if i in keep_ixs]
        return bg_color, shapes
这个模块是就是产生数据的模块,这里的数据只有三种(圆,正方形,圆)。每个物体的颜色,大小都是随机的进行抽取的。
数据生成
# 这里的训练数据随机产生的,通过ShapesDataset就是可以生成一个专门产生数据的类别,
# 这里数据包括三个类别,"square","circle","triangle"
dataset_train = ShapesDataset()
dataset_train.load_shapes(500, config.IMAGE_SHAPE[0], config.IMAGE_SHAPE[1])
dataset_train.prepare()

# Validation dataset
dataset_val = ShapesDataset()
dataset_val.load_shapes(50, config.IMAGE_SHAPE[0], config.IMAGE_SHAPE[1])
dataset_val.prepare()
使用上面的数据模块,产生训练(500图片)和验证的数据(50张图片)。
对图片进行可视化:
# 可以通过这里的可视化工具查看数据
image_ids = np.random.choice(dataset_train.image_ids, 4)
for image_id in image_ids:
    image = dataset_train.load_image(image_id)
    mask, class_ids = dataset_train.load_mask(image_id)
    visualize.display_top_masks(image, mask, class_ids, dataset_train.class_names)
使用load_image可以对通过图片信息,产生训练使用的数据
可视化结果如下:
创建模型
# 创建一个mask rcnn
model = modellib.MaskRCNN(mode="training", config=config,
                          model_dir=MODEL_DIR)
选择一个训练使用的权重
init_with = "coco"  # imagenet, coco, or last
# 选择一个预训练的权重
if init_with == "imagenet":
    model.load_weights(model.get_imagenet_weights(), by_name=True)
elif init_with == "coco":
    # Load weights trained on MS COCO, but skip layers that
    # are different due to the different number of classes
    # See README for instructions to download the COCO weights
    model.load_weights(COCO_MODEL_PATH, by_name=True,
                       exclude=["mrcnn_class_logits", "mrcnn_bbox_fc",
                                "mrcnn_bbox", "mrcnn_mask"])
elif init_with == "last":
    # Load the last model you trained and continue training
    model.load_weights(model.find_last(), by_name=True)
这里可以根据你下载的预训练模型,选择相应的参数进行训练
# 选择进行训练的阶段 heads 和 all,这里的训练方式不一样
model.train(dataset_train, dataset_val,
            learning_rate=config.LEARNING_RATE,
            epochs=1,
            layers='heads')
在keras中执行上面这段代码,完了过就开始训练了
- heads:冻结主干网络,而训练网络的heads
- all:微调所有的网络参数
Epoch 1/1
100/100 [==============================] - 73s - loss: 2.2164 - rpn_class_loss: 0.0242 - rpn_bbox_loss: 1.0638 - mrcnn_class_loss: 0.2426 - mrcnn_bbox_loss: 0.3006 - mrcnn_mask_loss: 0.2385 - val_loss: 1.8454 - val_rpn_class_loss: 0.0232 - val_rpn_bbox_loss: 0.9971 - val_mrcnn_class_loss: 0.1398 - val_mrcnn_bbox_loss: 0.1343 - val_mrcnn_mask_loss: 0.2042
测试模型
class InferenceConfig(ShapesConfig):
    GPU_COUNT = 1
    IMAGES_PER_GPU = 1

inference_config = InferenceConfig()

# Recreate the model in inference mode

# 创建一个模型进行推断
model = modellib.MaskRCNN(mode="inference",
                          config=inference_config,
                          model_dir=MODEL_DIR)

# Get path to saved weights
# Either set a specific path or find last trained weights
# model_path = os.path.join(ROOT_DIR, ".h5 file name here")
model_path = model.find_last()

# Load trained weights
print("Loading weights from ", model_path)
# 下载模型的参数
model.load_weights(model_path, by_name=True)
这里直接创建了一个进行测试的模型,下载了刚才训练完成模型的参数进行测试
获取训练数据的标签
# 使用模型下载训练数据
original_image, image_meta, gt_class_id, gt_bbox, gt_mask =\
    modellib.load_image_gt(dataset_val, inference_config,
                           image_id, use_mini_mask=False)
使用模型对图片进行检测
# 使用模型对数据进行检测
results = model.detect([original_image], verbose=1)

r = results[0]
visualize.display_instances(original_image, r['rois'], r['masks'], r['class_ids'],
                            dataset_val.class_names, r['scores'], ax=get_ax())
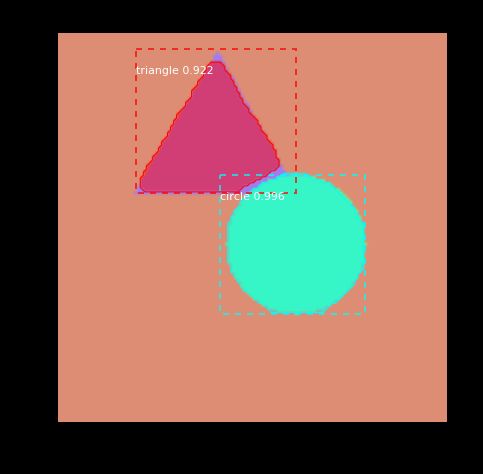
上面对图片进行检测之后,还对图片进行可视化。
到这里,整个模型的流程就结束了
那接下就看看model是怎么产生的吧。。。。
解析Mask rcnn
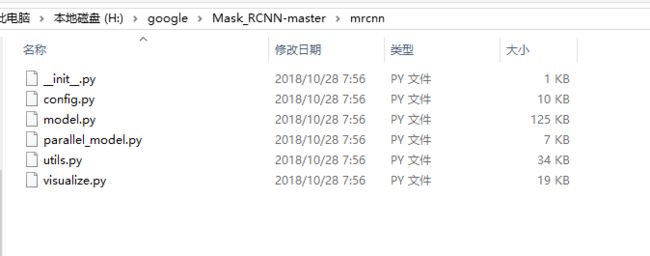
模型在mscnn中,如下:
文件可真大,model.py文件有足足3000行代码:
在刚才的文件train_shapes.ipynb中
from mrcnn.config import Config
from mrcnn import utils
import mrcnn.model as modellib
from mrcnn import visualize
from mrcnn.model import log
这里说明model所用的到东西不多。
- log
- modellib
1.modellib.MaskRCNN
2.modellib.load_image_gt
3.modellib.mold_image
鉴于文件复杂度,这里只进行MaskRCNN的解析,其他的坑慢慢填
吧。
这里是通过modellib.MaskRCNN构建mask rcnn 模型的。这里有好几个参数。需要慢慢解析。。。。。。。。
model = modellib.MaskRCNN(mode="training", config=config,
                         model_dir=MODEL_DIR)
这里只解析model主要的函数,就是出现在训练流程中的,其他的函数不需要太关注,这样就可以减少学习负担,以下函数排名,按照出场顺序:
- model:
1.model.find_last
2.model.load_weights
3.model.train
4.model.detect
所以这要看看这个函数就可以了,其他的函数,就让它。。。。。
MaskRCNN
    def __init__(self, mode, config, model_dir):
        """
        mode: Either "training" or "inference"
        config: A Sub-class of the Config class
        model_dir: Directory to save training logs and trained weights
        """
        assert mode in ['training', 'inference']
        self.mode = mode
        self.config = config
        self.model_dir = model_dir

        # 设置模型保存的目录
        self.set_log_dir()

        # 构建整个模型
        self.keras_model = self.build(mode=mode, config=config)
上面就是初始化函数。
这里的这个build函数,就是模型的主要部分,这里使用涉及的代码量在2000左右。都是FPN的翻来覆去,在构建模型,由于keras不是特别熟悉等其他原因,没法完全理解所有代码,所以就。。。。水吧。。。。。。。
- build函数
def build(self, mode, config):
        """Build Mask R-CNN architecture.
            input_shape: The shape of the input image.
            mode: Either "training" or "inference". The inputs and
                outputs of the model differ accordingly.
        """
        assert mode in ['training', 'inference']

        # Image size must be dividable by 2 multiple times
        # 这里的h , w 必须是2的幂次方
        h, w = config.IMAGE_SHAPE[:2]
        if h / 2**6 != int(h / 2**6) or w / 2**6 != int(w / 2**6):
            raise Exception("Image size must be dividable by 2 at least 6 times "
                            "to avoid fractions when downscaling and upscaling."
                            "For example, use 256, 320, 384, 448, 512, ... etc. ")

        # Inputs
        # 构建模型的image输入
        input_image = KL.Input(
            shape=[None, None, config.IMAGE_SHAPE[2]], name="input_image")

        # 创建image图片的尺寸图
        input_image_meta = KL.Input(shape=[config.IMAGE_META_SIZE],
                                    name="input_image_meta")
        if mode == "training":
            # RPN GT
            # 获取RPN的真实标签
            input_rpn_match = KL.Input(
                shape=[None, 1], name="input_rpn_match", dtype=tf.int32)
            input_rpn_bbox = KL.Input(
                shape=[None, 4], name="input_rpn_bbox", dtype=tf.float32)

            # Detection GT (class IDs, bounding boxes, and masks)
            # 1. GT Class IDs (zero padded)

            # 获取图片中mask rcnn中的信息
            input_gt_class_ids = KL.Input(
                shape=[None], name="input_gt_class_ids", dtype=tf.int32)
            # 2. GT Boxes in pixels (zero padded)
            # [batch, MAX_GT_INSTANCES, (y1, x1, y2, x2)] in image coordinates
            input_gt_boxes = KL.Input(
                shape=[None, 4], name="input_gt_boxes", dtype=tf.float32)
            # Normalize coordinates
            gt_boxes = KL.Lambda(lambda x: norm_boxes_graph(
                x, K.shape(input_image)[1:3]))(input_gt_boxes)
            # 3. GT Masks (zero padded)
            # [batch, height, width, MAX_GT_INSTANCES]
            if config.USE_MINI_MASK:
                input_gt_masks = KL.Input(
                    shape=[config.MINI_MASK_SHAPE[0],
                           config.MINI_MASK_SHAPE[1], None],
                    name="input_gt_masks", dtype=bool)
            else:
                input_gt_masks = KL.Input(
                    shape=[config.IMAGE_SHAPE[0], config.IMAGE_SHAPE[1], None],
                    name="input_gt_masks", dtype=bool)
        elif mode == "inference":
            # Anchors in normalized coordinates
            input_anchors = KL.Input(shape=[None, 4], name="input_anchors")

        # Build the shared convolutional layers.
        # Bottom-up Layers
        # Returns a list of the last layers of each stage, 5 in total.
        # Don't create the thead (stage 5), so we pick the 4th item in the list.
        # config.BACKBONE ==   BACKBONE = "resnet101"
        if callable(config.BACKBONE):
            # 构建resnet101基础模型,这里使用C2, C3, C4, C5作为FCN的
            _, C2, C3, C4, C5 = config.BACKBONE(input_image, stage5=True,
                                                train_bn=config.TRAIN_BN)
        else:

            _, C2, C3, C4, C5 = resnet_graph(input_image, config.BACKBONE,
                                             stage5=True, train_bn=config.TRAIN_BN)
        # Top-down Layers
        # TODO: add assert to varify feature map sizes match what's in config

        # FPN几个层
        P5 = KL.Conv2D(config.TOP_DOWN_PYRAMID_SIZE, (1, 1), name='fpn_c5p5')(C5)
        P4 = KL.Add(name="fpn_p4add")([
            KL.UpSampling2D(size=(2, 2), name="fpn_p5upsampled")(P5),
            KL.Conv2D(config.TOP_DOWN_PYRAMID_SIZE, (1, 1), name='fpn_c4p4')(C4)])
        P3 = KL.Add(name="fpn_p3add")([
            KL.UpSampling2D(size=(2, 2), name="fpn_p4upsampled")(P4),
            KL.Conv2D(config.TOP_DOWN_PYRAMID_SIZE, (1, 1), name='fpn_c3p3')(C3)])
        P2 = KL.Add(name="fpn_p2add")([
            KL.UpSampling2D(size=(2, 2), name="fpn_p3upsampled")(P3),
            KL.Conv2D(config.TOP_DOWN_PYRAMID_SIZE, (1, 1), name='fpn_c2p2')(C2)])
        # Attach 3x3 conv to all P layers to get the final feature maps.
        P2 = KL.Conv2D(config.TOP_DOWN_PYRAMID_SIZE, (3, 3), padding="SAME", name="fpn_p2")(P2)
        P3 = KL.Conv2D(config.TOP_DOWN_PYRAMID_SIZE, (3, 3), padding="SAME", name="fpn_p3")(P3)
        P4 = KL.Conv2D(config.TOP_DOWN_PYRAMID_SIZE, (3, 3), padding="SAME", name="fpn_p4")(P4)
        P5 = KL.Conv2D(config.TOP_DOWN_PYRAMID_SIZE, (3, 3), padding="SAME", name="fpn_p5")(P5)
        # P6 is used for the 5th anchor scale in RPN. Generated by
        # subsampling from P5 with stride of 2.
        P6 = KL.MaxPooling2D(pool_size=(1, 1), strides=2, name="fpn_p6")(P5)

        # Note that P6 is used in RPN, but not in the classifier heads.
        rpn_feature_maps = [P2, P3, P4, P5, P6]
        mrcnn_feature_maps = [P2, P3, P4, P5]

        # Anchors
        # 构建box生成器模块
        if mode == "training":
            anchors = self.get_anchors(config.IMAGE_SHAPE)
            # Duplicate across the batch dimension because Keras requires it
            # TODO: can this be optimized to avoid duplicating the anchors?
            anchors = np.broadcast_to(anchors, (config.BATCH_SIZE,) + anchors.shape)
            # A hack to get around Keras's bad support for constants
            anchors = KL.Lambda(lambda x: tf.Variable(anchors), name="anchors")(input_image)
        else:
            anchors = input_anchors

        # RPN Model
        # 构建RPN模块
        rpn = build_rpn_model(config.RPN_ANCHOR_STRIDE,
                              len(config.RPN_ANCHOR_RATIOS), config.TOP_DOWN_PYRAMID_SIZE)
        # Loop through pyramid layers
        layer_outputs = []  # list of lists
        # 对每一个特征图,RPN模块都会生成box 坐标和 classe分数
        for p in rpn_feature_maps:
            layer_outputs.append(rpn([p]))
        # Concatenate layer outputs
        # Convert from list of lists of level outputs to list of lists
        # of outputs across levels.
        # e.g. [[a1, b1, c1], [a2, b2, c2]] => [[a1, a2], [b1, b2], [c1, c2]]
        output_names = ["rpn_class_logits", "rpn_class", "rpn_bbox"]
        outputs = list(zip(*layer_outputs))
        outputs = [KL.Concatenate(axis=1, name=n)(list(o))
                   for o, n in zip(outputs, output_names)]

        # 把所有FPN的值进行整理
        rpn_class_logits, rpn_class, rpn_bbox = outputs

        # Generate proposals
        # Proposals are [batch, N, (y1, x1, y2, x2)] in normalized coordinates
        # and zero padded.
        proposal_count = config.POST_NMS_ROIS_TRAINING if mode == "training"\
            else config.POST_NMS_ROIS_INFERENCE

        # 对box进行筛选,使用NOM和top等手段对 box进行过滤
        rpn_rois = ProposalLayer(
            proposal_count=proposal_count,
            nms_threshold=config.RPN_NMS_THRESHOLD,
            name="ROI",
            config=config)([rpn_class, rpn_bbox, anchors])

        if mode == "training":
            # Class ID mask to mark class IDs supported by the dataset the image
            # came from.
            # 构建类别信息
            active_class_ids = KL.Lambda(
                lambda x: parse_image_meta_graph(x)["active_class_ids"]
                )(input_image_meta)

            if not config.USE_RPN_ROIS:
                # Ignore predicted ROIs and use ROIs provided as an input.
                input_rois = KL.Input(shape=[config.POST_NMS_ROIS_TRAINING, 4],
                                      name="input_roi", dtype=np.int32)
                # Normalize coordinates
                target_rois = KL.Lambda(lambda x: norm_boxes_graph(
                    x, K.shape(input_image)[1:3]))(input_rois)
            else:
                target_rois = rpn_rois

            # Generate detection targets
            # Subsamples proposals and generates target outputs for training
            # Note that proposal class IDs, gt_boxes, and gt_masks are zero
            # padded. Equally, returned rois and targets are zero padded.
            # 构建mask的真实标签
            rois, target_class_ids, target_bbox, target_mask =\
                DetectionTargetLayer(config, name="proposal_targets")([
                    target_rois, input_gt_class_ids, gt_boxes, input_gt_masks])

            # Network Heads
            # TODO: verify that this handles zero padded ROIs
            # 使用FPN模型生成的模型进行mask rcnn的掩码预测。
            mrcnn_class_logits, mrcnn_class, mrcnn_bbox =\
                fpn_classifier_graph(rois, mrcnn_feature_maps, input_image_meta,
                                     config.POOL_SIZE, config.NUM_CLASSES,
                                     train_bn=config.TRAIN_BN,
                                     fc_layers_size=config.FPN_CLASSIF_FC_LAYERS_SIZE)

            mrcnn_mask = build_fpn_mask_graph(rois, mrcnn_feature_maps,
                                              input_image_meta,
                                              config.MASK_POOL_SIZE,
                                              config.NUM_CLASSES,
                                              train_bn=config.TRAIN_BN)

            # TODO: clean up (use tf.identify if necessary)
            output_rois = KL.Lambda(lambda x: x * 1, name="output_rois")(rois)

            # Losses
            # 构建损失函数
            rpn_class_loss = KL.Lambda(lambda x: rpn_class_loss_graph(*x), name="rpn_class_loss")(
                [input_rpn_match, rpn_class_logits])
            rpn_bbox_loss = KL.Lambda(lambda x: rpn_bbox_loss_graph(config, *x), name="rpn_bbox_loss")(
                [input_rpn_bbox, input_rpn_match, rpn_bbox])
            class_loss = KL.Lambda(lambda x: mrcnn_class_loss_graph(*x), name="mrcnn_class_loss")(
                [target_class_ids, mrcnn_class_logits, active_class_ids])
            bbox_loss = KL.Lambda(lambda x: mrcnn_bbox_loss_graph(*x), name="mrcnn_bbox_loss")(
                [target_bbox, target_class_ids, mrcnn_bbox])
            mask_loss = KL.Lambda(lambda x: mrcnn_mask_loss_graph(*x), name="mrcnn_mask_loss")(
                [target_mask, target_class_ids, mrcnn_mask])

            # Model
            inputs = [input_image, input_image_meta,
                      input_rpn_match, input_rpn_bbox, input_gt_class_ids, input_gt_boxes, input_gt_masks]
            if not config.USE_RPN_ROIS:
                inputs.append(input_rois)
            outputs = [rpn_class_logits, rpn_class, rpn_bbox,
                       mrcnn_class_logits, mrcnn_class, mrcnn_bbox, mrcnn_mask,
                       rpn_rois, output_rois,
                       rpn_class_loss, rpn_bbox_loss, class_loss, bbox_loss, mask_loss]
            model = KM.Model(inputs, outputs, name='mask_rcnn')
        else:
            # Network Heads
            # Proposal classifier and BBox regressor heads
            mrcnn_class_logits, mrcnn_class, mrcnn_bbox =\
                fpn_classifier_graph(rpn_rois, mrcnn_feature_maps, input_image_meta,
                                     config.POOL_SIZE, config.NUM_CLASSES,
                                     train_bn=config.TRAIN_BN,
                                     fc_layers_size=config.FPN_CLASSIF_FC_LAYERS_SIZE)

            # Detections
            # output is [batch, num_detections, (y1, x1, y2, x2, class_id, score)] in
            # normalized coordinates
            detections = DetectionLayer(config, name="mrcnn_detection")(
                [rpn_rois, mrcnn_class, mrcnn_bbox, input_image_meta])

            # Create masks for detections
            detection_boxes = KL.Lambda(lambda x: x[..., :4])(detections)
            mrcnn_mask = build_fpn_mask_graph(detection_boxes, mrcnn_feature_maps,
                                              input_image_meta,
                                              config.MASK_POOL_SIZE,
                                              config.NUM_CLASSES,
                                              train_bn=config.TRAIN_BN)

            model = KM.Model([input_image, input_image_meta, input_anchors],
                             [detections, mrcnn_class, mrcnn_bbox,
                                 mrcnn_mask, rpn_rois, rpn_class, rpn_bbox],
                             name='mask_rcnn')

        # Add multi-GPU support.
        if config.GPU_COUNT > 1:
            from mrcnn.parallel_model import ParallelModel
            model = ParallelModel(model, config.GPU_COUNT)

        return model
这里mask rcnn网络的网络构建图。
虽然水了点但还是,需要做一下记录的:
- 1.基于keras的特点,这里首先构建输入数据的层。
# Inputs
        # 构建模型的image输入
        input_image = KL.Input(
            shape=[None, None, config.IMAGE_SHAPE[2]], name="input_image")

        # 创建image图片的尺寸图
        input_image_meta = KL.Input(shape=[config.IMAGE_META_SIZE],
                                    name="input_image_meta")
        if mode == "training":
            # RPN GT
            # 获取RPN的真实标签
            input_rpn_match = KL.Input(
                shape=[None, 1], name="input_rpn_match", dtype=tf.int32)
            input_rpn_bbox = KL.Input(
                shape=[None, 4], name="input_rpn_bbox", dtype=tf.float32)

            # Detection GT (class IDs, bounding boxes, and masks)
            # 1. GT Class IDs (zero padded)

            # 获取图片中mask rcnn中的信息
            input_gt_class_ids = KL.Input(
                shape=[None], name="input_gt_class_ids", dtype=tf.int32)
            # 2. GT Boxes in pixels (zero padded)
            # [batch, MAX_GT_INSTANCES, (y1, x1, y2, x2)] in image coordinates
            input_gt_boxes = KL.Input(
                shape=[None, 4], name="input_gt_boxes", dtype=tf.float32)
            # Normalize coordinates
            gt_boxes = KL.Lambda(lambda x: norm_boxes_graph(
                x, K.shape(input_image)[1:3]))(input_gt_boxes)
            # 3. GT Masks (zero padded)
            # [batch, height, width, MAX_GT_INSTANCES]
            if config.USE_MINI_MASK:
                input_gt_masks = KL.Input(
                    shape=[config.MINI_MASK_SHAPE[0],
                           config.MINI_MASK_SHAPE[1], None],
                    name="input_gt_masks", dtype=bool)
            else:
                input_gt_masks = KL.Input(
                    shape=[config.IMAGE_SHAPE[0], config.IMAGE_SHAPE[1], None],
                    name="input_gt_masks", dtype=bool)
上面都是构建训练数据的输入层
-
- 构建resnet101网络,这里直接
            # 构建resnet101基础模型,这里使用C2, C3, C4, C5作为FCN的
            _, C2, C3, C4, C5 = resnet_graph(input_image, config.BACKBONE,
                                             stage5=True, train_bn=config.TRAIN_B
这里的resnet_graph就是 构建resnet101网络的图:
def resnet_graph(input_image, architecture, stage5=False, train_bn=True):
    """Build a ResNet graph.
        architecture: Can be resnet50 or resnet101
        stage5: Boolean. If False, stage5 of the network is not created
        train_bn: Boolean. Train or freeze Batch Norm layers
        resnet_graph(input_image, config.BACKBONE,
                                             stage5=True, train_bn=config.TRAIN_BN)
    """
    assert architecture in ["resnet50", "resnet101"]
    # Stage 1
    x = KL.ZeroPadding2D((3, 3))(input_image)
    x = KL.Conv2D(64, (7, 7), strides=(2, 2), name='conv1', use_bias=True)(x)
    x = BatchNorm(name='bn_conv1')(x, training=train_bn)
    x = KL.Activation('relu')(x)
    C1 = x = KL.MaxPooling2D((3, 3), strides=(2, 2), padding="same")(x)
    # Stage 2
    x = conv_block(x, 3, [64, 64, 256], stage=2, block='a', strides=(1, 1), train_bn=train_bn)
    x = identity_block(x, 3, [64, 64, 256], stage=2, block='b', train_bn=train_bn)
    C2 = x = identity_block(x, 3, [64, 64, 256], stage=2, block='c', train_bn=train_bn)
    # Stage 3
    x = conv_block(x, 3, [128, 128, 512], stage=3, block='a', train_bn=train_bn)
    x = identity_block(x, 3, [128, 128, 512], stage=3, block='b', train_bn=train_bn)
    x = identity_block(x, 3, [128, 128, 512], stage=3, block='c', train_bn=train_bn)
    C3 = x = identity_block(x, 3, [128, 128, 512], stage=3, block='d', train_bn=train_bn)
    # Stage 4
    x = conv_block(x, 3, [256, 256, 1024], stage=4, block='a', train_bn=train_bn)
    block_count = {"resnet50": 5, "resnet101": 22}[architecture]
    for i in range(block_count):
        x = identity_block(x, 3, [256, 256, 1024], stage=4, block=chr(98 + i), train_bn=train_bn)
    C4 = x
    # Stage 5
    if stage5:
        x = conv_block(x, 3, [512, 512, 2048], stage=5, block='a', train_bn=train_bn)
        x = identity_block(x, 3, [512, 512, 2048], stage=5, block='b', train_bn=train_bn)
        C5 = x = identity_block(x, 3, [512, 512, 2048], stage=5, block='c', train_bn=train_bn)
    else:
        C5 = None
    return [C1, C2, C3, C4, C5]
上面就是resnet101的模型函数,没有作注解,可以脑补一下resnet101的模型结构,这里返回中间五个feature map
- 3.接下来就是进行FPN的模型构建
        # RPN Model
        # 构建RPN模块
        rpn = build_rpn_model(config.RPN_ANCHOR_STRIDE,
                              len(config.RPN_ANCHOR_RATIOS), config.TOP_DOWN_PYRAMID_SIZE)
        # Loop through pyramid layers
        layer_outputs = []  # list of lists
        # 对每一个特征图,RPN模块都会生成box 坐标和 classe分数
        for p in rpn_feature_maps:
            layer_outputs.append(rpn([p]))
1.关于怎么构建P2, P3, P4, P5, P6的特征金子塔,被我省略,
- 这里拿到[P2, P3, P4, P5, P6]对这些feature map进行特征进行box坐标和classes 的分数预测。使用build_rpn_model构建RPN层。
def rpn_graph(feature_map, anchors_per_location, anchor_stride):
    # TODO: check if stride of 2 causes alignment issues if the feature map
    # is not even.
    # Shared convolutional base of the RPN
    # 对输入的特征图进行编码
    shared = KL.Conv2D(512, (3, 3), padding='same', activation='relu',
                       strides=anchor_stride,
                       name='rpn_conv_shared')(feature_map)

    # Anchor Score. [batch, height, width, anchors per location * 2].
    # 进行二分类
    x = KL.Conv2D(2 * anchors_per_location, (1, 1), padding='valid',
                  activation='linear', name='rpn_class_raw')(shared)

    # Reshape to [batch, anchors, 2]
    rpn_class_logits = KL.Lambda(
        lambda t: tf.reshape(t, [tf.shape(t)[0], -1, 2]))(x)

    # Softmax on last dimension of BG/FG.
    rpn_probs = KL.Activation(
        "softmax", name="rpn_class_xxx")(rpn_class_logits)

    # Bounding box refinement. [batch, H, W, anchors per location * depth]
    # where depth is [x, y, log(w), log(h)]
    # 进行box做坐标的预测
    x = KL.Conv2D(anchors_per_location * 4, (1, 1), padding="valid",
                  activation='linear', name='rpn_bbox_pred')(shared)

    # Reshape to [batch, anchors, 4]
    rpn_bbox = KL.Lambda(lambda t: tf.reshape(t, [tf.shape(t)[0], -1, 4]))(x)

    return [rpn_class_logits, rpn_probs, rpn_bbox]
build_rpn_model调用rpn_graph进行RPN层的预测。如上所示:
- 构建mask
            mrcnn_class_logits, mrcnn_class, mrcnn_bbox =\
                fpn_classifier_graph(rois, mrcnn_feature_maps, input_image_meta,
                                     config.POOL_SIZE, config.NUM_CLASSES,
                                     train_bn=config.TRAIN_BN,
                                     fc_layers_size=config.FPN_CLASSIF_FC_LAYERS_SIZE)

            mrcnn_mask = build_fpn_mask_graph(rois, mrcnn_feature_maps,
                                              input_image_meta,
                                              config.MASK_POOL_SIZE,
                                              config.NUM_CLASSES,
                                              train_bn=config.TRAIN_BN)
使用RPN生成的进行mask预测。这里的rios的掩码其实是二值化的
def build_fpn_mask_graph(rois, feature_maps, image_meta,
                         pool_size, num_classes, train_bn=True):

    # ROI Pooling
    # Shape: [batch, num_rois, MASK_POOL_SIZE, MASK_POOL_SIZE, channels]
    x = PyramidROIAlign([pool_size, pool_size],
                        name="roi_align_mask")([rois, image_meta] + feature_maps)

    # Conv layers
    x = KL.TimeDistributed(KL.Conv2D(256, (3, 3), padding="same"),
                           name="mrcnn_mask_conv1")(x)
    x = KL.TimeDistributed(BatchNorm(),
                           name='mrcnn_mask_bn1')(x, training=train_bn)
    x = KL.Activation('relu')(x)

    x = KL.TimeDistributed(KL.Conv2D(256, (3, 3), padding="same"),
                           name="mrcnn_mask_conv2")(x)
    x = KL.TimeDistributed(BatchNorm(),
                           name='mrcnn_mask_bn2')(x, training=train_bn)
    x = KL.Activation('relu')(x)

    x = KL.TimeDistributed(KL.Conv2D(256, (3, 3), padding="same"),
                           name="mrcnn_mask_conv3")(x)
    x = KL.TimeDistributed(BatchNorm(),
                           name='mrcnn_mask_bn3')(x, training=train_bn)
    x = KL.Activation('relu')(x)

    x = KL.TimeDistributed(KL.Conv2D(256, (3, 3), padding="same"),
                           name="mrcnn_mask_conv4")(x)
    x = KL.TimeDistributed(BatchNorm(),
                           name='mrcnn_mask_bn4')(x, training=train_bn)
    x = KL.Activation('relu')(x)

    # 使用反卷积
    x = KL.TimeDistributed(KL.Conv2DTranspose(256, (2, 2), strides=2, activation="relu"),
                           name="mrcnn_mask_deconv")(x)
    x = KL.TimeDistributed(KL.Conv2D(num_classes, (1, 1), strides=1, activation="sigmoid"),
                           name="mrcnn_mask")(x)
    return x
这里得到模型的mask,之后就可以进行loss计算了
- loss计算
            # Losses
            # 构建损失函数
            rpn_class_loss = KL.Lambda(lambda x: rpn_class_loss_graph(*x), name="rpn_class_loss")(
                [input_rpn_match, rpn_class_logits])
            rpn_bbox_loss = KL.Lambda(lambda x: rpn_bbox_loss_graph(config, *x), name="rpn_bbox_loss")(
                [input_rpn_bbox, input_rpn_match, rpn_bbox])
            class_loss = KL.Lambda(lambda x: mrcnn_class_loss_graph(*x), name="mrcnn_class_loss")(
                [target_class_ids, mrcnn_class_logits, active_class_ids])
            bbox_loss = KL.Lambda(lambda x: mrcnn_bbox_loss_graph(*x), name="mrcnn_bbox_loss")(
                [target_bbox, target_class_ids, mrcnn_bbox])
            mask_loss = KL.Lambda(lambda x: mrcnn_mask_loss_graph(*x), name="mrcnn_mask_loss")(
                [target_mask, target_class_ids, mrcnn_mask])

            # Model
            inputs = [input_image, input_image_meta,
                      input_rpn_match, input_rpn_bbox, input_gt_class_ids, input_gt_boxes, input_gt_masks]
            if not config.USE_RPN_ROIS:
                inputs.append(input_rois)
            outputs = [rpn_class_logits, rpn_class, rpn_bbox,
                       mrcnn_class_logits, mrcnn_class, mrcnn_bbox, mrcnn_mask,
                       rpn_rois, output_rois,
                       rpn_class_loss, rpn_bbox_loss, class_loss, bbox_loss, mask_loss]
            model = KM.Model(inputs, outputs, name='mask_rcnn')
train
def train(self, train_dataset, val_dataset, learning_rate, epochs, layers,
              augmentation=None, custom_callbacks=None, no_augmentation_sources=None):
        assert self.mode == "training", "Create model in training mode."

        # Pre-defined layer regular expressions
        layer_regex = {
            # all layers but the backbone
            "heads": r"(mrcnn\_.*)|(rpn\_.*)|(fpn\_.*)",
            # From a specific Resnet stage and up
            "3+": r"(res3.*)|(bn3.*)|(res4.*)|(bn4.*)|(res5.*)|(bn5.*)|(mrcnn\_.*)|(rpn\_.*)|(fpn\_.*)",
            "4+": r"(res4.*)|(bn4.*)|(res5.*)|(bn5.*)|(mrcnn\_.*)|(rpn\_.*)|(fpn\_.*)",
            "5+": r"(res5.*)|(bn5.*)|(mrcnn\_.*)|(rpn\_.*)|(fpn\_.*)",
            # All layers
            "all": ".*",
        }
        if layers in layer_regex.keys():
            layers = layer_regex[layers]

        # Data generators
        #
        train_generator = data_generator(train_dataset, self.config, shuffle=True,
                                         augmentation=augmentation,
                                         batch_size=self.config.BATCH_SIZE,
                                         no_augmentation_sources=no_augmentation_sources)
        val_generator = data_generator(val_dataset, self.config, shuffle=True,
                                       batch_size=self.config.BATCH_SIZE)

        # Create log_dir if it does not exist
        if not os.path.exists(self.log_dir):
            os.makedirs(self.log_dir)

        # Callbacks
        callbacks = [
            keras.callbacks.TensorBoard(log_dir=self.log_dir,
                                        histogram_freq=0, write_graph=True, write_images=False),
            keras.callbacks.ModelCheckpoint(self.checkpoint_path,
                                            verbose=0, save_weights_only=True),
        ]

        # Add custom callbacks to the list
        if custom_callbacks:
            callbacks += custom_callbacks

        # Train
        log("\nStarting at epoch {}. LR={}\n".format(self.epoch, learning_rate))
        log("Checkpoint Path: {}".format(self.checkpoint_path))
        self.set_trainable(layers)
        self.compile(learning_rate, self.config.LEARNING_MOMENTUM)

        if os.name is 'nt':
            workers = 0
        else:
            workers = multiprocessing.cpu_count()
        # 进行训练
        self.keras_model.fit_generator(
            train_generator,
            initial_epoch=self.epoch,
            epochs=epochs,
            steps_per_epoch=self.config.STEPS_PER_EPOCH,
            callbacks=callbacks,
            validation_data=val_generator,
            validation_steps=self.config.VALIDATION_STEPS,
            max_queue_size=100,
            workers=workers,
            use_multiprocessing=True,
        )
        self.epoch = max(self.epoch, epochs)
model.train 的就是进行训练的一个函数,这其实就是调用,
使用self.keras_model.fit_generator对模型进行训练。
- model.load_weights
def load_weights(self, filepath, by_name=False, exclude=None):
        """Modified version of the corresponding Keras function with
        the addition of multi-GPU support and the ability to exclude
        some layers from loading.
        exclude: list of layer names to exclude
        """
        import h5py
        # Conditional import to support versions of Keras before 2.2
        # TODO: remove in about 6 months (end of 2018)
        try:
            from keras.engine import saving
        except ImportError:
            # Keras before 2.2 used the 'topology' namespace.
            from keras.engine import topology as saving

        if exclude:
            by_name = True

        if h5py is None:
            raise ImportError('`load_weights` requires h5py.')
        # 加载预训练模型
        f = h5py.File(filepath, mode='r')
        if 'layer_names' not in f.attrs and 'model_weights' in f:
            f = f['model_weights']

        # In multi-GPU training, we wrap the model. Get layers
        # of the inner model because they have the weights.
        keras_model = self.keras_model
        layers = keras_model.inner_model.layers if hasattr(keras_model, "inner_model")\
            else keras_model.layers

        # Exclude some layers
        if exclude:
            layers = filter(lambda l: l.name not in exclude, layers)

        if by_name:
            saving.load_weights_from_hdf5_group_by_name(f, layers)
        else:
            saving.load_weights_from_hdf5_group(f, layers)
        if hasattr(f, 'close'):
            f.close()

        # Update the log directory
        self.set_log_dir(filepath)
这是个进行参数加载的模型,使用keras极其方便地加载数据,同时过滤掉不需要的参数。
- model.detect
def detect(self, images, verbose=0):
        assert self.mode == "inference", "Create model in inference mode."
        assert len(
            images) == self.config.BATCH_SIZE, "len(images) must be equal to BATCH_SIZE"

        if verbose:
            log("Processing {} images".format(len(images)))
            for image in images:
                log("image", image)

        # Mold inputs to format expected by the neural network
        # 加载数据,直接从images获取数据
        molded_images, image_metas, windows = self.mold_inputs(images)

        # Validate image sizes
        # All images in a batch MUST be of the same size
        image_shape = molded_images[0].shape
        for g in molded_images[1:]:
            assert g.shape == image_shape,\
                "After resizing, all images must have the same size. Check IMAGE_RESIZE_MODE and image sizes."

        # Anchors
        # 获取anchors
        anchors = self.get_anchors(image_shape)
        # Duplicate across the batch dimension because Keras requires it
        # TODO: can this be optimized to avoid duplicating the anchors?
        anchors = np.broadcast_to(anchors, (self.config.BATCH_SIZE,) + anchors.shape)

        if verbose:
            log("molded_images", molded_images)
            log("image_metas", image_metas)
            log("anchors", anchors)
        # Run object detection
        # 使用模型进行预测,这里的预测是在加载模型参数之后的才做的
        detections, _, _, mrcnn_mask, _, _, _ =\
            self.keras_model.predict([molded_images, image_metas, anchors], verbose=0)
        # Process detections
        # 图片检测完成之后,需要对box进行坐标变换
        results = []
        for i, image in enumerate(images):
            final_rois, final_class_ids, final_scores, final_masks =\
                self.unmold_detections(detections[i], mrcnn_mask[i],
                                       image.shape, molded_images[i].shape,
                                       windows[i])
            results.append({
                "rois": final_rois,
                "class_ids": final_class_ids,
                "scores": final_scores,
                "masks": final_masks,
            })
        return results
model.detect 是在模型完全训练好之后使用,并且需要在参数加载完成之后使用。
参考:
TensorFlow实战:Chapter-8上(Mask R-CNN介绍与实现)
matterport Mask_RCNN官方教程翻译
Mask-RCNN技术解析
Mask_RCNN训练自己的数据,其中Labelme的使用说明


