参考 :
http://blog.csdn.net/qq942477618/article/details/53928951
http://hao360.blog.51cto.com/5820068/1653638/
说明:zabbix版本用的是2.4的版本
一 zabbix 客户端配置
1 写一个自动发现脚本 ,脚本的目录在/usr/local/zabbix/scripts/web_site_code_status.sh (,脚本的名字自定义)
cat web_site_code_status.sh
#!/bin/bash
# function:monitor web site code status from zabbix
# License: GPL
# mail:admin#itnihao.com
# version:1.0 date:2012-12-09
     source /etc/bashrc >/dev/null 2>&1
    source /etc/profile  >/dev/null 2>&1
#/usr/bin/curl -o /dev/null -s -w %{http_code} http://$1/
WEB_SITE_discovery () {
WEB_SITE=($(cat  /home/usr/local/zabbix/scripts/WEB1.txt|grep -v "^#"))
        printf '{\n'
        printf '\t"data":[\n'
for((i=0;i<${#WEB_SITE[@]};++i))
{
num=$(echo $((${#WEB_SITE[@]}-1)))
        if [ "$i" != ${num} ];
        then
            printf "\t\t{ \n"
            printf "\t\t\t\"{#SITENAME}\":\"${WEB_SITE[$i]}\"},\n"
        else
            printf  "\t\t{ \n"
            printf  "\t\t\t\"{#SITENAME}\":\"${WEB_SITE[$num]}\"}]}\n"
        fi
}
}
web_site_code () {
        /usr/bin/curl -o /dev/null -s http://$1ttp://$1ttp://$1
}
case "$1" in
web_site_discovery)
        WEB_SITE_discovery
;;
web_site_code)
        web_site_code $2
;;
*)
        echo "Usage:$0 {web_site_discovery|web_site_code [URL]}"
;;
esac
2 同样的在/usr/local/zabbix/scripts/WEB1.txt下面建立一个文件里面写上你要监控网站的url ##域名前面不需要加http
www.ihnhlife.com
m.ihnhlife.com
s.ihnhlife.com
www.baidu.com
www.qq.com
3 编辑zabbix_agentd配置文件,自定义key
UserParameter=web.site.discovery,/usr/local/zabbix/scripts/web_site_code_status.sh  web_site_discovery
UserParameter=web.site.code[*],/usr/local/zabbix/scripts/web_site_code_status.sh web_site_code $1
4 服务端测试 ,在服务端输入 zabbix_get -s 192.168.127.130 -k web.site.discovery,返回下面的内容即为正常。(130是客户端Ip)
 zabbix_get -s 192.168.127.130 -k web.site.discovery
{
        "data":[
                {
                        "{#SITENAME}":"www.baidu.com"},
                {
                        "{#SITENAME}":"www.qq.com"},
                {
                        "{#SITENAME}":"www.ihnhlife.com"},
                {
                        "{#SITENAME}":"s.ihnhlife.com"},
                {
                        "{#SITENAME}":"m.ihnhlife.com"}]}
5 在服务端测试
zabbix_get -s 192.168.127.130 -k web.site.codewww.baidu.com]
200

第二种写法:
/home/usr/local/zabbix/bin/zabbix_get -s 127.0.0.1 -p 10050 -k web.site.code[http://58.116.122.250/op/generate.aspx]
200
二 web页面操作
1 创建模板
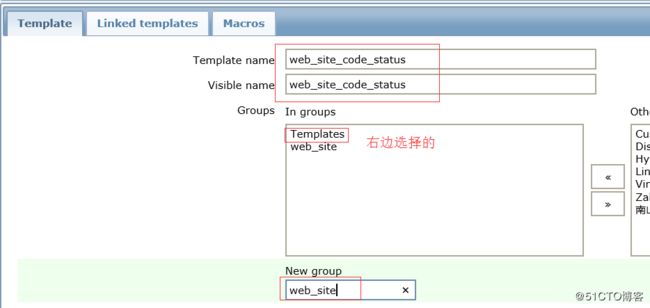
2 点击application ,然后单击create application
设置组的名称为web_site_code_status
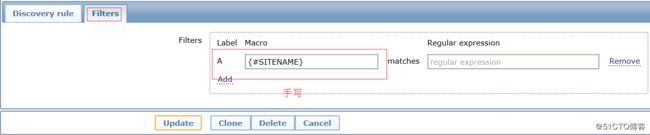
3 单击discovery rules,然后create discovery rule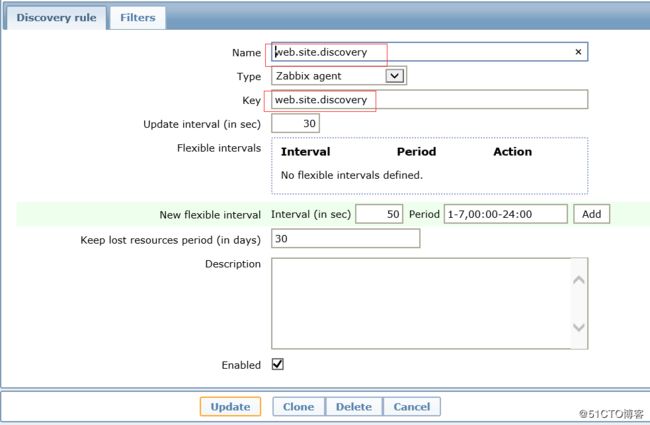
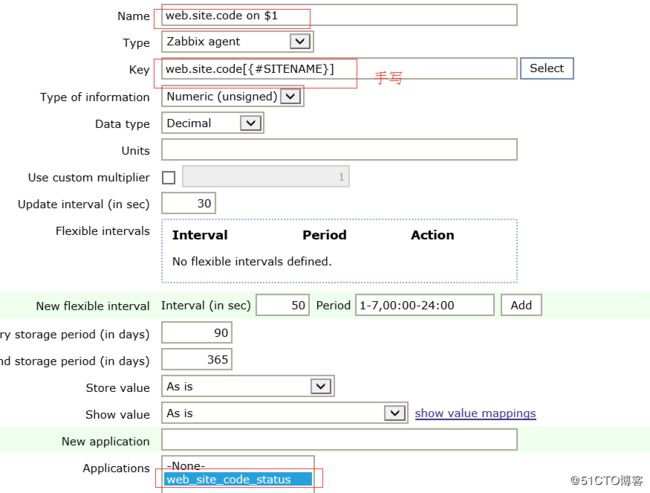
4)添加items, 注意:(在自动发现规则里面添加)单击item prototypes----create item prototype
5 创建trigger 单击trigger prototypes
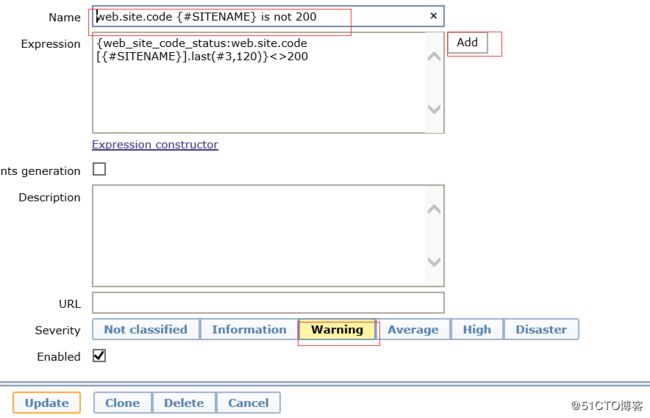
点击add之后会出现下面的这个
6 创建图像单击graph prototypes---create graph prototype
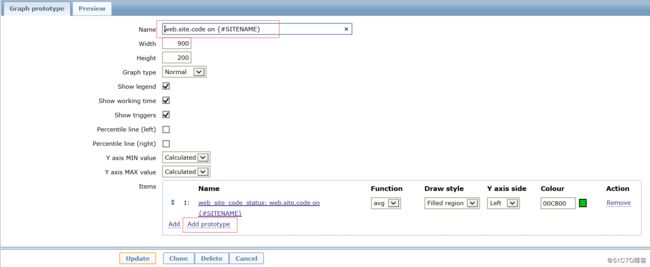
到此,模板创建完成了,然后给相应的主机倒入模板即可
如果你还想监控别的网站,在客户端里面的WEB1.txt里面直接添加网址即可。
如果有现成的模板直接导入即可。
模板见 https://down.51cto.com/data/2462893