Ionic2的官方文档相对是比较详细的,但也是因为分类较多,所以来回查看比较费劲,而且一些API的用法也有不清楚和错误的地方。这里总结下我用到的一些组件的示例。
ActionSheet
import {ActionSheetController, AlertController} from 'ionic-angular';
export class HomePage {
constructor(private actionSheet: ActionSheetController, private alertCtrl: AlertController) {
showActionSheet() {
    let isIos = this.commonService.isIos;
    let actionSheet = this.actionSheet.create({
      title: '常用字段管理',
      buttons: [
        {
          text: '添加',
          icon: isIos ? null: 'add-circle',
          handler: () => {
            this.addField();
          }
        },
        {
          text: '清除',
          icon: isIos ? null: 'remove-circle',
          handler: ()=>{
            this.clearCommonFields();
          }
        },
        {
          text: '取消',
          icon: isIos ? null: 'close',
          role: 'cancel',
          handler: () =>{}
        }
      ]
    });
    actionSheet.present();
  }
}

addField() {
    let alert = this.alertCtrl.create({
      title: '添加常用字段',
      inputs: [
        {
          name: 'name',
          placeholder: '字段名称'
        },
        {
          name: 'defValue',
          placeholder: '默认值'
        }
      ],
      buttons: [
        {
          text: '取消',
          role: 'cancel',
          handler: data => {
          }
        },
        {
          text: '确认',
          handler: data => {
            if (data.name == null || data.name == '') {
              this.commonService.showToast('字段的名称不能为空', 'top');
              return false;
            } else {
              //省略
            }
            }
          }
        }
      ]
    });
    alert.present();
  }
ActionSheet在Android和IOS上样式有差,IOS是不支持带icon的,所以通过Platform.is('ios')判断设备系统;
handler: 给一个function,若想函数执行完alert不消失,可以通过 return false实现;
Alert
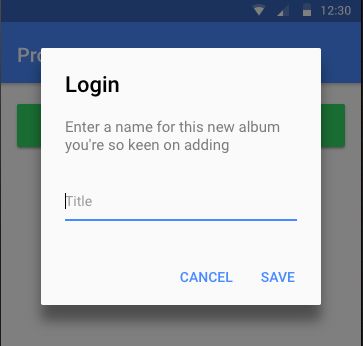
- prompt 带输入框
showPrompt() {
    let prompt = this.alert.create({
      title: '自定义订单',
      inputs: [
        {
          name: 'title',
          placeholder: '自定义订单名'
        }
      ],
      buttons: [
        {
          text: '取消',
          handler: data => {
          }
        },
        {
          text: '保存',
          handler: data => {
                ...
            });
          }
        }
      ]
    });
    prompt.present();
  }
- confirm
showConfirm() {
    let alert = this.alert.create({
        title: '清除历史订单',
      message: '确认清除该设备推过的所有订单记录',
      buttons: [
        {
          text: '取消',
          role: 'cancel',
          handler: () => {
            console.log('canceled');
          }
        },
        {
          text: '清除',
          handler: ()=>{
            this.clearHistory();
          }
        }
      ]
    });
    alert.present();
  }
Select
        报文类型

          1.0.0
          5.0.0
input ion-item-sliding
常用字段
{{item.name}}
ion-label,ionic2提供三种形式,fixed,label显示在输入框左边,floating,当选中输入框时或有文本时,label会浮在输入框左上方, inline,默认值
*ngFor="let item of commonFields"这是Angluar2对于Angular1里ng-repeat的写法,注意不要犯少掉*或ngFor写成ngfor的错误;
(click)="deleteField(item.name);$event.stopPropagation()"这里因为滑动弹出的按钮显示在input控件上,为了防止按钮事件传递,需添加$event.stopPropagation();
Buttons
//click事件
sendOrder() {
this.isSendClicked = true;
...
setTimeout(() => {
this.isSendClicked = false;
}, 1500);
}
为了防止按钮的连续点击多次触发事件,通过[disabled]绑定变量和setTimeout方法设置延时;
在非button标签元素设置点击事件时,可能出现点击响应较慢的情况,标签里添加tappable属性即可。
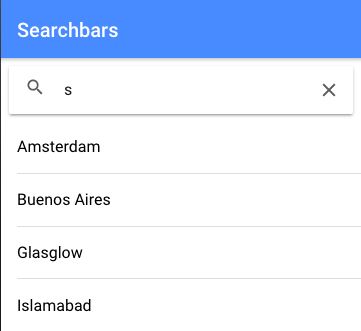
SearchBar
//搜索
getItems(ev: any) {
    this.initData(true);
    let searchText = ev.target.value;
    if (searchText && searchText.trim() != '') {
      this.items = this.items.filter((item) => {
        let label = item.label;
        return (label.toLowerCase().indexOf(searchText.toLowerCase()) > -1);
      })
    }
  }
在搜索框的绑定事件中调用你的数据刷新方法;
Segment
这是一个类似于tabs的按钮组,展示在同一行,笔者在一个页面中通过segment去切换List中的内容。
实际使用中遇到了bug,与ngFor会冲突,代码如下:
{{sys}}
执行以上代码会发现无法切换segment,查git上issue,发现该问题讨论挺多,应该是个当前版本未修复的bug,回复里有不少提供了解决方案,笔者使用的解决方法是通过ngIf去判断数组是否存在,修改代码:
{{sys}}
添加*ngIf="systems",然后在ts中写切换segment的事件即可。
sysChanged(){
    console.log('change system'+ this.selectedSys);
    this.refreshList(this.selectedSys).then(data=>{
      this.releaseList = data;
    });
  }
更新
后面开发过程中,segment这种写法出现一个bug: 当在ts中动态添加了segment button数组后,后面添加的segment-button无法active,git上有相关issue,尚未解决。
解决方法:利用
{{sys}}
Modals
了解Bootstrap的童鞋应该都知道,模态框,在当前页面弹出一个页面组件。笔者一开始使用命令行创建一个新页面作为modal,实际运行后却一直提示no provider for page xxx。然而笔者已经在app.moudle中引入该页,后改为将modal作为内部组件写在需弹出的页面,代码如下:
//弹出model的事件
showMore(release) {
this.modal.create(ReleaseDetailModal, {release: release}).present();
}
/**
* 内部类,modal
*/
@Component({
template: `
版本信息
{{item.name}}
{{item.value}}
`
})
export class ReleaseDetailModal {
public release;
public releaseInfo = [];
constructor(public navCtrl: NavController, public navParams: NavParams,
public viewCtrl: ViewController) {
this.release = this.navParams.get('release');
for (let key in this.release) {
....
}
dismiss() {
this.viewCtrl.dismiss();
}


