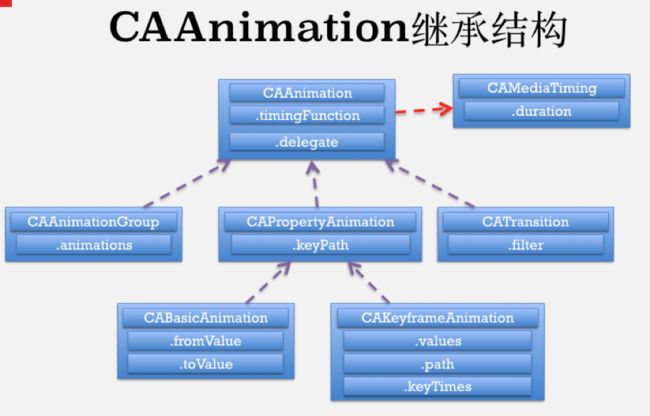
Core Animation, 中文翻译为核心动画,它是一组非常强大的动画处理 API.使用它能做出非常绚丽的动画效果, 而且往往事半功倍. 也就是说, 使用少量的代码就可以实现非常强大的功能. Core Animation可以用在Mac OS X和iOS平台. Core Animation的动画执行过程是在后台操作的, 不会阻塞主线程. 要注意的是, Core Animation是直接作用在CALayer上的.并非UIView.
Core Animation的使用步骤:
- 初始化一个
CAAnimation对象,并设置一些动画的相关属性. - 通过调用
CALayer的addAnimation:forKey:方法增加CAAnimation对象到CALayer中,这样就能开始执行动画了.同样,我们可以通过调用CALayer的removeAnimationForKey:方法可以停止CALayer中的动画.
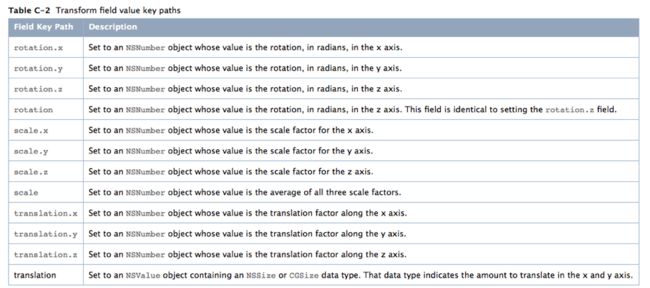
关于“x, y, z轴”的描述:
-
x 轴表示水平直线轴,旋转方向为“上下旋转” -
y 轴表示垂直直线轴,旋转方向为“左右旋转” -
z 轴表示从平面向内穿透的直线,旋转方向为“平面旋转” - 如果
x 轴为1,y 轴也为1,那么实现的旋转方向为“对角线旋转”
CABasicAnimation的使用: (基本动画)
-
CAPropertyAnimation的子类属性解析: -
fromValue : keyPath相应属性的初始值 -
toValue : keyPath相应属性的结束值 - 随着动画的进行,在长度为
duration的持续时间内,keyPath相应属性的值从fromValue渐渐地变为toValue. - 如果
fillMode = kCAFillModeForwards和removedOnComletion = NO; 那么在动画执行完毕后,图层会保持显示动画执行后的状态,但实质上,图层的属性值还是动画执行前的初始值,并没有真正被改变.比如:CALayer的postion初始值为(0,0),CABasicAnimation的fromValue为(10,10),toValue为(100,100),虽然动画执行完毕后图层保持在(100,100)这个位置,实质上图层的position还是为(0,0);
 //代码实现

 ------------------------------ ViewController.m------------------------------
 @interface ViewController()

 @property (nonatomic,weak) UIView *redView;

 @end

 @implementation ViewController

 - (void)viewDidLoad {
        [super viewDidLoad];

        //创建一个UIView
        UIView *redView = [[UIView alloc] init];
        redView.frame=CGRectMake(50,50,80,80);
        redView.backgroundColor= [UIColor redColor];
        [self.view addSubview:redView];
        self.redView = redView;
 }
演示代码一
- (void)touchesBegan:(NSSet *)touches withEvent:(UIEvent*)event {
        CABasicAnimation *anim1 = [CABasicAnimation animationWithKeyPath:@"position.y"];
        //设置动画结束位置
        anim1.toValue = @(300);
        //设置动画持续时间
        anim1.duration = 0.5;
        //重复
        anim1.repeatCount = 10;
        //把核心动画添加到layer中
        [self.redView.layer  addAnimation:anim1 forKey:@"anim1"];
}
展示效果:
注意:
方式一layer的真实位置还在原来的位置.
方式二layer的真实位置就是当前的位置.
//演示代码二
- (void)touchesBegan:(NSSet *)touches withEvent:(UIEvent*)event {

        // 1.创建一个核心动画对象(基本动画) keyPath指的就是将来要修改的CALayer的属性名称
        CABasicAnimation*anim1 = [CABasicAnimation animationWithKeyPath:@"position"];
        anim1.fromValue= [NSValue valueWithCGPoint:CGPointMake(50,50)];
        anim1.toValue= [NSValue valueWithCGPoint:CGPointMake(150,250)];
        //设置layer执行完毕动画后,不要回去( 方式一 )注意: layer的真实位置还在原来的位置.
        anim1.removedOnCompletion = NO;//当核心动画执行完毕后不要从layer中移除
        anim1.fillMode = kCAFillModeForwards;

        //为animation对象设置代理(设置layer执行完毕动画后,不要回去 - 方法二)
        //这里的代理没有协议,叫做隐式代理
        anim1.delegate = self;
        //设置动画持续时间
        anim1.duration=2;
        // 2.把核心动画对象添加到对应的layer中,第二个参数表示是这个动画的一个"键",一个layer中可以添加多个核心动画
        [self.redView.layer addAnimation:anim1 forKey:@"anim1"];
}

//动画开始执行
 - (void)animationDidStart:(CAAnimation*)anim {
        NSLog(@"start...");
}

//动画结束执行
- (void)animationDidStop:(CAAnimation*)anim finished:(BOOL)flag {
        // 注意: layer的真实位置就是当前的位置.
        self.redView.center = CGPointMake(150,250);
        NSLog(@"stop...");
}
@end
CAKeyframeAnimation的使用: (关键帧动画)
-
CAPropertyAnimation的子类. 跟CABasicAnimation的区别: -
CABasicAnimation只能从一个数值(fromValue)变到另一个数值(toValue). 而CAKeyframeAnimation会使用一个NSArray保存这些数值. 属性解析如下: -
Values:就是上述的NSArray对象, 里面的元素称为“关键帧” (keyframe). 动画对象会在指定的时间(duration)内, 依次显示values数组中的每一个关键帧. -
Path: 可以设置一个CGPathRef \ CGMutablePathRef, 让层跟着路径移动. Path只对CALayer的anchorPoint和position其作用.如果你设置了path, 那么values将被忽略. -
keyTimes:可以为对应的关键帧 制定对应的时间点.其取值范围为0到1.0.
keyTimes中的每一个时间值都对应values中的每一帧, 当keyTimes没有设置的时候,各个关键帧的时间是平分的.
//演示代码一通过values数组属性设置路径
//代码实现
------------------------------ ViewController.m------------------------------
- (void)touchesBegan:(NSSet *)touches withEvent:(UIEvent*)event {
         // 1.创建一个关键帧动画
        CAKeyframeAnimation*animKey = [CAKeyframeAnimation animationWithKeyPath:@"position"];
        animKey.duration=3.0;
        // 2.设置动画属性
        NSValue*p1 = [NSValue valueWithCGPoint:CGPointMake(50,150)];
        NSValue*p2 = [NSValue valueWithCGPoint:CGPointMake(250,150)];
        NSValue*p3 = [NSValue valueWithCGPoint:CGPointMake(50,450)];
        NSValue*p4 = [NSValue valueWithCGPoint:CGPointMake(250,450)];
        animKey.values=@[p1, p2, p3, p4];
        // 3.添加
        [self.redView.layer addAnimation:animKey forKey:@"animKey"];
 }
//演示代码二通过path来设置路径
- (void)viewDidLoad {
        [superviewDidLoad];
        //创建一个UIView
        UIView*redView = [[UIView alloc] init];
        redView.frame=CGRectMake(50,50,50,20);
        redView.backgroundColor= [UIColor redColor];
        [self.view addSubview:redView];
        self.redView= redView;
}

- (void)touchesBegan:(NSSet *)touches withEvent:(UIEvent*)event {
        // 1.创建一个关键帧动画
        CAKeyframeAnimation*animKey = [CAKeyframeAnimation animationWithKeyPath:@"position"];
        animKey.duration=3;
        //设置该属性的此枚举值会锁着旋转的角度做"自转"
        animKey.rotationMode = kCAAnimationRotateAuto;
        // 2.设置动画属性
        UIBezierPath*path = [UIBezierPath bezierPathWithOvalInRect:CGRectMake(50,100,150,200)];
        animKey.path= path.CGPath;
        // 3.添加
        [self.redView.layer addAnimation:animKey forKey:@"animKey"];
}
案例三使用关键帧动画来实现图片抖动
实现的步骤是什么?
- 第一步,在视图加载完成之后首先来创建一个UIView.并为UIView设置内容.Layer的contents属性.
- 第二步,点击屏幕实现图片抖动效果,使用序列帧动画( values数组)来实现.
------------------------------ ViewController.m------------------------------

@interfaceViewController()

@property(nonatomic,weak)UIView*iconView;

@end

@implementationViewController
- (void)viewDidLoad {
        [super viewDidLoad];
        self.view.backgroundColor = [UIColorlight GrayColor];
        UIView *iconView = [[UIView alloc] init];
        iconView.layer.contents = (__bridgeid_Nullable)([UIImage imageNamed:@"icon"].CGImage);
        iconView.frame  = CGRectMake(85,100,150,150);
        iconView.layer.cornerRadius = 30;
        iconView.layer.masksToBounds = YES;
        [self.view addSubview:iconView];
        self.iconView = iconView;
}
 - (void)touchesBegan:(NSSet *)touches withEvent:(UIEvent*)event {
        // 1.创建一个关键帧动画
        CAKeyframeAnimation *anim = [CAKeyframeAnimation animationWithKeyPath:@"transform.rotation.z"];
        // 2.设置关键帧值数组
        anim.values=@[@(-M_PI_4*0.1*2),@(M_PI_4*0.1*2),@(-M_PI_4*0.1*2),];
        anim.repeatCount=CGFLOAT_MAX;
        // 3.把核心动画对象添加到layer中
        [self.iconView.layer addAnimation:anim forKey:@"icon_anim"];
}
@end
CAAnimationGroup的使用: (组动画)
CAAnimation的子类.可以保存一组动画对象, 将CAAnimationGroup对象加入层后,组中所有动画对象可以同时并发运行.属性解析如下:
- animations :用来保存一组动画对象的NSArray.默认情况下,一组动画对象是同时运行的,也可以通过设置动画对象的beginTime属性来更改动画的开始时间.
------------------------------ ViewController.m------------------------------

- (void)touchesBegan:(NSSet *)touches withEvent:(UIEvent*)event {

        // 1.创建一个组动画
        CAAnimationGroup*anim = [CAAnimationGroup animation];
        // 2.向组动画中添加各种子动画
        //旋转
        CABasicAnimation *anim1 = [CABasicAnimation animationWithKeyPath:@"transform.rotation.z"];
        anim1.byValue=@(M_PI*2*1000); // transform.rotation.z表示以平面轴旋转1000圈
        //缩放
        CABasicAnimation *anim2 = [CABasicAnimation animationWithKeyPath:@"transform.scale"];
        anim2.toValue=@(0.1);// transform.scale表示以x, y, z,三个轴进行缩放至原来尺寸的0.1倍
        //位移
        CAKeyframeAnimation *anim3 = [CAKeyframeAnimation animationWithKeyPath:@"position"];
        anim3.path= [UIBezierPath bezierPathWithOvalInRect:CGRectMake(50,100,150,200)].CGPath;
        // 3.设置属性,并把子动画添加到组动画中
        anim.animations=@[anim1, anim2, anim3];
        //包含平面旋转1000圈,缩放至原来尺寸的0.1倍,和椭圆路径进行动画,时长使用1.5秒来完成.
        anim.duration=1.5;
        anim.repeatCount=CGFLOAT_MAX;
        // 4.把动画添加到对应的layer中
        [self.redView.layer addAnimation:animforKey:@"group_anim"];
}
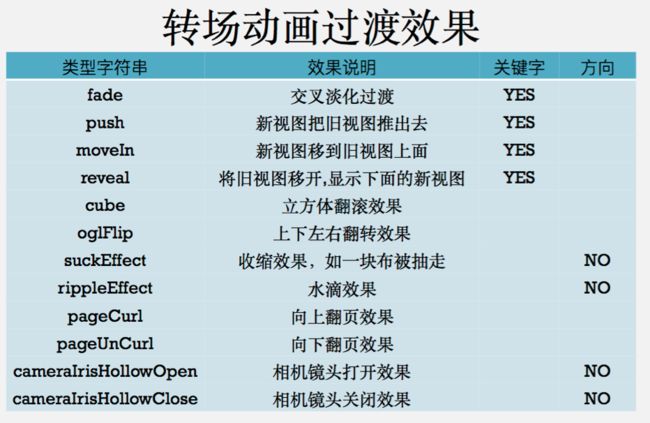
CATransition的使用: (转场动画)
CAAnimation的子类.用于做转场动画,能够为层提供移出屏幕和移入屏幕的动画效果.
UINavigationController就是通过CATransition实现了将控制器的视图推入屏幕的动画效果.属性解析如下:
- type :动画过渡类型.
- Subtype :动画过渡方向.
- startProgress :动画起点(在整体动画的百分比).
- endProgress :动画终点(在整体动画的百分比).
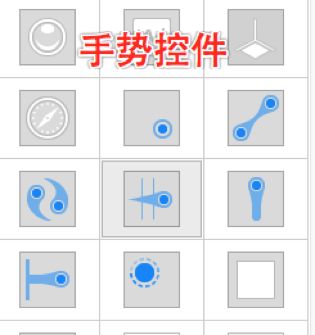
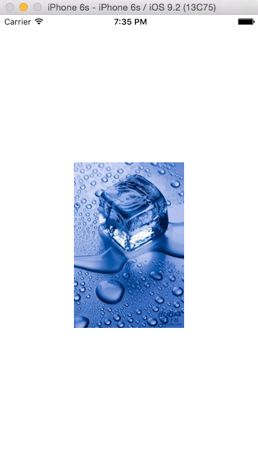
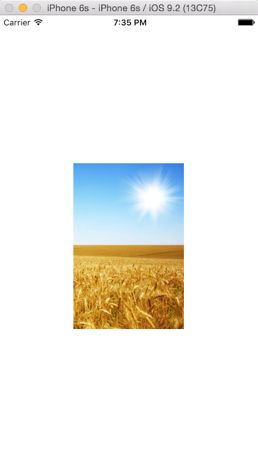
需求一根据手势实现图片浏览器!可以直接在控件面板中向图片拖入手势.
展示效果:
------------------------------ ViewController.m------------------------------

@interfaceViewController()

@property(weak,nonatomic)IBOutletUIImageView*imgViewIcon;

//记录下标

@property(nonatomic,assign)intindex;

@end

@implementationViewController

- (void)viewDidLoad {

[superviewDidLoad];

self.imgViewIcon.userInteractionEnabled=YES;

}

//两个手势识别器同时连线到了这个方法中

- (IBAction)didRecognizeSwipeGesture:(UISwipeGestureRecognizer*)sender {
        if(sender.direction==UISwipeGestureRecognizerDirectionLeft) {
                self.index++;
        }else{
                self.index--;
        }
        //判断是否越界
        if(self.index>4) {
                self.index=0;
        }
        if(self.index<0) {
                self.index=4;
        }
        //拼接图片名称
        NSString*imgName = [NSString stringWithFormat:@"%d",self.index+1];
        //切换图片
        self.imgViewIcon.image= [UIImage imageNamed:imgName];
}
@end
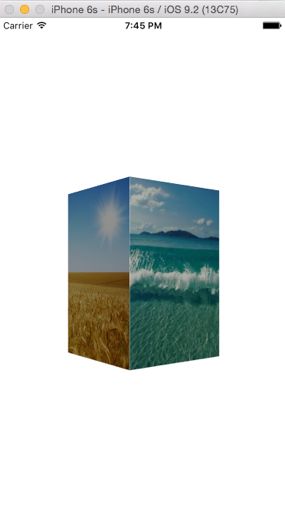
需求二为图片添加转场动画对象(CATransiton).
- 创建一个转场动画对象.
- 设置转场动画的类型和子类型.
- 将转场动画添加到对应的控件身上.
特别注意:转场动画添加到哪个控件身上,就是哪个控件的整体进行转场的动画.
展示效果:
------------------------------ ViewController.m------------------------------

//两个手势识别器同时连线到了这个方法中
- (IBAction)didRecognizeSwipeGesture:(UISwipeGestureRecognizer*)sender {
        // 1.创建一个转场动画对象
        CATransition*anim = [CATransition animation];
        // 2.设置转场动画类型
        anim.type=@"cube";
        anim.duration=1.5;//动画时长
        if (sender.direction == UISwipeGestureRecognizerDirectionLeft) {
        // 2.设置转场动画的子类型
                anim.subtype=kCATransitionFromRight;
                self.index++;
        }else{
                // 2.设置转场动画的子类型
                anim.subtype=kCATransitionFromLeft;
                self.index--;
        }

        //判断是否越界
        if(self.index>4) {
                self.index=0;
        }

        if(self.index<0) {
                self.index=4;
        }

        //拼接图片名称
        NSString*imgName = [NSString stringWithFormat:@"%d",self.index+1];
        //切换图片
        self.imgViewIcon.image= [UIImage imageNamed:imgName];
        // 3.把转场动画添加到对应的控件身上
        [self.imgViewIcon.layer addAnimation:animforKey:@"anim1"];
}
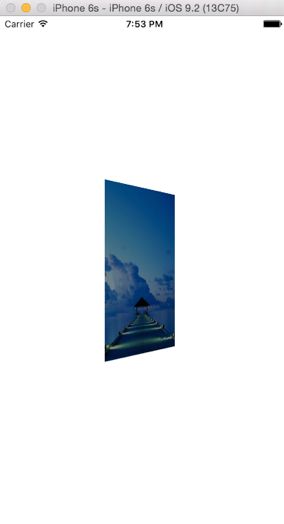
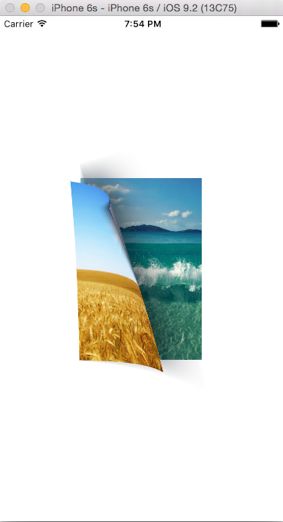
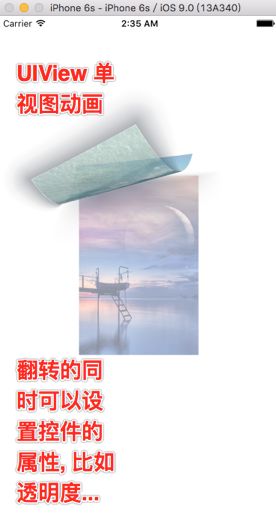
需求三是用UIView动画函数实现转场动画->单视图.
展示效果:
------------------------------ ViewController.m------------------------------

//两个手势识别器同时连线到了这个方法中

- (IBAction)didRecognizeSwipeGesture:(UISwipeGestureRecognizer*)sender {
        if(sender.direction==UISwipeGestureRecognizerDirectionLeft) {
                self.index++;
        }else{
                self.index--;
        }
        //判断是否越界
        if(self.index>4) {
                self.index=0;
        }
        if(self.index<0) {
                self.index=4;
        }

        //拼接图片名称
        NSString*imgName = [NSString stringWithFormat:@"%d",self.index+1];
        //切换图片
        self.imgViewIcon.image= [UIImage imageNamed:imgName];
        //通过UIView来添加转场动画
        [UIView transitionWithView:self.imgViewIcon duration:0.5 options:UIViewAnimationOptionTransitionCurlUp animations:^{
                [UIView animateWithDuration:0.5animations:^{
                        self.imgViewIcon.alpha=0.4;
                }completion:^(BOOLfinished) {
                        [UIView animateWithDuration:0.5animations:^{
                                self.imgViewIcon.alpha=1.0;
                        }];
                }];
        }completion:^(BOOLfinished) {
                NSLog(@"动画完成!");
        }];
}
UIView转场动画单视图方法介绍.

+ (void)transitionWithView:(UIView*)view

duration:(NSTimeInterval)duration

options:(UIViewAnimationOptions)options

animations:(void(^__nullable)(void))animations completion:(void(^__nullable)(BOOLfinished))completion;

lduration :动画的持续时间

lview :需要进行转场动画的视图

loptions :转场动画的类型

lanimations :将改变视图属性的代码放在这个block中

lcompletion :动画结束后,会自动调用这个block

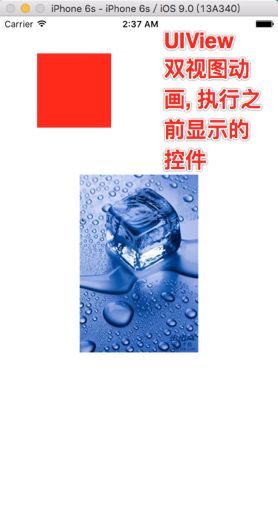
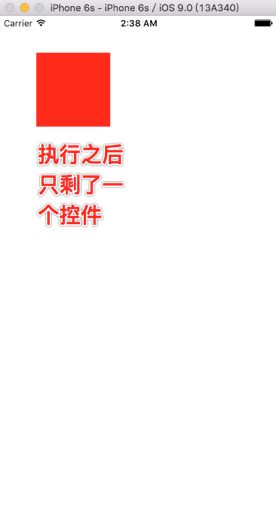
UIView转场动画双视图方法介绍.

+ (void)transitionFromView:(UIView*)fromView toView:(UIView*)toView

duration:(NSTimeInterval)duration

options:(UIViewAnimationOptions)options

completion:(void(^__nullable)(BOOLfinished))completion;

lduration :动画的持续时间

loptions :转场动画的类型

lanimations :将改变视图属性的代码放在这个block中

lcompletion :动画结束后,会自动调用这个block
