第一部分:装好并配置LAMP
一、配置CentOS7
1、开SSH
systemctl enable sshd
2、安装rz
yum -y install lrzsz
之后上传文件一定要用-be参数(其中-b是--binary用二进制的方式上传,-e是--escape强制escape所有控制字符),否则上传的文件不完整
rz –be
3、安装wget
yum -y install wget
4、关闭SELINUX
vi /etc/sysconfig/selinux
修改下边红字部分
# This file controls the state of SELinux on the system.
# SELINUX= can take one of these three values:
# enforcing - SELinux security policy is enforced.
# permissive - SELinux prints warnings instead of enforcing.
# disabled - No SELinux policy is loaded.
SELINUX=disabled
# SELINUXTYPE= can take one of three two values:
# targeted - Targeted processes are protected,
# minimum - Modification of targeted policy. Only selected processes are protected.
# mls - Multi Level Security protection.
SELINUXTYPE=targeted
5、关闭防火墙
systemctl disable firewalld
Removed symlink /etc/systemd/system/multi-user.target.wants/firewalld.service.
Removed symlink /etc/systemd/system/dbus-org.fedoraproject.FirewallD1.service.
二、Apache
1、安装Apache
yum -y install httpd httpd-devel
安装路径:/etc/httpd
配置文件:/etc/httpd/conf/httpd.conf
模块路径:/usr/lib64/httpd/modules/
web目录:/var/www/html
2、配置httpd,将服务器名称替换为您自己的环境
vi /etc/httpd/conf/httpd.conf
#改用户和组
User www
Group www
#添加只能使用目录名称访问的文件名
DirectoryIndex index.html index.php
# server's response header(安全性)
ServerTokens Prod
# keepalive is ON
KeepAlive On
3、创建对应权限账户
groupadd www
useradd www -g www -s /sbin/nologin -M
4、启动和激活服务
systemctl start httpd
systemctl enable httpd
三、PHP
1、安装
不要用yum install php-fpm安装,否则安装上的是源里的旧版本PHP,最好用编译安装
(1)首先安装必须的组件
yum -y install gcc gcc-c++ libxml2 libxml2-devel bzip2 bzip2-devel libmcrypt libmcrypt-devel openssl openssl-devel libcurl libcurl-devel libjpeg libjpeg-devel libpng libpng-devel freetype freetype-devel gmp gmp-devel readline readline-devel libxslt libxslt-devel perl perl-devel psmisc.x86_64 recode recode-devel libtidy libtidy-devel
其中libxml2的版本必须大于2.7.0
注意libmcrypt和libmcrypt-devel已不被任何源支持,所以要单独安装
下载libmcrypt-2.5.7.tar.gz
mkdir /home/software
cd /home/software
wget ftp://mcrypt.hellug.gr/pub/crypto/mcrypt/libmcrypt/libmcrypt-2.5.7.tar.gz
解压
tar zxf libmcrypt-2.5.7.tar.gz
cd libmcrypt-2.5.7
用./configure和make && make install安装
为LDAP功能单独安装组件
yum install -y openldap openldap-devel
(2)之后下载php
cd /home/software
wget http://cn.php.net/distributions/php-7.2.5.tar.gz
tar -xvf php-7.2.5.tar.gz
cd php-7.2.5
./configure \
--prefix=/usr/local/php \
--with-config-file-path=/etc \
--with-apxs2=/usr/bin/apxs \
--enable-fpm \
--with-fpm-user=www \
--with-fpm-group=www \
--enable-inline-optimization \
--disable-debug \
--disable-rpath \
--enable-shared \
--enable-soap \
--with-libxml-dir \
--with-xmlrpc \
--with-openssl \
--with-mhash \
--with-pcre-regex \
--with-sqlite3 \
--with-zlib \
--enable-bcmath \
--with-iconv \
--with-bz2 \
--enable-calendar \
--with-curl \
--with-cdb \
--enable-dom \
--enable-exif \
--enable-fileinfo \
--enable-filter \
--with-pcre-dir \
--enable-ftp \
--with-gd \
--with-openssl-dir \
--with-jpeg-dir \
--with-png-dir \
--with-zlib-dir \
--with-freetype-dir \
--with-gettext \
--with-gmp \
--with-mhash \
--enable-json \
--enable-mbstring \
--enable-mbregex \
--enable-mbregex-backtrack \
--with-libmbfl \
--with-onig \
--enable-pdo \
--with-mysqli=mysqlnd \
--with-pdo-mysql=mysqlnd \
--with-pdo-sqlite \
--with-readline \
--enable-session \
--enable-shmop \
--enable-simplexml \
--enable-sockets \
--enable-sysvmsg \
--enable-sysvsem \
--enable-sysvshm \
--enable-wddx \
--with-xsl \
--enable-zip \
--enable-mysqlnd-compression-support \
--with-pear \
--enable-opcache \
--with-libdir=lib64 \
--with-ldap
之后可能会错误1:configure: error: Don't know how to define struct flock on this system, set --enable-opcache=no
解决:第一步、yum groupinstall "Development Tools"
第二步、32位系统
ln -s /usr/local/MySQL/lib/libmysqlclient.so /usr/lib/
ln -s /usr/local/mysql/lib/libmysqlclient.so.18 /usr/lib/libmysqlclient.so.18
64位系统
ln -s /usr/local/mysql/lib/libmysqlclient.so /usr/lib64/
ln -s /usr/local/mysql/lib/libmysqlclient.so.18 /usr/lib64/libmysqlclient.so.18
第三步、在/etc/ld.so.conf.d/local.conf加一行/usr/local/lib
vi /etc/ld.so.conf.d/local.conf
ldconfig -v
错误2:cURL version 7.10.5 or later is required to compile php with cURL support
解决:yum -y install curl-devel
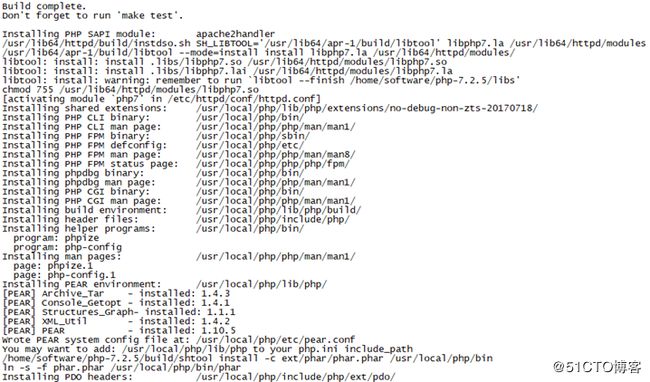
(3)最后编译PHP:make && make install 时间非常长,在至强E7的虚拟机上大概需要10-15分钟
结束后修改/etc/profile
vi /etc/profile
文档末尾加下边2行
PATH=$PATH:/usr/local/php/bin
export PATH
使上述改动立即生效
./etc/profile或source /etc/profile
(4)配置PHP-fpm
①拷贝配置和启动文件到相应目录
cp /home/software/php-7.2.5/php.ini-production /etc/php.ini
cp /usr/local/php/etc/php-fpm.conf.default /usr/local/php/etc/php-fpm.conf
cp /usr/local/php/etc/php-fpm.d/www.conf.default /usr/local/php/etc/php-fpm.d/www.conf
cp /home/software/php-7.2.5/sapi/fpm/init.d.php-fpm /etc/init.d/php-fpm
chmod +x /etc/init.d/php-fpm
②修改PHP账号
vi /usr/local/php/etc/php-fpm.d/www.conf
user = www #改成非ROOT但对PHP有权限账号
group = www #同上
www账号必须有Apache权限、web目录权限和PHP权限,否则会出403、404错误。或者这里写权限更高的账号。
前边Apache的/etc/httpd/conf/httpd.conf文件中的User www Group www必须和PHP使用的账户一样
③打开PHP的错误回显
display_errors = On
⑤配置Apache使PHP生效
vi /etc/httpd/conf/httpd.conf
在AddType application*后面加如下一行
AddType application/x-httpd-php .php .phtml
在DirectoryIndex index.html加上index.php
DirectoryIndex index.php index.html index.htm
确保httd.conf文件中包含以下字段
LoadModule php7_module /usr/lib64/httpd/modules/libphp7.so
重启httpd
systemctl restart httpd
2、启动:
/etc/init.d/php-fpm start
重启
/etc/init.d/php-fpm restart
若重启时出现错误:ERROR: unable to bind listening socket for address '127.0.0.1:9000': Address already in use (98)
则:
[root@webserver ~]# netstat -lntup | grep 9000
[root@webserver ~]# killall php-fpm
3、设置开机启动:
在/etc/rc.d/rc.local中添加一行/usr/local/php/sbin/php-fpm来启动PHP7
vi /etc/rc.d/rc.local
注意CentOS7默认不执行/etc/rc.d/rc.local,需要chmod +x /etc/rc.d/rc.local命令修改权限才可以
第二部分:装好并配置LDAP Account Manager
cd /home/software
tar xvfj ldap-account-manager-6.3.tar.bz2
cd ldap-account-manager-6.3
./configure --with-httpd-user=www --with-httpd-group=www --with-web-root=/var/www/html/lam
make install
chown www:www /var/www/html/lam/ -R
cd /usr/local/lam/etc
cp config.cfg.sample config.cfg
chown www:www config.cfg
如果不用上边这行命令会出现下边错误
输入http://IP/lam访问LAM首页
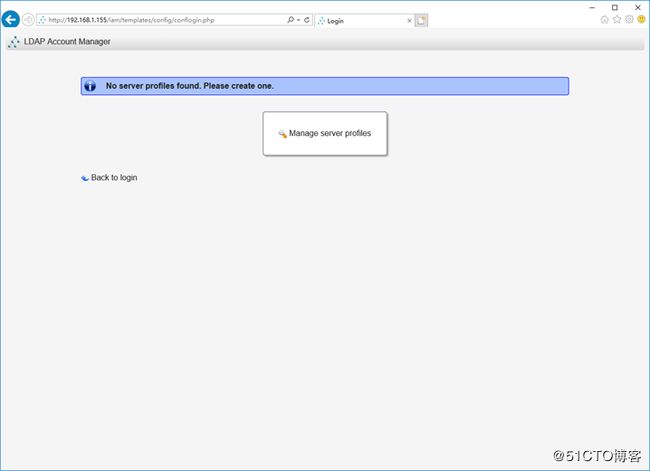
会提示没有配置文件,此时点击首页右上角:LAM configuration
首先配置全局设置,点击:Edit general settings
输入Master password默认密码:lam
在通用设置里只改:会话超时 240
下边的日志根据自己的需求修改
确定后会让继续修改服务器配置文件
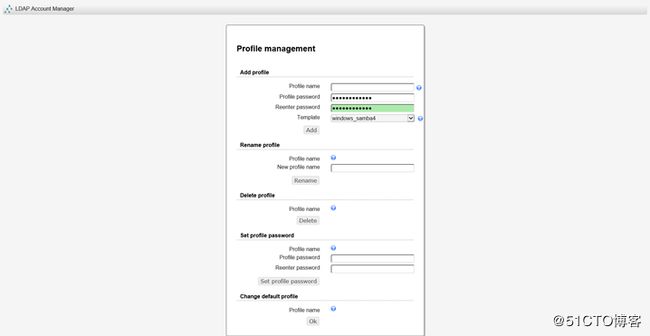
点击首页右上角:LAM configuration,然后点击:Edit server profiles点击:Manage server profiles
创建服务器配置文件:
在"Profile management"-"Add profile"填写
配置文件名:****
配置文件密码:********
模板:windows_samba4
点击"Add"
输入Master password默认密码:lam
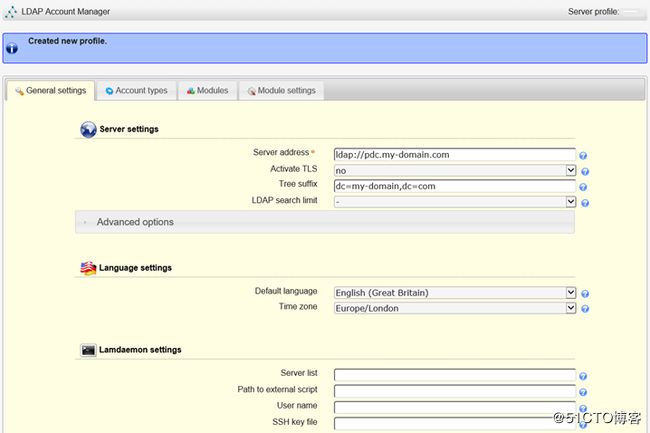
进入Manage server profiles页面
通用设置选项卡
服务器设置
服务器地址:ldap://192.168.1.160 #服务器IP或域名
激活TLS:no
树状结构后缀:dc= #完整DC
LDAP搜索限制:-
显示名:Nt-DC1 #显示在登录页面
追随引荐的服务器:不勾选
分页结果:勾选
参照完整性叠加:勾选
语言设定
缺省语言:简体中文 (中国)
时区:Asia/Shanghai
工具设置-隐藏的工具
服务器信息:不勾选 #登录后右上角显示
其他都勾选
安全设定
登录方法:固定列表 #固定列表意思是只有下边这个用户才可以登录本系统
合法用户列表:CN=LAM,CN=Users,DC=*****,DC=**
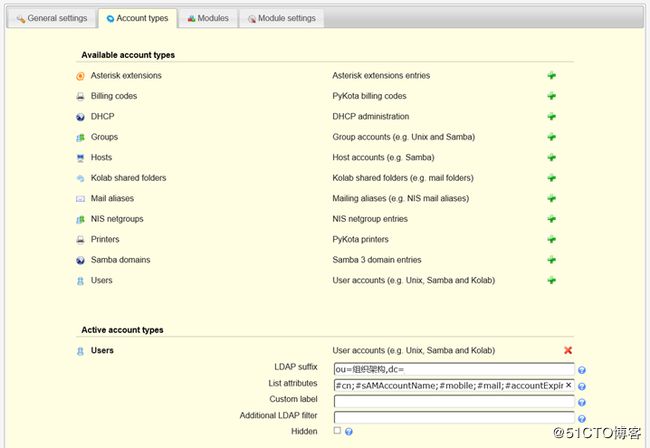
账号类型选项卡
激活帐号类型-用户 #删掉Groups和Hosts,只留Users
LDAP后缀:ou=组织架构,dc=*****,dc=** #要从哪个OU里提取用户
属性列表:#cn;#sAMAccountName;#mobile;#mail;#userAccountControl;#pwdLastSet;#lastLogon #登录后显示在用户选项卡里的列表
自定义标签: #留空,这里修改用户选项卡名字
附加的LDAP过滤表达式: #留空,因为有LDAP后缀了,这里就不写了
隐藏:不勾选
模块选项卡
默认不变
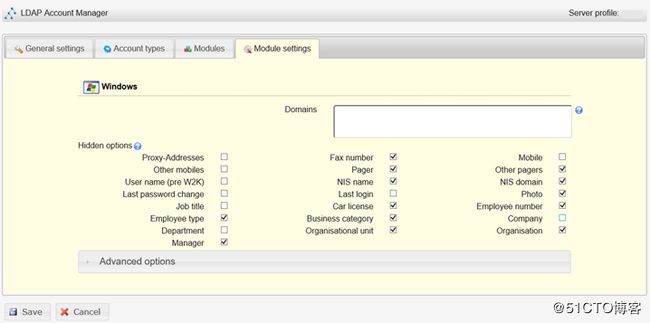
模块设置
Windows
域:*********
其他的按照下图设置
保存后,输入http://IP/lam访问LAM首页。
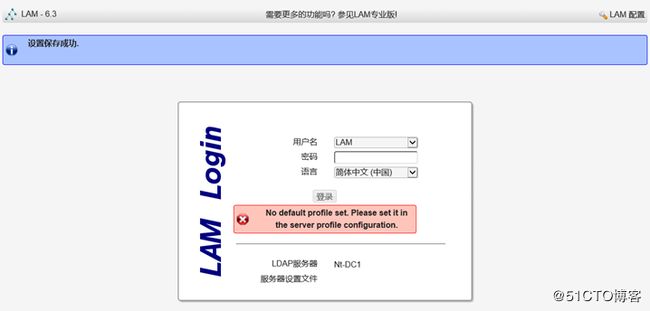
问题:登录显示No default profile set. Please set it in the server profile configuration.
解决:config.cfg配置写错了,将default:的值改成****即可
vi /usr/local/lam/etc/config.cfg
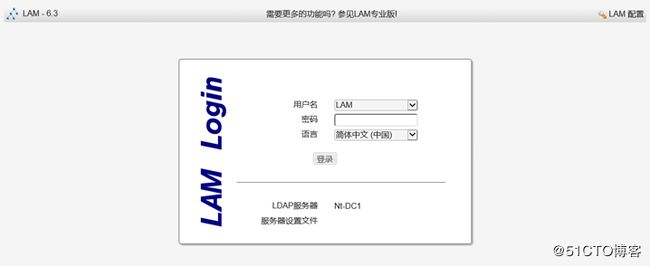
之后重新输入http://IP/lam访问LAM首页
输入DN账户LAM的密码
这是登录后的页面,只有用户选项卡
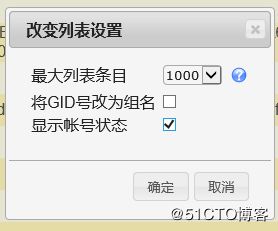
点击右上表的扳手图标,可以修改
最大列表条目:1000
将GID号改为组名:不勾选
显示帐号状态:勾选
随便修改一个用户信息,提示修改成功,OK
