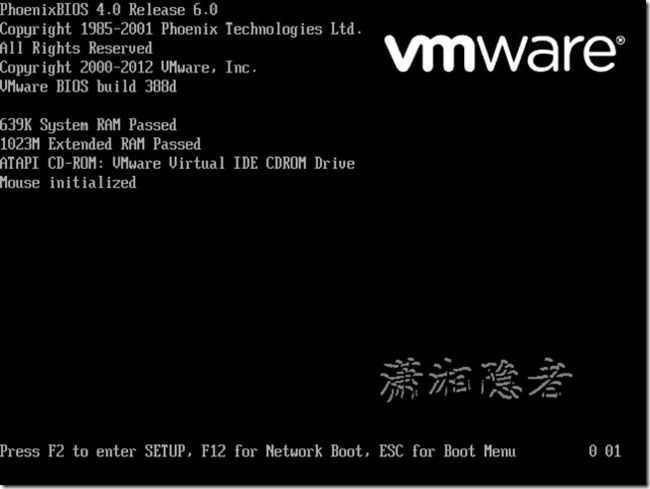
在VMware里面如何进入BIOS是个头疼的问题,因为启动界面一闪而过(下面两个图如果不设置bios.bootDelay,基本上很难抓到),即使你狂按F2或ESC键(ESC: 调整启动顺序;F2: 进入BIOS Setup) ,绝大部分都无法进入BIOS。因为VMware启动界面显示时间太短、系统无法识别按键而直接开启了系统。
研究了一下,发现VMware的配置文件.vmx可以控制这个过程, 网上提示有两种参数可以设置来解决这个问题:
1. 加入一行:bios.forceSetupOnce = "TRUE" ;开机就自动进入BIOS!
不过VMware启动后,会将该参数由TRUE变为FALSE,如果您还要继续使用BIOS,就再手动改成TRUE即可;
2. 延长启动画面时间:bios.bootDelay = "10000";10000为10秒。
特意在Vmware上测试了一下,如下所示,找到服务器GETTESTLX的Vmware的配置文件,具体内容如下所示,在配置文件末尾配置上面两个参数都能顺利进入BIOS。
.encoding = "UTF-8"
config.version = "8"
virtualHW.version = "8"
nvram = "GETTESTLX.nvram"
pciBridge0.present = "TRUE"
svga.present = "TRUE"
pciBridge4.present = "TRUE"
pciBridge4.virtualDev = "pcieRootPort"
pciBridge4.functions = "8"
pciBridge5.present = "TRUE"
pciBridge5.virtualDev = "pcieRootPort"
pciBridge5.functions = "8"
pciBridge6.present = "TRUE"
pciBridge6.virtualDev = "pcieRootPort"
pciBridge6.functions = "8"
pciBridge7.present = "TRUE"
pciBridge7.virtualDev = "pcieRootPort"
pciBridge7.functions = "8"
vmci0.present = "TRUE"
hpet0.present = "TRUE"
displayName = "GETTESTLX"
extendedConfigFile = "GETTESTLX.vmxf"
virtualHW.productCompatibility = "hosted"
memSize = "1024"
scsi0.virtualDev = "lsilogic"
scsi0.present = "TRUE"
ide1:0.deviceType = "cdrom-image"
ide1:0.fileName = "/vmfs/volumes/4f38d1b9-9720c09c-38a5-782bcb6ee1e6/ISO/OracleLinux-R5-U7-Server-x86_64-dvd.iso"
ide1:0.present = "TRUE"
floppy0.startConnected = "FALSE"
floppy0.clientDevice = "TRUE"
floppy0.fileName = "vmware-null-remote-floppy"
ethernet0.virtualDev = "e1000"
ethernet0.networkName = "IP27"
ethernet0.addressType = "vpx"
ethernet0.generatedAddress = "00:50:56:b3:c0:f7"
ethernet0.present = "TRUE"
scsi0:0.deviceType = "scsi-hardDisk"
scsi0:0.fileName = "GETTESTLX.vmdk"
scsi0:0.present = "TRUE"
guestOS = "rhel5-64"
toolScripts.afterPowerOn = "TRUE"
toolScripts.afterResume = "TRUE"
toolScripts.beforeSuspend = "TRUE"
toolScripts.beforePowerOff = "TRUE"
uuid.bios = "42 33 d1 9c 71 9c 24 d8-82 e0 84 22 ae f7 e5 9a"
vc.uuid = "50 33 09 82 fa 29 14 fc-e0 4c 34 78 f6 56 a7 a2"
sched.scsi0:0.throughputCap = "off"
sched.swap.derivedName = "/vmfs/volumes/54e2da83-530edd90-a073-842b2b58e01d/GETTESTLX/GETTESTLX-a452f717.vswp"
uuid.location = "56 4d f0 82 ff e1 99 25-75 92 bc 2c 02 0a 59 af"
replay.supported = "FALSE"
replay.filename = ""
scsi0:0.redo = ""
pciBridge0.pciSlotNumber = "17"
pciBridge4.pciSlotNumber = "21"
pciBridge5.pciSlotNumber = "22"
pciBridge6.pciSlotNumber = "23"
pciBridge7.pciSlotNumber = "24"
scsi0.pciSlotNumber = "16"
ethernet0.pciSlotNumber = "32"
vmci0.pciSlotNumber = "33"
vmci0.id = "-1359485542"
hostCPUID.0 = "0000000b756e65476c65746e49656e69"
hostCPUID.1 = "000206c220200800029ee3ffbfebfbff"
hostCPUID.80000001 = "0000000000000000000000012c100800"
guestCPUID.0 = "0000000b756e65476c65746e49656e69"
guestCPUID.1 = "000206c200010800829822030fabfbff"
guestCPUID.80000001 = "00000000000000000000000128100800"
userCPUID.0 = "0000000b756e65476c65746e49656e69"
userCPUID.1 = "000206c220200800029822030fabfbff"
userCPUID.80000001 = "00000000000000000000000128100800"
evcCompatibilityMode = "FALSE"
vmotion.checkpointFBSize = "4194304"
cleanShutdown = "TRUE"
softPowerOff = "FALSE"
sched.scsi0:0.shares = "normal"
ide1:0.allowGuestConnectionControl = "TRUE"
tools.remindInstall = "TRUE"
参考资料:
http://www.xiazaiba.com/jiaocheng/881.html


