1.目标
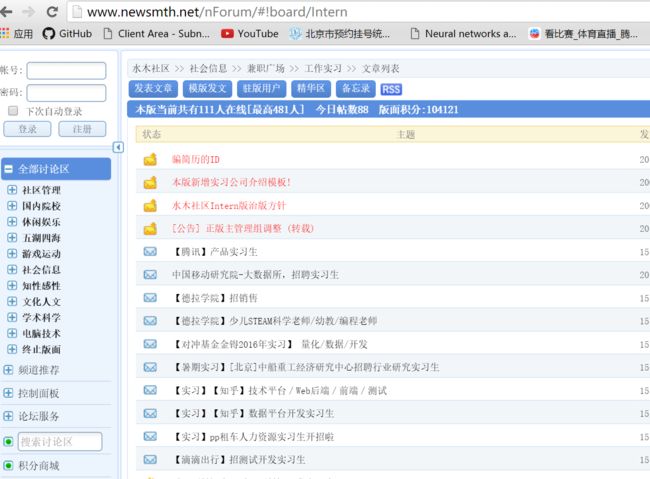
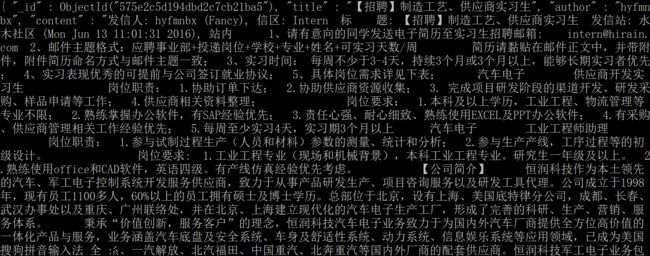
这两天要弄一个大作业,从水木社区和北大未名社区的实习板块,爬取实习信息,保存在MongoDB数据库。
正好想学习一下scrapy框架的使用,就愉快地决定用scrapy来实现。
2.介绍
Scrapy是Python开发的一个快速,高层次的屏幕抓取和web抓取框架,用于抓取web站点并从页面中提取结构化的数据。使用了 Twisted 异步网络库来处理网络通讯。整体架构:
学习使用Scrapy,最重要的是 官方文档。本文的主要参考资料也是该文档。
Scrapy的安装,这里就不说了,在满足一系列依赖的安装以后,pip一下,就搞定了。
pip install scrapy
3.开始
3.1 首先,新建一个Scrapy工程。
进入你的目标目录,输入以下指令,创建项目intern。
$ scrapy startproject intern
目录结构如下:
.
├── scrapy.cfg
└── intern
  ├── __init__.py
  ├── items.py
  ├── pipelines.py
  ├── settings.py
  └── spiders
    └── __init__.py
这个目录结构要熟记于心。
- scrapy.cfg: 全局配置文件
- intern/: 项目python模块
- intern/items.py: 项目items文件,定义爬取的数据保存结构
- intern/pipelines.py: 项目管道文件,对爬取来的数据进行清洗、筛选、保存等操作
- intern/settings.py: 项目配置文件
- intern/spiders: 放置spider的目录
3.2 编写items.py文件。
定义item的字段如下:
import scrapy
class InternItem(scrapy.Item):
  title = scrapy.Field()
  href = scrapy.Field()
  author = scrapy.Field()
  time = scrapy.Field()
  content = scrapy.Field()
  is_dev = scrapy.Field()
  is_alg = scrapy.Field()
  is_fin = scrapy.Field()
  base_url_index = scrapy.Field()
定义的方法很简单,每个字段都=scrapy.Field()即可。
使用:比如要使用某item的title,就像python中的dict一样,item['title']即可。
3.3 编写爬虫。
好了终于到了编写爬虫了。以爬取水木社区的爬虫为例。在spiders目录下,创建smSpider.py。
class SMSpider(scrapy.spiders.CrawlSpider):
'''
#要建立一个 Spider,你可以为 scrapy.spider.BaseSpider 创建一个子类,并确定三个主要的、强制的属性:
#name :爬虫的识别名,它必须是唯一的,在不同的爬虫中你必须定义不同的名字.
#start_urls :爬虫开始爬的一个 URL 列表。爬虫从这里开始抓取数据,所以,第一次下载的数据将会从这些 URLS 开始。其他子 URL 将会从这些起始 URL 中继承性生成。
#parse() :爬虫的方法,调用时候传入从每一个 URL 传回的 Response 对象作为参数,response 将会是 parse 方法的唯一的一个参数,
#这个方法负责解析返回的数据、匹配抓取的数据(解析为 item )并跟踪更多的 URL。
'''
  name="sm"
  base_url = 'http://www.newsmth.net/nForum/board/Intern'
  start_urls = [base_url]
  start_urls.extend([base_url+'?p='+str(i) for i in range(2,4)])
  platform = getPlatform()
  def __init__(self):
    scrapy.spiders.Spider.__init__(self)
    if self.platform == 'linux':
      self.driver = webdriver.PhantomJS()
    elif self.platform == 'win':
      self.driver =webdriver.PhantomJS(executable_path= 'F:/runtime/python/phantomjs-2.1.1-windows/bin/phantomjs.exe')
    self.driver.set_page_load_timeout(10)
    dispatcher.connect(self.spider_closed, signals.spider_closed)
  def spider_closed(self, spider):
    self.driver.quit()
  def parse(self,response):
...
从浅到深,一步步解释这段代码。
首先,这个SMSpider是继承于CrawlSpider,CrawlSpider继承于BaseSpider。一般用BaseSpider就够了,CrawlSpider可以增加一些爬取的Rule。但实际上我这里并没有用到。必需要定义的三个属性。
name:爬虫的名字。(唯一)
start_url:爬虫开始爬取的url列表。
parse():爬虫爬取的方法。调用时传入一个response对象,作为访问某链接的响应。
在爬取水木社区的时候发现,水木的实习信息是动态加载的。
也就是说,源代码中,并没有我们要的实习信息。这时,考虑使用Selenium和Phantomjs的配合。Selenium本来在自动化测试上广泛使用,它可以模仿用户在浏览器上的行为,比如点击按钮等等。Phantomjs是一个没有UI的浏览器。Selenium和Phantomjs搭配,就可以方便地抓取动态加载的页面。
回到SMSpider的代码,我们要判断当前的操作系统平台,然后在Selenium的webdriver中加载Phantomjs。Linux不用输入路径,Windows要输入程序所在路径。在 init()的结尾,还要加上事件分发器,使得在爬虫退出后,关闭Phantomjs。
self.driver.set_page_load_timeout(10)
这句代码是为了不让Phantom卡死在某一链接的请求上。设定每个页面加载时间不能超过10秒。
具体的parse方法:
def parse(self,response):
  self.driver.get(response.url)
  print response.url
  #等待,直到table标签出现
  try:
    element = WebDriverWait(self.driver,30).until(
               EC.presence_of_all_elements_located((By.TAG_NAME,'table'))        )
    print 'element:\n', element
  except Exception, e:
    print Exception, ":", e
    print "wait failed"
  page_source = self.driver.page_source
  bs_obj = BeautifulSoup(page_source, "lxml")
  print bs_obj
  table = bs_obj.find('table',class_='board-list tiz')
  print table
  print "find message ====================================\n"
  intern_messages = table.find_all('tr',class_=False)
  for message in intern_messages:
    title, href, time, author = '','','',''
    td_9 = message.find('td',class_='title_9')
    if td_9:
      title = td_9.a.get_text().encode('utf-8','ignore')
      href = td_9.a['href']
    td_10 = message.find('td', class_='title_10')
    if td_10:
      time=td_10.get_text().encode('utf-8','ignore')
    td_12 = message.find('td', class_='title_12')
    if td_12:
      author = td_12.a.get_text().encode('utf-8','ignore')
    item = InternItem()
    print 'title:',title
    print 'href:', href
    print 'time:', time
    print 'author:', author
    item['title'] = title
    item['href'] = href
    item['time'] = time
    item['author'] = author
    item['base_url_index'] = 0
    #嵌套爬取每条实习信息的具体内容
    root_url = 'http://www.newsmth.net'
    if href!='':
    content = self.parse_content(root_url+href)
    item['content'] = content
    yield item
这段代码,先是找到动态加载的目标标签,等待这个标签出现,再爬取实习信息列表,再嵌套爬取每条实习信息的具体内容。这里我使用bs4对html进行解析。你也可以使用原生态的Xpath,或者selector。这里就不进行具体的讲解了,多了解几种方法,熟练一种即可。爬取到的目标内容,像 item['title'] = title这样,保存在item里。注意最后不是return,而是yeild。parse方法采用生成器的模式,逐条爬取分析。
爬取具体实习内容的代码:
def parse_content(self,url):
  self.driver.get(url)
  try:
    element = WebDriverWait(self.driver, 30).until(
            EC.presence_of_all_elements_located((By.TAG_NAME, 'table'))        )
    print 'element:\n', element
  except Exception, e:
    print Exception, ":", e
    print "wait failed"
  page_source = self.driver.page_source
  bs_obj = BeautifulSoup(page_source, "lxml")
  return bs_obj.find('td', class_='a-content').p.get_text().encode('utf-8','ignore')
3.4 编写pipelines.py。
接下来,我们想把爬取到的数据,存在Mongodb里面。这可以交给pipeline去做。pipeline是我喜欢Scrapy的一个理由,你可以把你爬到的数据,以item的形式,扔进pipeline里面,进行筛选、去重、存储或者其他自定义的进一步的处理。pipeline之间的顺序,可以在settings.py中设置,这使得pipeline更加灵活。
来看看MongoDBPipeline:
class MongoDBPipeline(object):
  def __init__(self):
    pass
  def open_spider(self, spider):
    self.client = pymongo.MongoClient(
    settings['MONGODB_SERVER'],
    settings['MONGODB_PORT']        )
    self.db = self.client[settings['MONGODB_DB']]
    self.collection = self.db[settings['MONGODB_COLLECTION']]
  def close_spider(self, spider):
    self.client.close()
  def process_item(self, item, spider):
    valid = True
    for data in item:
      if not data :
        valid = False
        raise DropItem("Missing {0}!".format(data))
      if item['title'] == '':
        valid = False
        raise DropItem("title is '' ")
      if valid:
        self.collection.insert(dict(item))
    return item
来说明一下。
首先创建类MongoDBPipeline,这里不用继承什么预先设定好的pipeline。但是要有一个process_item的方法,传入一个item和spider,返回处理完的item。open_spider和close_spider是在爬虫开启和关闭的时候调用的回调函数。这里我们要用到MongoDB,所以我们在爬虫开启的时候,连接一个Mongo客户端,在爬虫关闭的时候,再把客户端关掉。这里的数据库相关的信息,都保存在settings.py里面。如下:
MONGODB_SERVER = "localhost"
MONGODB_PORT = 27017
MONGODB_DB = "intern"
MONGODB_COLLECTION = "items"
写在settings.py里面的参数可以通过
from scrapy.conf import settings
settings['xxxxxx']
这种方式来获取。
在写完MongoDBPipeline以后,还要在settings.py注册一下这个pipeline,如下:
ITEM_PIPELINES = {
    'intern.pipelines.TagPipeline': 100,
    'intern.pipelines.MongoDBPipeline':300
}
后面的数值越小,越先执行。数值的范围是1000以内的整数。通过这种方法,可以非常方便地设置pipeline之间的顺序,以及开启和关闭一个pipeline。
4.运行
在项目目录下,执行如下指令:
scrapy crawl sm
这时我们的SMSpider就愉快地开始爬取数据了。
5.下一步
关于scrapy框架,要学的还有很多。比如说扩展和中间件的编写,以及Crawler API的使用。
关于爬虫,可以学习的还有:
- 使用代理
- 模拟登陆
下面一段时间,要做新浪微博的爬虫,届时有新的收获再和大家分享。
本文源码地址:github
将实习信息评分并发送email的版本:github
喜欢star一下哦~~~~


