一个应用要想生动丰富,不可能缺少动画这种效果,React Native提供了两个互补的动画系统:用于全局的布局动画LayoutAnimation,和用于创建更精细的交互控制的动画Animated。
LayoutAnimation
直接使用
LayoutAnimation的动画不是一个单独的存在,比如,有两个view,一个view放大,会把另外一个view挤走,这时,其实两个view都是有动画的,所以LayoutAnimation常用来更新flexbox布局,因为它可以无需测量或者计算特定属性就能直接产生动画。尤其是当布局变化可能影响到父节点(譬如“查看更多”展开动画既增加父节点的尺寸又会将位于本行之下的所有行向下推动)时,如果不使用LayoutAnimation,可能就需要显式声明组件的坐标,才能使得所有受影响的组件能够同步运行动画。
我先上一下官方的代码,再进行逐行解释:
import React, { Component } from 'react';
import {
  AppRegistry,
    Platform,
  Text,
  View,
    NativeModules,
    LayoutAnimation,
    TouchableOpacity,
    StyleSheet,
} from 'react-native';
const { UIManager } = NativeModules;

UIManager.setLayoutAnimationEnabledExperimental &&
UIManager.setLayoutAnimationEnabledExperimental(true);
export default class TestLayout extends Component {

    state = {
        w: 100,
        h: 100,
    };

    _onPress = () => {
        LayoutAnimation.spring();
        this.setState({w: this.state.w + 15, h: this.state.h + 15})
    }

    render() {
        return (


                        Press me!


        );
    }
}

const styles = StyleSheet.create({
    container: {
        flex: 1,
        alignItems: 'center',
        justifyContent: 'center',
    },
    box: {
        width: 200,
        height: 200,
        backgroundColor: 'red',
    },
    button: {
        backgroundColor: 'black',
        paddingHorizontal: 20,
        paddingVertical: 15,
        marginTop: 15,
    },
    buttonText: {
        color: '#fff',
        fontWeight: 'bold',
    },
});

AppRegistry.registerComponent('TestLayout', () => TestLayout);
分析:
如果需要动画适配android,需要加上UIManager.setLayoutAnimationEnabledExperimental && UIManager.setLayoutAnimationEnabledExperimental(true);
定义一个state这个state是组件内可变的,我们先定义一个初始宽高,接着将这个宽高,赋值给一个View,同时增加一个按钮,按钮的点击事件:
 _onPress = () => {
        LayoutAnimation.spring();
        this.setState({w: this.state.w + 15, h: this.state.h + 15})
    }
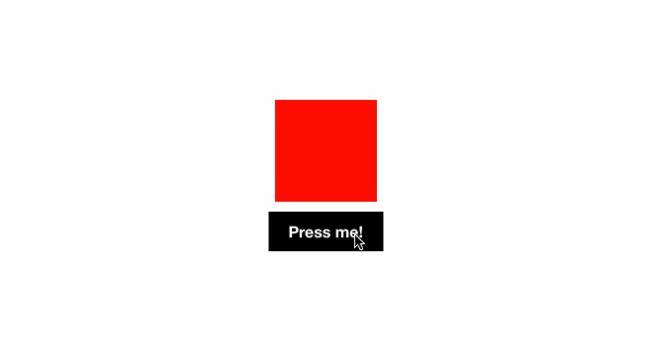
也就是将我们定义的初始宽高,增加15,由于我们已将state的属性值设置给了View,所以,View的宽高,随之改变。如下图所示:
这种动画增加很简单,因为不用单独给某个组件设置什么,只需要
LayoutAnimation.spring();即可,当然还有
LayoutAnimation. linear()以及
LayoutAnimation.easeInEaseOut()
对应的含义如下:
- spring //弹跳
- linear //线性
- easeInEaseOut //缓入缓出
引申
其实官方还提供了两种方式,修改代码测试一下:
 _onPress = () => {
        // LayoutAnimation.easeInEaseOut();
        requestAnimationFrame(()=>{
            this.setState({w: this.state.w + 15, h: this.state.h + 15})
        })

    }
这种方式并不是RN提供的API,而是web的一种渲染模式,所以动画显得有些生硬,并且由于频繁地销毁、重绘,性能不好。
如果执意使用上述方式,可以稍微再做下修改,使用原生组件的 setNativeProps 方法来做对应实现,它会直接修改组件底层特性,不会重绘组件:
  _onPress = () => {
        // LayoutAnimation.easeInEaseOut();
        requestAnimationFrame(()=>{
            this.refs.box.setNativeProps({
                style: {
                    width :this.state.w+15,
                    height : this.state.h+15
                }
            });
        })

    }
同时给view加个ref:
Press me!
自定义
上面提到的动画效果,如果不能满足开发需求,还可以进行自定义:
   _onPress = () => {
         // LayoutAnimation.easeInEaseOut();
       LayoutAnimation.configureNext({
            duration: 200,
            create: {
                type: LayoutAnimation.Types.linear,
                property: LayoutAnimation.Properties.opacity,
            },
            update: {
                type: LayoutAnimation.Types.easeInEaseOut
            }
        });

        this.setState({ w: this.state.w + 15, h: this.state.h + 15 });

    }
这里对参数进行一下说明,自定义动画需要设置的参数主要是
- duration动画持续的时长
- create创建一个新的动画
- update 当视图被更新的时候所使用的动画
其中type是动画类型包括spring,linear,easeInEaseOut,easeIn,easeOut,keyboard
其中property是动画属性包括opacity,scaleXY
Animated
Animated库使得开发者可以非常容易地实现各种各样的动画和交互方式,并且具备极高的性能。Animated旨在以声明的形式来定义动画的输入与输出,在其中建立一个可配置的变化函数,然后使用简单的start/stop方法来控制动画按顺序执行。
这个对于从Android转向ReactNative开发的同学,还是很好理解的。
Animated仅封装了四个可以动画化的组件:View、Text、Image和ScrollView,不过你也可以使用Animated.createAnimatedComponent()来封装你自己的组件。
单个动画
现在修改一下上面使用的代码:
import React, { Component } from 'react';
import {
  AppRegistry,
    Platform,
  Text,
  View,
    Animated,
    ToastAndroid,
    NativeModules,
    LayoutAnimation,
    TouchableOpacity,
    StyleSheet,
} from 'react-native';
const { UIManager } = NativeModules;

UIManager.setLayoutAnimationEnabledExperimental &&
UIManager.setLayoutAnimationEnabledExperimental(true);

export default class TestLayout extends Component {

    state = {
        w: 100,
        h: 100,
    };

    constructor(props) {
        super(props);
        this.state = {
            fadeAnim: new Animated.Value(0),          // 透明度初始值设为0
        };
    }
    _onPress = () => {
        Animated.timing(                            // 随时间变化而执行的动画类型
            this.state.fadeAnim,                      // 动画中的变量值
            {
                toValue: 1,                             // 透明度最终变为1,即完全不透明
            }
        ).start();

    }

    render() {
        return (


                   Test Animated!


                        Press me!


        );
    }
}

const styles = StyleSheet.create({
    container: {
        flex: 1,
        alignItems: 'center',
        justifyContent: 'center',
    },
    box: {
        width: 200,
        height: 200,
        backgroundColor: 'red',
    },
    button: {
        backgroundColor: 'black',
        paddingHorizontal: 20,
        paddingVertical: 15,
        marginTop: 15,
    },
    buttonText: {
        color: '#fff',
        fontWeight: 'bold',
    },
});

AppRegistry.registerComponent('TestLayout', () => TestLayout);
现在根据代码来解释一下动画是如何实现的。
- 在构造函数中创建Animated,出事状态透明度为0
this.state = {
            fadeAnim: new Animated.Value(0),          // 透明度初始值设为0
        };
2.AnimatedValue绑定到Style的可动画属性
Test Animated!
3.使用Animated.timing来创建自动的动画,当然也可以使用Animated.event来根据手势,触摸更新动画的状态,这里我们希望是动画随着时间的变化而变化,用timing,同时,在按钮的点击事件中start动画:
     _onPress = () => {
        Animated.timing(                            // 随时间变化而执行的动画类型
            this.state.fadeAnim,                      // 动画中的变量值
            {
                toValue: 1,                             // 透明度最终变为1,即完全不透明
            }
        ).start();

    }
同时我们也可以根据,需要配置一些其他系数,如时长:
  _onPress = () => {
        Animated.timing(                            // 随时间变化而执行的动画类型
            this.state.fadeAnim,                      // 动画中的变量值
            {
                toValue: 1,                             // 透明度最终变为1,即完全不透明
                duration: 2000,
            }
        ).start();

    }
组合动画
组合动画主要分为如下几种: Animated.parallel、Animated.sequence、Animated.stagger、Animated.delay。
修改一下上面的例子,先看一下Animated.parallel(只贴出代码中不同的地方):
 constructor(props) {
        super(props);
        this.state = {
            transFirstAnim: new Animated.ValueXY({
                x: 10,
                y: 20
            }),
            transSecondAnim: new Animated.ValueXY({
                x: 10,
                y: 40
            })
        };
    }
    _onPress = () => {

        Animated.parallel([
            Animated.timing(this.state.transFirstAnim,
                {
                    toValue: {
                        x : 30,
                        y :30
                    },
                    duration: 2000,
                    delay: 1000
                }
            ),
            Animated.timing(this.state.transSecondAnim, {
                toValue: {
                    x : 30,
                    y :50
                },
                duration: 2000,
                delay: 1000
            })
        ]).start();
    }
    render() {
        return (


                   Test Animated111!


                    Test Animated222!


                        Press me!


        );
    }
这样运行观看,可以发现,两行字是以相同的速度一起开始运动的(抓到的动图太大,不上传了)。
同样我们可以将 Animated.parallel改为Animated.sequence、Animated.stagger、Animated.delay进行测试。
- Animated.parallel 两个动画同时进行
- Animated.sequence 两个动画按顺序进行
- Animated.stagger 接受一系列动画数组和一个延迟时间,按照序列,每隔一个延迟时间后执行下一个动画(其实就是插入了delay的parrllel)
- Animated.delay 生成一个延迟时间(基于timing的delay参数生成)
总结
基本以上介绍的功能可以覆盖大部分需求,当然还有插值,原生驱动等特性,暂时我还没有用到,需要使用的朋友可以关注官网。
如果你也做ReactNative开发,并对ReactNative感兴趣,欢迎关注我的公众号,加入我们的讨论群:

