一、介绍
1、dash 是什么
dash 是一个基于 Flask (Python) + React 的 web 框架。
入门指南:https://dash.plot.ly/getting-started>
二、安装
1、安装
pip install dash==0.39.0  # The core dash backend
pip install dash-daq==0.1.0  # DAQ components (newly open-sourced!)
2、启动
$ python app.py三、使用
1、基本框架
import dash
# init dash
external_stylesheets = ['https://codepen.io/chriddyp/pen/bWLwgP.css']
app = dash.Dash(__name__, external_stylesheets=external_stylesheets)

# create layout
app.layout = html.Div(children=[
    # ……
]),


if __name__ == '__main__':
    # debug=True 激活所有开发工具,可选参数参考(https://dash.plot.ly/devtools)
    app.run_server(debug=True,dev_tools=)
2、组件
Declarative UI —— 声明式 UI
(1)html 元素
import dash_html_components as html
class/style 跟 react 的写法规范差不多。
# html.H1(children='Hello Dash') = html.H1('Hello Dash')

html.H1('Hello Dash'),

html.H1(id="h1-element", className='h1', children='Hello Dash',
style={'textAlign': 'center', 'color': '#7FDBFF'}),
布局
        # 嵌套
    html.Div(children=[
        html.Div('111'),
        html.Div('222'),
        html.Div('333'),
    ]),
# 12网格布局
html.Div(className='row', children=[
html.Div('111', className='four columns'),
html.Div('222', className='four columns'),
html.Div('333', className='four columns'),
]),
# 更多预设 className 可以查看: https://codepen.io/chriddyp/pen/bWLwgP.css
# tips:className='four columns' 其实是三列,className='three columns' 其实是四列,意思是用 12 除以它。(2)python 封装的组件
import dash_core_components as dcc
import plotly.graph_objs as go
包括但不限于 单选框、下拉框、Markdown、Store、Graphs……,更多组件https://dash.plot.ly/dash-core-components
    # draw Graph
    dcc.Graph(
        id='cluster_count',
        figure={
            'data': [go.Bar(
                x=[1,2,3],
                y=[100,200,300],
                text=['100个','200个','300个'],
                textposition='auto',
            )],
            'layout': go.Layout(
            )
        },
    ),
    # figure 属性下有 ”data“+"layout" 属性
它基于plotly.py画图库 https://plot.ly/python/,画图库又基于SVG和WebGL (默认为 SVG,对大型数据集会切换到WebGL)。
# 组件用法帮助
>>> help(dcc.Dropdown)
loading 组件
dcc.Loading执行回调的过程中会显示type属性设置的 loading 图标, 而回调完成后会显示children里的内容。
dcc.Loading(id="loading-1", children=[html.Div(id="loading-output-1")], type="default"),
dcc.Input(id="input-1", value='1'),


@app.callback(Output("loading-output-1", "children"), [Input("input-1", "value")])
def input_triggers_spinner(value):
    time.sleep(1)
    return value
这里的回调
@app.callback在下面会有介绍。
Interval 组件
dcc.Interval,interval设置间隔时间,n_intervals记录触发次数。
dcc.Interval(
            id='interval-component',
            interval=1*1000, # in milliseconds
            n_intervals=0
        )


@app.callback(Output('interval-component-div', 'children'),
              [Input('interval-component', 'n_intervals')])
def update_metrics(n):
    return "Already run {} times".format(n)
(3)创建自己的组件
略
3、回调
Reactive Programming —— 反应式编程
from dash.dependencies import Input, Output, State
dcc.Input(id='my-input', value='initial value', type='text'),
dcc.Input(id='my-input-2', value='initial value', type='text'),
html.Button(id='submit-button', n_clicks=0, children='Submit'),
html.Div(id='my-div'),
html.Div(id='my-div-2')

@app.callback(
    [Output(component_id='my-div', component_property='children'),
     Output(component_id='my-div-2', component_property='children')
     ],
     # 简写形式(省略 component_id + component_property)
    [Input('submit-button', 'n_clicks')],
    [State(component_id='my-input', component_property='value'),
     State(component_id='my-input-2', component_property='value')
     ]
)
def update_output_div(n_clicks, input_value, input_value_2):
    return 'You\'ve entered "{}" and "{}"'.format(input_value, input_value_2), 'You\'ve click : "{}" times'.format(n_clicks)
注意事项(坑)
(1)每一个 callback 都会发送一个请求。
(2)所有回调里的 Input 都必须有Output。
(3)同一个组件可以出现在多个回调的Input;但是在 Output 上,只能出现在一处回调里。
(4)不支持组件的双向绑定。
@app.callback(
    Output('my-id-2', 'value'),
    [Input('my-id', 'value')])
def aaa(data):
    print("11:"+data)
    return data

@app.callback(
    Output('my-id', 'value'),
    [Input('my-id-2', 'value')])
def bbb(data):
    print("22:"+data)
    return data
官方说这个 feature 暂时没有解决,具体时间未知。详细讨论如下:
https://community.plot.ly/t/interdependent-components/8299/4
https://community.plot.ly/t/two-way-binding-for-rangeslider-and-input-fields-without-dependency-loop/4810
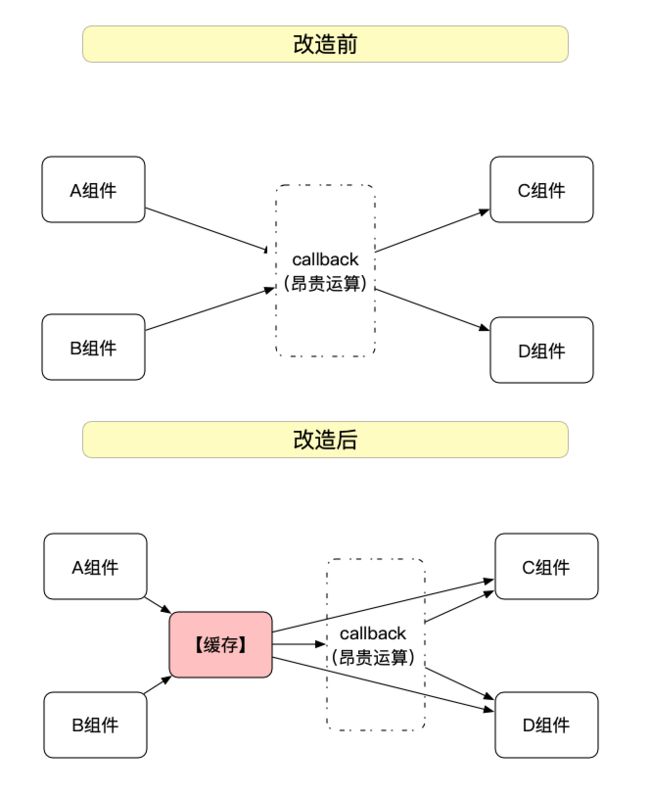
(5)在回调中共享数据
dash 有个原则就是Callbacks绝不能修改其范围之外的变量。
但我们有时候需要用到共享数据,比如引入缓存机制来提高性能,这个时候应该怎么办呢?
方法一:存到当前用户的浏览器会话中(例如隐藏 DIV)
方法二:存到服务器磁盘上(例如文件或数据库)
方法三:存到服务器内存上(例如Redis)
持久化需要把数据序列化( 比如 toJSON() ),对于复杂的数据,推荐使用
apache arrow。
其中方法二和三可以使用Flask-Caching来实现。
pip install Flask-Caching实现回调的缓存机制:
from flask_caching import Cache


cache = Cache(app.server, config={
    'CACHE_TYPE': 'filesystem',
    'CACHE_DIR': 'cache-directory'
})
# use redis
# 'CACHE_TYPE': 'redis',
# 'CACHE_REDIS_URL': os.environ.get('REDIS_URL', '')


html.Div(id='flask-cache-memoized-children'),
        dcc.RadioItems(
            id='flask-cache-memoized-dropdown',
            options=[
                {'label': 'Option {}'.format(i), 'value': 'Option {}'.format(i)}
                for i in range(1, 4)
            ],
            value='Option 1'
        ),
        html.Div('Results are cached for {} seconds'.format(TIMEOUT)),

@app.callback(
    Output('flask-cache-memoized-children', 'children'),
    [Input('flask-cache-memoized-dropdown', 'value')])
@cache.memoize(timeout=60)  # in seconds
def render(value):
    return 'Selected "{}" at "{}"'.format(
        value, datetime.datetime.now().strftime('%H:%M:%S')
    )
4、交互
只适用于dash_core_components
目前只支持四种交互方式: hoverData, clickData, selectedData, relayoutData。
@app.callback(
    Output('click-data', 'children'),
    [Input('cluster_count', 'clickData')])
def display_click_data(clickData):
    return json.dumps(clickData, indent=2)
注意事项(坑)
(1)回调时的形参不能随意指定
@app.callback(
    Output('hover-data', 'children'),
    [Input('cluster_count', 'hoverData')])
# tips: 这里形参的hoverData不可以随便指定其他称呼,否则会获取不到值
def display_hover_data(hoverData):
    return json.dumps(hoverData, indent=2)
(2)暂不支持设置悬停和点击时的样式修改。
5、CSS & JS (& Header )
(1)外部文件(需手动引入)
# external_stylesheets
external_stylesheets = [
    'https://codepen.io/chriddyp/pen/bWLwgP.css',
    {
        'href': 'https://stackpath.bootstrapcdn.com/bootstrap/4.1.3/css/bootstrap.min.css',
        'rel': 'stylesheet',
        'integrity': 'sha384-MCw98/SFnGE8fJT3GXwEOngsV7Zt27NXFoaoApmYm81iuXoPkFOJwJ8ERdknLPMO',
        'crossorigin': 'anonymous'
    }
]

# external_scripts
external_scripts = [
    'https://www.google-analytics.com/analytics.js',
    {'src': 'https://cdn.polyfill.io/v2/polyfill.min.js'},
    {
        'src': 'https://cdnjs.cloudflare.com/ajax/libs/lodash.js/4.17.10/lodash.core.js',
        'integrity': 'sha256-Qqd/EfdABZUcAxjOkMi8eGEivtdTkh3b65xCZL4qAQA=',
        'crossorigin': 'anonymous'
    }
]

meta_tags = [
    {
        'name': 'description',
        'content': 'My description'
    },
    {
        'http-equiv': 'X-UA-Compatible',
        'content': 'IE=edge'
    }
]


# init dash
app = dash.Dash(__name__,
      external_stylesheets=external_stylesheets,
      external_scripts=external_scripts,
      meta_tags=meta_tags
        )
(2)CDN文件(需手动引入)
app = dash.Dash(__name__,
    assets_external_path='http://your-external-assets-folder-url/'
)
app.scripts.config.serve_locally = False
(3) 本地文件(自动引入)
在根目录创建assets文件夹:
# 可以改这个设置
app.config.assets_folder = 'assets'
A、里面的 CSS/JS 文件会自动引入
B、IMG 图片需要这样加载html.Img(src='/assets/image.png'):
app.py
- assets/
    |-- typography.css
    |-- header.css
    |-- custom-script.js
    |-- image.png
6、路由
# ------------ 先定义 dcc.Location ,它的 pathname 属性会实时记录当前 url 的值 ------------

dcc.Location(id='url', refresh=False), # 没有任何显示作用

# ------------ 改变 url ------------

# 会刷新页面
dcc.Link('Navigate to "/"', href='/'),
dcc.Link('Navigate to "/page-2"', href='/page-2'),

# 不会刷新页面
html.A(href='/page-3',children='Navigate to "/page-3"'),


# ------------ 改变 url 的 回调 ------------

@app.callback(dash.dependencies.Output('page-content', 'children'),
              [dash.dependencies.Input('url', 'pathname')])
def display_page(pathname):
    return html.Div([
        html.H3('You are on page {}'.format(pathname))
    ])
构建多页面应用程序
略
注意事项 (坑)
如果我们通过不同的 url去渲染不同的页面的话,会碰到一个问题,就是我们可能会率先定义了回调,而回掉中的组件暂时还没渲染到app.layout中,因此Dash会引发异常以警告我们可能做错了。在这种情况下,我们可以通过设置忽略该异常。即:
app.config.suppress_callback_exceptions = True
7、Auth
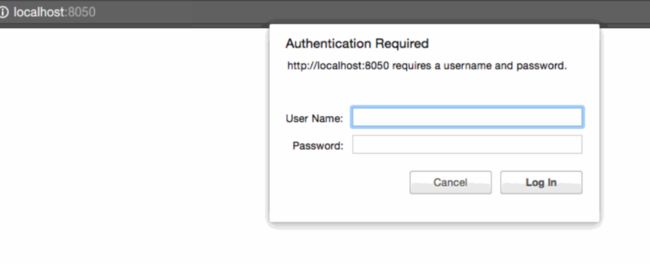
(1)HTTP Basic Auth
pip install dash-authimport dash_auth
# Keep this out of source code repository - save in a file or a database
VALID_USERNAME_PASSWORD_PAIRS = [
['hello', 'world']
]
auth = dash_auth.BasicAuth(
app,
VALID_USERNAME_PASSWORD_PAIRS
)
app.scripts.config.serve_locally = True(2)Plotly OAuth (需要付费)
略

