【homebrew 系列文章】
- HomeBrew常规使用教程
- Homebrew进阶使用教程(一)
- Homebrew进阶使用教程(二)-用一个命令行天气客户端构建自己的仓库
- Homebrew进阶使用教程(三)-apue.h在mac下安装并使用连接
我的github地址:github地址:https://github.com/rangaofei/homebrew-saka
软件运行
这里容我先装个逼,推广一下自己的仓库,虽然只有两个包:
github地址
一个非常简单的命令行客户端,接口采用的是和风天气接口,感谢。
1. 安装
本项目目前只支持homebrew获取方式。
首先获取仓库
brew tap rangaofei/saka
然后安装该项目
brew install sweather
2. 使用
2.1 设置地区
目前支持到区县级别
sweather -setloc
2.2 查看天气
sweather [address]
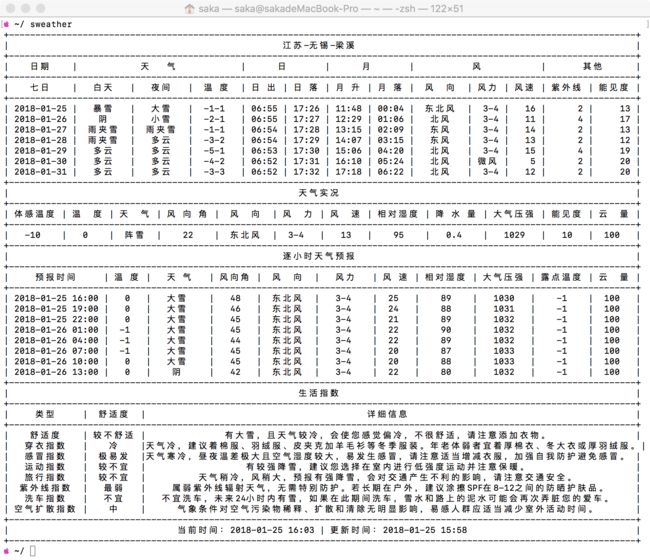
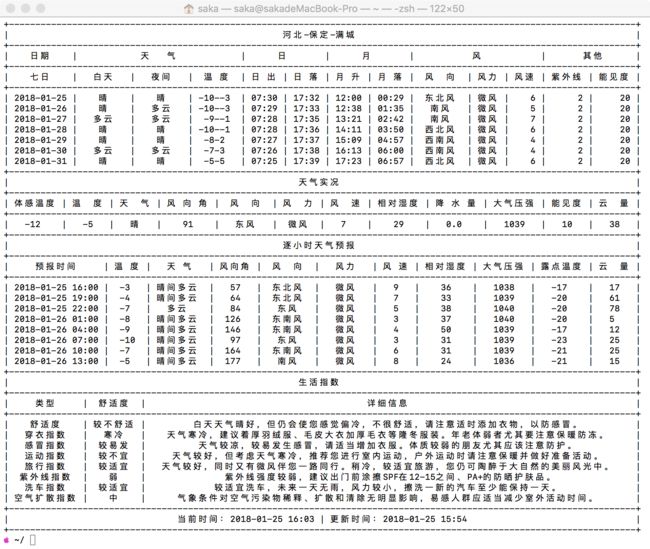
显示包括七天天气、实况天气、逐小时预报、生活指数、更新时间等信息。
直接输入sweather显示默认地区的天气。后边跟上开头不是'-'字符串,直接搜索对应地址的天气
2.2 查看七天天气
sweather -forecast
2.3 查看当前天气实况
sweather -now
2.4 查看天气指数
sweather -lifestyle
2.5 查看逐小时天气预报
sweather -hourly
2.6 查看地址信息
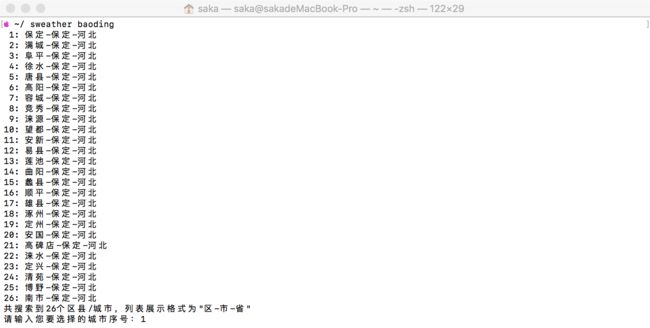
sweather -loc [address]
直接输入-loc显示默认地址信息,后边接地址显示所有包含该地址的信息
2.8 查看空气质量
sweather -air [address]
欢迎各位大佬使用,同时假如有自己要发布的库可以直接留言,大佬如果允许的话我帮助各位编写好ruby脚本发布到该仓库,供所有人使用。
homebrew的仓库
brew会提供一个官方的仓库,homebrew-coregithub地址。
homebrew安装完毕后这个仓库自动加载到usr/local/Homerew/Library/Taps/文件夹下,这是一个git管理的地址,意味着我们可以提交自己的pullrequest到该仓库。
重点关注一下homebrew-core/Formula/,该文件夹下包含我们所有的仓库中的软件安装脚本,例如curl.rb这个ruby脚本即是安装curl时需要的脚本。
加入第三方仓库
此处我们以自己创建的仓库为例讲解:
-
仓库名称
brew时以github为基础构建的ruby脚本,所有仓库都集中再github上,所有此处演示的也是构建再github上的仓库。
- 仓库名称必须以
homebrew-anything格式来命名,homebrew-前缀是可选的,但是如果不加该前缀,必须使用整个url来安装,相当麻烦,所以务必加上此前缀。anything可以设置为任意自己喜欢的名字。
这是我的仓库的名称:
[图片上传失败...(image-2b6f4d-1517147154944)] - 创建一个Formula文件夹,用来存放安装脚本,里边的文件名称就是你在brew install
时候的名称。
-
命令
- brew tap
brew tap
将你自己的仓库clone到本地Tap文件夹下,你可以通过brew [un]install来管理你的仓库中的软件的安装与卸载。当你使用brew update时,也会更新自己仓库中的包安装文件。
例如上面的我的仓库homebrew-saka,我的用户名是rangaofei,则我可以使用 brew tap rangaofei/saka,来增加我自己的仓库:
[图片上传失败...(image-91c8f9-1517147154944)]
如上图所示,我的仓库已经添加进来了。
brew tap
通过url将其他非github的仓库添加进来,这个地址可以不是http协议,只要支持git协议即可。此处不演示。
brew untap user/repo
删除已增加的仓库,同时在该仓库下的软件也都能再使用。
brew tap-pin user/repo
将指定仓库标记为包首选搜索仓库。
brew tap-unpin user/repo
取消指定仓库的包首选搜索。
名字重复的包
假如自己的仓库中有和homebrew-core仓库中名字相同的包,当然可以。
当使用brew_install命令时brew会有一个默认的搜索顺序:
- pinned taps(标记的仓库)
- core formulae(核心仓库)
- other taps(其他仓库)
也就是说假如我们给任何仓库一个pinned标记,homebrew会自动先搜索核心仓库,再搜索其他仓库。假如标记了某个仓库,则会先搜索标记的仓库,在搜索核心仓库,最后是其他仓库。
假如我们标记了某个仓库,例如saka,那当我的仓库中有curl包,core中也有curl包时,首先安装saka仓库中的curl。
如果你想从指定的仓库安装某个包也可以通过加上user/repo来执行。比如我们想安装vim,则有如下两种方式:
brew install vim                     # 从homebrew/core安装
brew install username/repo/vim       # 从指定仓库安装
发布自己的包
brew是以ruby脚本来执行安装,语法遵循ruby语法。
- 发布源码包地址
现在我有一个c语言编写的获取天气命令行客户端,放在github托管,文件地址为
https://raw.githubusercontent.com/rangaofei/SimpleWeather/master/sweather-1.1.0.tar.gz
格式最好以压缩文件格式结尾,此处只需要打包必须的文件,尽量小巧。重点关注一下最后几个字符:sweather-1.0.7.tar.gz
sweather表示包的名称,也就是我们安装好后的文件夹的名称
1.1.0表示版本号,此处最好与你发布的程序版本号一致,
例如我在cmake中程序版本号设置
set(VERSION_MAJOR 1)
set(VERSION_MINOR 1)
set(VERSION_PATCH 0)
- 创建formula
执行命令行
brew create https://raw.githubusercontent.com/rangaofei/SimpleWeather/master/sweather-1.0.7.tar.gz
brew会自动创建一个sweather.rb 文件,文件内容大致如下(此处我已修改了一些内容,包括desc,homepage,cmake依赖以及安装时改用cmake):
# Documentation: https://docs.brew.sh/Formula-Cookbook.html
#                http://www.rubydoc.info/github/Homebrew/brew/master/Formula
# PLEASE REMOVE ALL GENERATED COMMENTS BEFORE SUBMITTING YOUR PULL REQUEST!

class Sweather < Formula
  desc "一个非常简单的获取天气客户端\n    ----by saka"
  homepage "https://juejin.im/user/5855ebea8d6d810065a4befa/posts"
  url "https://raw.githubusercontent.com/rangaofei/SimpleWeather/master/sweather-1.0.7.tar.gz"
  sha256 "64808c700bd46d837c6b06d7965f4f99d3c91b4c2764c3d02f893b8dfb9e9aa2"

  depends_on "cmake" => :build
#  depends_on "curl"=>:run
  def install
    etc.install Dir["src/*"]
    mkdir "build" do
      system "cmake", "..", *std_cmake_args
      system "make"
      system "make", "install" # if this fails, try separate make/make install steps

    end
  end

  test do
    # `test do` will create, run in and delete a temporary directory.
    #
    # This test will fail and we won't accept that! For Homebrew/homebrew-core
    # this will need to be a test that verifies the functionality of the
    # software. Run the test with `brew test sweather`. Options passed
    # to `brew install` such as `--HEAD` also need to be provided to `brew test`.
    #
    # The installed folder is not in the path, so use the entire path to any
    # executables being tested: `system "#{bin}/program", "do", "something"`.
    system "false"
  end
end
这个文件会创建在核心仓库,也就是在/usr/local/Homebrew/Library/Taps/homebrew/homebrew-core/Formula/位置,只要copy我们自己仓库的位置即可,我的是/usr/local/Homebrew/Library/Taps/rangaofei/homebrew-saka/Formula/。更改完毕后,通过git提交至自己的github即可。
git add sweather.rb
git commit -m 'add new formula sweather'
git push origin
提交完毕后我们执行
brew update来更新仓库。
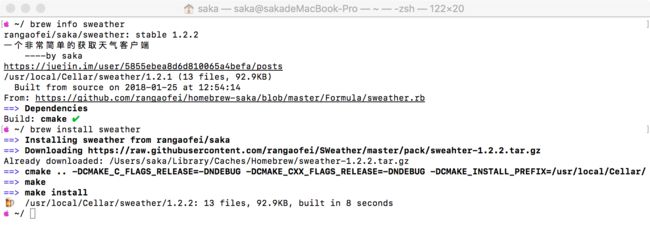
然后执行
brew search sweather # 搜索包
brew info sweather # 显示包的信息
brew install sweather # 安装包
[图片上传失败...(image-3e94fe-1517147154944)]
由于安装时依赖了cmake,所以会自动先下载安装cmake(我已安装好),然后下载sweather安装。
此时你就可以在命令行查看天气了:
sweather -v # 查看当前版本
sweather -setloc liangxi #设置天气地址为梁溪-无锡
sweather -now #查看现在天气
sweather #查看三天的天气


