本文主要内容
- 使用workspace对多个项目进行管理
- 工作空间中使用cocoapods管理不同项目的依赖
- workspace共用自己写的framework
Let us rock and roll!
使用workspace对多个项目进行管理
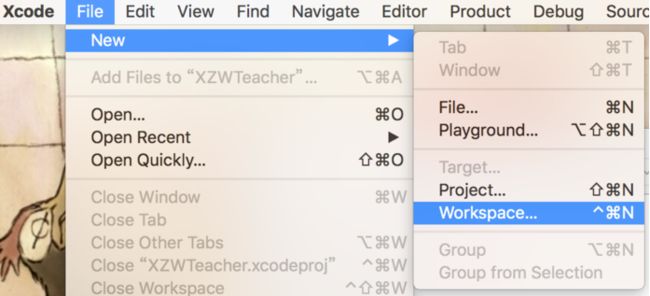
首先创建一个新的工作空间
命名为MYProjects
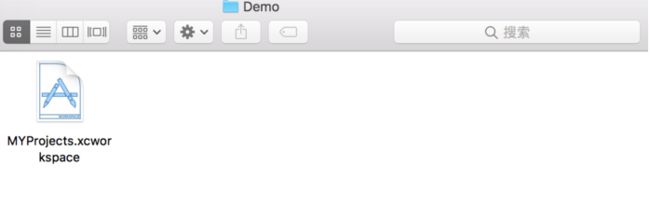
我们获得了一个空的MYProjects.xcworkspace文件
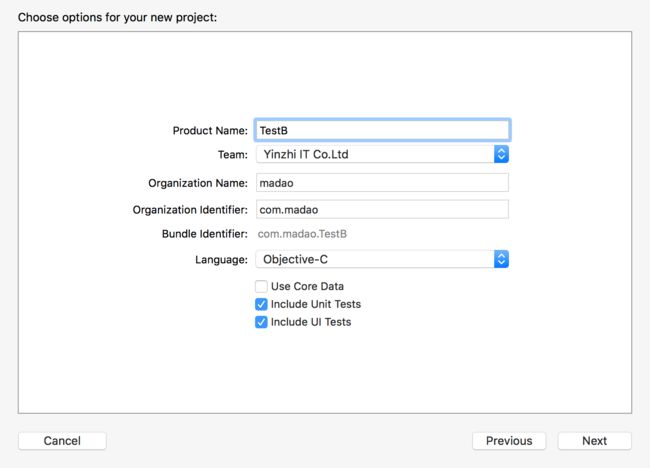
假设我们有两个工程 TestA 和 TestB
在我们目录下创建了两个工程文件和一个 MYProjects.xcworkspace 文件
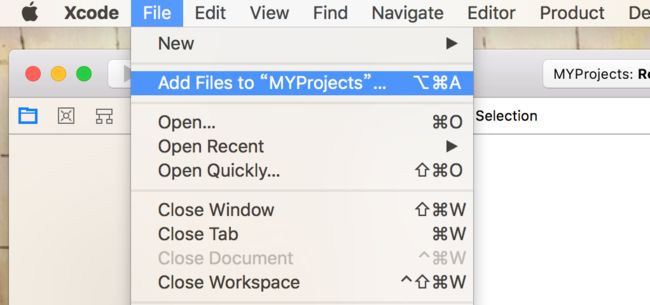
打开MYProjects.xcworkspace 如图所示将两个工程(选中TestA.xcodeproj 和 TestB.xcodeproj导入)导入进来
我们工作空间便同时存在了两个不同的工程
以后我们只需要打开 MYProjects.xcworkspace 便可以管理我们的工作空间了
工作空间中使用cocoapods管理不同项目的依赖
我们需要在目录里面手动创建一个Podfile
# Uncomment the next line to define a global platform for your project
# platform :ios, '8.0'
#xcodeproj 'Portfolio/Portfolio.xcodeproj'
#source 'https://mirrors.tuna.tsinghua.edu.cn/git/CocoaPods/Specs.git'

##设置workspace文件
workspace 'MYProjects.xcworkspace'
cd进入工作空间目录,执行pod install, 进行pod 初始化
重头戏来了,下面我们要为针对每个项目配置Podfile
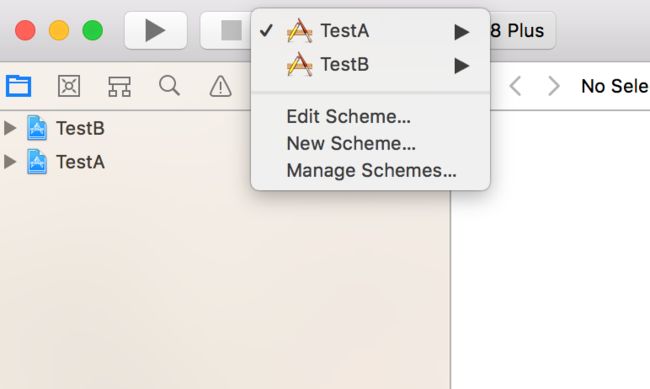
在此之前,大多情况下,我们开发中可能会存在两个版本的App,例如 开发版 和 正式版,如下图我们复制一个Target,并命名为TestADev和TestBDev作为开发版本,
Xcode会为我们复制的Target自动生成了一个plist文件(一个target对应一个plist文件),名称为 TestA copy-Info.plist, 之后我们开发版target的属性便在这个文件中设置了
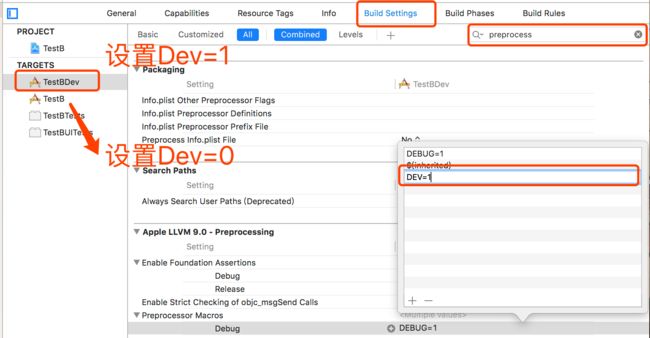
为了能够在代码中区分,我们只需要如下设置, TestBDev设置DEV=1, TestB设置DEV=0
在代码中我们只需要简单地判断下 DEV 便能够区分是开发版还是正式版本了
if (DEV == 1){
        // 测试开发环境
        requestURL = "127.0.0.1"
}else{
        // 正式开发环境
        requestURL = "213.23.43.12"
}
到现在为止,我们工作空间有了两个工程,两个工程分别对应了两个版本
| 工作空间 | 开发版本target | 正式版本target |
|---|---|---|
| TestA | TestADev | TestA |
| TestB | TestBDev | TestB |
我们要在Podfile中为每个target做配置
首先我们看下项目 TestA 如何配置
############################################# TestA
#需要添加添加依赖的target数组
targetsArray = ['TestA', 'TestADev']
# 遍历数组,分别添加依赖
for index in 0..targetsArray.length - 1 do
    # 数组中获取元素
    proj = targetsArray[index]
    target proj do
        # Uncomment the next line if you're using Swift or would like to use dynamic frameworks
        use_frameworks!
        # 辨识是哪个项目
        project 'TestA/TestA.xcodeproj'
        # Pods for TestA
        # 键入需要添加的依赖
        pod 'AFNetworking', '~> 3.1.0'

        # end Pods for TestA
        # 如果 target 下标为1, 即只为开发板做 单元测试 和 UI测试
        if index == 0
            target proj + 'Tests' do
                inherit! :search_paths
                # Pods for testing
            end

            target proj + 'UITests' do
                inherit! :search_paths
                # Pods for testing
            end
        end
    end
end
TestB 配置也是一样的,最终我们得到的 Podfile 文件
# Uncomment the next line to define a global platform for your project
# platform :ios, '8.0'
#xcodeproj 'Portfolio/Portfolio.xcodeproj'
#source 'https://mirrors.tuna.tsinghua.edu.cn/git/CocoaPods/Specs.git'


##设置workspace文件
workspace 'MYProjects.xcworkspace'


############################################# TestA
targetsArray = ['TestA', 'TestADev']
for index in 0..targetsArray.length - 1 do
    proj = targetsArray[index]
    target proj do
        # Uncomment the next line if you're using Swift or would like to use dynamic frameworks
        use_frameworks!
        project 'TestA/TestA.xcodeproj'
        # Pods for TestA
        pod 'AFNetworking', '~> 3.1.0'

        # end Pods for TestA
        # 如果 target 下标为0, 即只为正式版做 单元测试 和 UI测试
        if index == 0
            target proj + 'Tests' do
                inherit! :search_paths
                # Pods for testing
            end

            target proj + 'UITests' do
                inherit! :search_paths
                # Pods for testing
            end
        end
    end
end

############################################# TestB
targetsArray = ['TestB', 'TestBDev']
for index in 0..targetsArray.length - 1 do
    proj = targetsArray[index]
    target proj do
        # Uncomment the next line if you're using Swift or would like to use dynamic frameworks
        use_frameworks!
        project 'TestB/TestB.xcodeproj'
        # Pods for TestA
        pod 'AFNetworking', '~> 3.1.0'

        # end Pods for TestA
        # 如果 target 下标为0, 即只为正式版做 单元测试 和 UI测试
        if index == 0
            target proj + 'Tests' do
                inherit! :search_paths
                # Pods for testing
            end

            target proj + 'UITests' do
                inherit! :search_paths
                # Pods for testing
            end
        end
    end
end
但是这样做会有个缺陷,不同工程使用同一个不同版本的三方库将会报错,因为这样会导致podfile中的版本冲突,如下所示
Analyzing dependencies
[!] Unable to satisfy the following requirements:

- `AFNetworking (~> 3.1.0)` required by `Podfile`
- `AFNetworking (~> 3.1.0)` required by `Podfile`
- `AFNetworking (= 2.6.3)` required by `Podfile`
- `AFNetworking (= 2.6.3)` required by `Podfile`
最后我们要做的就是pod install下即可了
workspace共用自己写的framework
如法炮制,我们创建一个framework,命名为 MADFramework
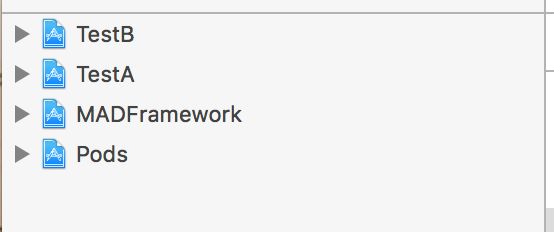
build一下,加入工作空间,现在我们有四个蓝色的图标了
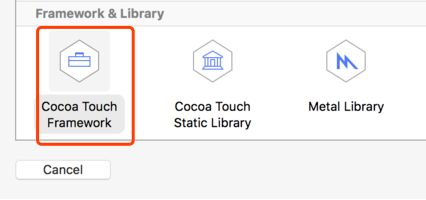
值得注意的是,我们添加的framework默认是动态库,苹果是不允许上架的,我们需要如下图进行更改,将framework设置为静态库
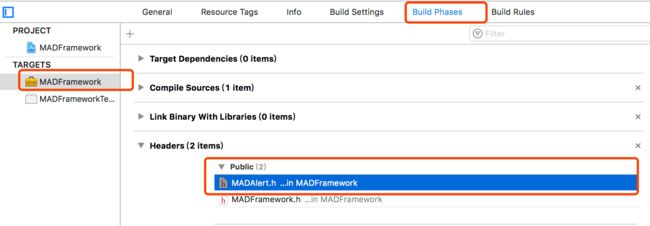
接着在framework中新建一个类MADAlert.h
#import "MADAlert.h"
#import

@implementation MADAlert

+ (void)alert
{
    UIAlertView *alert = [[UIAlertView alloc] initWithTitle:@"Hello ☺☺☺☺☺☺☺☺" message:nil delegate:nil cancelButtonTitle:nil otherButtonTitles:@"done", nil];
    [alert show];
}
@end
如下如将需要暴露的header放入public
为了我们其他的工程能识别我们的framework,做如下图设置
在ViewController代码中添加调用代码
#import "MADAlert.h"
@implementation ViewController

- (void)viewDidLoad {
    [super viewDidLoad];
    // Do any additional setup after loading the view, typically from a nib.
    [MADAlert alert];
}
运行下:
That all
补充 静态动态库区别:
静态库:链接阶段导入,完整地被复制到可执行文件,使用了多少次,就会被拷贝多少次
动态库:运行时动态加载,多个程序共用, 例如系统的UIKit.framwork等,能够节省内存,减少应用包体积
静态库:以
.a和.framework为文件后缀名。
动态库:以.tbd(之前叫.dylib)和.framework为文件后缀名。
静态库:不可以单独使用,需要依赖
.h文件调用,表现为二进制文件
动态库:可以单独使用, 表现为可执行文件
