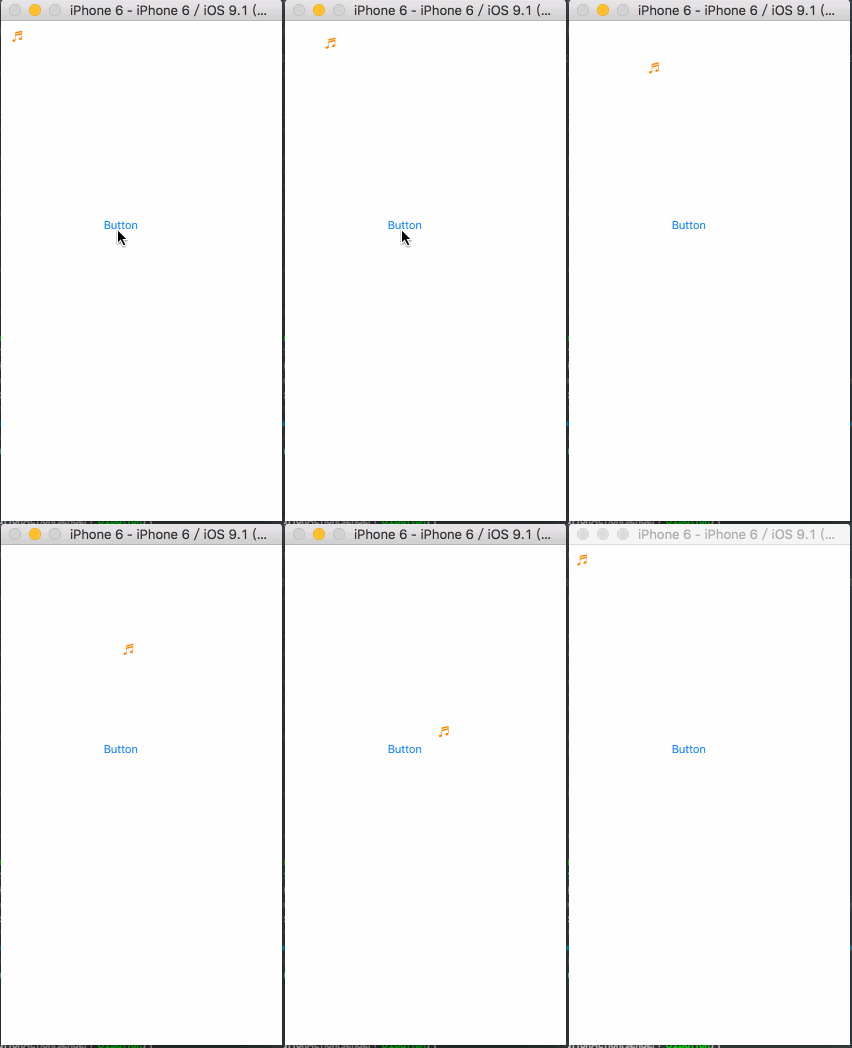
近期的工作会涉及到大量的画图,可能会加上一定的动画效果,因此把之前的笔记做一个整理.
介绍CAPropertyAnimation的两个子类(CABasicAnimation和CAKeyframeAnimation.),想想还是回过头来梳理一下CAAnimation这个父类,比如CABasicAnimation属于他自己的只有3个property,其他都是继承来的.不过就算是CAAnimation,它自身的property还是用的不多,像我们定义动画常常设置的时间propertyduration,beginTime,repeatCount等都在协议CAMediaTiming中...
CAAnimation Property
-
removedOnCompletion:设置是否动画完成后,动画效果从设置的layer上移除。默认为YES -
timingFunction:用于变化起点和终点之间的插值计算,形象点说它决定了动画运行的节奏,比如是均匀变化(相同时间变化量相同)还是先快后慢,先慢后快还是先慢再快再慢.
Timing Function对应的类是CAMediaTimingFunction,它提供了两种获得时间函数的方式,一种是使用预定义的五种时间函数,一种是通过给点两个控制点得到一个时间函数**
系统给的最熟悉的就是Linear了,匀速...
kCAMediaTimingFunctionLinear,
kCAMediaTimingFunctionEaseIn,  // 动画缓慢进入,然后加速离开
kCAMediaTimingFunctionEaseOut,  //  动画全速进入,然后减速离开
kCAMediaTimingFunctionEaseInEaseOut, // 动画缓慢进入,然后加速,最后减速离开
kCAMediaTimingFunctionDefault.
自定义的则是下面2个方法:(贝塞尔曲线什么的,不太懂...)
    /* Creates a timing function modelled on a cubic Bezier curve. The end
     * points of the curve are at (0,0) and (1,1), the two points 'c1' and
     * 'c2' defined by the class instance are the control points. Thus the
     * points defining the Bezier curve are: '[(0,0), c1, c2, (1,1)]' */

    public init(controlPoints c1x: Float, _ c1y: Float, _ c2x: Float, _ c2y: Float)

    /* 'idx' is a value from 0 to 3 inclusive. */
     public func getControlPointAtIndex(idx: Int, values ptr: UnsafeMutablePointer)
CAMediaTiming Property
-
duration:动画持续时间(最熟悉没有之一...),默认是0,但这不意味着动画时长为0秒,为0.25 -
beginTime:指定动画开始时间。从开始指定延迟几秒执行的话,请设置为「CACurrentMediaTime() + 秒数」的形式. -
timeOffset:我理解为时间的偏移量,比如一个duration为5秒的动画,将timeOffset设置为2,那么动画的运行是2s->5s->0s->2s -
speed:时间加速..设置duration为3秒,但是speed为2,动画快速的执行了1.5秒,speed越大则说明时间流逝速度越快,动画也越快 -
repeatCount:代表动画重复的迭代次数,默认为0,也并不意味为0次,而是1次 -
repeatDuration:动画的重复时间(间隔),如果它小于动画的duration,那么动画就会提前结束 -
autoreverses(Bool):动画结束时是否执行逆动画,可以产生从初始值到最终值,并反过来回到初始值的动画,也就是这意味着动画发生了两次 -
fillMode:一般与removedOnCompletion(必须设置为false)一起用
kCAFillModeRemoved  // 这个是默认值,也就是说当动画开始前和动画结束后,动画对layer都没有影响,动画结束后,layer会恢复到之前的状态
kCAFillModeForwards // 当动画结束后,layer会一直保持着动画最后的状态
kCAFillModeBackwards // 这个和kCAFillModeForwards是相对的,就是在动画开始前,你只要将动画加入了一个layer,layer便立即进入动画的初始状态并等待动画开始.你可以这样设定测试代码,将一个动画加入一个layer的时候延迟5秒执行.然后就会发现在动画没有开始的时候,只要动画被加入了layer,layer便处于动画初始状态
kCAFillModeBoth  // 理解了上面两个,这个就很好理解了,这个其实就是上面两个的合成.动画加入后开始之前,layer便处于动画初始状态,动画结束后layer保持动画最后的状态.
CAAnimationDelegate Methods
获取动画的事件处理
// 动画开始
- (void)animationDidStart:(CAAnimation *)anim;
// 动画结束
- (void)animationDidStop:(CAAnimation *)anim finished:(BOOL)flag;
但这个delegate 有一个特别的地方,就是@property(nullable, strong) id 用的是strong修饰
- 全局变量设置下会出现循环引用,参照CABasicAnimation的Delegate的坑
- 也有说它是内存管理规则中的一个例外,无须处理.你是担心 strong 的 delegate 引起循环引用吗?这里的情况跟一般的 delegate 不太一样,首先动画是异步的,在动画的过程中,它的 delegate 随时都有可能被释放掉,如果不是个强引用的话,比如用户点了返回之类的。另外一方面,一般来说你并不会持有一个 CAAnimation 的强引用(跟 UITableView 不一样.
CAPropertyAnimation作为属性动画的基类,并不能直接使用.通常我们操作的是它的两个子类CABasicAnimation和CAKeyframeAnimation.
CABasicAnimation
1.基础动画,通过属性修改进行动画参数控制,只有初始状态和结束状态。它只有3个属性:fromValue toValue ByValue,其他全是继承的.对于它这3个属性可以参考:官方文档
// 如果fromValue和toValue不为nil,那么动画帧变化就是从from到to
Both fromValue and toValue are non-nil. Interpolates between fromValue and toValue.
// 如果fromValue和toValue不为nil,那么动画帧变化就是从from到from+by(可见byValue是相对值概念)
fromValue and byValue are non-nil. Interpolates between fromValue and (fromValue + byValue).
// 剩下的大致相同...就不多解释了
byValue and toValue are non-nil. Interpolates between (toValue - byValue) and toValue.

fromValue is non-nil. Interpolates between fromValue and the current presentation value of the property.

toValue is non-nil. Interpolates between the current value of keyPath in the target layer’s presentation layer and toValue.

byValue is non-nil. Interpolates between the current value of keyPath in the target layer’s presentation layer and that value plus byValue.

All properties are nil. Interpolates between the previous value of keyPath in the target layer’s presentation layer and the current value of keyPath in the target layer’s presentation layer.
2(*).使用animationWithKeyPath:方法进行实例化,并指定Layer的属性作为keyPath(关键路径)来注册.
对于这个keyPath,Core Animation Programming Guide中给出了一些常见的,你还可以写
path(xxx.fromValue = yyy.CGPath xxx.toValue = yyy.CGPath)layer的属性layer子类属性-比如:strokeStart,strokeEnd,locations(CAGradientLayer)- ...
rotation.x Set to an NSNumber object whose value is the rotation, in radians, in the x axis.
rotation.y Set to an NSNumber object whose value is the rotation, in radians, in the y axis.
rotation.z Set to an NSNumber object whose value is the rotation, in radians, in the z axis.
rotation Set to an NSNumber object whose value is the rotation, in radians, in the z axis. This field is identical to setting the rotation.z field.
scale.x Set to an NSNumber object whose value is the scale factor for the x axis.
scale.y Set to an NSNumber object whose value is the scale factor for the y axis.
scale.z Set to an NSNumber object whose value is the scale factor for the z axis.
scale Set to an NSNumber object whose value is the average of all three scale factors.
translation.x Set to an NSNumber object whose value is the translation factor along the x axis.
translation.y Set to an NSNumber object whose value is the translation factor along the y axis.
translation.z Set to an NSNumber object whose value is the translation factor along the z axis.
translation Set to an NSValue object containing an NSSize or CGSize data type. That data type indicates the amount to translate in the x and y axis
对比这些keyPath不难发现,等价于第一章中UIView封装的block动画,不过要配以下方法:
public func CGAffineTransformMakeTranslation(tx: CGFloat, _ ty: CGFloat) -> CGAffineTransform

/* Return a transform which scales by `(sx, sy)':
     t' = [ sx 0 0 sy 0 0 ] */

public func CGAffineTransformMakeScale(sx: CGFloat, _ sy: CGFloat) -> CGAffineTransform

/* Return a transform which rotates by `angle' radians:
     t' = [ cos(angle) sin(angle) -sin(angle) cos(angle) 0 0 ] */

public func CGAffineTransformMakeRotation(angle: CGFloat) -> CGAffineTransform

/* Return true if `t' is the identity transform, false otherwise. */

public func CGAffineTransformIsIdentity(t: CGAffineTransform) -> Bool

/* Translate `t' by `(tx, ty)' and return the result:
     t' = [ 1 0 0 1 tx ty ] * t */

public func CGAffineTransformTranslate(t: CGAffineTransform, _ tx: CGFloat, _ ty: CGFloat) -> CGAffineTransform

/* Scale `t' by `(sx, sy)' and return the result:
     t' = [ sx 0 0 sy 0 0 ] * t */

public func CGAffineTransformScale(t: CGAffineTransform, _ sx: CGFloat, _ sy: CGFloat) -> CGAffineTransform

/* Rotate `t' by `angle' radians and return the result:
     t' =  [ cos(angle) sin(angle) -sin(angle) cos(angle) 0 0 ] * t */

public func CGAffineTransformRotate(t: CGAffineTransform, _ angle: CGFloat) -> CGAffineTransform
translation对应平行移动;scale对应缩放;rotation对应旋转.
至于CGAffineTransformMakeTranslation和CGAffineTransformTranslate的区别:前者每次都是以最初位置的中心点为起始参照,后者每次都是以传入的transform为起始参照.
@举个栗子
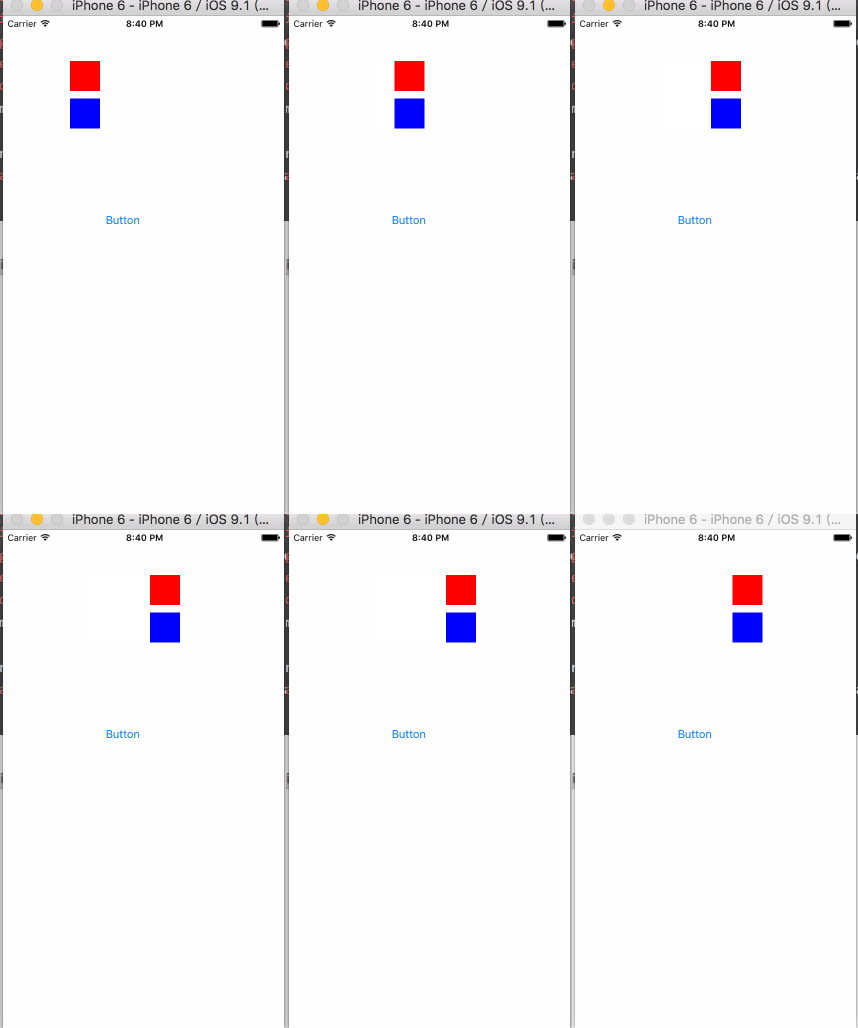
        // 1.keyPath-translation
        let basicAnimation = CABasicAnimation(keyPath: "transform.translation.x")
        basicAnimation.toValue = 200
        basicAnimation.duration = 2.0
        basicAnimation.timingFunction = CAMediaTimingFunction(name: kCAMediaTimingFunctionEaseInEaseOut)
        basicAnimation.removedOnCompletion = false
        basicAnimation.fillMode = kCAFillModeForwards
        redView.layer.addAnimation(basicAnimation, forKey: nil)
        // 1.block
        UIView.animateWithDuration(2.0) { () -> Void in
            self.blueView.transform = CGAffineTransformMakeTranslation(200.0, 0.0)
        }

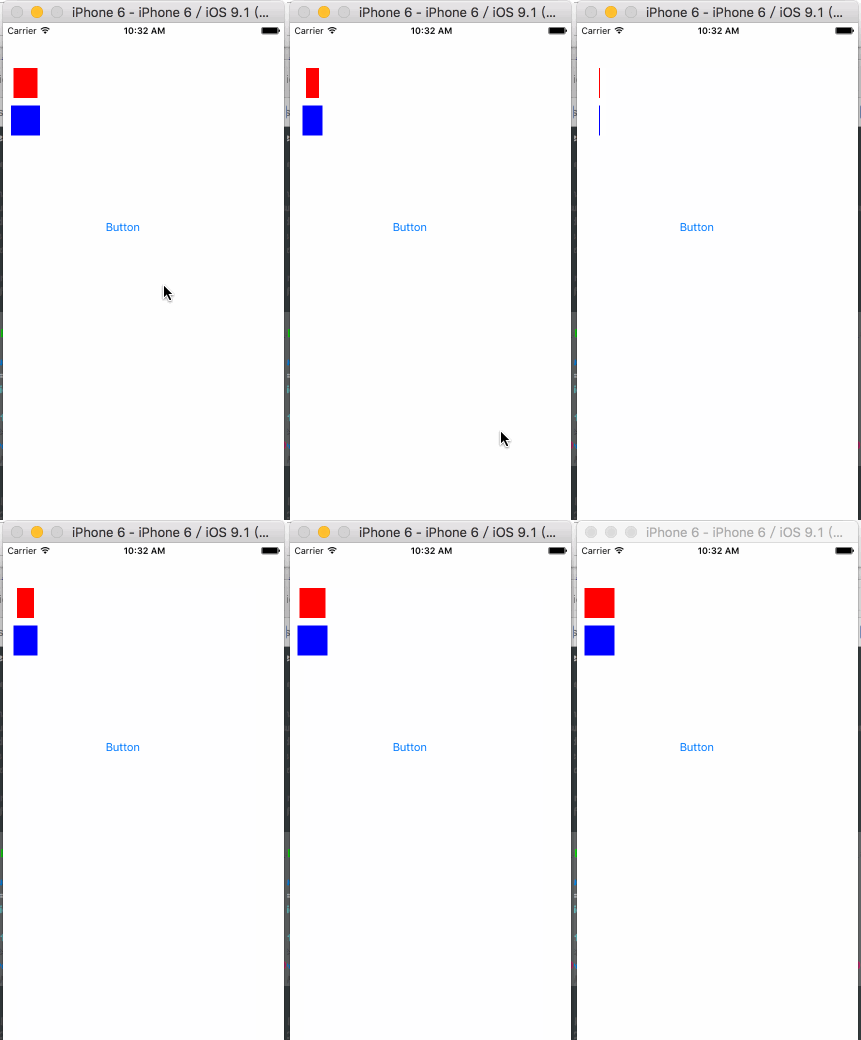
        // 2.keyPath-rotation
        let rotateAnimation = CABasicAnimation(keyPath: "transform.rotation.y")// 绕y轴旋转
        rotateAnimation.duration = 5.0
        rotateAnimation.fromValue = 0.0
        rotateAnimation.toValue = M_PI
        redView.layer.addAnimation(rotateAnimation, forKey: nil)
        // 2.block
        UIView.animateWithDuration(5.0) { () -> Void in
            // 必须用带3D的方法,这样处于立体坐标系
            self.blueView.layer.transform = CATransform3DMakeRotation(CGFloat(M_PI), 0.0, -1.0, 0.0)
            //CGAffineTransformMakeRotation(CGFloat(M_PI)) 平面旋转
        }

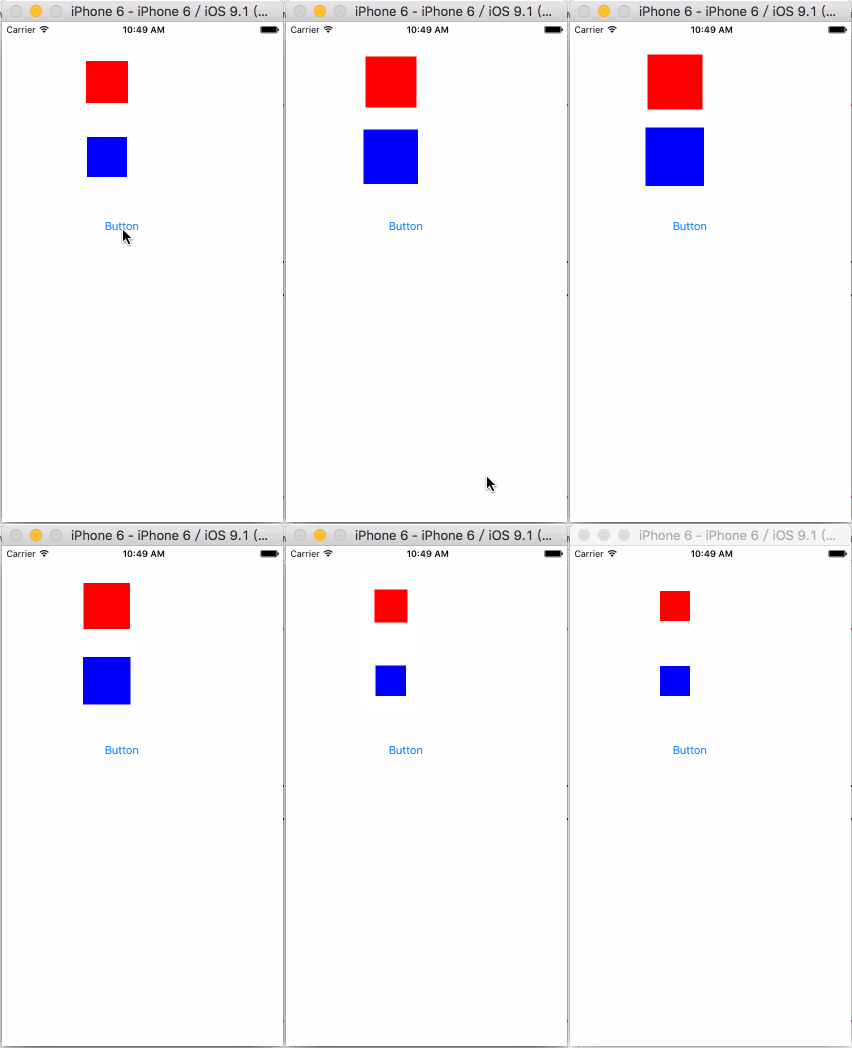
        // 3.keyPath-scale
        let scaleAnimation = CABasicAnimation(keyPath: "transform.scale")
        scaleAnimation.duration = 1.0
        scaleAnimation.autoreverses = true
        scaleAnimation.fromValue = 1.0
        scaleAnimation.toValue = 2.0
        redView.layer.addAnimation(scaleAnimation, forKey: nil)
        // 3.block
        UIView.animateWithDuration(1.0, animations: { () -> Void in
            self.blueView.transform = CGAffineTransformMakeScale(2.0, 2.0)
            }) { (_) -> Void in
                UIView.animateWithDuration(1.0, animations: { () -> Void in
                    self.blueView.transform = CGAffineTransformMakeScale(1.0, 1.0)
                })
        }
CGAffineTransform是作用于View的主要为2D变换,而CATransform3D主要作用于Layer,为3D变换使用.
如图可见,是等价的,不过blcok形式虽然方便,功能却没keyPath形式强大,如果你操作复杂动画,还是用第一种方式比较好!
3.这里提一下CAAnimationGroup,它只有一个属性public var animations: [CAAnimation]?,意思已经非常明了了,如果你想同时旋转+移动+缩放,就把上面3个animation放到这个数组中就可以了,就不加篇幅去具体介绍了...
CAKeyframeAnimation
CABasicAnimation算是CAKeyFrameAnimation的特殊情况,即不考虑中间变换过程,只考虑起始点与目标点就可以了。而CAKeyFrameAnimation则更复杂一些,允许我们在起点与终点间自定义更多内容来达到我们的实际应用需求.最常见的就是虾米音乐点击音乐抛出一个和淘宝点击一个物品自动抛入到购物车等(当初觉得好叼..知道真相的我眼泪掉下来).KeyFrame的意思是关键帧,举栗子可以理解为北斗七星之间连线,一共8个帧(指连成循环,第七星又连回第一星),改变每一帧对应状态,这样就不是单一的直线运动.
它的一些重要属性:
-
values:存放整个动画过程中的关键帧点的数组,也就是动画路径 -
path:同样是用于指定整个动画所经过的路径的,需要注意的是,values与path是互斥的,当values与path同时指定时,path会覆盖values,即values属性将被忽略(CGPath类型,可以去研究下CoreGraphics) -
keyTimes:动画时间数组,存放的是每一帧对应的时间,你没有显式地对keyTimes进行设置,则系统会默认每条子路径的时间为:ti=duration/(5-1),即每条子路径的duration相等,都为duration的1\4.[0,0.1,0.5,1]对应的就是1->2:0.1 2->3:0.4 3->4:0.5 -
timingFunctions:老熟人了,同上.. -
calculationMode:来设定关键帧中间的值是怎么被计算的(不太懂,参考下:这里)
        kCAAnimationLinear // 默认值,表示当关键帧为座标点的时候,关键帧之间直接直线相连进行插值计算;
        kCAAnimationDiscrete // 离散的,就是不进行插值计算,所有关键帧直接逐个进行显示;
        kCAAnimationPaced // 使得动画均匀进行,而不是按keyTimes设置的或者按关键帧平分时间,此时keyTimes和timingFunctions无效;
        kCAAnimationCubic // 对关键帧为座标点的关键帧进行圆滑曲线相连后插值计算,对于曲线的形状还可以通过tensionValues,continuityValues,biasValues来进行调整自定义,这里的数学原理是Kochanek–Bartels spline,这里的主要目的是使得运行的轨迹变得圆滑;
        kCAAnimationCubicPaced // 看这个名字就知道和kCAAnimationCubic有一定联系,其实就是在kCAAnimationCubic的基础上使得动画运行变得均匀,就是系统时间内运动的距离相同,此时keyTimes以及timingFunctions也是无效的.
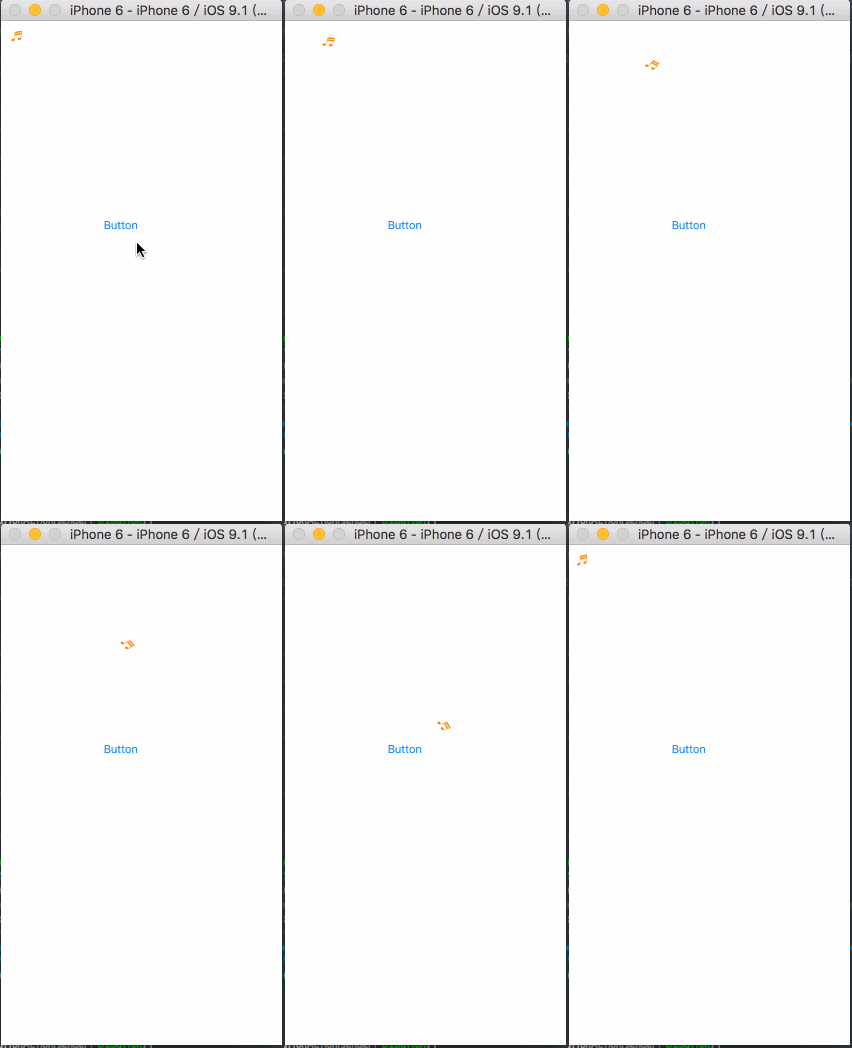
+rotationMode:Possible values are auto and autoReverse. Defaults to nil.我是这样理解,飞机按路径飞行(方向从左往右),如果你不设置rotationMode,那么飞机只会是永远和X轴平行,反之设置了,那么飞机头就会随路径变化而变化
@再举个栗子
        let animationTest = CAKeyframeAnimation(keyPath: "position")
        let pathTest = CGPathCreateMutable()
        CGPathMoveToPoint(pathTest, nil, 20, 20)
        CGPathAddCurveToPoint(pathTest, nil, 160, 30, 220, 220, 240, 380) // 贝塞尔曲线,起始点+控制点
        animationTest.path = pathTest
        animationTest.duration = 10.0
        animationTest.timingFunction = CAMediaTimingFunction(name: kCAMediaTimingFunctionEaseIn)
        animationTest.rotationMode = "auto"
        redView.layer.addAnimation(animationTest, forKey: nil)
两种结果来说明rotationMode的效果.第一张为auto,第二张默认为nil
更多的动画效果就不一一展示了,大家去随便试验玩起来吧.
参考链接
Controlling Animation Timing
CAMediaTiming
iOS Core Animation: Advanced Techniques
