本篇内容是基于上篇《LVS负载均衡集群详解》为前提,所以一些基本的上篇文档详细介绍过的内容不再重复。
一、环境拓扑介绍
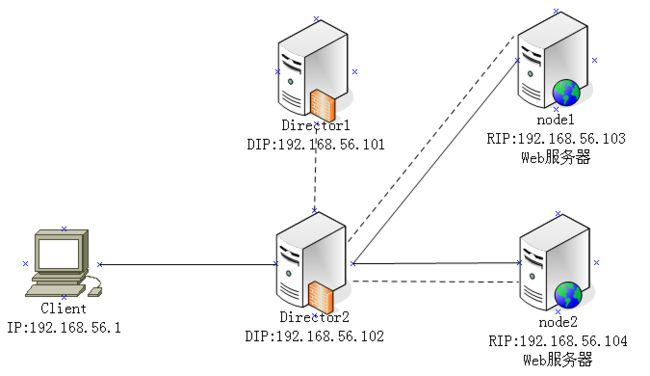
说明:前端两台调度服务器Director1和Director2,两者之间可以实现故障转移,例如当Director1节点出现故障时Director2节点可以自动接管调度服务器的资源,能够继续为为客户端转发请求到后端Real Server;而且当后台的node1或着node2出现故障时能够把故障节点自动踢出列表,当恢复正常时能够自动加入。
注意:
1、设置各个节点间的时间同步
2、基于hosts文件实现能够互相用主机名访问
3、使用uname -n执行结果要和主机名相同
4、确保ipvsadm服务和httpd服务关闭开机启动
二、安装相关软件包
需要的软件:
ipvsadm
heartbeat
heartbeat-ldirectord
heartbeat-pils
heartbeat-stonith
libnet
perl-MailTools
libtool-ltdl
openhpi-libs
perl-Compress-Zlib
perl-HTML-Parser
perl-HTML-Tagset
perl-TimeDate
perl-libwww-perl
三、配置Director节点之间高可用
1、复制配置文件样例
[root@director1 ~]# cd /usr/share/doc/heartbeat-2.1.4/
[root@director1 heartbeat-2.1.4]# cp authkeys ha.cf haresources /etc/ha.d/
2、编辑配置文件
[root@director1 heartbeat-2.1.4]# cd /etc/ha.d/
[root@director1 ha.d]# vim ha.cf
--------------------------添加如下行------------------------------------
bcast eth1
//定义发送心跳信息的广播接口,我这里是eth1
node director1
//定义节点
node director2
-------------------------结束--------------------------------------------
编辑配置文件authkeys
[root@director1 ha.d]# vim authkeys
-------------------------添加如下行---------------------------------
auth 1
1 md5 124hddhu56d8yd8
//后边的为随机数值
--------------------------结束-------------------------------------
[root@director1 ha.d]# chmod 600 authkeys //设置权限为600
编辑配置文件haresources
[root@director1 ha.d]# vim haresources //编辑资源配置文件添加如下行
director1 192.168.56.200/32/eth1/192.168.56.200 ldirectord
//定义资源VIP,ldirectord服务
编辑ldriectord配置文件
[root@director1 ha.d]# vim ldirectord.cf
--------------------------------修改为以下内容----------------------------
checktimeout=3
//检测超时时间
checkinterval=1
//检测间隔
autoreload=yes
//该配置文件修改后能够自动重载
quiescent=yes
virtual=192.168.56.200:80
//定义VIP地址和端口
real=192.168.56.103:80 gate
//定义real server的IP和端口
real=192.168.56.104:80 gate
//定义第二个real server
fallback=127.0.0.1:80 gate
//如果所有后端节点不可用时请求连接的转发位置,此处设置转发给director自身的80端口
service=http
//定义服务类型
request=".test.html"
//检测后端节点时使用的页面
receive="ok"
//检测的关键字,这里的设置表示测试访问.test.html页面是否包含ok关键字,如果有则说明该节点正常,否则认定为故障
scheduler=wlc
//指定算法
protocol=tcp
//定义协议为tcp
checktype=negotiate
//检测类型
checkport=80
//检测的端口
-----------------------------------结束------------------------------------------
3、把配置文件拷贝到director2节点
[root@director1 ha.d]# scp -p ha.cf authkeys ldirectord.cf haresources director2:/etc/ha.d/
四、配置后端服务节点
安装apache配置测试主页
[root@node1 ~]# yum -y install httpd
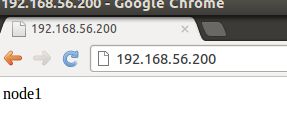
[root@node1 ~]# echo node1 > /var/www/html/index.html
[root@node1 ~]# echo ok > /var/www/html/.test.html
配置节点的其他参数请参看LVS的文档介绍,这里执行在LVS文档中介绍的real server上执行的脚本(参见另外一篇博客:LVS负载均衡集群详解):
[root@node1 ~]# bash realserver.sh start
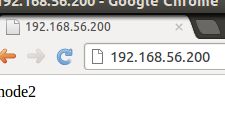
在node2上执行与node1节点相同的操作,为了演示方便可以看出效果在node2节点上的index.html页面输入与node1不同的内容以示区分。
五、启动heartbeat服务测试
[root@director1 ha.d]# service heartbeat start
[root@director1 ha.d]# ssh director2 'service heartbeat start'
//director节点通过SSH启动heartbeat服务
测试Director1节点故障
[root@director1 ha.d]# /usr/lib/heartbeat/hb_standby
//该脚本为heartbeat自带的脚本可以使该节点转为备用节点。
测试node1节点故障
[root@node1 ~]# service httpd stop
在director2节点上使用ipvsadm -Ln命令可以看到已经自动把node1节点相关条目移除
测试node1和node2节点同时故障,由于在ldirectord配置文件中设置了当所有后端节点故障时请求转发至director本身的80端口,所以这里需要director也安装httpd服务,或者修改该配置文件转向其他Web服务器。
总结:至此一个高可用的Director调度服务器集群已经完成,同时也要注意在现实环境中至少要2条线路来同时广播节点心跳信息,避免因为线路的故障造成节点间的资源争夺。