mmdetection简介
目标检测工具箱mmdetection是香港中文大学-商汤科技联合实验室基于pytorch开源的检测库,它包含个丰富的目标检测和实例分割方法以及相关的组件和模块。现在mmdetection成了一个涵盖许多主流检测方法和模块的统一平台。
mmdetection官方并不提供windows版本的稳定安装教程,网上有相关的教程但是并不支持最新的mmdetection版本,这边根据各位大佬的博客总结了以下这篇文章,帮助大家可以在windows10中使用。
环境版本要求:
python=3.6
cuda=10.0
cudnn=7.5.0
pytorch=1.2.0
torchversion=0.4.0
安装软件:
安装vs2017
需要勾选c++环境,给mmdetection编译提供环境
安装cuda10
安装时有关vs的相关选项需要选中
注意:如果是安装cuda9的话不支持最新的1917版本的vs2017,只能支持到1911版本的vs2017,所以可以安装vs2015
安装cudnn7.5.0
将压缩包中所有的文件夹直接复制粘贴到cuda安装目录下即可
安装anaconda
官网下载最新版本默认安装即可,需要提升anaconda文件夹权限为完全控制
安装pycharm
安装gitbash
从github上下载项目以及安装pycocotools都需要用到
下载地址:https://gitforwindows.org/
python环境搭建:
以管理员身份运行Anaconda Prompt(windows安装一定要以管理员身份安装,不然有些东西会装不上去,没有权限)
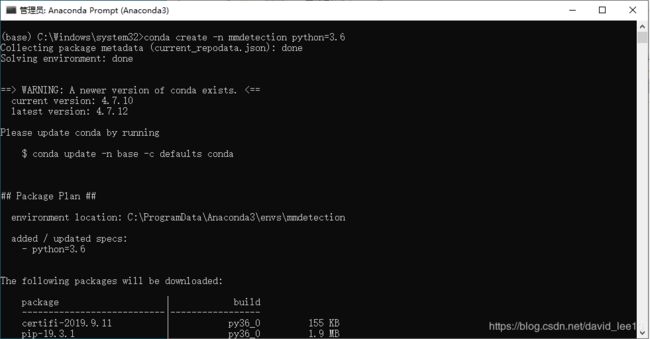
创建python3.6环境:
conda create -n mmdetecion python=3.6
(python3.7兼容性不好)
激活环境:
conda activate mmdetection
安装pytorch,window环境下稳定1.2.0版本:
conda install pytorch torchvision cudatoolkit=10.0 -c pytorch
conda国内加速教程:https://segmentfault.com/a/1190000019680625
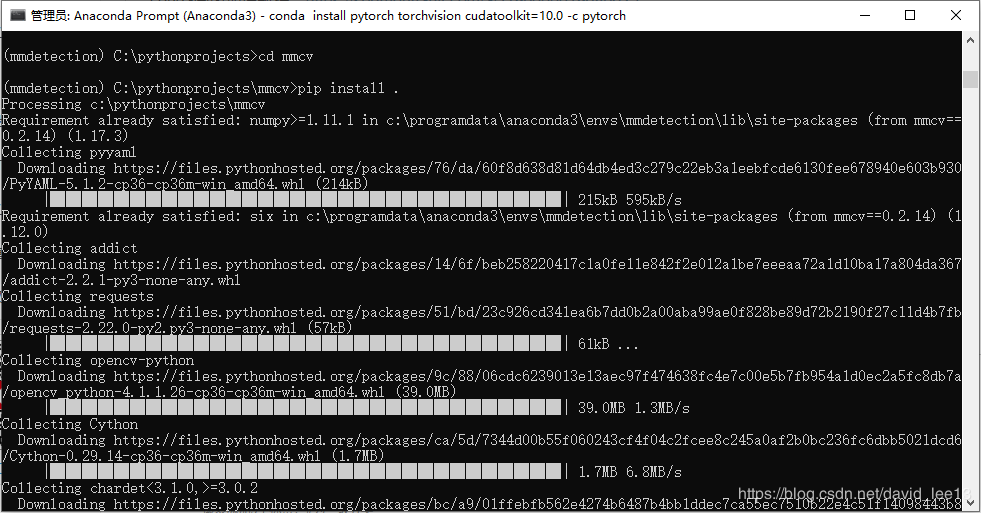
安装mmcv:
官方下载地址:https://github.com/open-mmlab/mmcv
git clone https://github.com/open-mmlab/mmcv.git
cd mmcv
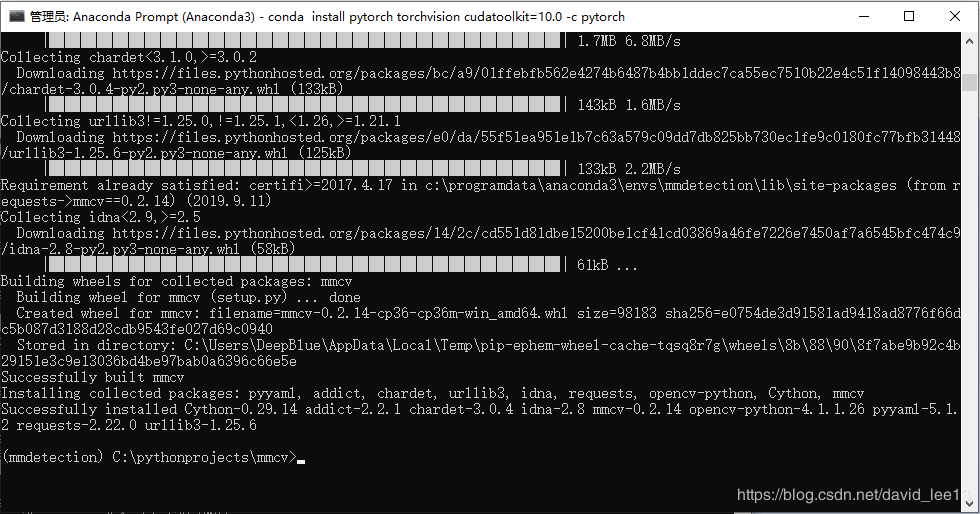
pip install .
会自动安装Cython
安装pycocotools:
是mmdection读取coco数据集必备包
在命令行输入
pip install git+https://github.com/philferriere/cocoapi.git#subdirectory=PythonAPI
安装mmdetection:
官方网站:https://github.com/open-mmlab/mmdetection
补充安装依赖包requirements:
pip install -r requirements.txt
修改编译文件:
1.将~Lib\site-packages\torch\utils\cpp_extension.py 中 info = info.decode().lower()修为 info=info.decode("utf8","ignore").lower()
最好将所有decode() 都改成decode("utf8","ignore")
修改setup.py文件中extra_compile_args 相关代码:
def make_cuda_ext(name, module, sources):

 return CUDAExtension(
 name='{}.{}'.format(module, name),
 sources=[os.path.join(*module.split('.'), p) for p in sources],
 extra_compile_args={
  'cxx': ["-DMS_WIN64","-MD"],
  'nvcc': [
  '-D__CUDA_NO_HALF_OPERATORS__',
  '-D__CUDA_NO_HALF_CONVERSIONS__',
  '-D__CUDA_NO_HALF2_OPERATORS__',
  ]
 })
2.当前文件夹运行
python setup.py build_ext --inplace 进行编译
python setup.py install develop 完成安装
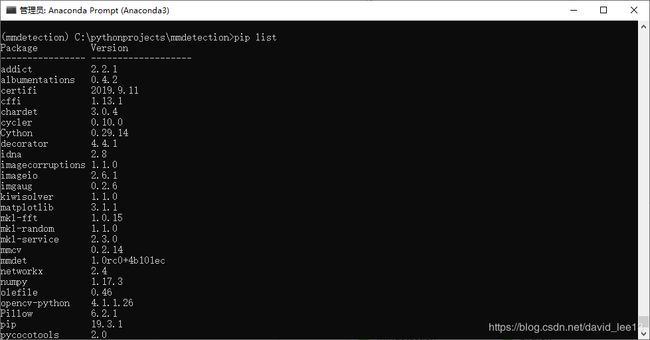
运行pip list 查看是否安装成功,成功的话会有mmdet包以及对应版本
后续问题:
修改~\Lib\site-packages\mmcv\utils中的config.py文件中的123行的
with open(filename, 'r', encoding='utf-8') as f:
增加encoding='utf-8'
到此,在windows10中就可以正常运行mmdetecion框架代码了,之前有遇到focal loss不能正常使用,但是后来安装都是可以的,后续有什么问题欢迎大家提出,谢谢。
2020-01-10更新:
mmdetection在2019年12月13号进行了新版本的更新,其中对api/train.py增加torch.distributed,这块在windows下不支持,所以要在windows中训练的话需要把v1.0rc1的版本的train与新版本的train进行合并,主要是去除torch.distributed以及_non_dist_train的修改为主。
总结
以上所述是小编给大家介绍的mmdetection在windows10系统环境中搭建过程,希望对大家有所帮助,如果大家有任何疑问请给我留言,小编会及时回复大家的。在此也非常感谢大家对脚本之家网站的支持!
如果你觉得本文对你有帮助,欢迎转载,烦请注明出处,谢谢!


