一.Pxe+ Dhcp + Tftp + Apache + Kickstart 简介。
1.)PXE:
可以提供网络接口的中间层,负责串联起tftp,dhcp,httpd,。Pex不依赖磁盘,而是通过网络找到tftp引导内核装载,找到httpd根据Kickstart配置文件内找到对应的软件包,并且为客户机通过dhcp动态分配IP地址。
2.)DHCP:
UDP协议,67端口,通过配置地址池为客户机自动分配IP地址,通过租约来控制IP地址合理使用。
3.)TFTP:
UDP协议,69端口,一种小型文件传输软件,适合局域网。配置简单,C/S架构。
4.)Apache:
网页服务器,工作在80端口。
5.)Kickstart:
为无人职守批量装机提供配置文件,图形化生成配置。可以检查配置语法是否正确。
6.)Xinetd:
超级守护进程,帮助平时连接数量少的进程启动进程。超级守护进程本身是一个独立守护进程。这里是监听tftp。
二.准备环境:CentOS 6.5 x86_64 操作系统,iso光盘。
网卡信息:172网络为桥接,192网络为VM9虚拟网络。
事先配置好yum源,或者本地yum源。
1.)查看IP地址。
#  ifconfig | grep "inet addr"
 inet addr:172.16.249.249  Bcast:172.16.255.255  Mask:255.255.0.0
 inet addr:192.168.32.100  Bcast:192.168.32.255  Mask:255.255.255.0
2.)安装DHCP,修改配置文件,启动,检查端口。
# yum install dhcp
# cp /usr/share/doc/dhcp-4.1.1/dhcpd.conf.sample /etc/dhcp/dhcpd.conf
  cp: overwrite `/etc/dhcp/dhcpd.conf'? y
# vim /etc/dhcp/dhcpd.conf
subnet 192.168.32.0 netmask 255.255.255.0 {
  range 192.168.32.100 192.168.32.110;      #指定分配IP地址池
  option routers 192.168.32.100;            #指定网关
  next-server 192.168.32.100;               #指定tftp地址
  filename "pxelinux.0";                    #镜像文件
  }
检查下DHCP配置文件是否正常,是否能分配IP地址。
# /etc/init.d/dhcpd configtest
Syntax: OK
# /etc/init.d/dhcpd start
Starting dhcpd:                                            [  OK  ]

# chkconfig --level 2345 dhcpd on
# chkconfig dhcpd –list
dhcpd          0:off1:off2:on3:on4:on5:on6:off
检查端口。
# netstat -anl | grep :67
udp        0      0 0.0.0.0:675                 0.0.0.0:*
udp        0      0 0.0.0.0:67                  0.0.0.0:*
3.)检查DHCP是否可以自动分发IP地址。
4.)现在一切正常。开始安装tftp,检查端口,tftp的启动方式比较特殊,检查tftp是否正常提供服务。
# yum install tftp tftp-server
Downloading Packages:
(1/3): tftp-0.49-7.el6.x86_64.rpm                      | 32 kB     00:00
(2/3): tftp-server-0.49-7.el6.x86_64.rpm               | 39 kB     00:00
(3/3): xinetd-2.3.14-39.el6_4.x86_64.rpm               | 121 kB     00:00

# chkconfig tftp on
# /etc/init.d/xinetd start
Starting xinetd:                                           [  OK  ]

# chkconfig xinetd –list
xinetd         0:off1:off2:off3:on4:on5:on6:off

# chkconfig tftp –list
tftp           on
查看UDP 69端口是否在监听状态。
# netstat -unl
Active Internet connections (only servers)
Proto Recv-Q Send-Q Local Address               Foreign Address             State
udp        0      0 0.0.0.0:69                  0.0.0.0:*
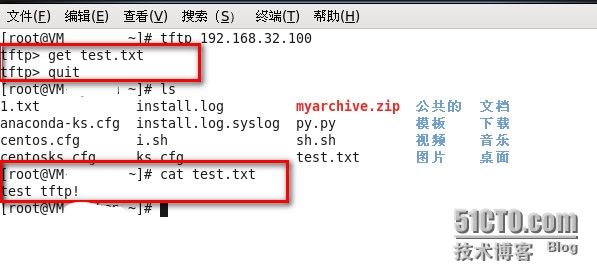
在TFTP里面创建个文件,测试通过DHCP分配IP地址那台客户端是否可以下载文件。
现在tftp也能正常工作了。
5.)安装Apache,因为是两块网卡,需要绑定一下,绑定在192.168.32.100的IP上,加入开机启动,检查端口以及测试页是否可以打开。
# yum install httpd
# chkconfig httpd on
# chkconfig httpd –list
httpd          0:off1:off2:on3:on4:on5:on6:off

# vim /etc/httpd/conf/httpd.conf
ServerName 192.168.32.100:80

# /etc/init.d/httpd start
Starting httpd:                                            [  OK  ]
# netstat -anlp | grep :80
tcp        0      0 :::80            :::*              LISTEN      2438/httpd
测试IP地址是否可以访问测试页。网络服务方面基本配置完成。
6.)创建centos6.5目录,用来挂载光盘。
# mkdir /var/www/html/centos6.5
# mount /dev/cdrom /var/www/html/centos6.5/
mount: block device /dev/sr0 is write-protected, mounting read-only
7.)安装syslinux。
# rpm -ql syslinux | grep 'pxelinux.0'
/usr/share/syslinux/gpxelinux.0
/usr/share/syslinux/pxelinux.0
pxelinux.0的作用类似于grub程序,通过它引导kernel和initrd,实现网络启动 。
8.)复制(内核vmlinuz),复制(RAM initrd.img(临时根文件系统)),复制(COM32映像文件vesamenu.c32),复制(图片splash.jpg),复制(菜单isolinux.cfg)到pexlinux.cfg/下。
# cp /usr/share/syslinux/pxelinux.0 /var/lib/tftpboot/
# mkdir /var/lib/tftpboot/pxelinux.cfg | ls /var/lib/tftpboot/
pxelinux.0  pxelinux.cfg

# cp /var/www/html/centos6.5/p_w_picpaths/pxeboot/{vmlinuz,initrd.img} /var/lib/tftpboot/
# ls /var/lib/tftpboot/
initrd.img  pxelinux.cfg  pxelinux.0  t  vmlinuz

# cp /var/www/html/centos6.5/isolinux/{ vesamenu.c32,splash.jpg,isolinux.cfg} /var/lib/tftpboot/
# ls /var/lib/tftpboot/
initrd.img  isolinux.cfg  pxelinux.cfg  pxelinux.0  splash.jpg  vesamenu.c32  vmlinuz

# pwd
/var/lib/tftpboot
# mv isolinux.cfg pxelinux.cfg/default
# chmod -R go+w *
# ll
total 36976
-r--rw-rw- 1 root root 33383679 Jul 30 14:40 initrd.img
-rw-rw-rw- 1 root root    26828 Jul 30 14:33 pxelinux.0
drwxrwxrwx 2 root root     4096 Jul 30 15:06 pxelinux.cfg
-r--rw-rw- 1 root root   151230 Jul 30 14:43 splash.jpg
-r--rw-rw- 1 root root   162860 Jul 30 14:43 vesamenu.c32
-r-xrwxrwx 1 root root  4128368 Jul 30 14:40 vmlinuz

# ll pxelinux.cfg/
total 4
-r--rw-rw- 1 root root 977 Jul 30 15:06 default
9.)开始修改default文件。
display boot.msg
default vesamenu.c32
#prompt 1
timeout 100  #修改超时时间为10秒
display boot.msg
menu background splash.jpg
menu title Welcome to CentOS 6.5!
menu color border 0 #ffffffff #00000000
menu color sel 7 #ffffffff #ff000000
menu color title 0 #ffffffff #00000000
menu color tabmsg 0 #ffffffff #00000000
menu color unsel 0 #ffffffff #00000000
menu color hotsel 0 #ff000000 #ffffffff
menu color hotkey 7 #ffffffff #ff000000
menu color scrollbar 0 #ffffffff #00000000
label linux
  menu label ^Install or upgrade an existing system
  menu default
  kernel vmlinuz
  append initrd=initrd.img text ks=http://192.168.32.100/centos.cfg
  #添加一个text非图形安装界面,然后指定ks路径。
  ……
10)制作kickstart文件,保存到httpd根目录下。
#Kickstart file automatically generated by anaconda.
#version=DEVEL
install
url --url=http://192.168.32.100/centos6.5
lang en_US.UTF-8
keyboard us
network --onboot yes --device eth0 --mtu=1500 --bootproto dhcp --noipv6
rootpw  --iscrypted $1$B3IXhpZ0$L0hp9PpuuxNJoArKJLg2O.
# reboot after installation
reboot
firewall –disabled
authconfig --useshadow  --passalgo=sha512
selinux –disabled
timezone Asia/Shanghai
bootloader --location=mbr --driveorder=sda --append="crashkernel=auto crashkernel=auto rhgb rhgb rhgb quiet quiet quiet"
# The following is the partition information you requested
# Note that any partitions you deleted are not expressed
# here so unless you clear all partitions first, this is
# not guaranteed to work
zerombr yes
clearpart –all

part /boot --fstype=ext4 --size=200
part pv.008002 --size=61440
volgroup vg0 --pesize=8192 pv.008002
logvol / --fstype=ext4 --name=root --vgname=vg0 --size=20480
logvol swap --name=swap --vgname=vg0 --size=2048
logvol /usr --fstype=ext4 --name=usr --vgname=vg0 --size=10240
logvol /var --fstype=ext4 --name=var --vgname=vg0 --size=20480

repo --name="CentOS"  --baseurl=http://192.168.32.100/centos6.5 --cost=100
%packages
@Base
@Core
@Development tools
@Server Platform Development
--resolvedeps

%end
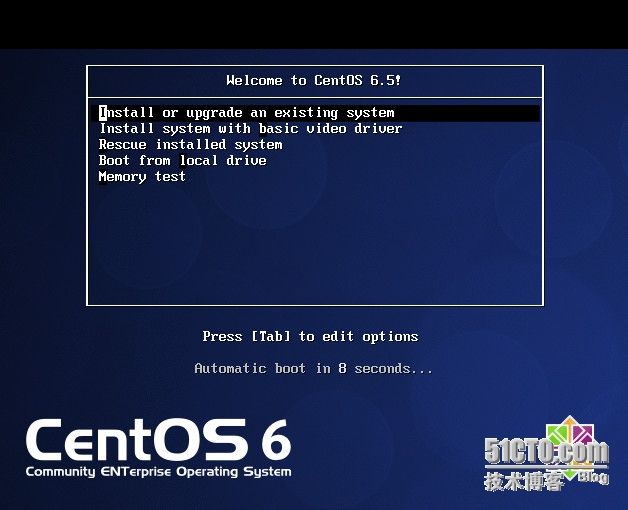
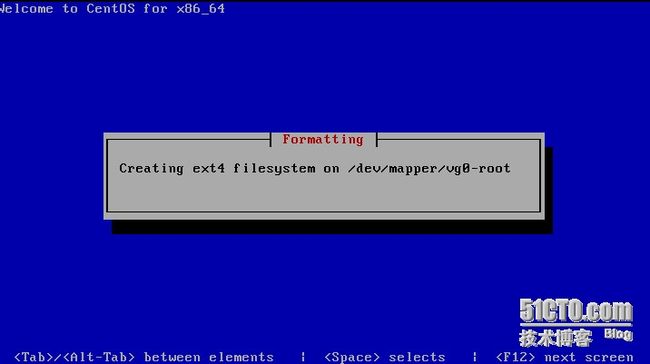
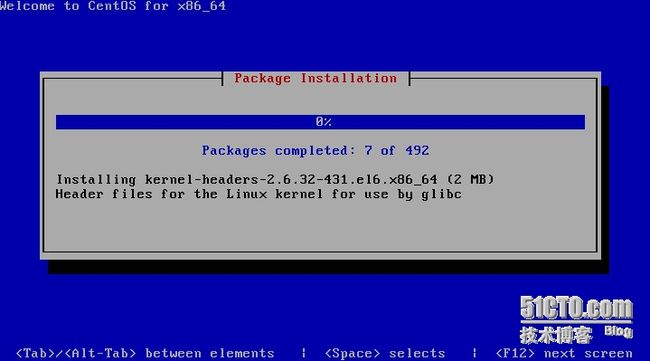
11.)新建虚拟机后,通过VM9网络自动安装。
总结:
配置好Kickstart的配置文件默认保存在/root路径下,ks.cfg权限很可能是仅属主拥有读写权限,属组,其他用户无任何权限。这时候就会出现在自动化装机时候的问题。生成文件后,保存到httpd根目录下。使用wget测试下是否可以下载。
在光盘中复制vmlinuz等文件的时候,由于挂载光盘就是只读状态,也需要相对应的修改下权限。
DHCP动态分配IP地址时,如果网关也在地址池内,也会被动态分配出去。


