一般提到虚拟化技术,虚拟机和Docker是两个经常谈到的话题。总的来说,它们的对操作系统和进程的隔离程度不同,虚拟机与客户操作系统共享硬件,而Docker更加轻量,每个镜像只包含了必须的运行时库。
Docker的应用场景
- Web 应用的自动化打包和发布。
- 自动化测试和持续集成、发布。
- 在服务型环境中部署和调整数据库或其他的后台应用。
- 从头编译或者扩展现有的
OpenShift或Cloud Foundry平台来搭建自己的PaaS环境。
安装
Debian / Ubuntu 用户
以下内容根据 官方文档 修改而来。
如果你过去安装过 docker,先删掉:
sudo apt-get remove docker docker-engine docker.io
首先安装依赖:
sudo apt-get install apt-transport-https ca-certificates curl gnupg2 software-properties-common
信任 Docker 的 GPG 公钥。根据你的发行版,下面的内容有所不同。
Ubuntu
curl -fsSL https://download.docker.com/linux/ubuntu/gpg | sudo apt-key add -
Debian
curl -fsSL https://download.docker.com/linux/debian/gpg | sudo apt-key add -
对于 amd64 架构的计算机,添加软件仓库:
sudo add-apt-repository \
   "deb [arch=amd64] https://mirrors.tuna.tsinghua.edu.cn/docker-ce/linux/debian \
   $(lsb_release -cs) \
   stable"
最后安装
sudo apt-get update
sudo apt-get install docker-ce
Fedora / CentOS / RHEL
如果你之前安装过docker,请先删掉
sudo yum remove docker docker-common docker-selinux docker-engine
安装一些依赖
sudo yum install -y yum-utils device-mapper-persistent-data lvm2
根据你的发行版下载repo文件:
- CentOS / RHEL Fedora
wget -O /etc/yum.repos.d/docker-ce.repo https://download.docker.com/linux/centos/docker-ce.repo
- Fedora
wget -O /etc/yum.repos.d/docker-ce.repo https://download.docker.com/linux/fedora/docker-ce.repo
把软件仓库地址替换为 TUNA:
sudo sed -i 's+download.docker.com+mirrors.tuna.tsinghua.edu.cn/docker-ce+' /etc/yum.repos.d/docker-ce.repo
最后安装:
sudo yum makecache fast
sudo yum install docker-ce
检查是否安装成功,在终端输入
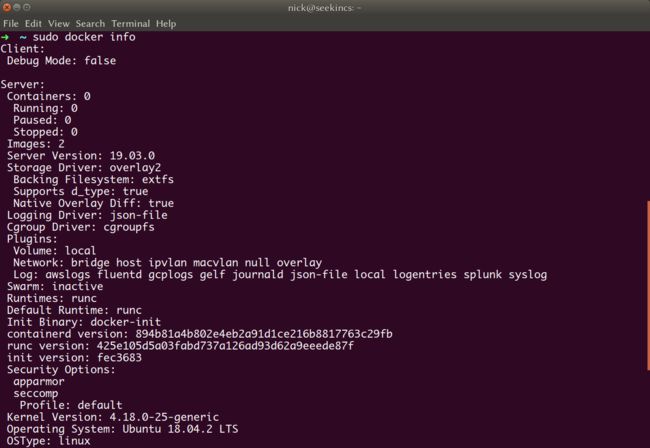
sudo docker info
如果出现如下信息,表明安装已经完成。
也可以输入
sudo docker -v
查看版本号,安装成功会返回当前安装的docker版本。
使用
查看当前安装的所有镜像
命令:sudo docker images
sudo docker images
REPOSITORY          TAG                 IMAGE ID            CREATED             SIZE
nginx               latest              e445ab08b2be        3 days ago          126MB
ubuntu              latest              3556258649b2        3 days ago          64.2MB
安装新的镜像
命令:sudo docker pull [镜像名]
sudo docker pull hello-world
Using default tag: latest
latest: Pulling from library/hello-world
1b930d010525: Pull complete
Digest: sha256:6540fc08ee6e6b7b63468dc3317e3303aae178cb8a45ed3123180328bcc1d20f
Status: Downloaded newer image for hello-world:latest
docker.io/library/hello-world:latest
运行某个镜像
命令:sudo docker run [镜像ID]
sudo docker run fce289e99eb9
Hello from Docker!
This message shows that your installation appears to be working correctly.

To generate this message, Docker took the following steps:
 1. The Docker client contacted the Docker daemon.
 2. The Docker daemon pulled the "hello-world" image from the Docker Hub.
    (amd64)
 3. The Docker daemon created a new container from that image which runs the
    executable that produces the output you are currently reading.
 4. The Docker daemon streamed that output to the Docker client, which sent it
    to your terminal.

To try something more ambitious, you can run an Ubuntu container with:
 $ docker run -it ubuntu bash

Share images, automate workflows, and more with a free Docker ID:
 https://hub.docker.com/

For more examples and ideas, visit:
 https://docs.docker.com/get-started/
查看正在运行的容器
命令:sudo docker ps -a
sudo docker ps -a
CONTAINER ID IMAGE COMMAND CREATED STATUS PORTS NAMES
86994c0c2312 fce289e99eb9 "/hello" 2 minutes ago Exited (0) 2 minutes ago distracted_brown
交互式地运行某个容器
命令: sudo docker run -it [容器名称/存储库] /bin/bash
-
-t:在新容器内指定一个伪终端或终端。 -
-i:允许对容器内的标准输入 (STDIN) 进行交互。
sudo docker run -it ubuntu /bin/bash
root@bdecf113a1a5:/# ls -l
total 64
drwxr-xr-x   2 root root 4096 Jul 18 21:21 bin
drwxr-xr-x   2 root root 4096 Apr 24  2018 boot
drwxr-xr-x   5 root root  360 Jul 27 11:45 dev
drwxr-xr-x   1 root root 4096 Jul 27 11:45 etc
drwxr-xr-x   2 root root 4096 Apr 24  2018 home
drwxr-xr-x   8 root root 4096 May 23  2017 lib
drwxr-xr-x   2 root root 4096 Jul 18 21:19 lib64
drwxr-xr-x   2 root root 4096 Jul 18 21:18 media
drwxr-xr-x   2 root root 4096 Jul 18 21:18 mnt
drwxr-xr-x   2 root root 4096 Jul 18 21:18 opt
dr-xr-xr-x 314 root root    0 Jul 27 11:45 proc
drwx------   2 root root 4096 Jul 18 21:21 root
drwxr-xr-x   1 root root 4096 Jul 23 15:21 run
drwxr-xr-x   1 root root 4096 Jul 23 15:21 sbin
drwxr-xr-x   2 root root 4096 Jul 18 21:18 srv
dr-xr-xr-x  13 root root    0 Jul 27 11:45 sys
drwxrwxrwt   2 root root 4096 Jul 18 21:21 tmp
drwxr-xr-x   1 root root 4096 Jul 18 21:18 usr
drwxr-xr-x   1 root root 4096 Jul 18 21:21 var
这样,你就可以想使用操作系统一样对容器操作,非常方便。
移除镜像
命令:sudo docker rmi[镜像ID]
-
rmi:remove image
sudo docker rmi fce289e99eb9
注意,如果镜像有实例(即相关容器)在运行的话,删除会失败:
Error response from daemon: conflict: unable to delete fce289e99eb9 (must be forced) - image is being used by stopped container 86994c0c2312
这时,删除容器即可。
命令:sudo docker rm [容器ID]
sudo docker rm 86994c0c2312
然后再删除。
Untagged: hello-world:latest
Untagged: hello-world@sha256:6540fc08ee6e6b7b63468dc3317e3303aae178cb8a45ed3123180328bcc1d20f
Deleted: sha256:fce289e99eb9bca977dae136fbe2a82b6b7d4c372474c9235adc1741675f587e
Deleted: sha256:af0b15c8625bb1938f1d7b17081031f649fd14e6b233688eea3c5483994a66a3
安装Nginx并发布Web应用
安装
sudo docker pull nginx
运行
不做任何配置,运行nginx。
sudo docker run --name nginx-test -p 8080:80 -d nginx
-
nginx-test容器名称。 -
-d设置容器在在后台一直运行。 -
-p端口进行映射,将本地 8080 端口映射到容器内部的 80 端口。
输出容器ID:
e51334ab14fecfa2cb00b8b444da01ce5058dc9f565b410d748db8d2f097a6c5
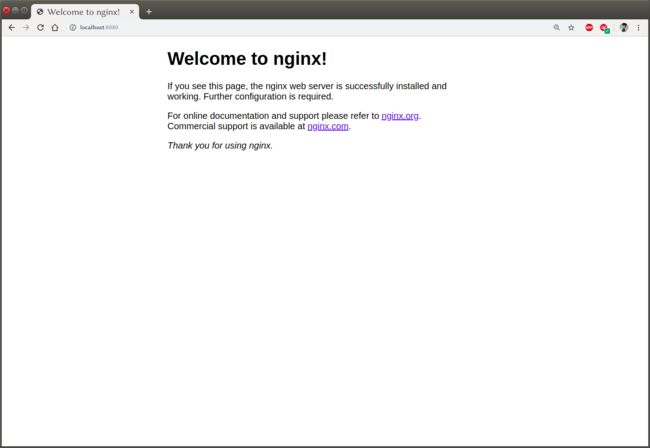
在浏览器查看运行情况。
熟悉的开始界面,它成功运行了!
现在,考虑将我们的Web应用在Nginx容器中发布。新建index.html文件,写入内容:
My Web Application


    大家好!
    我是五分钟诗人,这是我的Web应用!
将其放到Nginx容器中:
sudo docker cp index.html e51334ab14fe:/usr/share/nginx/html
-
cp表示复制 -
e51334ab14fe:/usr/share/nginx/html是容器内部路径
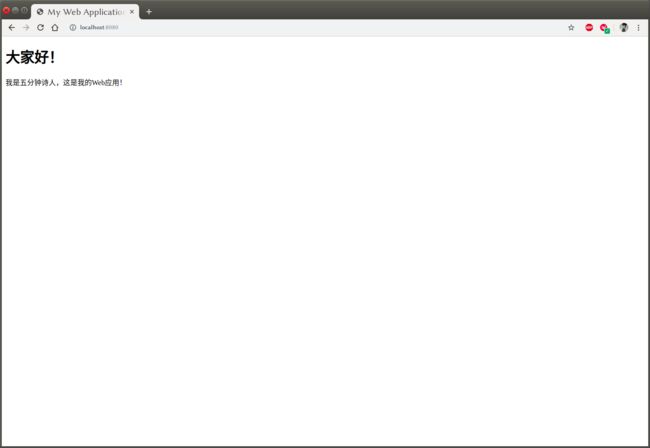
再次访问http://localhost:8080,我们将看到下面的景象。
这表明Web应用已经发布成功了。


