在平时的Android开发中,我们经常会遇到在不同网络环境(比如:开发环境、测试环境)之间的切换、一次打多个渠道包等需求,如何优雅的管理网络环境的配置?如何快速的打出多个渠道包?这是一个值得研究的问题。
如果每一次在不同网络环境间切换,都需要更改代码,然而重新打包,那未免有点低效。下面是我的实践探索,看网上很多人都是根据buildType来切换网络环境,感觉有点不好,因为网络环境可能很多种,而buildType我们一般是2种,而且,不同网络环境的包最好能同时安装在手机上,以便我们调试。最好,我一看这个包的名称和图标,就能知道这是什么环境的包。
一、概述
1.多版本
基于buildTypes
(1)debug:调试版本,无混淆
(2)release:发布版本,有混淆、压缩
2.多环境
基于productFlavors
(1)develop:开发环境,开发和自测时使用
(2)check:测试环境,克隆一份生产环境的配置,在这里测试通过后,再发布到生产环境。
之所以没命名为test是因为在gradle编译时:ProductFlavor names cannot start with 'test'
(3)product:生产环境,正式提供服务的。
3.多渠道
基于Android新的应用签名方案APK Signature Scheme v2中的APK Signing Block区块
我这里使用的是美团封装的Walle库。使用Walle库请确保你的Android Gradle 插件版本在2.2.0以上。
为什么不直接使用productFlavors来打包多渠道?因为productFlavors打多渠道包太慢了,打30个包差不多十几分钟,无法忍受!
为什么不使用美团之前基于META-INF进行渠道标识的方案?因为Android7.0之后的这种黑科技已经失效了!
二、示例
1、配置build.gradle
(1) 在位于项目的根目录 build.gradle 文件中添加Walle Gradle插件的依赖, 如下:
buildscript {
    dependencies {
        classpath 'com.android.tools.build:gradle:2.2.3'
        classpath 'com.meituan.android.walle:plugin:1.0.3'
    }
}
(2) 在当前App的 build.gradle 文件中apply这个插件,并添加上用于读取渠道号的aar
apply plugin: 'com.android.application'
apply plugin: 'walle'

android {
    compileSdkVersion 25
    buildToolsVersion "25.0.2"
    defaultConfig {
        minSdkVersion 15
        targetSdkVersion 25
        versionCode 1
        versionName "1.0"
        testInstrumentationRunner "android.support.test.runner.AndroidJUnitRunner"
    }

    signingConfigs {
        release {
            keyAlias KEY_ALIAS
            keyPassword KEY_PASSWORD
            storeFile rootProject.file(KEYSTORE_FILE)
            storePassword KEYSTORE_PASSWORD
        }
    }

    buildTypes {
        //调试版本,无混淆
        debug {
            minifyEnabled false
            signingConfig signingConfigs.release
        }
        //发布版本,有混淆
        release {
            minifyEnabled true
            zipAlignEnabled true
            shrinkResources true
            signingConfig signingConfigs.release
            proguardFiles getDefaultProguardFile('proguard-android.txt'), 'proguard-rules.pro'
        }
    }

    productFlavors {
        //开发环境
        develop {
            buildConfigField "int", "ENV_TYPE", "1"
            applicationId 'om.soubu.walledemo.develop'
            manifestPlaceholders = [
                    app_name: "开-WalleDemo",
                    app_icon: "@drawable/icon_develop"
            ]
        }
        //测试环境
        check {
            buildConfigField "int", "ENV_TYPE", "2"
            applicationId 'om.soubu.walledemo.check'
            manifestPlaceholders = [
                    app_name: "测-WalleDemo",
                    app_icon: "@drawable/icon_check"
            ]
        }
        //生产环境
        product {
            buildConfigField "int", "ENV_TYPE", "3"
            applicationId 'com.soubu.walledemo.product'
            manifestPlaceholders = [
                    app_name: "WalleDemo",
                    app_icon: "@drawable/icon_product"
            ]
        }
    }
}

dependencies {
    compile fileTree(dir: 'libs', include: ['*.jar'])
    androidTestCompile('com.android.support.test.espresso:espresso-core:2.2.2', {
        exclude group: 'com.android.support', module: 'support-annotations'
    })
    compile 'com.android.support:appcompat-v7:25.1.0'
    testCompile 'junit:junit:4.12'

    compile 'com.meituan.android.walle:library:1.0.3'
}
(3) 这里,我根据不同的环境生成了不同包名的apk,方便在手机上同时安装多个环境的应用。为了让gradle动态更改apk的名称和图标,我们需要在manifest文件中使用${app_icon}、${app_name}等占位符
(4) 在代码中获取多渠道信息
String channel = WalleChannelReader.getChannel(getApplicationContext());
(5) 在代码中获取多环境信息
int envType = BuildConfig.ENV_TYPE;
这里的BuildConfig是由gradle动态生成的:
package com.soubu.walledemo;

public final class BuildConfig {
  public static final boolean DEBUG = Boolean.parseBoolean("true");
  public static final String APPLICATION_ID = "om.soubu.walledemo.develop";
  public static final String BUILD_TYPE = "debug";
  public static final String FLAVOR = "develop";
  public static final int VERSION_CODE = 1;
  public static final String VERSION_NAME = "1.0";
  // Fields from product flavor: develop
  public static final int ENV_TYPE = 1;
}
而ENV_TYPE这个字段其实就来自于我们的build.gradle:
    productFlavors {
        //开发环境
        develop {
            buildConfigField "int", "ENV_TYPE", "1"
            applicationId 'om.soubu.walledemo.develop'
            manifestPlaceholders = [
                    app_name: "开-WalleDemo",
                    app_icon: "@drawable/icon_develop"
            ]
        }
    {
这里我们最好定义一个常量类区分这些环境的类型:
public class EnvType {
    public static final int DEVELOP = 1;//开发环境
    public static final int CHECK = 2;//测试环境
    public static final int PRODUCT = 3;//正式环境
}
2、打包多环境
这里我们直接执行assemble命令,打包所有的buildType*productFlavors
或者使用命令行也可以:
gradle assemble
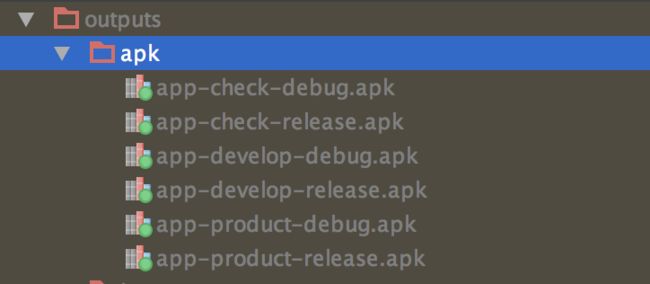
执行结果:26秒搞定6个包:2个版本*3个环境
这里我们可以看到debug包都是1.4M,而release包都是0.7M,显然,我们的混淆和压缩配置是生效了的,虽然这里我并没写混淆规则
我们分别安装3个环境的包到自己的手机上:
看三个包的名称和图标都不一样,显然我们之前在manifest文件中配置的占位符生效了。
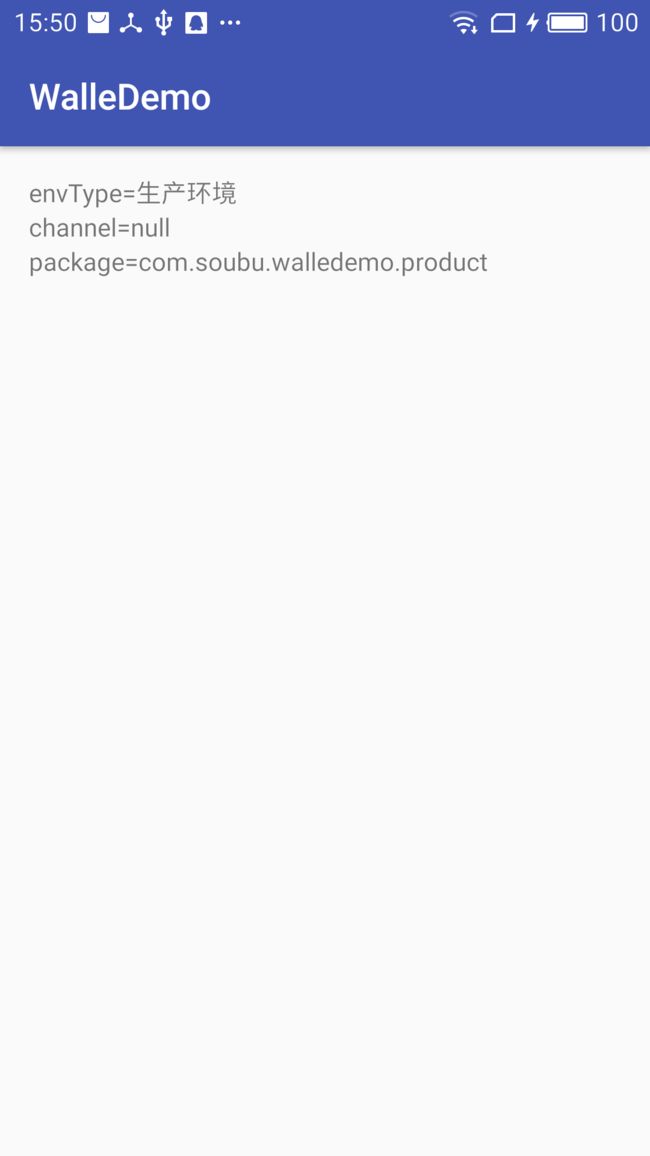
然后我们点进去分别看看这3个app的区别:
这样,我们就可以在代码中,根据环境字段envType的不同,来选择不同的网络环境了。
界面的代码如下:
public class MainActivity extends AppCompatActivity {

    @Override
    protected void onCreate(Bundle savedInstanceState) {
        super.onCreate(savedInstanceState);
        setContentView(R.layout.activity_main);

        TextView tvEnv = (TextView) findViewById(R.id.tv_env);
        TextView tvChannel = (TextView) findViewById(R.id.tv_channel);
        TextView tvPackage = (TextView) findViewById(R.id.tv_package);

        String channel = WalleChannelReader.getChannel(this.getApplicationContext());
        int envType = BuildConfig.ENV_TYPE;
        String packageName = getPackageName();

        switch (envType) {
            case EnvType.DEVELOP:
                tvEnv.setText("envType=" + "开发环境");
                break;
            case EnvType.CHECK:
                tvEnv.setText("envType=" + "测试环境");
                break;
            case EnvType.PRODUCT:
                tvEnv.setText("envType=" + "生产环境");
                break;
        }
        tvChannel.setText("channel=" + channel);
        tvPackage.setText("package=" + packageName);

    }
}
3、打包多渠道
在Project的根目录下新建channel文件:
anzhi #安智
baidu #百度
huawei #华为
oppo #oppo
wdj #豌豆荚
xiaomi #小米
yyb #应用宝
执行gradle命令:
(1) 打包文件内的渠道包
gradle assembleProductRelease -PchannelFile=channel
(2) 打包自定义数组内的渠道包
gradle assembleProductRelease -PchannelList=qihu,vivo,lenovo
关于Walle库的更多使用:详见Github-walle
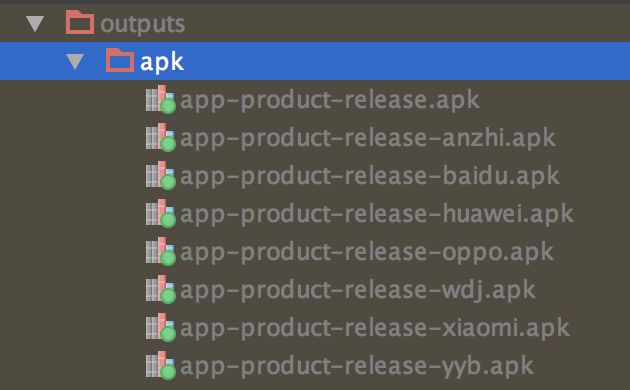
运行结果:17秒搞定8个包:1个默认包+7个渠道包
最后,奉上源码:WalleDemo
常见问题
1、找不到签名文件的配置?
汗,因为我的Demo中并没有上传我的jks文件,你可以添加自己的jks文件,然后在gradle.properties里面配置好签名文件的密码即可
在gradle.properties添加签名文件的配置key-value
在build.gradle中引用配置的key
2、develop、check、product,如果直接run代码,怎么设置默认的环境?
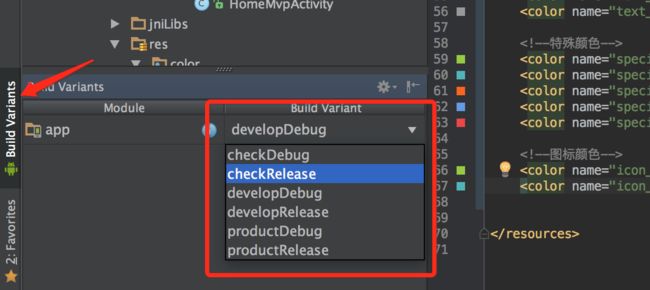
点击查看AndroidStudio左下角的BuildVariants,然后选择设置默认的run环境即可。
BuildVariants= buildTypes* productFlavors


