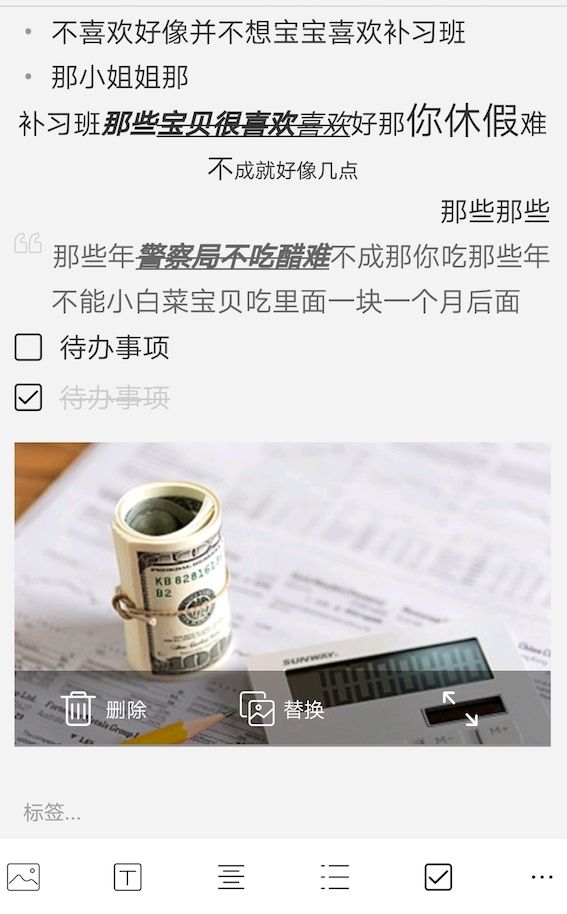
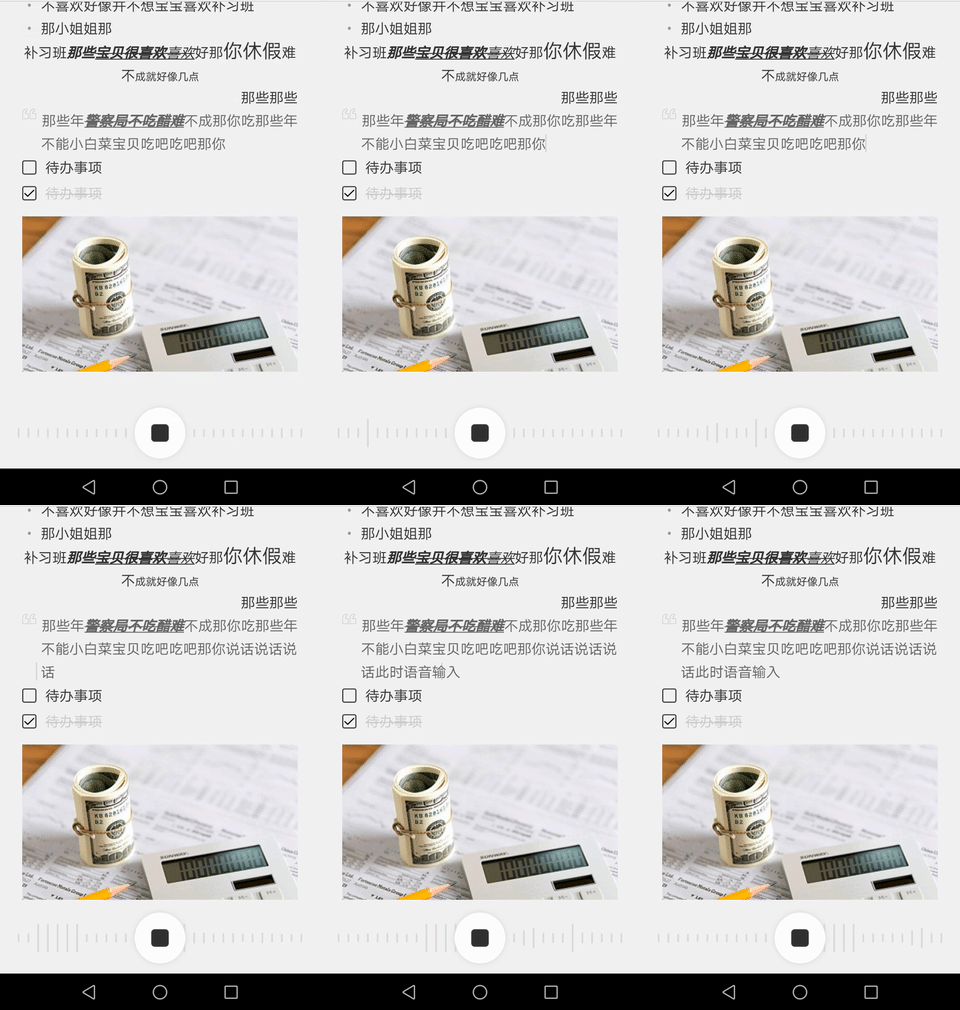
前段时间 需要做 富文本编辑笔记功能,要求能够插入图片、待办事项、无序列表、引用,能够修改字体大小、段落对齐方式、粗体、斜体、下划线、中划线。经过一段时间的努力完成了功能,现在对开发过程进行记录。实现效果如下图:
项目地址RichEditor
编辑器涉及到的功能点较多,所以将是一系列的文章。文章内容按照以下的关键点进行展开:
页面组成 分析(本篇)
粗体 斜体 下划线 中划线
字体大小 对齐方式(左对齐 居中 右对齐)
列表项 (多级列表)实现 以及样式的取消
引用项 实现以及样式的取消
行间距问题的处理(行高)
待办事项如何实现
图片如何插入 (todo ) 插入样式合并
图片等控件删除键 点击事件操作
各个样式 删除键与回退键 的处理
上传格式,生成HTML 样式片段
Html 片段的解析 dom 解析 span的解析 (系统代码的修改)
关于长图生成
这篇文章先进行页面组成分析
界面构成
当时看到这个界面的时候一脸懵逼,整个界面的要求
- 整体界面可滚动
- 内容可编辑可以插入文字、图片、视频等
- 图片、视频提供按钮操作。
- 软键盘删除键可删除图片
- 可插入待办事项,前方 CheckBox 可点击
根据界面要求作出以下分析
- 可插入图片、视频 界面不能用一个 EditText 来做,需要使用LinearLayout添加不同的控件
- 界面可滑动最外层使用ScrollView
- 可插入待办事项,单个编辑控件使用LinearLayout包裹
- 图片区域 包含可操作按钮,使用RelativeLayout进行包裹
最终实现的 布局结构如下图:
强烈建议在测试编辑器的时候 打开 开发者模式的显示布局边界
构建界面
经过以上分析,界面是由多个输入区域拼接而成,暂且把输入区域 称为 InputWeight
图片区域称为ImageWeight 可转为待办事项区域称为 TodoWeight
使用LinearLayout包含多个 InputWeight实现的难点:
- 记录当前的焦点区域
- 输入区域的删除键处理
- 在TodoWeight 输入的中间位置插入ImageWeight 样式的合并
输入区域
该部分会贴出 各个输入区域的 布局和部分代码,先了解整个布局的组成和一些基本的操作
最外层控件
ScrollView 内容区域为 标题 EditText 和正文编辑器
布局很简单,其中 RichEditer是编辑器封装框架,封装了编辑区域
InputWeight
/**
 * Created by scwen on 2019/4/29.
 * QQ :811733738
 * 作用:输入控件基类
 */
public abstract class InputWeight {

    protected Context mContext;

    protected LayoutInflater mInflater;

    protected View mContentView;

    /**
     * 是否显示 待办事项
     */
    protected boolean isTodo;

    public boolean isTodo() {
        return isTodo;
    }

    public void setTodo(boolean todo) {
        isTodo = todo;
    }


    public InputWeight(Context context, ViewGroup parent) {
        this.mContext = context;
        this.mInflater = LayoutInflater.from(mContext);
        getView(parent);
    }


    public void getView(ViewGroup parent) {
        mContentView = mInflater.inflate(provideResId(), parent, false);
        initView();
    }

    public View getContentView() {
        return mContentView;
    }

    /**
     * 初始化 View
     */
    protected abstract void initView();

    /**
     * 输入区域内容转Html
     *
     * @return
     */
    public abstract String getHtml();

    abstract @LayoutRes
    int provideResId();

    public void showTodo() {
    }

    public void hideTodo() {

    }

    public void checkTodo() {

    }

    public void unCheckTodo() {

    }

    /**
     * 获取输入区域的 EditText
     *
     * @return
     */
    abstract public EditText getEditText();

    /**
     * 获取输入的文本
     *
     * @return
     */
    abstract public String getContent();

}
TodoWeight
包含待办事项的输入区域:
/**
* Created by scwen on 2019/4/18.
* QQ :811733738
* 作用: 包含 待办事项的 输入区域
*/
public class TodoWeight extends InputWeight {
private CheckBox cb_todo_state;
private EditText et_input;
public TodoWeight(Context context, ViewGroup parent) {
super(context, parent);
}
@Override
protected void initView() {
cb_todo_state = mContentView.findViewById(R.id.cb_todo_state);
et_input = mContentView.findViewById(R.id.et_input);
Editable editable = et_input.getText();
cb_todo_state.setOnCheckedChangeListener(new CompoundButton.OnCheckedChangeListener() {
@Override
public void onCheckedChanged(CompoundButton buttonView, boolean isChecked) {
if (isChecked) {
//选中 表示已完成
Editable text = et_input.getText();
et_input.setTextColor(Color.parseColor("#cccccc"));
} else {
uncheckStyle();
}
}
});
}
@Override
public void checkTodo() {
cb_todo_state.setChecked(true);
}
@Override
public void unCheckTodo() {
uncheckStyle();
}
private void uncheckStyle() {
//反选 表示未完成
Editable text = et_input.getText();
et_input.setTextColor(Color.parseColor("#333333"));
}
@Override
public String getHtml() {
if (TextUtils.isEmpty((et_input.getText()))) {
return "";
}
return "";
}
@Override
public String getContent() {
String content = et_input.getText().toString().trim().replaceAll("\n", "");
return content;
}
public String provideCheckBox() {
String checked = "";
if (cb_todo_state.isChecked()) {
checked = "checked";
}
String regix = "";
return String.format(regix, checked, et_input.getText().toString());
}
@Override
int provideResId() {
return R.layout.note_input_todo;
}
@Override
public EditText getEditText() {
return et_input;
}
public boolean hasDone() {
return cb_todo_state.isChecked();
}
@Override
public void showTodo() {
et_input.setHint("待办事项");
cb_todo_state.setVisibility(View.VISIBLE);
//执行样式清除
setTodo(true);
}
@Override
public void hideTodo() {
cb_todo_state.setVisibility(View.GONE);
et_input.setHint("");
uncheckStyle();
setTodo(false);
}
}
内容比较简单,初始化控件、添加CheckBox 点击监听,提供了切换CheckBox显示方法
布局文件
LinearLayout 包裹CheckBox 和 EditText ,CheckBox 默认隐藏,当切换为 待办事项时,显示CheckBox
ImageWeight
/**
* Created by scwen on 2019/4/18.
* QQ :811733738
* 作用: 图片区域
*/
public class ImageWeight extends InputWeight implements View.OnClickListener {
private ImageView iv_input_image; //图片
private LinearLayout ll_bottom_tools; //底部控件
private RelativeLayout rl_delete; //删除
private RelativeLayout rl_replace; //替换
private RelativeLayout rl_full; //全屏
private String path; //图片 手机路径
private String shortPath; //图片上传服务器 短路径
public String getShortPath() {
return shortPath == null ? "" : shortPath;
}
public void setShortPath(String shortPath) {
this.shortPath = shortPath;
}
public String getPath() {
return path == null ? "" : path;
}
public void setPath(String path) {
this.path = path;
}
public void replacePath(String path) {
this.path = path;
loadImage(path);
}
public ImageWeight(Context context, ViewGroup parent, String path) {
super(context, parent);
this.path = path;
loadImage(path);
}
public void loadImage(String path) {
//Glide 加载图片
RequestOptions options = new RequestOptions();
options.placeholder(R.drawable.big_image_placeholder)
.sizeMultiplier(0.5f)
.diskCacheStrategy(DiskCacheStrategy.ALL)
.transform(new EditerTranform(mContext, 45));
Glide.with(mContext)
.load(path)
.apply(options)
.listener(new RequestListener() {
@Override
public boolean onLoadFailed(@Nullable GlideException e, Object model, Target target, boolean isFirstResource) {
return false;
}
@Override
public boolean onResourceReady(Drawable resource, Object model, Target target, DataSource dataSource, boolean isFirstResource) {
//记载图片完成后 设置控件的 高度
ViewGroup.LayoutParams layoutParams = mContentView.getLayoutParams();
int minimumHeight = resource.getMinimumHeight();
layoutParams.height = minimumHeight;
return false;
}
})
.into(iv_input_image);
}
private ImageActionListener mImageActionListener;
public void setImageActionListener(ImageActionListener imageActionListener) {
mImageActionListener = imageActionListener;
}
@Override
public String getHtml() {
return provideHtml(shortPath);
}
public String provideHtml(String path) {
return String.format(" ", path);
}
@Override
int provideResId() {
return R.layout.note_input_image;
}
@Override
public String getContent() {
return "";
}
@Override
public EditText getEditText() {
return null;
}
private void initListener() {
iv_input_image.setOnClickListener(this);
rl_delete.setOnClickListener(this);
rl_replace.setOnClickListener(this);
rl_full.setOnClickListener(this);
}
@Override
public void initView() {
iv_input_image = mContentView.findViewById(R.id.iv_input_image);
ll_bottom_tools = mContentView.findViewById(R.id.ll_bottom_tools);
rl_delete = mContentView.findViewById(R.id.rl_delete);
rl_replace = mContentView.findViewById(R.id.rl_replace);
rl_full = mContentView.findViewById(R.id.rl_full);
initListener();
}
@Override
public void onClick(View v) {
if (v.getId() == R.id.iv_input_image) {
//点击图片 显示下方 按钮区域
ll_bottom_tools.setVisibility(ll_bottom_tools.getVisibility() == View.VISIBLE ? View.GONE : View.VISIBLE);
} else if (v.getId() == R.id.rl_delete) {
//触发 删除图片监听
if (mImageActionListener != null) {
mImageActionListener.onAction(ImageActionListener.ACT_DELETE, this);
}
} else if (v.getId() == R.id.rl_replace) {
//触发替换图片监听
if (mImageActionListener != null) {
mImageActionListener.onAction(ImageActionListener.ACT_REPLACE, this);
}
} else if (v.getId() == R.id.rl_full) {
//触发预览图片监听
if (mImageActionListener != null) {
mImageActionListener.onAction(ImageActionListener.ACT_PREVIEW, this);
}
}
}
}
ImageActionListener
/**
 * Created by scwen on 2019/4/23.
 * QQ :811733738
 * 作用:图片操作监听
 */
public interface ImageActionListener {
      /**
       * 删除图片
       */
      int  ACT_DELETE=0;
      /**
       * 替换图片
       */
      int  ACT_REPLACE=1;
      /**
       * 预览图片
       */
      int  ACT_PREVIEW=2;

      void onAction(int action, ImageWeight imageWeight);

}
布局文件
RelativeLayout包裹内容区域,ImageView 控件自适应高度,底部包含3个点击区域
创建控件测试
创建Editor1控件,继承自LinearLayout,并且设置 当前的方向为VERTICAL
提供创建ImageWeight 和TodoWeight方法添加到控件中
public class Editor1 extends LinearLayout {

    /**
     * 输入控件的集合
     */
    private List inputWeights = new ArrayList<>();


    public Editor1(Context context) {
        this(context, null);
    }

    public Editor1(Context context, @Nullable AttributeSet attrs) {
        this(context, null, 0);
    }

    public Editor1(Context context, @Nullable AttributeSet attrs, int defStyleAttr) {
        super(context, attrs, defStyleAttr);
        init(context);
    }

    /**
     * 初始胡
     *
     * @param context
     */
    private void init(Context context) {
        //设置当前控件的方向为  VERTICAL
        setOrientation(VERTICAL);
        //默认需要创建 TodoWeight
        TodoWeight todoWeight = addTodoWeight();
        //默认第一个控件需要 Hint
        todoWeight.getEditText().setHint(R.string.input_content);
    }

    /**
     * 添加 EditText 控件
     *
     * @return
     */
    public TodoWeight addTodoWeight() {
        TodoWeight todoWeight = new TodoWeight(getContext(), this, null);
        inputWeights.add(todoWeight);
        addView(todoWeight.getContentView());
        return todoWeight;
    }

    /**
     * 添加Image 控件
     * @return
     */
    public ImageWeight addImageWeight() {
        ImageWeight imageWeight = new ImageWeight(getContext(), this, null);
        inputWeights.add(imageWeight);
        addView(imageWeight.getContentView());
        return imageWeight;
    }


}
Activity测试
Activity 中创建两个Button 测试添加输入区域
btn_add_edit.setOnClickListener(new View.OnClickListener() {
    @Override
    public void onClick(View v) {
        TodoWeight todoWeight = editor1.addTodoWeight();
        //测试显示 CheckBox
        todoWeight.showTodo();

    }
});

btn_add_image.setOnClickListener(new View.OnClickListener() {
    @Override
    public void onClick(View v) {
        editor1.addImageWeight();
    }
});
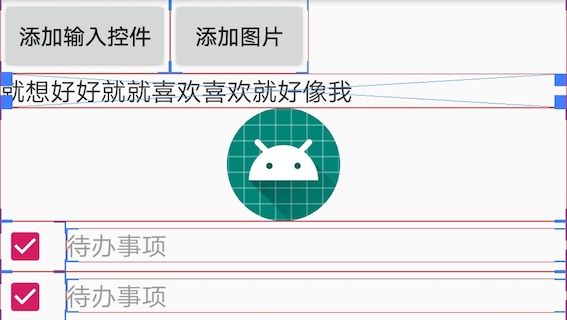
测试界面效果如下:
焦点EditText记录
当前的编辑器已经添加了多个InputWeight,现在的问题在于需要记录当前编辑的EditText,在应用样式的时候定位到输入的控件,在编辑器中添加如下变量:
private EditText lastFocusEdit; //当前正在编辑的EditText
如何监听当前的输入控件呢,这就用到了OnFocusChangeListener
private OnFocusChangeListener focusListener; // 所有EditText的焦点监听listener
在init方法中,创建对象
 focusListener = new OnFocusChangeListener() {

            @Override
            public void onFocusChange(View v, boolean hasFocus) {
                if (hasFocus) {
                    lastFocusEdit = (EditText) v;
                }
            }
        };
改造刚刚的 addTodoWeight方法
/**
     * 添加 EditText 控件
     *
     * @return
     */
    public TodoWeight addTodoWeight() {
        TodoWeight todoWeight = new TodoWeight(getContext(), this, null);
        inputWeights.add(todoWeight);
        //
        todoWeight.getEditText().setOnFocusChangeListener(focusListener);
        todoWeight.getEditText().requestFocus();
        addView(todoWeight.getContentView());
        return todoWeight;
    }
注意上面的代码 ,一定要先setOnFocusChangeListener(focusListener) 再 requestFocus
图片插入
上方测试的插入图片功能只是最简单的在最末尾加入图片控件,现在要增加在输入的文本中间插入功能
分为四种情况
- 当前焦点EditText 内容为空
- 当前输入光标在EditText已输入内容最前端
- 当前输入光标在EditText已输入内容最末端
- 当前输入光标在EditText已输入内容中间
判断四种情况代码:
 public ImageWeight insertImage() {
        //lastFocusEdit获取焦点的EditText
        Editable preContent = lastFocusEdit.getText();

        //获取控件位置
        int lastEditIndex = indexOfChild((View) lastFocusEdit.getParent());

        ImageWeight imageWeight = null;

        if (preContent.length() == 0) {
            //当前焦点EditText 内容为空
        } else {
            //获取光标所在位置
            int cursorIndex = lastFocusEdit.getSelectionStart();
            //获取光标前面的 内容
            CharSequence start = preContent.subSequence(0, cursorIndex);
            //获取光标后面内容
            CharSequence end = preContent.subSequence(cursorIndex, preContent.length());

            if (start.length() == 0) {
                //如果光标已经顶在了editText的最前面

            } else if (end.length() == 0) {
                // 如果光标已经顶在了editText的最末端

            } else {
                //如果光标已经顶在了editText的最中间,

            }
        }

        return imageWeight;
    }
针对以上四种情况的处理
- 直接在EditText下方插入图片,插入新的EditText
- 直接在EditText下方插入图片,并且插入新的EditText
- 则需要添加新的imageView和EditText
- 则需要分割字符串,分割成两个EditText,并在两个EditText中间插入图片
需要在指定位置插入TodoWeight 和ImageWeight,增加addTodoWeightAtIndex 和 addImageWeightAtIndex方法
最终改造的代码如下:
 public ImageWeight insertImage(String path) {
        //lastFocusEdit获取焦点的EditText
        Editable preContent = lastFocusEdit.getText();

        //获取控件位置
        int lastEditIndex = indexOfChild((View) lastFocusEdit.getParent());

        ImageWeight imageWeight = null;

        if (preContent.length() == 0) {
            //如果当前获取焦点的EditText为空,直接在EditText下方插入图片,并且插入空的EditText
            addTodoWeightAtIndex(lastEditIndex + 1, "");
            imageWeight = addImageWeightAtIndex(lastEditIndex + 1, path);
        } else {
            //获取光标所在位置
            int cursorIndex = lastFocusEdit.getSelectionStart();
            //获取光标前面的 内容
            CharSequence start = preContent.subSequence(0, cursorIndex);
            //获取光标后面内容
            CharSequence end = preContent.subSequence(cursorIndex, preContent.length());

            if (start.length() == 0) {
                //如果光标已经顶在了editText的最前面,则直接插入图片,并且EditText下移即可
                imageWeight = addImageWeightAtIndex(lastEditIndex, path);
                //同时插入一个空的EditText,防止插入多张图片无法写文字
                addTodoWeightAtIndex(lastEditIndex + 1, "");
            } else if (end.length() == 0) {
                // 如果光标已经顶在了editText的最末端,则需要添加新的imageView和EditText
                addTodoWeightAtIndex(lastEditIndex + 1, "");
                imageWeight = addImageWeightAtIndex(lastEditIndex + 1, path);
            } else {
                //如果光标已经顶在了editText的最中间,则需要分割字符串,分割成两个EditText,并在两个EditText中间插入图片
                //把光标前面的字符串保留,设置给当前获得焦点的EditText(此为分割出来的第一个EditText)
                lastFocusEdit.setText(start);
                //把光标后面的字符串放在新创建的EditText中(此为分割出来的第二个EditText)
                addTodoWeightAtIndex(lastEditIndex + 1, end);
                //在第二个EditText的位置插入一个空的EditText,以便连续插入多张图片时,有空间写文字,第二个EditText下移
                addTodoWeightAtIndex(lastEditIndex + 1, "");
                //在空的EditText的位置插入图片布局,空的EditText下移
                imageWeight = addImageWeightAtIndex(lastEditIndex + 1, path);
            }
        }

        return imageWeight;
    }

    public TodoWeight addTodoWeightAtIndex(int index, CharSequence sequence) {
        TodoWeight todoWeight = new TodoWeight(getContext(), this, focusListener);
        inputWeights.add(index, todoWeight);
        //设置 显示的内容
        if (sequence != null && sequence.length() > 0) {
            todoWeight.getEditText().setText(sequence);
        }
        todoWeight.getEditText().setOnFocusChangeListener(focusListener);
        addView(todoWeight.getContentView(), index);

        lastFocusEdit = todoWeight.getEditText();
        lastFocusEdit.requestFocus();
        lastFocusEdit.setSelection(sequence.length(), sequence.length());
        return todoWeight;
    }

    public ImageWeight addImageWeightAtIndex(int index, String path) {
        ImageWeight imageWeight = new ImageWeight(getContext(), this, path);
        inputWeights.add(index, imageWeight);
        addView(imageWeight.getContentView(), index);
        return imageWeight;
    }
删除键处理
到此已经能够创建 输入控件和图片控件了 ,可以随意的添加图片了。
现在我们开始处理下一个问题:删除
- 监听删除键的点击
- 当光标在EditText 输入中间,点击删除不进行处理正常删除
- 当光标在EditText首端,判断前一个控件,如果是图片控件,删除图片控件,如果是输入控件,删除当前控件并将输入区域合并成一个输入区域
监听删除键
private OnKeyListener keyListener; //按键监听

// 主要用来处理点击回删按钮时,view合并操作
keyListener = new OnKeyListener() {

   @Override
   public boolean onKey(View v, int keyCode, KeyEvent event) {
          if (event.getAction() == KeyEvent.ACTION_DOWN) {
              if (event.getKeyCode() == KeyEvent.KEYCODE_DEL) {
                   onBackspacePress((EditText) v);
                    return false;
                }
          }
          return false;
    }
};
修改 addTodoWeight方法
 public TodoWeight addTodoWeightAtIndex(int index, CharSequence sequence) {
        TodoWeight todoWeight = new TodoWeight(getContext(), this, focusListener);
        inputWeights.add(index, todoWeight);

        if (sequence != null && sequence.length() > 0) {
            todoWeight.getEditText().setText(sequence);
        }
     //添加 键盘监听
        todoWeight.getEditText().setOnKeyListener(keyListener);
        todoWeight.getEditText().setOnFocusChangeListener(focusListener);
        addView(todoWeight.getContentView(), index);

        lastFocusEdit = todoWeight.getEditText();
        lastFocusEdit.requestFocus();
        lastFocusEdit.setSelection(sequence.length(), sequence.length());
        return todoWeight;
    }
处理删除键的代码:
 private void onBackspacePress(EditText editText) {
        int selectionStart = editText.getSelectionStart();
        //只有光标在 edit 区域的 最前方  判断 上一个 控件的类型
        if (selectionStart == 0) {
            int editIndex = indexOfChild((View) editText.getParent());
            //第一个控件 直接 返回
            if (editIndex == 0) {
                return;
            }
            //获取前一个 输入控件
            InputWeight baseInputWeight = inputWeights.get(editIndex - 1);
            //执行类型检查
            if (baseInputWeight instanceof ImageWeight) {
                //前一个 控件是  图片 控件 直接删除
                removeWeight(baseInputWeight);
            } else if (baseInputWeight instanceof TodoWeight) {
                //前一个控件是 edittext  进行 样式的合并
                //获取当前输入的 文本
                Editable currContent = editText.getText();
                //获取 前一个输入控件
                EditText preEdit = baseInputWeight.getEditText();
                //获取前一个控件的 内容
                Editable preEditContent = preEdit.getText();
                //-----------------------
                removeWeight(inputWeights.get(editIndex));
                //将当前 输入内容 添加到 前一个控件中
                preEditContent.insert(preEditContent.length(), currContent);
                //移动光标
                preEdit.setSelection(preEditContent.length(), preEditContent.length());
                //获取焦点
                preEdit.requestFocus();
                lastFocusEdit = preEdit;
            }

        }
    }

    /**
     * 移除控件
     * @param inputWeight
     */
    public void removeWeight(InputWeight inputWeight) {
        removeView(inputWeight.getContentView());
        inputWeights.remove(inputWeight);
    }
小结
本篇文章作为整个系列的第一篇,展示了编辑器的基本功能,分析了界面的组成,并且结合代码完成了创建输入控件、添加控件、插入图片控件、输入控件删除键功能。
项目地址RichEditor
下一篇预告:
Span实现基础样式 粗体 斜体 下划线 中划线 字体大小 对齐方式(左对齐 居中 右对齐)


