1.conda安装
- 直接安装
    conda install fasttree mummer mafft repeatmasker prodigal
    conda install trf trnascan-se
    conda install lastz
    conda install ucsc-chainnet orthomcl
    conda install canu pacbio_falcon effectivet3
2.手动安装
2.1 Celera assembler
- 界面似乎提醒已经停止更新,如果是pacbio nanopore数据,请用canu。
下载界面 - 新名字叫Whole-Genome Shotgun Assembler
- 安装代码
       wget https://nchc.dl.sourceforge.net/project/wgs-assembler/wgs-assembler/wgs-8.3/wgs-8.3rc2.tar.bz2
       bzip2 -dc wgs-8.3rc2.tar.bz2 | tar -xf -
       cd wgs-8.3rc2
       cd kmer && make install && cd ..
       cd src && make && cd ..
       cd ..
- 使用:
wgs-8.3rc2/*/bin/runCA星号这里是机器名,比如Linux-amd64。 - runCA
2.2 Rfam
- 先安装Infernal软件 http://eddylab.org/infernal/
conda install -c bioconda infernal=1.1.2 - 下载Rfam数据库
得到Rfam.cm和Rfam.clainfo两个文件。我将它们放在新建的Rfam文件夹里。
    wget ftp://ftp.ebi.ac.uk/pub/databases/Rfam/12.2/Rfam.cm.gz
    gunzip Rfam.cm.gz
    wget ftp://ftp.ebi.ac.uk/pub/databases/Rfam/12.2/Rfam12.2.claninfo
- 在Rfam文件夹中运行,建立索引:
cmpress Rfam.cm
- 详细见链接
2.3 RNAmmer
- 下载界面链接
http://www.cbs.dtu.dk/services/RNAmmer/ - 需要学术邮箱
- signalP同 链接
4.安装
cat rnammer-1.2.tar.Z | gunzip | tar xvf -
需要hmmsearch和Getopt::Long perl模块。
需要修改rnammer文件。
-
rnammer安装路径
-hmmsearch路径
-perl路径
2.4 Quiver
- 安装最新SMRTanalysis,包含在内。
2.5 PHAST
- 下载界面链接
- 安装代码 1)安装clapck 2)安装Phast
    wget http://www.netlib.org/clapack/clapack.tgz
    tar -xvzf clapack.tgz
    cd CLAPACK-3.2.1
    cp make.inc.example make.inc && make f2clib && make blaslib && make lib
    ##安装Phast
    wget http://compgen.cshl.edu/phast/downloads/phast.v1_4.tgz
    tar -xvzf phast.v1_4.tgz
    cd phast/src/
    make CLAPACKPATH=/home/liyb/biosoft/CLAPACK-3.2.1
2.6 CRISPRFinder
- online 链接
- java版本链接
2.7 IslandPath-DIOMB
web版本:已整合入islandviewer 4 link
linux版本
- 安装界面
- 需要先安装HMMER3
  wget http://eddylab.org/software/hmmer3/3.1b2/hmmer-3.1b2-linux-intel-x86_64.tar.gz
  tar -xvzf ?? && cd hmmer-3.1b2
   ./configure
   make
   make check
   make install
- 安装islandpath
linux版本:
git clone https://github.com/brinkmanlab/islandpath
需要安装几个perl模块
Data::Dumper
Log::Log4perl
Config::Simple
Moose
MooseX::Singleton
Bio::Perl
perl -MCPAN -e shell
>install Data::Dumper
- 运行:输入文件是annotated genome as a genbank (.gbk) 或者embl (.embl) file.
# gbk file
./Dimob.pl example/NC_003210.gbk NC_003210_GIs.txt
# embl file
./Dimob.pl example/NC_003210.embl NC_003210_GIs.txt
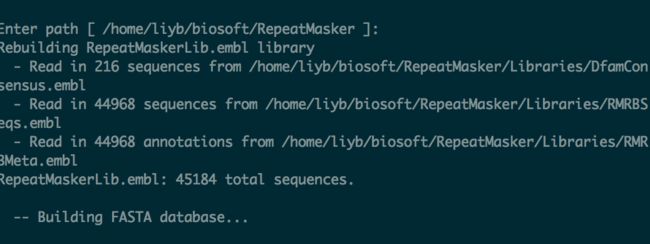
2.8 repeatmasker
- RMBlast序列搜索引擎
conda直接安装
手动安装
http://www.repeatmasker.org/RMBlast.html
2.6.0 ver 2 2017-3-29
# 下载RMBlast源码包并编辑
cd ~/bin/
wget ftp://ftp.ncbi.nlm.nih.gov/blast/executables/blast+/2.6.0/ncbi-blast-2.6.0+-src.tar.gz
wget http://www.repeatmasker.org/isb-2.6.0+-changes-vers2.patch.gz
tar zxvf ncbi-blast-2.6.0+-src.tar.gz
gunzip isb-2.6.0+-changes-vers2.patch.gz
cd ncbi-blast-2.6.0+-src
patch -p1 < ../isb-2.6.0+-changes-vers2.patch
cd c++
./configure --with-mt --prefix=/usr/local/rmblast --without-debug
make
# 安装程序及库至系统目录,有报误,但我们需要的rmblastn已经可以正常使用了
sudo make install # Makefile:40: recipe for target 'install-toolkit' failed
# 测试程序是否安装成功
/usr/local/rmblast/bin/rmblastn -h
- TRF(Tandem Repeat Finder)
conda 直接安装
手动安装
http://tandem.bu.edu/trf/trf.download.html
4.09 2016-2-22
最新版4.09,本操作系统需要安装其中的legacy的64位版才能运行
cd ~/bin/
wget http://tandem.bu.edu/trf/downloads/trf409.legacylinux64
chmod +x trf409.legacylinux64
sudo cp trf409.legacylinux64 /usr/local/bin/trf
# 测试有帮助信息即可用
trf
- RepeatMasker
http://www.repeatmasker.org/RMDownload.html
4.0.7 2017-2-1
# 下载267MB安装包,也比较慢,放在后台慢慢下
nohup wget -c http://www.repeatmasker.org/RepeatMasker-open-4-0-7.tar.gz &bg
tar xvzf RepeatMasker-open-4-0-7.tar.gz
- Repbase数据库
http://www.girinst.org/server/RepBase/index.php
需要注册才能下载,人工审批,可能要等两天。
RepBaseRepeatMaskerEdition-20170127.tar.gz (48.84 MB) 也可以在我的百度网盘下载,并上传服务器至RepeatMasker下载的相同目录。http://pan.baidu.com/s/1c2zSMKo
mv RepBaseRepeatMaskerEdition-20170127.tar.gz RepeatMasker/
cd RepeatMasker/
tar xvzf RepBaseRepeatMaskerEdition-20170127.tar.gz
!conda安装后不方便加库,建议手动安装repeatmasker
将下载的repbase库全部放在repeatmasker的libraries目录下面
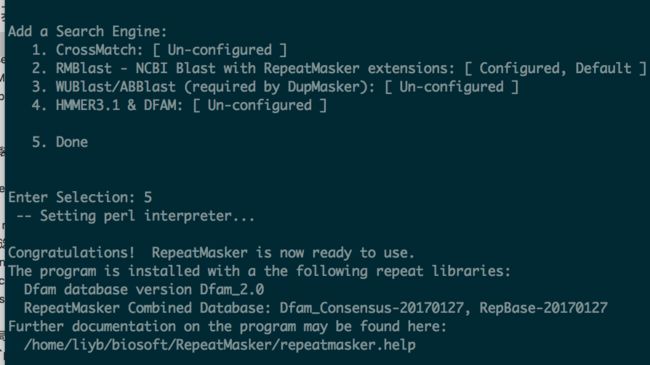
- 配置RepeatMasker依赖关系
# 默认perl, repatmasker, trf安装位置正确的就一路回车
# 搜索引挚选择2 RMBlast,输入RMBlast安装目录/usr/local/rmblast/bin,# 再选5 done完成;例如我刚才编绎最新版安装目录:/usr/local/rmblast/bin;如果新版安装失败的,下载的旧版预编辑 安装目录为:/usr/local/rmblast-2.2.28/bin
./configure
#添加至全局环境变量
EMBOSS
#If you are compiling a fresh installation:
./configure
make
#If you compile it on subsequent occasions, use the following:-
rm config.cache
make clean
./configure
 make
2.9 blast早期版本
下载原代码
FTP 2012按照make/readme.unx中的提示。
2.1 在biosoft中新建toolkit文件夹,将targz放在该文件夹中解压
2.2 在toolkit目录,./ncbi/make/makedis.csh
2.3 编译失败,放弃另一种方法
下载2.2.26已编译的版本似乎更好,但ftp打不开(文件名变更了,可以从上一级目录开始找)
ftp
wget ftp://ftp.ncbi.nlm.nih.gov/blast/executables/legacy/2.2.26/blast-2.2.26-x64-linux.tar.gz
参照link
安装gnuplot 4
下载4.6.0
查看README.1st
./configure
make
antismash
- 自己尝试
antismash:需要python 2.7 环境
conda create -n Icey python=2 antismash
查看环境:conda info --envs
切换环境:source activate Icey(退出source deactivate)
download-antismash-databases - antismash:官方推荐安装方法 (未尝试)
link
创建antismash镜像,并安装antismash包。
conda create -n antismash antismash
source activate antismash
download-antismash-databases
source deactivate antismash
- 运行
source activate antismash
antismash my_input.gbk
picard
1.picard
conda安装会报错
手动安装:下载picard.jar就可以了
2.java -jar /path/to/picard.jar -h
- picard 直接运行
echo '#!/bin/bash' > ~/bin/picard
echo 'java -jar ~/src/picard-tools-1.140/picard.jar $@' >> ~/bin/picard

# Make the script executable
chmod +x ~/bin/picard
Mauve
- http://darlinglab.org/mauve/user-guide/installing.html
- 需要安装java


