最近一直在学习自定义View和自定义ViewGroup的东西,今天没事干就研究了一下FlowLayout,记录下实现步骤,参考自鸿洋博客
AndroidStudio使用
在根projcet的build.gradle中添加.
maven { url 'https://jitpack.io' }
在项目的build.gradle添加:
compile 'com.github.superSp:FlowLayout:1.0'
github有源码查看
效果图 自适应
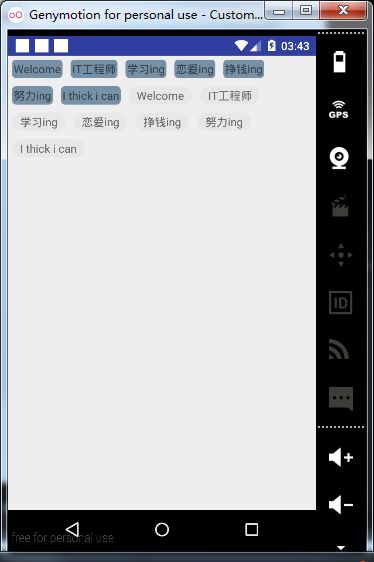
图片.png
效果图 固定大小
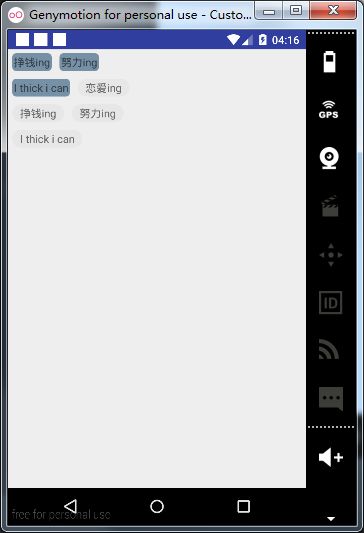
图片.png
使用方法——静态添加
style文件:
drawable文件:
样式1(flag_01)
样式2(flag_02)
按自己喜好设置就行~~
使用方法——动态添加
        FlowLayout flowLayout = new FlowLayout(this);

        flowLayout.initData(Arrays.asList("Welcome","IT工程师","学习ing","恋爱ing"
        ,"挣钱ing","努力ing","I thick i can"));

        setContentView(flowLayout);
initData方法
public void initData(List list)
public void initData(List list, int margin, int drawable)
添加点击事件
 flowLayout.setOnTabClickListener(new FlowLayout.IOnTabClickListener() {

            @Override
            public void onTabClick(int position, TextView textView) {
                Toast.makeText(Test.this,position+" "+textView.getText(),Toast.LENGTH_SHORT).show();
            }
        });
        setContentView(flowLayout);
实现思路
构造方法
    public FlowLayout(Context context) {
        this(context, null);
    }

    public FlowLayout(Context context, AttributeSet attrs) {
        this(context, attrs, 0);
    }

    public FlowLayout(Context context, AttributeSet attrs, int defStyleAttr) {
        super(context, attrs, defStyleAttr);
    }
子view支持margin属性
 @Override
    public LayoutParams generateLayoutParams(AttributeSet attrs) {
        return new MarginLayoutParams(getContext(), attrs);
    }
onMeasure方法
 @Override
    protected void onMeasure(int widthMeasureSpec, int heightMeasureSpec) {
        super.onMeasure(widthMeasureSpec, heightMeasureSpec);
        int widthSize = MeasureSpec.getSize(widthMeasureSpec);
        int heightSize = MeasureSpec.getSize(heightMeasureSpec);
        int widthMode = MeasureSpec.getMode(widthMeasureSpec);
        int heightMode = MeasureSpec.getMode(heightMeasureSpec);

        //测量子view的大小
        measureChildren(widthMeasureSpec, heightMeasureSpec);

        //最终的宽和高
        int width = 0;
        int height = 0;
        //记录每一行的宽和高
        int lineWidth = 0;
        //子view数量
        int cCount = getChildCount();
        View cView;
        MarginLayoutParams params;
        int cWidth, cHeight;

        for (int i = 0; i < cCount; i++) {
            cView = getChildAt(i);
            params = (MarginLayoutParams) cView.getLayoutParams();
            cWidth = cView.getMeasuredWidth() + params.leftMargin + params.rightMargin;
            cHeight = cView.getMeasuredHeight() + params.topMargin + params.bottomMargin;

            ViewBean viewBean = new ViewBean();

            if (lineWidth + cWidth < widthSize) {

                lineWidth += cWidth;

                height = Math.max(height, cHeight);

                width = Math.max(lineWidth, width);

            } else {

                width = Math.max(lineWidth, width);

                height += cHeight;

                lineWidth = cWidth;

            }

            viewBean.setLeft(lineWidth - cWidth + params.leftMargin);
            viewBean.setTop(height - cHeight + params.topMargin);
            viewBean.setRight(lineWidth - params.rightMargin);
            viewBean.setBottom(height - params.bottomMargin);

            list.add(viewBean);

        }
        setMeasuredDimension(widthMode == MeasureSpec.EXACTLY ? widthSize : width, heightMode == MeasureSpec.EXACTLY ? heightSize : height);
    }
onLayout方法
 @Override
    protected void onLayout(boolean changed, int l, int t, int r, int b) {
        int cCount = getChildCount();
        for (int i = 0; i < cCount; i++) {
            getChildAt(i).layout(list.get(i).getLeft(), list.get(i).getTop(), list.get(i).getRight(), list.get(i).getBottom());
        }

    }
ViewBean方法
private class ViewBean {
        private int left;
        private int right;
        private int top;
        private int bottom;

        public int getLeft() {
            return left;
        }

        public void setLeft(int left) {
            this.left = left;
        }

        public int getRight() {
            return right;
        }

        public void setRight(int right) {
            this.right = right;
        }

        public int getTop() {
            return top;
        }

        public void setTop(int top) {
            this.top = top;
        }

        public int getBottom() {
            return bottom;
        }

        public void setBottom(int bottom) {
            this.bottom = bottom;
        }
    }
动态填充数据实现
 public void initData(List list) {
        ViewGroup.MarginLayoutParams pa = new ViewGroup.MarginLayoutParams(ViewGroup.MarginLayoutParams.WRAP_CONTENT,
                ViewGroup.MarginLayoutParams.WRAP_CONTENT);
        int size = list.size();
        for (int i = 0; i < size; i++) {
            TextView tv = new TextView(getContext());
            tv.setText(list.get(i));
            addView(tv, pa);
            ((ViewGroup.MarginLayoutParams) tv.getLayoutParams()).setMargins(DensityUtils.dp2px(getContext(), 5), DensityUtils.dp2px(getContext(), 5),
                    DensityUtils.dp2px(getContext(), 5), DensityUtils.dp2px(getContext(), 5));
            tv.setBackgroundResource(R.drawable.flag_01);
        }
    }
添加点击事件
public interface IOnTabClickListener {
        void onTabClick(int position, TextView textView);
    }

private void setOnclick(final int position, final TextView textView) {
        textView.setOnClickListener(new OnClickListener() {
            @Override
            public void onClick(View view) {
                iOnTabClickListener.onTabClick(position, textView);
            }
        });
    }
后记
比较难理解的部分应该就是onMeasure了。。当设置wrap的时候找到宽度最大的值。。并且设置每个view的坐标.