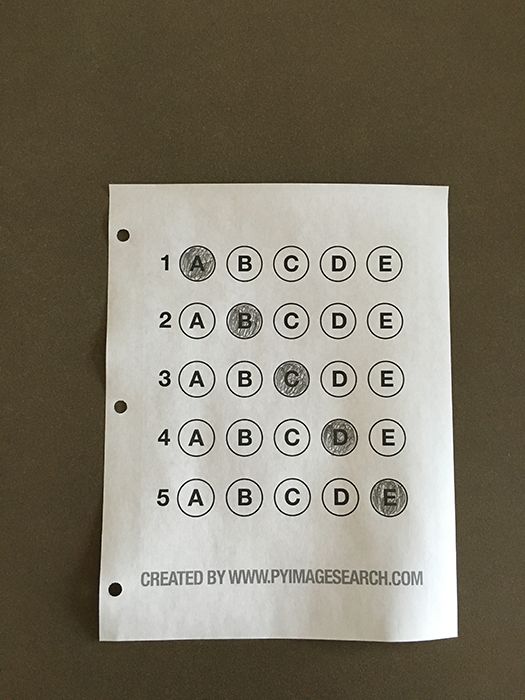
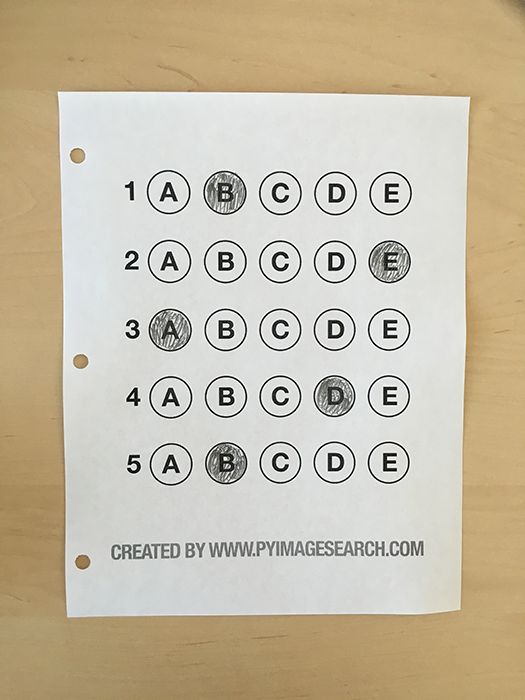
英文原文来自 Bubble sheet multiple choice scanner and test grader using OMR, Python and OpenCV
说到答题卡,满满的都是学生时代的回忆。本文实现了利用Python的计算机视觉和图像处理技术实现圆点答题卡识别。代码简洁,原理清晰,富有趣味。感谢英文原作者,他的代码和测试图片我放在了文末。
光学划记符号辨识(OMR)
本文综合了一些博文的技术,包括building a document scanner,contour sorting以及perspective transforms
实现答题卡识别的7步
- Step #1: 检测到图片中的答题卡
- Step #2: 应用透视变换来提取图中的答题卡(以自上向下的鸟瞰视图)
- Step #3: 从透视变换后的答题卡中提取 the set of 气泡/圆点 (答案选项)
- Step #4: 将题目/气泡排序成行
- Step #5: 判断每行中被标记/涂的答案
- Step #6: 在我们的答案字典中查找正确的答案来判断答题是否正确
- Step #7: 为其它题目重复上述操作
算法实现
让我们新建一个Python文件test_grader.py,然后添加以下内容:
# 引入必要的库
from imutils.perspective import four_point_transform
from imutils import contours
import numpy as np
import argparse
import imutils
import cv2

# 构建命令行参数解析并分析参数
# 对应使用方式 python test_grader.py --image images/test_01.png
ap = argparse.ArgumentParser()
ap.add_argument("-i", "--image", required=True,
    help="path to the input image")
args = vars(ap.parse_args())

# 构建答案字典,键为题目号,值为正确答案
ANSWER_KEY = {0: 1, 1: 4, 2: 0, 3: 3, 4: 1}
补充:
vars()接受一个对象返回它的内建字典
当然你需要有OpenCV和Numpy的包,但你可能没有最新版本的imutils,一个便于基本图像处理操作的库。使用下面的命令来安装和升级该库:
pip install --upgrade imutils
补充:在Windows7_64位+ Python 3.5测试,对于OpenCV的安装有两种方法,推荐第一种方法。(由于是python3,使用的是OpenCV 3.1.0)
- 使用活雷锋编译好的包,注意版本对应。下载页面选择
opencv_python-3.1.0-cp35-cp35m-win_amd64.whl,下载完成后在cmd命令行中使用pip install xx.whl安装,xx.whl为下载的文件对应路径。同理可在该页面找到numpy进行安装,当然,对于科学计算库的下载解决方案,首推anaconda。 - 下载OpenCV,直接安装(就是解压)后将OpenCV安装目录下的
\build\python\2.7\cv2.pyd复制到Python的子目录\Lib\site-packages下。然后将opencv的\build\bin目录添加到Windows的PATH中。
在python命令行中import cv2成功的话就是安装好了。
我们在命令行中只解析了一个参数,那就是要分析的图片的路径。然后定义了答案字典,在这里,题目对应的值是正确答案在行中的索引位置,跟python中列表的索引方式相同。
# 加载图片,将它转换为灰阶,轻度模糊,然后边缘检测。
image = cv2.imread(args["image"])
gray = cv2.cvtColor(image, cv2.COLOR_BGR2GRAY)
blurred = cv2.GaussianBlur(gray, (5, 5), 0)
edged = cv2.Canny(blurred, 75, 200)
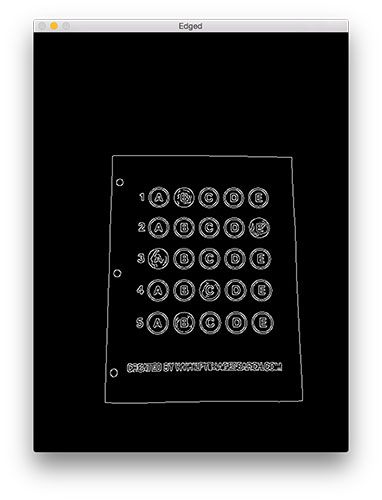
我们先从磁盘中加载了图片文件,然后将它转换为灰阶,再进行模糊处理来消除高频噪声。最后,使用Canny边缘检测器来获取答题卡的边缘。结果如下 :
注意,答题卡长方形的四个顶点都要在图中出现,这是我们事先约定的答题卡的边缘。
获取轮廓非常重要,因为下一步我们将它作为应用透视变换的标记(锚点),来获得一个答题卡的自上而下的鸟瞰视图。
补充:stackoverflow上的提问:边缘检测和轮廓检测的区别Difference between “Edge Detection” and “Image Contours” 最佳答案
简要来说,边缘是极值点,而轮廓一般从边缘得来,是闭合的曲线。
# 从边缘图中寻找轮廓,然后初始化答题卡对应的轮廓
cnts = cv2.findContours(edged.copy(), cv2.RETR_EXTERNAL,
    cv2.CHAIN_APPROX_SIMPLE)
cnts = cnts[0] if imutils.is_cv2() else cnts[1]
docCnt = None

# 确保至少有一个轮廓被找到
if len(cnts) > 0:
    # 将轮廓按大小降序排序
    cnts = sorted(cnts, key=cv2.contourArea, reverse=True)

    # 对排序后的轮廓循环处理
    for c in cnts:
        # 获取近似的轮廓
        peri = cv2.arcLength(c, True)
        approx = cv2.approxPolyDP(c, 0.02 * peri, True)

        # 如果我们的近似轮廓有四个顶点,那么就认为找到了答题卡
        if len(approx) == 4:
            docCnt = approx
            break
首先我们通过cv2.findContours从边缘检测的结果更进一步得到轮廓值。然后我们对轮廓的区域大小进行排序,在这里我们假设答题卡就是我们图像的焦点,它会比图中其它对象大,所以从大到小对轮廓进行检测,符合长方形特征的就是我们的答题卡了。
此外,对于每个轮廓,我们进行了近似,这在本质上意味着我们简化了轮廓点的数量,使其成为一个“更基本的”几何形状。
补充:关于更多轮廓近似的内容,请看 building a mobile document scanner.
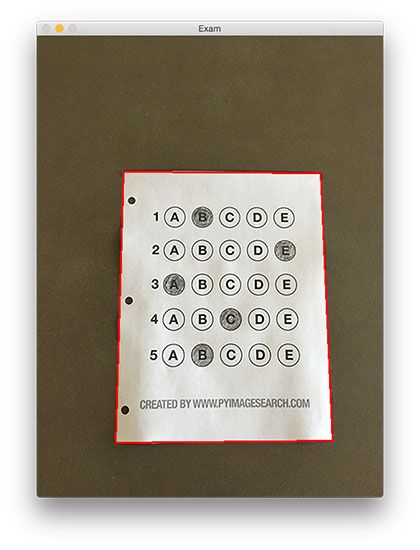
现在,如果docCnt在原始图像中画出来它将是这样的:
然后我们进行透视变换
# 对原始图像和灰度图都进行四点透视变换
paper = four_point_transform(image, docCnt.reshape(4, 2))
warped = four_point_transform(gray, docCnt.reshape(4, 2))
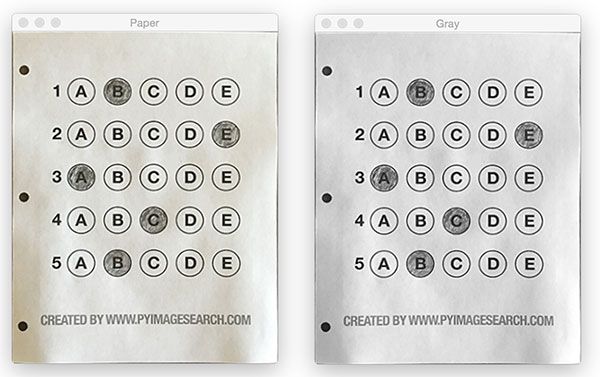
我们使用了four_point_transform函数,它将轮廓的(x, y) 坐标以一种特别、可重复的方式整理,并且对轮廓包围的区域进行透视变换。暂时我们只需要知道它的变换效果就行了。
补充:关于更多该函数的信息,参看4 Point OpenCV getPerspective Transform Example和Ordering coordinates clockwise with Python and OpenCV
好了,现在我们取得了一些进展。
我们从原始图像中获取了答题卡,并应用透视变换获取90度俯视效果。
下面要对题目进行判断了。
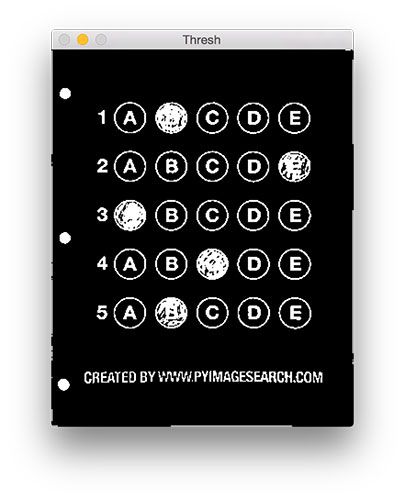
这一步开始于二值化,或者说是图像的前景和后景的分离/阈值处理。
# 对灰度图应用大津二值化算法
thresh = cv2.threshold(warped, 0, 255,
    cv2.THRESH_BINARY_INV | cv2.THRESH_OTSU)[1]
补充:大津二值化法
现在,我们的图像是一个纯粹二值图像了。
图像的背景是黑色的,而前景是白色的。
这二值化使得我们能够再次应用轮廓提取技术,以找到每个题目中的气泡选项。
# 在二值图像中查找轮廓,然后初始化题目对应的轮廓列表
cnts = cv2.findContours(thresh.copy(), cv2.RETR_EXTERNAL,
    cv2.CHAIN_APPROX_SIMPLE)
cnts = cnts[0] if imutils.is_cv2() else cnts[1]
questionCnts = []

# 对每一个轮廓进行循环处理
for c in cnts:
    # 计算轮廓的边界框,然后利用边界框数据计算宽高比
    (x, y, w, h) = cv2.boundingRect(c)
    ar = w / float(h)

    # 为了辨别一个轮廓是一个气泡,要求它的边界框不能太小,在这里边至少是20个像素,而且它的宽高比要近似于1
    if w >= 20 and h >= 20 and ar >= 0.9 and ar <= 1.1:
        questionCnts.append(c)
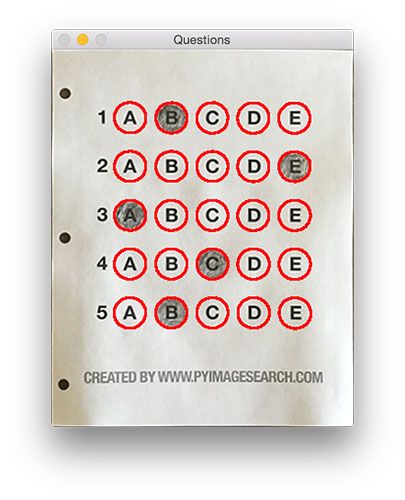
我们由二值图像中的轮廓,获取轮廓边界框,利用边界框数据来判定每一个轮廓是否是一个气泡,如果是,将它加入题目列表questionCnts。
将我们得到的题目列表中的轮廓在图像中画出,得到下图:
只有题目气泡区域被圈出来了,而其它地方没有。
接下来就是阅卷了:
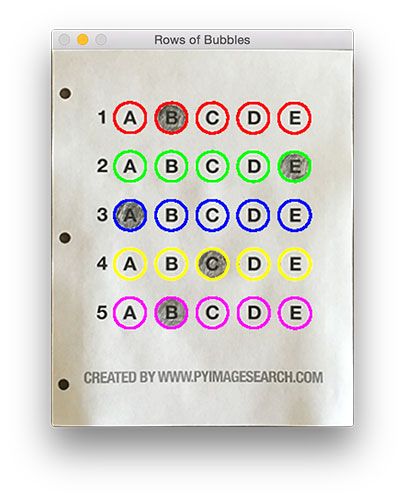
# 以从顶部到底部的方法将我们的气泡轮廓进行排序,然后初始化正确答案数的变量。
questionCnts = contours.sort_contours(questionCnts,
    method="top-to-bottom")[0]
correct = 0

# 每个题目有5个选项,所以5个气泡一组循环处理
for (q, i) in enumerate(np.arange(0, len(questionCnts), 5)):
    # 从左到右为当前题目的气泡轮廓排序,然后初始化被涂画的气泡变量
    cnts = contours.sort_contours(questionCnts[i:i + 5])[0]
    bubbled = None
首先,我们对questionCnts进行从上到下的排序,使得靠近顶部的一行气泡在列表中最先出现。然后对每行气泡应用从左到右的排序,使左边的气泡在队列中先出现。解释下,就是气泡轮廓按纵坐标先排序,并排的5个气泡轮廓纵坐标相差不大,总会被排在一起,而且每组气泡之间按从上到下的顺序排列,然后再将每组轮廓按横坐标分出先后。
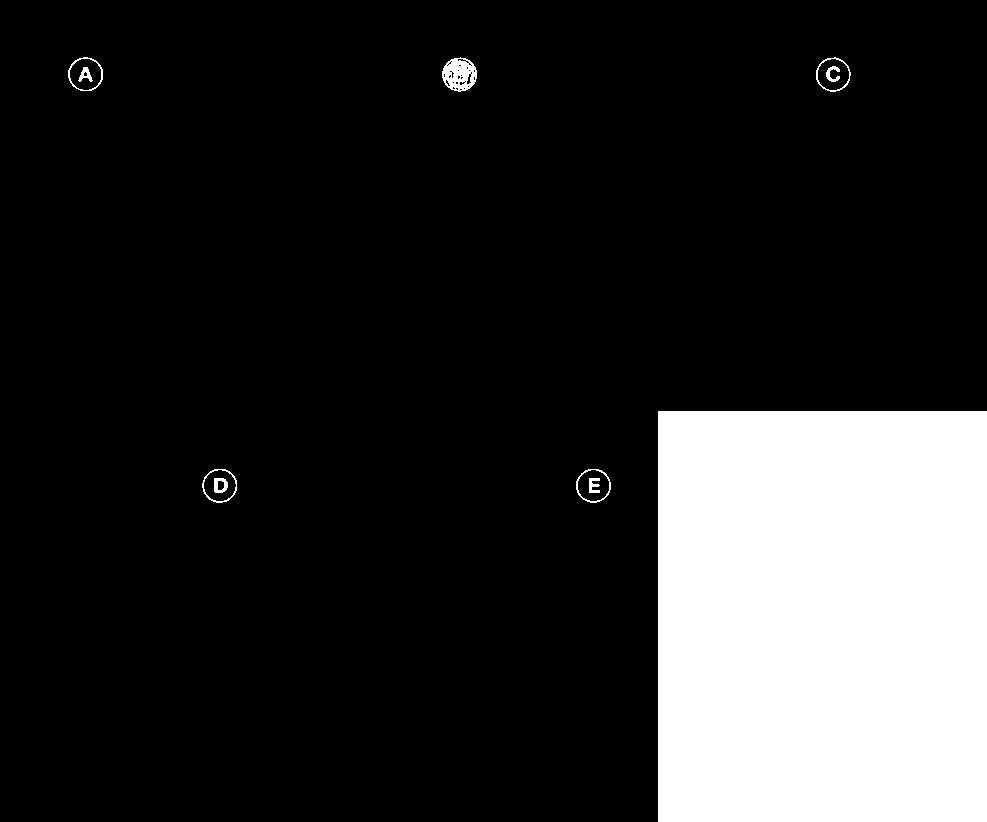
第二步,我们需要判断哪个气泡被填充了。我们可以利用二值图像中每个气泡区域内的非零像素点数量来进行判断。
    # 对一行从左到右排列好的气泡轮廓进行遍历
    for (j, c) in enumerate(cnts):
        # 构造只有当前气泡轮廓区域的掩模图像
        mask = np.zeros(thresh.shape, dtype="uint8")
        cv2.drawContours(mask, [c], -1, 255, -1)

        # 对二值图像应用掩模图像,然后就可以计算气泡区域内的非零像素点。
        mask = cv2.bitwise_and(thresh, thresh, mask=mask)
        total = cv2.countNonZero(mask)

        # 如果像素点数最大,就连同气泡选项序号一起记录下来
        if bubbled is None or total > bubbled[0]:
            bubbled = (total, j)
下图是对一行每一个气泡利用掩模和原二值图像合成的结果,显然B是超过阈值的像素点最多的,从而也就是答题者选中的答案。
接着就是查找答案字典,判断正误了。
    # 初始化轮廓颜色为红色,获取正确答案序号
    color = (0, 0, 255)
    k = ANSWER_KEY[q]

    # 检查由填充气泡获得的答案是否正确,正确则将轮廓颜色设置为绿色。
    if k == bubbled[1]:
        color = (0, 255, 0)
        correct += 1

    # 画出正确答案的轮廓线。
    cv2.drawContours(paper, [cnts[k]], -1, color, 3)
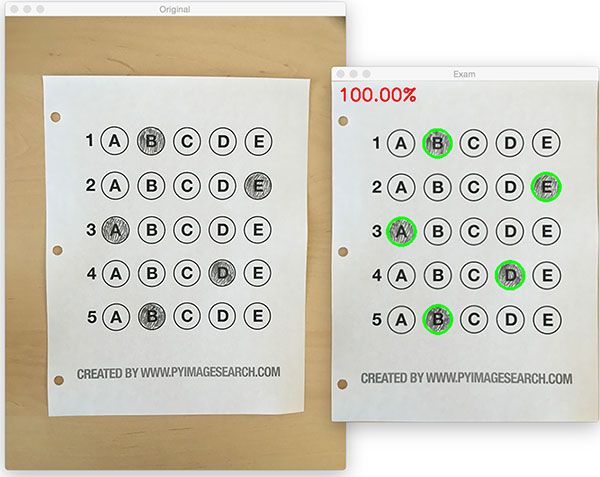
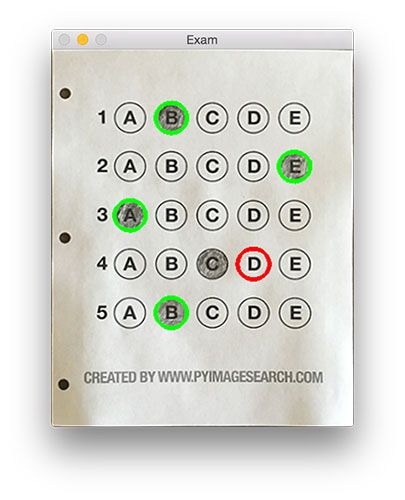
如果气泡作答是对的,则用绿色圈起来,如果不对,就用红色圈出正确答案:
最后,我们计算分数并展示结果。
# 计算分数并打分
score = (correct / 5.0) * 100
print("[INFO] score: {:.2f}%".format(score))
cv2.putText(paper, "{:.2f}%".format(score), (10, 30),
    cv2.FONT_HERSHEY_SIMPLEX, 0.9, (0, 0, 255), 2)
cv2.imshow("Original", image)
cv2.imshow("Exam", paper)
cv2.waitKey(0)
其它
- 为什么不使用圆形检测?
图中的圆形气泡可以使用Hough circles检测方法。但是- Hough circles的参数不好调
- 更重要的是避免用户使用错误造成的bug,填写答题卡时不时会有填涂超出圆形边界的现象。
拓展和改进
- 需要改进的是未填充气泡的处理逻辑,当前我们假设每行有且仅有一个填充气泡。进一步,要考虑如果答题者没有涂写答案或者涂写了多个选项的情况,这里的逻辑并不复杂。
全部源码和测试图片
- test_grader.py
# USAGE
# python test_grader.py --image test_01.png

# import the necessary packages
from imutils.perspective import four_point_transform
from imutils import contours
import numpy as np
import argparse
import imutils
import cv2

# construct the argument parse and parse the arguments
ap = argparse.ArgumentParser()
ap.add_argument("-i", "--image", required=True,
    help="path to the input image")
args = vars(ap.parse_args())

# define the answer key which maps the question number
# to the correct answer
ANSWER_KEY = {0: 1, 1: 4, 2: 0, 3: 3, 4: 1}

# load the image, convert it to grayscale, blur it
# slightly, then find edges
image = cv2.imread(args["image"])
gray = cv2.cvtColor(image, cv2.COLOR_BGR2GRAY)
blurred = cv2.GaussianBlur(gray, (5, 5), 0)
edged = cv2.Canny(blurred, 75, 200)

# find contours in the edge map, then initialize
# the contour that corresponds to the document
cnts = cv2.findContours(edged.copy(), cv2.RETR_EXTERNAL,
    cv2.CHAIN_APPROX_SIMPLE)
cnts = cnts[0] if imutils.is_cv2() else cnts[1]
docCnt = None

# ensure that at least one contour was found
if len(cnts) > 0:
    # sort the contours according to their size in
    # descending order
    cnts = sorted(cnts, key=cv2.contourArea, reverse=True)

    # loop over the sorted contours
    for c in cnts:
        # approximate the contour
        peri = cv2.arcLength(c, True)
        approx = cv2.approxPolyDP(c, 0.02 * peri, True)

        # if our approximated contour has four points,
        # then we can assume we have found the paper
        if len(approx) == 4:
            docCnt = approx
            break

# apply a four point perspective transform to both the
# original image and grayscale image to obtain a top-down
# birds eye view of the paper
paper = four_point_transform(image, docCnt.reshape(4, 2))
warped = four_point_transform(gray, docCnt.reshape(4, 2))

# apply Otsu's thresholding method to binarize the warped
# piece of paper
thresh = cv2.threshold(warped, 0, 255,
    cv2.THRESH_BINARY_INV | cv2.THRESH_OTSU)[1]

# find contours in the thresholded image, then initialize
# the list of contours that correspond to questions
cnts = cv2.findContours(thresh.copy(), cv2.RETR_EXTERNAL,
    cv2.CHAIN_APPROX_SIMPLE)
cnts = cnts[0] if imutils.is_cv2() else cnts[1]
questionCnts = []

# loop over the contours
for c in cnts:
    # compute the bounding box of the contour, then use the
    # bounding box to derive the aspect ratio
    (x, y, w, h) = cv2.boundingRect(c)
    ar = w / float(h)

    # in order to label the contour as a question, region
    # should be sufficiently wide, sufficiently tall, and
    # have an aspect ratio approximately equal to 1
    if w >= 20 and h >= 20 and ar >= 0.9 and ar <= 1.1:
        questionCnts.append(c)

# sort the question contours top-to-bottom, then initialize
# the total number of correct answers
questionCnts = contours.sort_contours(questionCnts,
    method="top-to-bottom")[0]
correct = 0

# each question has 5 possible answers, to loop over the
# question in batches of 5
for (q, i) in enumerate(np.arange(0, len(questionCnts), 5)):
    # sort the contours for the current question from
    # left to right, then initialize the index of the
    # bubbled answer
    cnts = contours.sort_contours(questionCnts[i:i + 5])[0]
    bubbled = None

    # loop over the sorted contours
    for (j, c) in enumerate(cnts):
        # construct a mask that reveals only the current
        # "bubble" for the question
        mask = np.zeros(thresh.shape, dtype="uint8")
        cv2.drawContours(mask, [c], -1, 255, -1)

        # apply the mask to the thresholded image, then
        # count the number of non-zero pixels in the
        # bubble area
        mask = cv2.bitwise_and(thresh, thresh, mask=mask)
        total = cv2.countNonZero(mask)

        # if the current total has a larger number of total
        # non-zero pixels, then we are examining the currently
        # bubbled-in answer
        if bubbled is None or total > bubbled[0]:
            bubbled = (total, j)

    # initialize the contour color and the index of the
    # *correct* answer
    color = (0, 0, 255)
    k = ANSWER_KEY[q]

    # check to see if the bubbled answer is correct
    if k == bubbled[1]:
        color = (0, 255, 0)
        correct += 1

    # draw the outline of the correct answer on the test
    cv2.drawContours(paper, [cnts[k]], -1, color, 3)

# grab the test taker
score = (correct / 5.0) * 100
print("[INFO] score: {:.2f}%".format(score))
cv2.putText(paper, "{:.2f}%".format(score), (10, 30),
    cv2.FONT_HERSHEY_SIMPLEX, 0.9, (0, 0, 255), 2)
cv2.imshow("Original", image)
cv2.imshow("Exam", paper)
cv2.waitKey(0)
- 测试图片
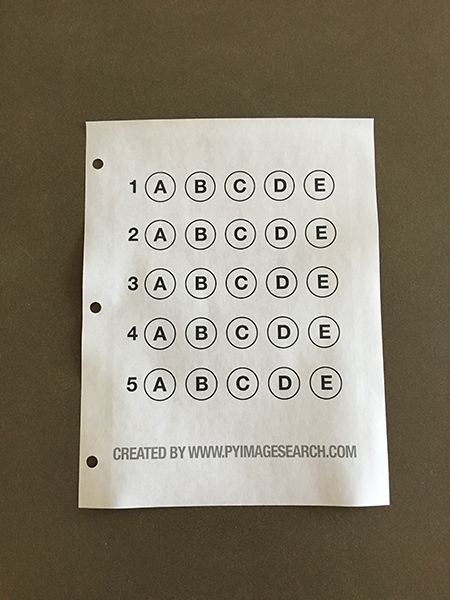
供修改的空答题卡图
