网上能找到一堆关于推送的文章,前几天接手其他同事的代码,加功能顺便梳理一下,感觉想要的在官方文档里面都能找到,写的很详细。
极光文档
SDK集成和证书的设置这里不弄了,文档里写的很详细,这里只记录一下相关代码部分。
极光有两种发送消息的机制:自定义消息和通知
- 自定义消息:
没有类似通知的横幅声音等,可自定义发送过来的数据格式以及字段。
而且只有在前端运行的时候才能收到自定义消息的推送。 - 通知:
就如我们平时用的通知,格式固定,但也可加扩展字段。
注册
- 位置
#import "AppDelegate.h"中的 - (BOOL)application: didFinishLaunchingWithOptions:
如果AppDelegate中代码较多,建议创建一个分类如: AppDelegate+JPush
在AppDelegate的didFinishLaunchingWithOptions方法中调用,更清晰。
- 头文件
#import "JPUSHService.h"
#import
添加代理
- 代码
// 初始化APNs代码
    if ([[UIDevice currentDevice].systemVersion floatValue] >= 10.0) {
        //notice: 3.0.0及以后版本注册可以这样写,也可以继续用之前的注册方式
        JPUSHRegisterEntity * entity = [[JPUSHRegisterEntity alloc] init];
        entity.types = UNAuthorizationOptionAlert|UNAuthorizationOptionBadge|UNAuthorizationOptionSound;
        [JPUSHService registerForRemoteNotificationConfig:entity delegate:self];

    } else if ([[UIDevice currentDevice].systemVersion floatValue] >= 8.0) {

        //可以添加自定义categories
        [JPUSHService registerForRemoteNotificationTypes:(UIUserNotificationTypeBadge|UIUserNotificationTypeSound|UIUserNotificationTypeAlert) categories:nil];
    } else {

        //categories 必须为nil
        [JPUSHService registerForRemoteNotificationTypes:(UIRemoteNotificationTypeBadge|UIRemoteNotificationTypeSound|UIRemoteNotificationTypeAlert) categories:nil];
    }
  NSString *advertisingId = [[[ASIdentifierManager sharedManager] advertisingIdentifier] UUIDString];

 // 初始化JPush代码
 [JPUSHService setupWithOption:launchOptions appKey:appKey channel:channel apsForProduction:isProduction advertisingIdentifier:advertisingId];

 //JPush标识此设备的 registrationID。
 [JPUSHService registrationIDCompletionHandler:^(int resCode, NSString *registrationID) {
        if(resCode == 0){
            NSLog(@"registrationID获取成功:%@",registrationID);
        } else{
            NSLog(@"registrationID获取失败,code:%d",resCode);
        }
    }];
现在iOS11都马上出来了,估计以后也不用再适配8以下的了吧。
- 注册APNs成功并上报DeviceToken
- (void)application:(UIApplication *)application didRegisterForRemoteNotificationsWithDeviceToken:(NSData *)deviceToken {
    //注册 DeviceToken
    [JPUSHService registerDeviceToken:deviceToken];
}
- 注册失败
#pragma mark  极光注册 失败
- (void)application:(UIApplication *)application didFailToRegisterForRemoteNotificationsWithError:(NSError *)error {
    NSLog(@"did Fail To Register For Remote Notifications With Error: %@", error
          );
}
通知部分
iOS10之后,接到通知:亲测,程序在前台运行时会调用此方法。
- (void)jpushNotificationCenter:(UNUserNotificationCenter *)center willPresentNotification:(UNNotification *)notification withCompletionHandler:(void (^)(NSInteger))completionHandler {
    NSDictionary * userInfo = notification.request.content.userInfo;
    if([notification.request.trigger isKindOfClass:[UNPushNotificationTrigger class]])  {
        // iOS 10 Support
        [JPUSHService handleRemoteNotification:userInfo];
    }
    NSLog(@"-------------推送消息4----------------\n%@",userInfo);
    // 需要执行这个方法,选择是否提醒用户,有Badge、Sound、Alert三种类型可以选择设置
    completionHandler(UNNotificationPresentationOptionAlert);
}
iOS10之后,接到通知:亲测,程序在后台、杀死、点击横幅时会调用此方法。
- (void)jpushNotificationCenter:(UNUserNotificationCenter *)center didReceiveNotificationResponse:(UNNotificationResponse *)response withCompletionHandler:(void (^)())completionHandler {
    // Required
    NSDictionary * userInfo = response.notification.request.content.userInfo;
    if([response.notification.request.trigger isKindOfClass:[UNPushNotificationTrigger class]]) {
        [JPUSHService handleRemoteNotification:userInfo];
    }
    NSLog(@"-------------推送消息3----------------\n%@",userInfo);
    completionHandler();
}
iOS10之后,程序在前台时也会显示横幅,所以如果有点击横幅跳制定页面的需求可以写在第二个方法中。
所以是当前台收到消息后,会直接调起第一个方法,同时弹出横幅,如果点击横幅,会调用第二个方法。
iOS7之前,没设备,没测
#pragma mark - iOS7以下 接到推送消息
- (void)application:(UIApplication *)application didReceiveRemoteNotification:(NSDictionary *)userInfo {
    [JPUSHService handleRemoteNotification:userInfo];
    NSLog(@"-------------推送消息1----------------\n%@",userInfo);
}
iOS7之后
#pragma mark - iOS7及iOS7之后 接到推送消息后操作

- (void)application:(UIApplication *)application didReceiveRemoteNotification:(NSDictionary *)userInfo fetchCompletionHandler:(void (^)(UIBackgroundFetchResult))completionHandler {
    NSLog(@"%@",userInfo);
    [JPUSHService handleRemoteNotification:userInfo];
    completionHandler(UIBackgroundFetchResultNewData);
    NSLog(@"-------------推送消息2----------------\n%@",userInfo);
}
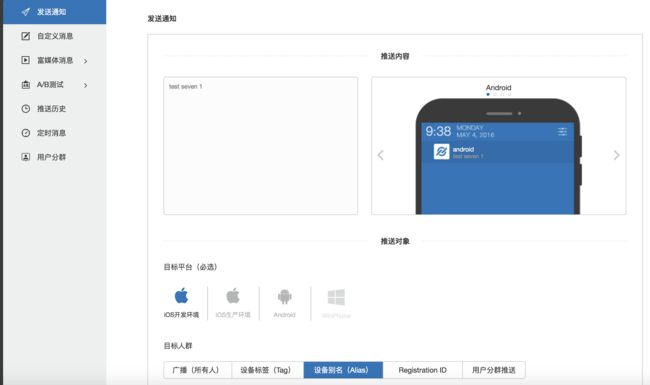
如果有账号的话可以极光的这个推送试一下

这里还可以添加扩展字段,Android有专门的扩展字段获取方法,iOS就直接在收到的
userInfo中
{
    "_j_business" = 1;
    "_j_msgid" = 40532396844772417;
    "_j_uid" = 9734978614;
    aps =     {
        alert = "test seven 1";
        badge = 1;
        sound = default;
    };
    bizType = coupon;
}
自定义消息
自定义消息的接收比较简单,
上面已经说过,只有在前台运行时才能收到通知,但我注意到,当程序在后台或杀死的时候有自定义消息推过来,打开app后依然能够收到。
  // 监听极光推送
    NSNotificationCenter *defaultCenter = [NSNotificationCenter defaultCenter];
    [defaultCenter addObserver:self selector:@selector(networkDidReceiveMessage:) name:kJPFNetworkDidReceiveMessageNotification object:nil];
#pragma mark 极光推动  获取自定义消息
- (void)networkDidReceiveMessage:(NSNotification *)notification {
   NSDictionary * userInfo = [notification userInfo];
   NSString *content = [userInfo valueForKey:@"content"];
   NSDictionary *extras = [userInfo valueForKey:@"extras"];
   NSString *customizeField1 = [extras valueForKey:@"customizeField1"]; //服务端传递的Extras附加字段,key是自己定义的
    ······
    ······
}
也可以通过上面图一中的自定义消息方式发送消息测试。
此方法不一定要在appdelegate,可以放在你希望的位置,切记重复使用。
更新: 2018.07.02
注册(application:didFinishLaunchingWithOptions:)
    JPUSHRegisterEntity * entity = [[JPUSHRegisterEntity alloc] init];
    entity.types = JPAuthorizationOptionAlert|JPAuthorizationOptionBadge|JPAuthorizationOptionSound;
    if ([[UIDevice currentDevice].systemVersion floatValue] >= 8.0) {
        // 可以添加自定义categories
        // NSSet *categories for iOS10 or later
        // NSSet *categories for iOS8 and iOS9
    }
    [JPUSHService registerForRemoteNotificationConfig:entity delegate:self];

    // Optional
    // 获取IDFA
    // 如需使用IDFA功能请添加此代码并在初始化方法的advertisingIdentifier参数中填写对应值
    NSString *advertisingId = [[[ASIdentifierManager sharedManager] advertisingIdentifier] UUIDString];
    // Required
    // init Push
    // notice: 2.1.5版本的SDK新增的注册方法,改成可上报IDFA,如果没有使用IDFA直接传nil
    // 如需继续使用pushConfig.plist文件声明appKey等配置内容,请依旧使用[JPUSHService setupWithOption:launchOptions]方式初始化。
    NSString *appKey =WISDOM?JPUSH_ID_WISDOM:JPUSH_ID_NORMAK;
    [JPUSHService setupWithOption:launchOptions appKey:appKey
                          channel:channel
                 apsForProduction:FALSE
            advertisingIdentifier:advertisingId];
代理
- (void)application:(UIApplication *)application didRegisterForRemoteNotificationsWithDeviceToken:(NSData *)deviceToken {
    [JPUSHService registerDeviceToken:deviceToken];
}

- (void)application:(UIApplication *)application didFailToRegisterForRemoteNotificationsWithError:(NSError *)error {
    NSLog(@"did Fail To Register For Remote Notifications With Error: %@", error);
}

#pragma mark iOS 10 Support  添加处理APNs 通知回调方法 通知 程序在前台的时候,调起此方法
- (void)jpushNotificationCenter:(UNUserNotificationCenter *)center willPresentNotification:(UNNotification *)notification withCompletionHandler:(void (^)(NSInteger))completionHandler  API_AVAILABLE(ios(10.0)){
    NSDictionary * userInfo = notification.request.content.userInfo;
    if([notification.request.trigger isKindOfClass:[UNPushNotificationTrigger class]]) {
        [JPUSHService handleRemoteNotification:userInfo];
    }
    NSLog(@"-------------推送消息4----------------\n%@",userInfo);
    completionHandler(UNNotificationPresentationOptionAlert); // 需要执行这个方法,选择是否提醒用户,有Badge、Sound、Alert三种类型可以选择设置
}

#pragma mark iOS 10 Support 通知 程序在后台 杀死 点击横幅时 调用此方法
- (void)jpushNotificationCenter:(UNUserNotificationCenter *)center didReceiveNotificationResponse:(UNNotificationResponse *)response withCompletionHandler:(void (^)(void))completionHandler  API_AVAILABLE(ios(10.0)){
    // Required
    NSDictionary * userInfo = response.notification.request.content.userInfo;
    if([response.notification.request.trigger isKindOfClass:[UNPushNotificationTrigger class]]) {
        [JPUSHService handleRemoteNotification:userInfo];
    }
    NSLog(@"-------------推送消息3----------------\n%@",userInfo);
    completionHandler();
}

#pragma mark - 通知清零 iOS7以下 接到推送消息
- (void)application:(UIApplication *)application didReceiveRemoteNotification:(NSDictionary *)userInfo {
    [UIApplication sharedApplication].applicationIconBadgeNumber=0;
    [[UIApplication sharedApplication] cancelAllLocalNotifications];
    [JPUSHService handleRemoteNotification:userInfo];
    NSLog(@"-------------推送消息1----------------\n%@",userInfo);
}

#pragma mark - iOS7及iOS7之后 接到推送消息后操作

- (void)application:(UIApplication *)application didReceiveRemoteNotification:(NSDictionary *)userInfo fetchCompletionHandler:(void (^)(UIBackgroundFetchResult))completionHandler {
    NSLog(@"%@",userInfo);
    [JPUSHService handleRemoteNotification:userInfo];
    completionHandler(UIBackgroundFetchResultNewData);
    NSLog(@"-------------推送消息2----------------\n%@",userInfo);
}
注册Alias (之前没有写这一步) 文档地址
注册了这一步,就可以不使用registrationID,而使用alias来进行推送,
我这里是加在了登录成功之后,使用用户名作为alias。
[JPUSHService setAlias:userName completion:^(NSInteger iResCode, NSString *iAlias, NSInteger seq) {
            NSLog(@"\n----------------%@----------------",iAlias);
        } seq:1];
自定义消息没变