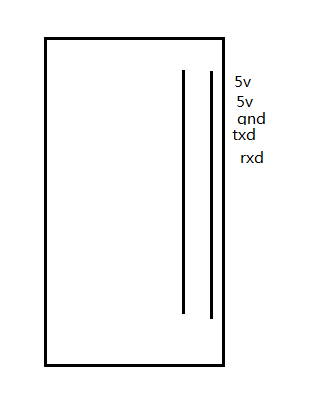
1、串口连接
这种方式在我树莓派的第一篇博客有讲,这里我简单介绍。
连接树莓派,树莓派GPIO串口的GND,txd,rxd分别与转接口的GND,rxd,txd相连,用的什么转接模块我不管,反正最后得变成一个USB的接口接在电脑上,并在电脑设备管理器上的端口选项可以发现它,用Serial登录。
串口登录没有多色高亮,所以用wifi登录,配置文件路径在路径为/etc/wpa_supplicant/wpa_supplicant.conf。
可以用PUTTY登录,我用的是新版的secureCRT。
串口线有4根,黑色表示gnd。红色vcc,另外的绿色和白色表示rxd和txd(顺序未知)。根据测试表明为rxd接到板子上的txd.另个绿色一则相反为txd.使用Serial登录。选择对应的COMx,选择波特率为115200。
系统默认的用户名为pi,密码为raspberry
Serial登录之后配置ssh。这里我事先配置过了,查看ip的命令为ifconfig.得到共享热点为树莓派分配的ip为192.168.43.67。。使用putty第一次ssh登录树莓派,电脑会弹窗警告。点击是即可。
使用nano编辑器对配置文件修改。
启用或者禁用使用SSH远程终端登录你的树莓派。
SSH允许你在另外一台计算机上使用命令行终端远程登录你的树莓派。禁用将会导致SSH服务不会在开机的时候启动以释放程序的资源。注意SSH默认是启用的。如果你的树莓派直接连接到公共网络,你应该禁用SSH,除非你确认已经为树莓派上每一个用户设置了密码。
/boot放置Linux内核以及其他用来启动树莓派的软件包
/bin放置与Raspbian有关(包括运行图形界面所需的)的二进制可执行文件
/dev这是虚拟文件夹之一,用来访问所有连接设备,包括存储卡
/etc系统管理和配置文件
/homeLinux上的我的文档,包含用户名命名的文件夹
/lib各种应用需要的代码库
/lost+found一般情况下是空的,当系统非法关机后,这里就存放了一些文件
/media放置可移动存储驱动器,比如USB和CD
/mnt用来手动挂在外部硬件驱动器或存储设备
/opt可选软件文件夹,非系统部分的软件将会放置在这里
/proc另一个虚拟文件夹,包含运行进程(或程序)的信息
/selinux由美国国家安全局开发的安全工具,用于增强Linux安全性
/sbin放置超级用户使用的系统管理命令
/sys放置操作系统文件
/tmp放置临时文件
/usr放置用户使用的程序
/var虚拟文件,用于程序保存数据
***********************************
使用cd /boot实现文件路径跳转。在使用ls列出改路径下的文件夹和文件。用绿色的着色表示文件,蓝色的着色表示文件夹。
cd overlays,直接跳转到该文件夹下。cd /表示跳转到根目录下。
跳到自己的 home 目录 :
cd ~
在根目录下用ls列出所有文件和文件夹。
bin dev home lost+found mnt proc run srv tmp varcd boot ect lib media opt root sbin sys usr
cd ..表示向高层回跳一级。
在根目录下使用
cd /home 之后使用cd pi得到的结果和cd ~的结果是完全相同的。
******************************
Linux cd命令用于切换当前工作目录至 dirName(目录参数)。
其中 dirName 表示法可为绝对路径或相对路径。若目录名称省略,则变换至使用者的 home 目录 (也就是刚 login 时所在的目录)。
另外,"~" 也表示为 home 目录 的意思,"." 则是表示目前所在的目录,".." 则表示目前目录位置的上一层目录。
Linux ls命令用于显示指定工作目录下之内容(列出目前工作目录所含之文件及子目录)。
ls -R列出文件夹下的路径及文件。
语法
**********************
Linux mkdir命令用于建立名称为 dirName 之子目录。
mkdir sangshu,在pi下面建立一个sangshu的文件夹。该命令用于创建文件夹目录。
使用nano编辑器,nano anbao.txt,输入内容退出保存,提示保存,按y.再回车确定即可。(原先没有文件将创建输入的文件名的文件)
将工作目录下,名为 AAA 的子目录删除 :
rmdir AAA;;;rmdir shu.vim(这是一个文件夹目录);;不能删除文件,只能是文件夹目录。
rm可以用来删除文件。rm anbao.txty;;;;
使用who命令查看谁登陆过该系统。
***************************************************
find home返回所有home的子路径文件。这样只能查询下一级的文件。下下级将不能查找到。
Linux find命令用来在指定目录下查找文件。任何位于参数之前的字符串都将被视为欲查找的目录名。如果使用该命令时,不设置任何参数,则find命令将在当前目录下查找子目录与文件。并且将查找到的子目录和文件全部进行显示。
find . -name "*.c"返回当前目录下的.c文件。find . .-name "*.c"上一级路径下的.c文件。
路径为/etc/wpa_supplicant/wpa_supplicant.conf
直接使用nano不被允许打开,使用sudo nano wpa_supplicant.conf即可。
修改密码之后如果使用ssh登陆仍然不会断开,使用wifi重启命令将会使其断开。
在配置文件路径下使用重启wifi命令失败,sudo service network restart。。。
在pi路径和根目录下仍然失败。那就使用sudo reboot吧
进入python之后使用quit()即可退出python重新进入home界面。
输入python2和python3进入各自程序。
******************************************************
sudo vi wpa_supplicant.conf进入vi命令模式之后
打开vim使用命令为vi。。使用冒号:加关键字写入vi命令模式。
:w //保存文件
:q //退出编辑器,如果文件已修改请使用下面的命令
:q! //退出编辑器,且不保存
:wq //退出编辑器,且保存文件
vi有3个模式:插入模式、命令模式、低行模式。
*****************************
a //在当前光标位置的右边添加文本
i //在当前光标位置的左边添加文本
A //在当前行的末尾位置添加文本
I //在当前行的开始处添加文本(非空字符的行首)
O //在当前行的上面新建一行
o //在当前行的下面新建一行
R //替换(覆盖)当前光标位置及后面的若干文本
J //合并光标所在行及下一行为一行(依然在命令模式)
这几个键将改变命令模式为插入模式。esc将是插入模式退为命令模式,再使用:u
撤销一步。
插入文本或行(vi命令模式下使用,执行下面命令后将进入插入模式,按ESC键可退出插入模式)
命令模式下的上下左右键才有意义。插入模式下没有方向键无意义。
dd //删除当前行
***************************
NAS(Network Attached Storage:网络附属存储)按字面简单说就是连接在网络上,具备资料存储功能的装置,因此也称为"网络存储器"。它是一种专用数据存储服务器。
直接在根目录下用mkdir share无法成功,用sudo mkdir share才行。如果目录已经存在的话将无法再创建一个同名字的目录。报错files exist
***********************************
Linux/Unix 的文件调用权限分为三级 : 文件拥有者、群组、其他。利用 chmod 可以藉以控制文件如何被他人所调用。
使用权限 : 所有使用者
此外chmod也可以用数字来表示权限如 :
chmod 777 file
语法为:
chmod abc file
其中a,b,c各为一个数字,分别表示User、Group、及Other的权限。
r=4,w=2,x=1
若要rwx属性则4+2+1=7;
若要rw-属性则4+2=6;
若要r-x属性则4+1=5。
********************************
设置一个公共目录
cd /;sudo mkdir share;sudo chmod 777 share
sudo vim /etc/samba/smb.conf
在最后添加:
[share]
comment = pi share
path = /share
browseable = yes
read only = no
writable = yes
public = yes
6.重启samba服务使之生效
sudo service smbd restart,重启失败。这命令不能实现。
sudo shutdown 关机,sudo shutdown -c关机取消。。。
****************************************
whereis python查询命令的方式。
Ctrl+D, 或 Quit[]退出wolfram的文本界面,https://reference.wolfram.com/language/tutorial/UsingATextBasedInterface.html,文本界面的使用命令。
***********************************************
环境变量,用分号隔开。最后一位没有分号,如需添加新的环境变量,继续加上分号和路径。。
D:\Python\Python36-32\Scripts\;
D:\Python\Python36-32\;
%SystemRoot%\system32;
%SystemRoot%;
%SystemRoot%\System32\Wbem;
%SYSTEMROOT%\System32\WindowsPowerShell\v1.0\;
C:\Program Files (x86)\Wolfram Research\WolframScript\;
D:\MATLAB\R2018a\runtime\win64;
D:\MATLAB\R2018a\bin
在dos下的快捷启动,python,MATLAB,wolframscript
**************************************************
添加多个wifi连接,/etc/wpa_supplicant/wpa_supplicant.conf修改再下面添加一个新的。
sudo poweroff关机
sudo reboot重启
sudo raspi-config配置界面。
whoami输出用户,cd,cat,mkdir,ls,pwd..
calendar返回历史事件。。
cd和cd ~的作用相同。。
pi账户必须用sudo才能执行某些命令。。获取root账户即可。。
BAD PASSWORD: it is based on a dictionary word”这是因为出现了字典里的字符串。
如果你采用英文与数字组合使用,且长度在6位以上,就不会报错。
sudo apt-get dist-upgrade更新软件。。
sudo apt-get install ****
E:unable to fetch some aechives 可能是网络原因。。
python -V默认python2
Python 2.7.13
pi@raspberrypi:~ $ python3 -V大写。。
Python 3.5.3
$ nano -V版本返回
sudo apt-get install python nano软件之间用空格隔开。。
python是解释型而不是编译型语言。。
ctrl+d或quit()或者exit()退出python3,,help()进入help>int,退出函数查询按q,退出help,。ctrl+d或者quit()。
$ cat py3prog/sample.py
print("here is the line dog.")
pi@raspberrypi:~ $ python3 py3prog/sample.py
here is the line dog.
g,x,o,nano编辑器帮助,退出,写入。
\u03c0是pi..unicode
*****************************************
import keyword关键字打出来。。
>>> print("keyword.kwlist")
keyword.kwlist
>>> print(keyword.kwlist)
['False', 'None', 'True', 'and', 'as', 'assert', 'break', 'class', 'continue', 'def', 'del', 'elif', 'else', 'except', 'finally', 'for', 'from', 'global', 'if', 'import', 'in', 'is', 'lambda', 'nonlocal', 'not', 'or', 'pass', 'raise', 'return', 'try', 'while', 'with', 'yield']
print("12","56","89",sep='*')这种用法。。print("1256","89",end='!\n'),,sep和end的用法。。
type("456")返回数据类型。。
a=input("请输入:")
请输入:56
>>> type(a)
b=int(a)
>>> type(a)
>>> type(b)
*****************
0b01001110二进制表示。。
c=a&b
>>> bin(c)
'0b1000101'
>>> oct(c)
'0o105'
>>> hex(c)
'0x45'
chmod +x script0401.py之后变为绿色。。修改权限
chmod u+x script0401.py
**************************************
脚本语言的第一行,目的就是指出,你想要你的这个文件中的代码用什么可执行程序去运行它
#!/usr/bin/python是告诉操作系统执行这个脚本的时候,调用/usr/bin下的python解释器。
#!/usr/bin/env python这种用法是为了防止操作系统用户没有将python装在默认的/usr/bin路径里。当系统看到这一行的时候,首先会到env设置里查找python的安装路径,再调用对应路径下的解释器程序完成操作。这种写法会去环境设置寻找python目录
print("12233{}".format(12))
1223312
>>> print("12233{}".format("56")),,format的用法。。
1223356
a=5.2*9;
>>> print("fggg{}".format(a))
fggg46.800000000000004
>>> print("fggg{0:.2f}".format(a))
fggg46.80
分数对象,,from fractions in Fraction
b=Fraction(1,5)
>>> b
Fraction(1, 5)
>>> print(b)
1/5
*************************
b=Fraction(5.5)
>>> print(b)
11/2
print(complex(1,2))
(1+2j)
math.factorial(5)阶乘。。
ceil,copysign,,fabs,factorial,floor,fmod,frexp,fsum,isfinite,isinf,isnan,ldexp,modf,trunc
from math import *,星号必须加上。。或者import math 使用math.ceil()
math+点+函数这种。。
math.fsum([1,2,3])
> x=-2
>>> y=6
z=math.copysign(y,x)
>>> z
-6.0
*********************************
math.fmod(5,3)
2.0
**************************
第一种,,pip3 install numpy
第二种采用源码安装:步骤如下:
1.下载源码包:
wget http://jaist.dl.sourceforge.net/project/numpy/NumPy/1.9.0/numpy-1.9.0.zip
2.解压
unzip numpy-1.9.0.zip
3.进入解压目录
cd numpy-1.9.0
4.运行解压目录里的setup.py 文件(root环境下)
python setup.py install
用nano编写python程序时注意if(x>0):空出4个空格。。tab键不对。。
x="35"判断能否转换为数字。。
>>> x.isdigit()
x="jk"
>>> x.isdigit()
False
for letter in 'Python':print(letter)
for letter in [1,2,3,6,8]:注意格式。。
... print(letter)
**********************
for i in range(1,5):
... print(i)--0***4
for i in range(5):
... print(i)--1***4
******************
for i in range(1,5,2):2为步长。。
... print(i)
在idle中,用死循环,while True:print(1),一直刷屏,怎么退出,ctrl+c,退出循环或者ctrl+z,直接退出python idle。。
tuplel=()
>>> print(tuplel)
(),,,, type(tuplel)
tuple([*,*,*,*])元组是不可改变的。。不能添加和删除值。。可以访问,
tuole6=(1,2,3,4)
>>> print(tuole6[2])
print(tuole6[1:3])
(2, 3)一侧省略表示剩下全部,,print(tuole6[1:])
> print(tuole6[1::2])加上步长。。
(2, 4)
*************************************
len(tuole6)获取元组的长度,,if 3 in tuole6:判断值是否在元组中,,
4
min,max
(1,2,2)+(5,8,9)元组加法。。
(1, 2, 2, 5, 8, 9)
**********************
列表是可变的,,
list1=[],,
tuple11=1,2,3,4,5
list(tuple11)或者tuple(tuple11)创建列表和元组。。
元组和列表都可以使用负数作为索引。。[*:*:*]切片来提取子列表
list1[1]=10,修改列表第二项的值。。
list1[1:3]=1,6
opl=4,0,2,type(opl),tuple类型。。用元组修改列表,,
del list1[1]
>>> list1
[1, 0, 9],,,,del list1[1:3]
list6.pop(5),弹出列表值,原列表该值删掉。
list6.pop()默认最后一个数。。
list1.append(5)
>>> list1
[1, 5]
list1.insert(0,"a")
>>> list1
['a', 1, 5]
append和pop堆栈操作,先入后出,list1=[10,20,30],list1.pop(),list1.pop(),list1.pop(),弹3次分别出来30,20,10
[1,2,3]+[4,5,6]
list5.append([5,6])
>>> list5
[1, 2, 3, [5, 6]]
list5.extend([7,0]),合并列表格式,去掉嵌套列表。。
>>> list5
[1, 2, 3, [5, 6], 7, 0]
*******************
list5=[1,2,3,4,1,2,3,5]
>>> list5.count(1)
list5.sort(),,,,sort()和sorted的用法,list5.sort(),,,sorted(list5),reversed(list5)
>>> list5
[1, 1, 2, 2, 3, 3, 4, 5],,,, list5.index(5)
7,,,给出索引号码。。
list13=[[1,2,3],[4,5,6],[7,8,9]]
reversed(list5)
>>> sorted(list5)
[1, 1, 2, 2, 3, 3, 4, 5],,,,注意reversed的返回值不是列表。。用遍历访问或者换为list5.reverse()
print(reversed(list5))
[1, 1, 2, 2, 3, 3, 4, 5]
>>> list5.reverse()
>>> list5
[5, 4, 3, 3, 2, 2, 1, 1],,,list5.reverse()可以直接返回倒序列表。。
******************************
创建列表,列表解析法。。
list6=[x*2 for x in list5]
>>> list6
[10, 8, 6, 6, 4, 4, 2, 2]
*********************
> list5=["a","g","i","l"]
>>> list6=[x.upper() for x in list5]
>>> list6
['A', 'G', 'I', 'L']
*********************
list7=[x.lower() for x in list6]
>>> list7
['a', 'g', 'i', 'l']
************
range5=range(5)
>>> print(range5)
range(0, 5),,range像列表一样是一种类型。。只能单个引用或遍历显示。。
python2中range()属于list,python3成为一种新的类型。。
student={}
>>> type(student)
定义字典是无序排列的。。
student["8"]=56
>>> student
{'h': '8', 1: 2, 'l': 7, '8': 56}。。。
student[1]
2
>>> student["8"]
56
>>> student["h"]值通过键得获取。。字典是不能使用例如index()这样的函数,因为位置在字典中并不重要。。关联才是重要的。。
student.get("k","not found")。字典get函数的可选参数。。
'not found'
>>> student.get("k")
****************************
lik9=student.keys()
>>> lik9
dict_keys(['h', 1, 'l', '8'])
>>> type(lik9)
for i in lik9:
... print(i,end=" ")
... student[i]
*******************
ron={"1":5,"8":9,"5":"k"}
>>> op0=ron.keys()
>>> sorted(op0)
['1', '5', '8']键值必须是同一种数据类型,才能用sorted()排序。。用op0.sort()是错误的。。因为键值列表类型不同于列表的新类型。。使用sorted(键列表)就成为了真正的列表。。
type(op0);l9=sorted(op0)
>>> l9
['1', '5', '8'],,
字典的键不能更改,值可以,
student
{'h': 'p', 1: 'p', 'l': 'p', '8': 'p'}
>>> student["0"]="p"
>>> student
{'h': 'p', 1: 'p', 'l': 'p', '0': 'p', '8': 'p'},,不存在的键,自动添加进去。。
del student["0"]
>>> student
{'h': 'p', 1: 'p', 'l': 'p', '8': 'p'},删掉一组关联。。
字典组建过程中可能碰巧产生排序。字典不强调位置。如果需要按序号打印,注意使用sorted()对键表(新的类型)排序产生由键值组成的新真正列表。
for i in range(5):
... print(i,end=" ")
... type(i)
...
0
1
2
3
4
用str(i)强制转换数据为字符串类型。
dict3={4:9}
>>> dict2.update(dict3)
>>> dict2
{1: 5, 4: 9, 5: 6},,注意字典update()的用法,,
temp_list=may_high_temp.values(),values()是值。
temp_list
dict_values([1, 2, 3, 4, 5, 6, 7, 8, 9, 10, 11, 12, 13, 14, 15, 16, 17, 18, 19, 20, 21, 22, 23, 24, 25, 26, 27, 28, 29, 30, 31])
>>> max_temp=max(temp_list)
5.3 Counter.most_common(n)
使用most_common(n)返回一个list, list中包含Counter对象中出现最多前n个元素。
Counter(temp_list)
Counter({1: 1, 2: 1, 3: 1, 4: 1, 5: 1, 6: 1, 7: 1, 8: 1, 9: 1, 10: 1, 11: 1, 12: 1, 13: 1, 14: 1, 15: 1, 16: 1, 17: 1, 18: 1, 19: 1, 20: 1, 21: 1, 22: 1, 23: 1, 24: 1, 25: 1, 26: 1, 27: 1, 28: 1, 29: 1, 30: 1, 31: 1})转换为counter类
使用most_common(n)返回一个list, list中包含Counter对象中出现最多前n个元素。
>>> c = Counter('abracadabra')>>> c
Counter({'a': 5,'b': 2,'r': 2,'d': 1,'c': 1})>>> c.most_common(3)
[('a', 5), ('b', 2), ('r', 2)]
mode_list
[(8, 8)]
>>> Counter(temp_list)
Counter({8: 8, 9: 5, 2: 4, 6: 3, 4: 3, 5: 3, 7: 2, 3: 2, 1: 1})
>>> mode_list[0]
(8, 8)
>>> mode_list[0][1]
8
>>> mode_list[0][0]
8
**********************************
c = Counter('abracadabra')
>>> c
Counter({'a': 5, 'b': 2, 'r': 2, 'c': 1, 'd': 1})
c.most_common(1)
[('a', 5)]从中拿出来数据
b=c.most_common(1)
>>> b[0]
('a', 5)
>>> b[0][1]
5
>>> b[0][0]
'a'
>>>
集合,,> jihe1=set()
>>> type(jihe1)
jihe1.add("4")
******************
jihe2=set([1,5,6,8])
>>> jihe2
{8, 1, 5, 6}
type({1,2,6})
*****************************
{1,2,3}.union({8,9,6})
{1, 2, 3, 6, 8, 9}
{1,2,3,2}.union({1,8,6})
{1, 2, 3, 6, 8},,,并集自动将相同变量置为一个。。
{1,2,3,2}.intersection({1,8,6})交集
{1}
{1,2,3,2}.difference({1,8,6})差集
{2, 3}
******************************
{1,2,3,2}.symmetric_difference({1,8,6})对称差集
{8, 2, 3, 6}
sorted会将集合变为列表,之前的字典键列表中变为真正列表。。
sorted({1,2,3,6})
[1, 2, 3, 6]。。。
****************************
a={1,2,3,4}
>>> a.update([1,5,6,9])
>>> a
{1, 2, 3, 4, 5, 6, 9}
>>> a.remove(9)
>>> a
{1, 2, 3, 4, 5, 6}
a.discard(4)
>>> a
{1, 2, 3, 5, 6}
discard不抛出异常,而remove会抛出异常。。
update可以一次多个元素,update([1,2,3])而remove只能一个remove(1),,remove([1,2])是错误的。。
a={1:2,5:9}
>>> a.pop(1)。。。pop(键)关联被删掉。
2
>>> a
{5: 9}
****************************
{1,2}.issubset({1,2,6,4,8})
True
a={1:5,6:9}
a.clear()清空字典。
a={1:9,8:10,7:6}
>>> a.items()返回键值对
dict_items([(8, 10), (1, 9), (7, 6)])
>>> sorted(a.items())
[(1, 9), (7, 6), (8, 10)]
b=sorted(a.items())
>>> b[0]
(1, 9)
unicode格式使用2个字节存储字符,比ascii格式容纳更多的文本,可以支持多种不同的语言。。
binarys1=b'123456'
>>> print(binarys1)
b'123456'
>>> print(binarys1[0])
49
>>> print(binarys1[1])
50
print(chr(binarys1[1]))
2
**********************
print("\'")
'
************************
> a="this is a "
>>> a[3]
's'
>>> a[4]
' '
*******************
a[3]="d"是不能改变字符串的内容的。。
print(a[3:6])
s i
a.replace("i","d")
'thds ds a '
> a.split()以空格分开。。
['this', 'is', 'a']
''.join(["1","2","3"])
'123'
>>> ' '.join(["1","2","3"])
'1 2 3'
'/'.join(["1","2","3"])。。。'分割符号'join([列表])
'1/2/3'
************************************
a=12
>>> a.isdigit()报错
a="12"
>>> a.isdigit()正确isdigit()是不能直接使用的,,点+digit()才是对的。。用来判断是否为数字字符串。
a="this is a girl"
>>> "i" in a
True
"is" in a
True
> a.find("th")
0
>>> a.find("h")
1
a.find("l")
13
>>> a.find("p")没有改字符的话返回-1
-1
> a.find("i")
2
>>> a.find("i",3,)多处位置存在"i",因为他只返回第一次出现的索引。。
5
a.find("i",6,)
11
a.rfind("i")从右往左查询"i"..
11
a.index("i")
2
>>> a.index("i",6)
11
a.count("i")
3
"1 2 {}".format(10)
'1 2 10'
"1 2 {} {}".format(10,"j")
'1 2 10 j'
"1 2 3 {dd}".format(dd=89)
'1 2 3 89'
>>> "1 2 3 {dd}".format(78)报错
"1 2 3 {0}".format(78)正确。。
'1 2 3 78'
"this is pi {}".format(3.1419926)
'this is pi 3.1419926'
"this is pi {0:.2f}".format(3.1419926)
'this is pi 3.14'
"{0:x}".format(56)
'38'
************************************
"{0:b}".format(56)
'111000'
"{0:+}".format(85)负号是不行的。。
'+85'
"{0:.2f}".format(12.365)
'12.37'
"{0:+.2f}".format(12.365)
'+12.37'
>>> "{0:.2f}".format(12.364)
'12.36'
*******************************
"this{0:>10d}".format(12)空出10个空格。。
'this 12'
"\u0020"为Unicode的Unicode转义编码。。为空格的编码。。
' '
> "A".casefold()
'a'
>>> "是".casefold()特殊字符也是可以的,大写转小写。。
'是'
caplitalize,, 'this'.capitalize()
'This'
*******************************
"vd".isalnum()
True
>>> "vd1".isalnum()
True
>>> "vd1*".isalnum()
False
*******************************************
os函数允许你使用各种操作系统的功能,如创建目录,os并不是python的内建函数,使用需要import os
import os
>>> os.getcwd()
'/home/pi'
os.mkdir('MyNewDir')
>>> os.chdir('MyNewDir')更改为当前工作目录
>>> os.getcwd()提供当前目录的绝对目录引用。。
'/home/pi/MyNewDir'
> os.mkdir('/home/pi/data')创建data文件目录,,
os.getcwd()
'/home/pi/data'
temp_file=open('2015.txt','w'),,w打开文件写入,不存在就创建。。
a,r,w,,open的三个可选参数。。r+,rb+,wb,,,,+号和文件指针有关。。
temp_file=open('2015.txt','w')这里没有使用绝对路径。。
>>>
KeyboardInterrupt
>>> temp_file.closed
False
temp_file.mode
'w'
temp_file.name不会返回绝对路径。。
'2015.txt'
os.getcwd()
'/home/pi/data'
os.getcwd()
'/home/pi'
file2=open("/home/pi/data/2015.txt",'r')这里使用了绝对路径
>>> file2.mode
'r'
file2.name
'/home/pi/data/2015.txt'返回完整路径
********************************
file2=open("2015.txt","r")
>>> file2.name
'2015.txt'
>>> file2.read()
'this is a girl.\nGit is a control system.\n'
*********************
file3=file2.read()
>>> type(file3)
> file3=file2.read(),,,,file2.read()使用一次就会不起作用。。。
>>> file3
'this is a girl.\nGit is a control system.\n'
>>> file3[0]
't'。。。。。 file3[0:7]
'this is'
***********************************
file3=file2.readline()
>>> file3[0]
't'
>>> file3
'this is a girl.\n'
*******************************
file2.readline()
'Git is a control system.\n'
>>> file2.readline()
''
********************************
file2=open('2015.txt','r')
>>> for i in range(1,3):
... kk=file2.readline()
... print(kk,end='')
...
this is a girl.
Git is a control system.
*************************************
kk=file2.readline()
>>> kk
'this is a girl.\n'
>>> kk1=file2.readline()
>>> kk1
'Git is a control system.\n'
read()读取太慢,一次接收所有字符,readline()逐行读取。。
这里的换行符被end=''干扰就可以避免产生双倍行距。。。
rstrip
***********************
for i in range(1,3):
... kk=file2.readline()
... kk=kk.rstrip('\n')是删除掉换行符与上面end=''抑制是不同的。。
... print(kk)
...
this is a girl.
Git is a control system.
*****************
for i in range(2):
... print("122",end='')表示不换行
... print("456")
...
122456
122456
*******************************
for i in range(2):
... print("122")换行了
... print("456")
...
122
456
122
456
***************************
"1223\n".rstrip('\n')
'1223'
.tell()表示当前文件的指针位置。。每个指针表示要读取的下一个字符。。
file2=open('2015.txt','r')
>>> file2.tell()
0
****************************************
file2.readline();file2.tell()
'this is a girl.\n'
16
最初的文件指针设置为0,即文件的开头。。
file2=open('2015.txt','r')
>>> file3=file2.read(2)
>>> file3
'th'
th'
>>>
KeyboardInterrupt
>>> file2.tell()
2
file2.read(2)
'is'
>>> file2.read(2)
' i'
file2.seek(0)
0
>>> file2.read(2)
'th'
read(文件指针)和seek(文件指针)可以指定不按顺序读取文件。。
touch 2016.txt。。。。创建一个空2016.txt文件。。
pi@raspberrypi:~/data $ ls
2015.txt 2016.txt
******************
echo "sss">>2016.txt直接写入2016.txt,,单个>会删掉原文本,>>则会从上往下写。。
os.listdir()
['2016.txt', '2015.txt']列出当前工作目录下的文件名。
*******************************
file2=open('2015.txt','r')
>>> for i in file2:
... print(i,end='')
...
this is a girl.
Git is a control system.什么read*()都不用,这种做法直接读取。。
****************************************************
os.getcwd()
'/home/pi'
>>> os.chdir('/home/pi/data')
>>> os.getcwd()
'/home/pi/data'
os.listdir()
['2016.txt', '2015.txt']
os.chdir('/home/pi/data')
>>> os.listdir()
['2016.txt', '2015.txt']
**********************************************************
文件打开在退出程序之前,一定要关闭。
file2=open('2015.txt','r')
>>> file2.closed
False
>>> file2.close()
>>> file2.closed
True
文件关闭可以使写缓存写入文本中,不关闭直接打开另一个的文件的话,写缓存的内容就会丢失。。。
file2=open('2014.txt','w')又写入了一个2014.txt文件。。
>>> os.listdir()
['2016.txt', '2014.txt', '2015.txt']
如果原来存在2015.txt且有内容,file2=open('2015.txt','w'),这将导致原文件内容被清空。。写模式会移除内容。。
lstrip()和rstrip()
open('2015.txt','a'),,模式a将文件指针指向文件末尾。。.write方法就会从文件末尾开始写入数据。。文件不会丢失任何数据。。
file2.seek(0),,,,,定位文本的指针。。
w+,,,,,,可读可写,指针开头,覆盖原有内容,a+可读可写,指针指向尾部,没有文件的话会创建。。
r+可读可写,指针开头,覆盖原有内容,没有文件的话,打开失败。。不会创建文件。。。
.tell()会告诉文本指针的位置。。

