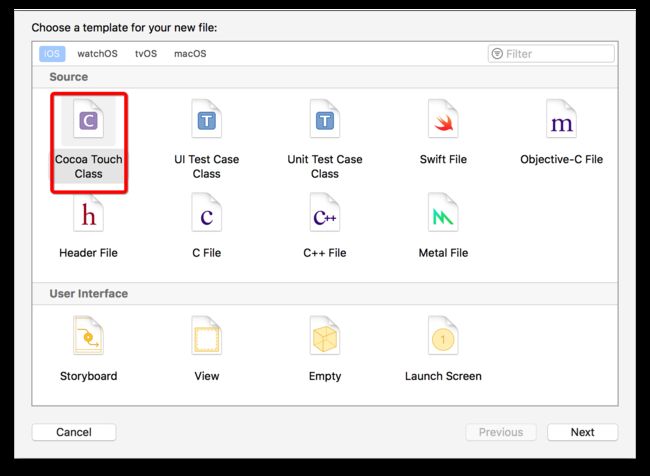
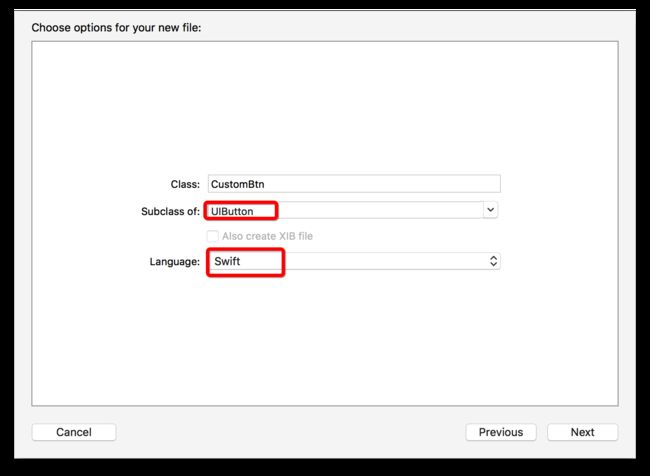
第二步:
第三步:写代码咯
import UIKit

class CustomBtn: UIButton {

    override init(frame: CGRect) {

        super.init(frame: frame)

        setTitleColor(UIColor.red, for: UIControlState.normal)
        setImage(UIImage(named:"qrcode_tabbar_icon_qrcode_highlighted"), for: UIControlState.normal)
        setImage(UIImage(named:"qrcode_tabbar_icon_qrcode_highlighted"), for: UIControlState.highlighted)
        titleLabel?.textAlignment = NSTextAlignment.center
        sizeToFit()

    }


    required init?(coder aDecoder: NSCoder) {
        fatalError("init(coder:) has not been implemented")
    }

    override func layoutSubviews() {
        super.layoutSubviews()

        imageView?.LYW_width = LYW_width * 0.6
        imageView?.LYW_height  = (imageView?.LYW_width)!
        imageView?.LYW_Y = LYW_height*0.1
        imageView?.LYW_centerX = LYW_width * 0.5

        titleLabel?.LYW_width = LYW_width
        titleLabel?.LYW_Y = (imageView?.LYW_bottomY)!
        titleLabel?.LYW_X = 0
        titleLabel?.LYW_height = LYW_height - (titleLabel?.LYW_Y)!
    }

}
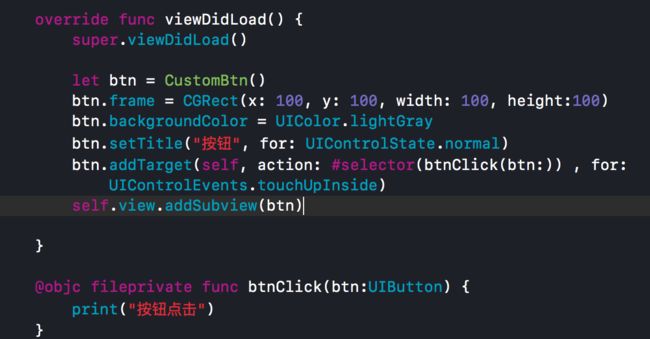
使用:
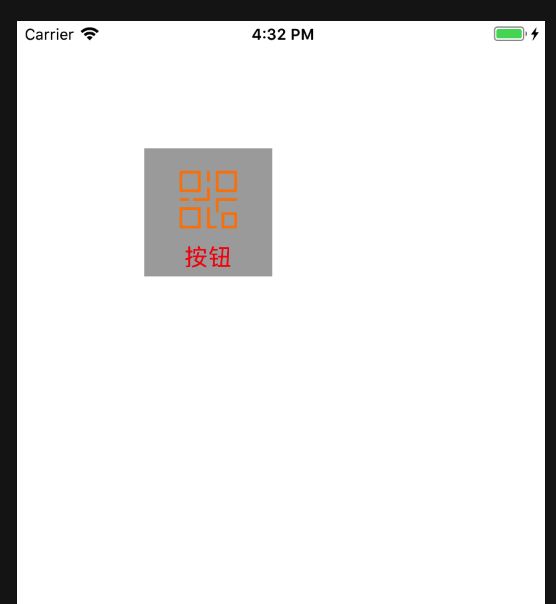
效果:图片在上,文字在下(可以根据自己的需求设置图片和文字的位置,默认是图片在右边,文字左边)
这个依赖我给UIView写的分类
代码留给你https://gitee.com/lanyingwei/codes/ebx5hj6q3d1vsop7zrmlt98
扩展:另外一种写发不需要依赖我写的那个分类
只需要按照上面的步骤,到第三步的时候代码不一样而已
import UIKit

class LYWVerticalBtn: UIButton {

    override init(frame: CGRect) {
        super.init(frame: frame)

        seutpUI()
    }

    required init?(coder aDecoder: NSCoder) {
        fatalError("init(coder:) has not been implemented")
    }


    override func layoutSubviews() {
        super.layoutSubviews()
        if imageView == nil {
            return
        }
        imageView?.frame = CGRect(x: self.frame.width*0.5 - imageView!.frame.width*0.5, y: 0, width: imageView!.frame.width, height: imageView!.frame.height)
        titleLabel?.frame = CGRect(x: 0, y: imageView!.frame.size.height, width: frame.width, height: frame.height - imageView!.frame.height)
    }

}

// 你可以在这里设置一些需要的属性
extension LYWVerticalBtn{

    fileprivate func seutpUI() {
        titleLabel?.textAlignment = .center
    }
}
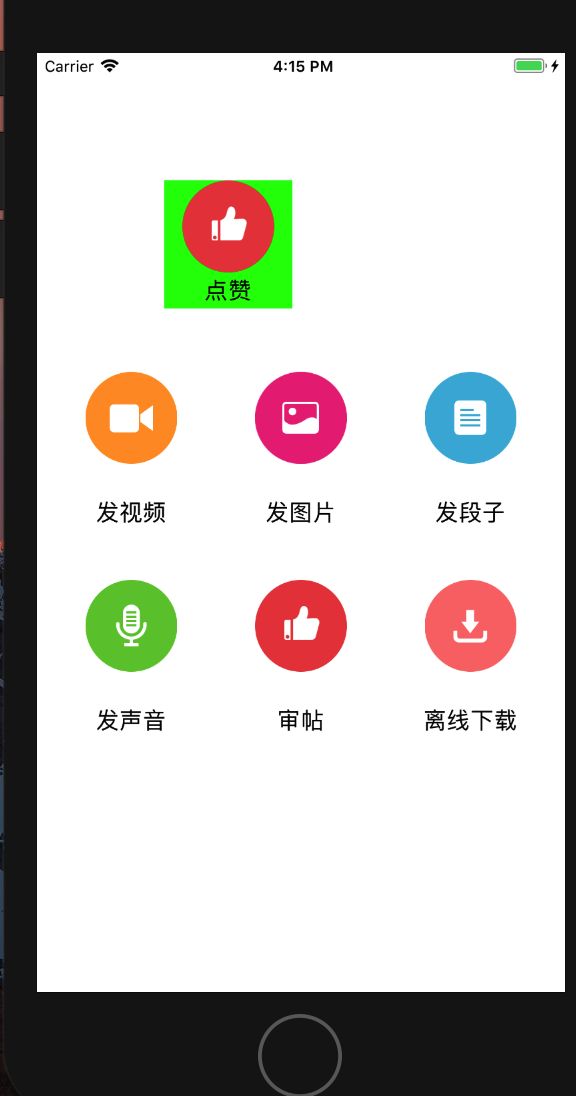
使用方法
        let button = LYWVerticalBtn()
        button.backgroundColor = UIColor.green
        button.setTitle("点赞", for: .normal)
        button.setTitleColor(UIColor.black, for: .normal)
        button.setImage(UIImage.init(named: "publish-review"), for: .normal)
        button.frame = CGRect(x: 100, y: 100, width: 100, height: 100)
        view.addSubview(button)
效果图
建议自己扩展写九宫格
偷偷把九宫格代码留给你哈哈哈
extension ViewController{
    func setupButton() {

        let images = ["publish-video","publish-picture","publish-text","publish-audio","publish-review","publish-offline"]
        let titles = ["发视频","发图片","发段子","发声音","审帖","离线下载"]
        // 每行放多少个
        let maxCols:CGFloat = 3
        // 间隔
        let buttonMargn:CGFloat = 15
        // 按钮宽
        let buttonW:CGFloat = (UIScreen.main.bounds.width - (maxCols + 1)*buttonMargn)/3
        // 按钮高
        let buttonH = buttonW + 30

        let buttonSpace:CGFloat = (UIScreen.main.bounds.width - buttonW * maxCols - buttonMargn * 2)/(maxCols - 1)

        let startY:CGFloat = UIScreen.main.bounds.height / 2 - buttonW

        for i in 0..
https://gitee.com/lanyingwei/codes/gnzjsry2x7eo9k5lati3467
哈哈哈 我又来了 在layoutSubviews
      //文字在左  图片在右
        titleLabel?.frame.origin.x = 0
        imageView?.frame.origin.x = titleLabel!.frame.size.width

        //图片在上  文字在下
        imageView?.frame = CGRect(x: self.frame.width*0.5 - imageView!.frame.width*0.5, y: 0, width: imageView!.frame.width, height: imageView!.frame.height)
        titleLabel?.frame = CGRect(x: 0, y: imageView!.frame.size.height, width: frame.width, height: frame.height - imageView!.frame.height)
