前言
上一篇中最后我们讲到,Qs加载分成两部分,一是加载SystemUI自带Tile,二是加载第三方应用通过Service注册的Tile。这里回顾一下如何加载第三方Tile:
private void addPackageTiles(final QSTileHost host) {
        mBgHandler.post(() -> {
            Collection params = host.getTiles();
            PackageManager pm = mContext.getPackageManager();
            List services = pm.queryIntentServicesAsUser(
                    new Intent(TileService.ACTION_QS_TILE), 0, ActivityManager.getCurrentUser());
            String stockTiles = mContext.getString(R.string.quick_settings_tiles_stock);

            for (ResolveInfo info : services) {
                String packageName = info.serviceInfo.packageName;
                ComponentName componentName = new ComponentName(packageName, info.serviceInfo.name);

                // Don't include apps that are a part of the default tile set.
                if (stockTiles.contains(componentName.flattenToString())) {
                    continue;
                }

                final CharSequence appLabel = info.serviceInfo.applicationInfo.loadLabel(pm);
                String spec = CustomTile.toSpec(componentName);
                State state = getState(params, spec);
                if (state != null) {
                    addTile(spec, appLabel, state, false);
                    continue;
                }
                if (info.serviceInfo.icon == 0 && info.serviceInfo.applicationInfo.icon == 0) {
                    continue;
                }
                Drawable icon = info.serviceInfo.loadIcon(pm);
                if (!permission.BIND_QUICK_SETTINGS_TILE.equals(info.serviceInfo.permission)) {
                    continue;
                }
                if (icon == null) {
                    continue;
                }
                icon.mutate();
                icon.setTint(mContext.getColor(android.R.color.white));
                CharSequence label = info.serviceInfo.loadLabel(pm);
                addTile(spec, icon, label != null ? label.toString() : "null", appLabel);
            }

            notifyTilesChanged(true);
        });
    }
SystemUI在query Tile的时候,通过query 安装应用中Service 中带有"android.service.quicksettings.action.QS_TILE"的,进行注册。今天就来讲讲第三方应用如何注册Tile到Qs,以及不得不说的TileService。
正文
如何注册实现
这里我们通过自定义的一个测试应用来讲述一下如何实现第三方应用如何注册。注册其实就分两步:
创建一个Service
在工程中创建一个Service,使其继承TileService,重写onTileAdded()、onTileRemoved()、onStartListening()、onStopListening()和onClick()方法。
public class CustomTileService extends TileService {
    @Override
    public void onTileAdded() {
        super.onTileAdded();
    }

    @Override
    public void onTileRemoved() {
        super.onTileRemoved();
    }

    @Override
    public void onStartListening() {
        super.onStartListening();
    }

    @Override
    public void onStopListening() {
        super.onStopListening();
    }

    @Override
    public void onClick() {
        super.onClick();
    }
}
在Manifest中注册
这里需要关注4个地方:
1.icon: 这里的icon就是Qs中显示的icon;
2.label: Qs中Tile的显示名称;
3.permission: 绑定Tile需要申请对应的权限;
4.action: systemUI通过query此action进行注册
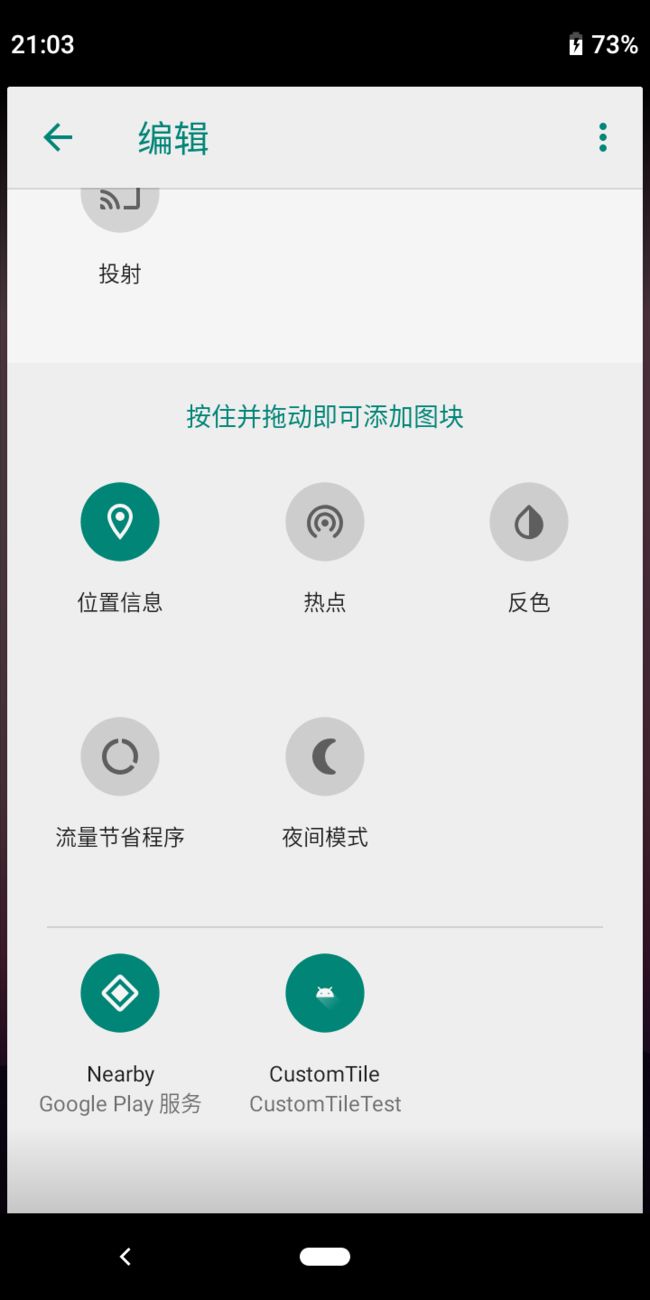
此时设备的Qs编辑中已经有注册的Tile了:
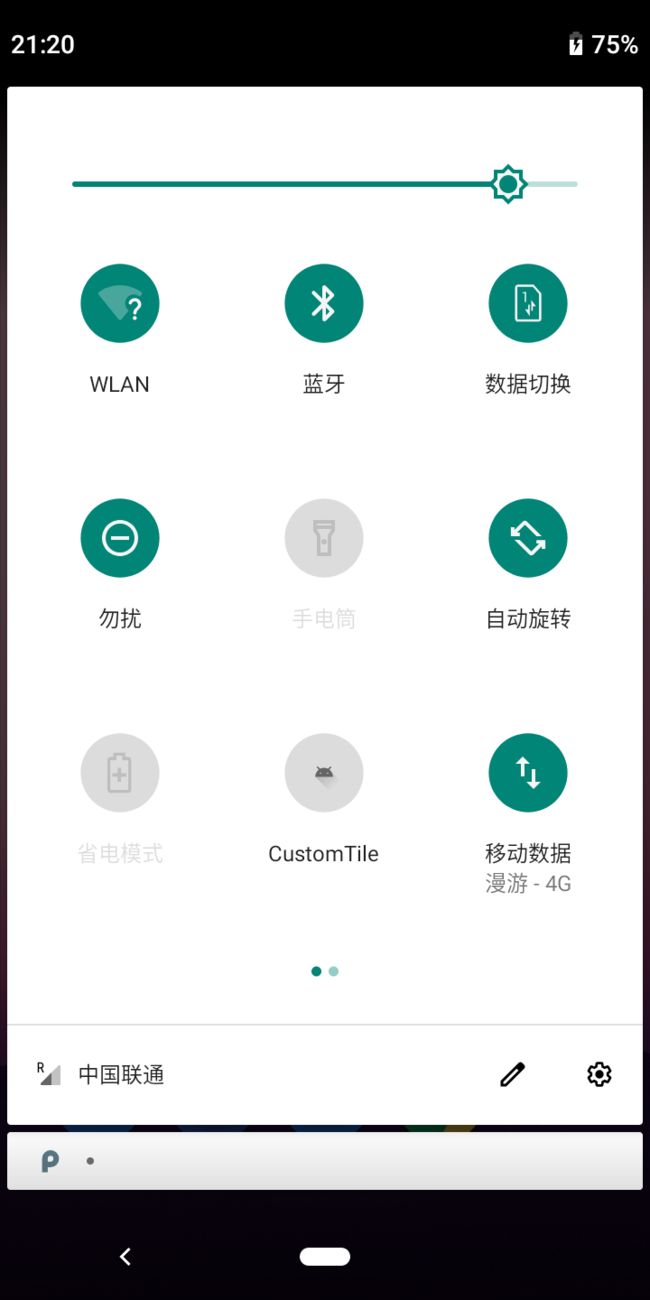
如图可以看出,注册的Tile已经在编辑区域了,用户只需将该Tile拖入常用区域即可使用。但是这里会发现,Tile每次点击后都是常亮状态,那么如何实现像飞行模式一样,关闭时灰显,打开时亮显呢?前面第一步中有重写onClick()方法,这里进一步实现一下:
@Override
    public void onClick() {
        Tile tile = getQsTile();
        if (tile == null) {
            return;
        }
        switch (tile.getState()) {
            case Tile.STATE_ACTIVE:
                tile.setState(Tile.STATE_INACTIVE);
                tile.updateTile();
                break;
            case Tile.STATE_INACTIVE:
                tile.setState(Tile.STATE_ACTIVE);
                tile.updateTile();
                break;
            default:
                break;
        }
    }
通过以上修改,即可实现tile的开关:
TileService
上面总结了第三方应用如何注册Tile到Qs,这里不得不提到集成的父类Service——TileService,这个service如何启动的呢?SystemUI又是如何知道应用注册了该Service呢?下面将对此类进行一个深入了解。
TileService的启动
在SystemUI的com/android/systemui/qs/external/TileLifecycleManager.java中,注册了一个"android.intent.action.PACKAGE_CHANGED"的广播接收者:
public class TileLifecycleManager extends BroadcastReceiver implements
        IQSTileService, ServiceConnection, IBinder.DeathRecipient {
    @Override
    public void onReceive(Context context, Intent intent) {
        if (DEBUG) Log.d(TAG, "onReceive: " + intent);
        if (!Intent.ACTION_USER_UNLOCKED.equals(intent.getAction())) {
            Uri data = intent.getData();
            String pkgName = data.getEncodedSchemeSpecificPart();
            if (!Objects.equals(pkgName, mIntent.getComponent().getPackageName())) {
                return;
            }
        }
        if (Intent.ACTION_PACKAGE_CHANGED.equals(intent.getAction()) && mChangeListener != null) {
            mChangeListener.onTileChanged(mIntent.getComponent());
        }
        stopPackageListening();
        if (mBound) {
            // Trying to bind again will check the state of the package before bothering to bind.
            if (DEBUG) Log.d(TAG, "Trying to rebind");
            setBindService(true);
        }
    }
当apk安装时,会触发setBindService(true):
public void setBindService(boolean bind) {
        if (mBound && mUnbindImmediate) {
            // If we are already bound and expecting to unbind, this means we should stay bound
            // because something else wants to hold the connection open.
            mUnbindImmediate = false;
            return;
        }
        mBound = bind;
        if (bind) {
            if (mBindTryCount == MAX_BIND_RETRIES) {
                // Too many failures, give up on this tile until an update.
                startPackageListening();
                return;
            }
            if (!checkComponentState()) {
                return;
            }
            if (DEBUG) Log.d(TAG, "Binding service " + mIntent + " " + mUser);
            mBindTryCount++;
            try {
                mIsBound = mContext.bindServiceAsUser(mIntent, this,
                        Context.BIND_AUTO_CREATE | Context.BIND_FOREGROUND_SERVICE_WHILE_AWAKE,
                        mUser);
            } catch (SecurityException e) {
                Log.e(TAG, "Failed to bind to service", e);
                mIsBound = false;
            }
        } else {
            if (DEBUG) Log.d(TAG, "Unbinding service " + mIntent + " " + mUser);
            // Give it another chance next time it needs to be bound, out of kindness.
            mBindTryCount = 0;
            mWrapper = null;
            if (mIsBound) {
                mContext.unbindService(this);
                mIsBound = false;
            }
        }
    }
这里通过bindServiceAsUser来启动TileService,Service启动后回调onServiceConnected:
@Override
    public void onServiceConnected(ComponentName name, IBinder service) {
        if (DEBUG) Log.d(TAG, "onServiceConnected " + name);
        // Got a connection, set the binding count to 0.
        mBindTryCount = 0;
        final QSTileServiceWrapper wrapper = new QSTileServiceWrapper(Stub.asInterface(service));
        try {
            service.linkToDeath(this, 0);
        } catch (RemoteException e) {
        }
        mWrapper = wrapper;
        handlePendingMessages();
    }
这样子IBind就被保存到QSTileServiceWrapper中,这里的Stub.asInterface(service)其实就是IQSTileService.Stub,这样子就可以实现跨进程,最终第三方应用的操作都在QSTileServiceWrapper的实例wrapper调用:
public class QSTileServiceWrapper {
    private static final String TAG = "IQSTileServiceWrapper";

    private final IQSTileService mService;

    public QSTileServiceWrapper(IQSTileService service) {
        mService = service;
    }

    public IBinder asBinder() {
        return mService.asBinder();
    }

    public boolean onTileAdded() {
        try {
            mService.onTileAdded();
            return true;
        } catch (Exception e) {
            Log.d(TAG, "Caught exception from TileService", e);
            return false;
        }
    }

    public boolean onTileRemoved() {
        try {
            mService.onTileRemoved();
            return true;
        } catch (Exception e) {
            Log.d(TAG, "Caught exception from TileService", e);
            return false;
        }
    }

    public boolean onStartListening() {
        try {
            mService.onStartListening();
            return true;
        } catch (Exception e) {
            Log.d(TAG, "Caught exception from TileService", e);
            return false;
        }
    }

    public boolean onStopListening() {
        try {
            mService.onStopListening();
            return true;
        } catch (Exception e) {
            Log.d(TAG, "Caught exception from TileService", e);
            return false;
        }
    }

    public boolean onClick(IBinder token) {
        try {
            mService.onClick(token);
            return true;
        } catch (Exception e) {
            Log.d(TAG, "Caught exception from TileService", e);
            return false;
        }
    }

    public boolean onUnlockComplete() {
        try {
            mService.onUnlockComplete();
            return true;
        } catch (Exception e) {
            Log.d(TAG, "Caught exception from TileService", e);
            return false;
        }
    }

    public IQSTileService getService() {
        return mService;
    }
}
总结
到这里,第三方如何注册Tile到Qs已经很明了了,其中最关键的就是TileService,希望通过这篇文章能够让大家对SystemUI Qs Tile有一个比较深入的了解。
本文已独家授权公众号ApeClub,转载请注明出处。


